Updated October 17, 2025
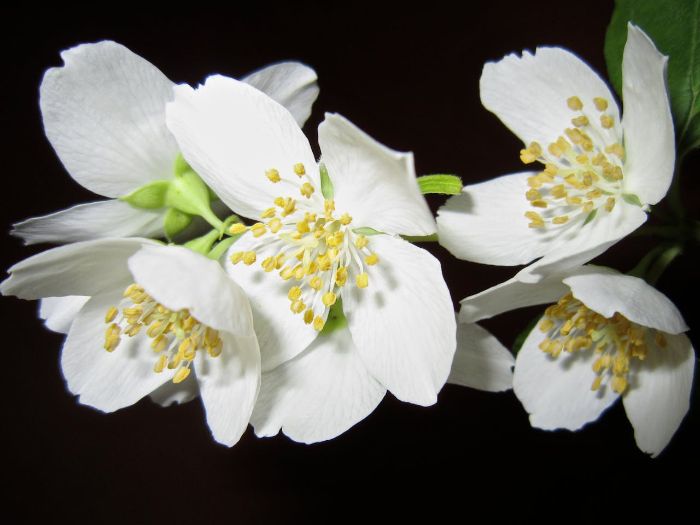
Jasmine responds quickly to the way its soil is prepared before planting. Drainage, texture, and nutrient balance determine whether the roots establish easily or remain stressed. By understanding soil requirements and applying precise planting methods, gardeners can reduce transplant shock and promote faster growth. The goal is to create conditions where jasmine can anchor deeply, absorb nutrients efficiently, and deliver consistent blooms across the season.
Key Takeaways
- Jasmine thrives when planted in well-drained soil with adjusted pH between 6.0 and 7.5.
- Correct planting depth and spacing prevent root stress and improve establishment.
- Consistent moisture during the first six weeks drives healthy root expansion.
- Annual pruning, mulching, and balanced fertilization sustain long-term flowering.
- Avoid common errors such as waterlogged soil, shallow planting, or neglected root preparation.
Table of Contents
Soil Requirements for Jasmine – Texture, pH, Drainage
Jasmine establishes quickly in soil that drains well, holds moderate moisture, and stays within a slightly acidic to neutral pH. Roots stall in compacted clay and suffer in waterlogged pockets, while pure sand dries too fast for steady blooming. A short set of field checks before planting, focused on soil texture, infiltration rate, and pH, prevents most establishment problems.
Ideal soil texture and structure
Loam with stable aggregates gives the best balance of air and water. Target an infiltration rate near 1 to 2 inches per hour. Rates below 0.5 inch per hour point to compaction or fine clay that needs remediation or a raised bed.
Run a simple percolation check. Dig a hole 12 inches deep and 8 inches wide. Fill once to pre‑wet, then refill and time the drop in the second fill. If water lingers after four hours, shift to a raised bed 8 to 12 inches high, or improve structure before planting.
Avoid mixing large volumes of sand into clay. That blend can create hardpan. Use mature compost and fine bark to increase pore space. Limit tillage to the top 6 to 8 inches to protect soil aggregates. On slopes, plant on gentle terraces so water pauses and enters the profile instead of running off.
Soil pH and nutrient availability
Most jasmine species take up nutrients efficiently between pH 5.5 and 7.0, with a practical target near 6.0 to 6.8. Chlorosis becomes likely above 7.5 as iron and manganese become less available. In alkaline soils, plan for gradual acidification and interim foliar support.
Adjust pH with measured doses based on actual test results rather than estimates. Elemental sulfur lowers pH over months as soil microbes process it. Use about 1 to 2 pounds per 100 square feet on sand, 2 to 3 on loam, and 3 to 4 on clay to drop roughly 0.5 to 1.0 pH unit, then retest. To raise low pH, apply calcitic or dolomitic lime. Typical starting rates run 2 to 5 pounds per 100 square feet depending on texture and current pH. For high‑pH sites where adjustment is slow, chelated iron (EDDHA form) corrects iron chlorosis during the first season.
Organic matter and microbial activity
Organic matter improves water holding, aggregation, and nutrient exchange. Aim near 3 to 5 percent in loam, 2 to 3 percent in sand, and 4 to 6 percent in clay. Use finished compost with a C:N near 12:1 to 20:1 and a low salt level. Electrical conductivity under about 4 mS/cm avoids salt stress at planting.
Blend 1 to 2 inches of compost into the top 6 to 8 inches of bed soil. Coarse bark fines at 10 to 20 percent by volume open tight clay. In sandy areas, biochar at 5 to 10 percent by volume increases water holding, but pre‑charge it with compost tea or diluted fertilizer before incorporation. Skip fresh manure at planting; high ammonium and salts can burn new roots. A 2 to 3‑inch mulch after planting maintains moisture and feeds soil life from the surface without disturbing structure.
Quick soil tuning guide
| Native soil | Primary issue | Field target | Amendments before planting | If targets are missed |
|---|---|---|---|---|
| Heavy clay | Slow infiltration | ≥1 in/hr | 1-2 in compost + 10-20% fine bark in top 6–8 in | Use raised bed 8-12 in; terrace on slopes |
| Loam | Maintain balance | 1–2 in/hr | 1-2 in compost blended lightly | Mulch 2-3 in; avoid over‑tilling |
| Coarse sand | Low water holding | ≥1 in/hr and higher OM | 1-2 in compost + 5-10% biochar (pre‑charged) | Add shade during heat; mulch to reduce loss |
| Alkaline soil (pH >7.5) | Micronutrient lockout | pH 6.0-6.8 | Elemental sulfur per texture rates; EDDHA iron for season one | Retest in 3-6 months; repeat light sulfur |
| Acid soil (pH <5.5) | Ca/Mg deficiency risk | pH 6.0-6.8 | Calcitic/dolomitic lime per test | Retest after 6-8 weeks |
With texture, infiltration, and pH brought into range, jasmine roots anchor fast and push steady new growth.
Planting Techniques for Jasmine
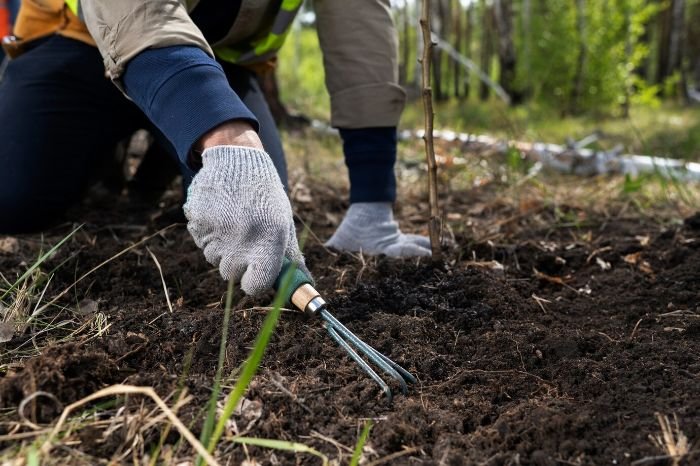
The act of planting determines whether Jasmine adapts quickly or struggles with stress. A hole of the right size, correct handling of the root system, and immediate stabilization measures reduce transplant shock and set the plant on a steady growth path. Every step needs to be deliberate, because errors made at planting are difficult to correct later.
Digging and Shaping the Planting Hole
The planting hole should be at least twice the diameter of the root ball. Depth should match the original container level to avoid burying the crown. Walls of the hole must be loosened rather than left smooth, otherwise roots circle and fail to penetrate into surrounding soil. On heavy clay, creating a shallow, wide bowl rather than a deep hole prevents water from pooling around the crown.
Handling Container-Grown Jasmine
Before planting, slide the plant gently from its pot and inspect the root system. If roots are tightly wound, slice shallow vertical cuts down the sides of the root ball to encourage lateral spread. Do not tear roots by hand, as this causes uneven regrowth and delays establishment. For healthy, evenly spread roots, minimal disturbance is best.
Backfilling and Settling the Soil
Backfill the hole with the same soil that was removed. Mixing in amendments at planting often creates layers that restrict water movement. As soil is returned, firm it gently to eliminate air pockets without compacting. After filling, water thoroughly to settle soil around the roots and establish full contact.
Staking and Initial Support
Young vines or top-heavy Jasmine cultivars benefit from staking at planting. A single, sturdy stake placed outside the root zone prevents root damage. Attach the stem with soft ties that allow some movement, since limited sway stimulates stronger trunk growth. Remove the stake once the plant can stand on its own without leaning.
A well-prepared planting hole, careful root inspection, and proper soil settlement form the baseline for Jasmine’s long-term stability. Once plants are anchored and hydrated correctly from the start, later care focuses on steady growth and bloom rather than recovery from poor establishment.
After‑Planting Care for Strong Establishment (First 6 Weeks)
The first six weeks set the tone for rooting, shoot growth, and bud formation. Plants settle fastest when moisture stays even around the root ball, soil temperatures remain moderate, and young stems receive steady support. Short, targeted checks during this period prevent the small errors that later become chronic problems.
Mulch placement and moisture balance
Lay a continuous layer of organic mulch two to three inches deep after planting. Keep a clear collar around the stem or trunk that measures three to six inches to prevent rot. Position drip lines or soaker hoses on the soil surface and then apply mulch over them so water reaches the root zone without evaporating at the surface. Shredded bark, leaf mold, or fine wood chips moderate heat and slow moisture loss. Avoid thick piles against the crown and avoid plastic sheeting that traps water.
Watering pattern for weeks 1-6
New roots occupy the original container volume plus a narrow halo. Water should target that zone until lateral roots expand. During days 1-10, keep the root ball evenly moist without flooding. Sandy beds often need a light recharge every one to two days. Loam holds for two to three days. Clay may stretch to three or four days. Deliver water slowly so it penetrates four to six inches.
From weeks 3-6, lengthen the interval and increase depth to train roots beyond the original ball. A single deeper session that reaches eight to ten inches is more useful than frequent surface wetting. Morning irrigation reduces heat stress and lowers disease pressure. If leaves droop at dawn, increase depth or shorten the interval. If soil feels cool and wet at four to six inches and leaves yellow, lengthen the interval.
Support and training during establishment
Climbing types need a firm start. Tie main stems to trellis wires with soft, flexible ties and leave room for growth. Space ties every eight to twelve inches along the leader. Guide laterals along the structure rather than allowing random looping, which prevents future tangles. Shrub forms rarely need staking unless the site is windy. Where staking is required, place stakes outside the root zone and remove them once stems can stand without leaning.
Sun, wind, and heat protection
Strong sun and hot, dry wind increase water loss faster than young roots can replace it. Afternoon shade cloth, temporary lattice, or a portable screen reduces stress during heat spikes. In exposed sites, a low windbreak on the windward side cuts leaf scorch. Light‑colored mulch lowers soil temperature several degrees, which helps bud retention on tender types. Avoid overhead spraying during peak heat, since rapid evaporation can leave salts on foliage.
Root zone checks and minor corrections
Check moisture at four to six inches with a narrow trowel or probe twice a week during the first fortnight, then weekly through week six. Refill surface depressions that form as soil settles so the crown remains level with the surrounding grade. If the planting hole edges were smooth, score the perimeter with a hand fork around the drip line to help roots cross into native soil. Remove any ties that begin to constrict stems as growth resumes.
Once plants pass the six‑week mark with steady moisture, secure ties, and an even canopy, routine care becomes straightforward.
Long‑Term Maintenance After Establishment
Once roots extend beyond the original planting hole, maintenance shifts to protecting soil structure, managing moisture at depth, and keeping growth aligned with available space. Small, consistent actions keep jasmine vigorous without heavy intervention later.
Irrigation after root expansion
Established plants draw water from a wider soil volume. Deep sessions spaced farther apart support that pattern better than frequent surface wetting. Allow the top few inches to dry while the 6-12 inch zone stays moist. Increase depth during hot spells and shorten intervals only when a probe at 6-8 inches reads dry. Containers need steadier schedules because root volume is limited; weight and finger checks at 2-3 inches guide timing.
Mulch renewal and soil surface care
Maintain a continuous mulch layer two to three inches deep. Pull material back several inches from stems to prevent rot. Top up yearly as organic mulch settles so evaporation stays low and soil temperature remains stable. Where wind exposes bare patches, re-establish coverage to prevent crusting and runoff. Remove any plastic films that trap water and cause sour conditions.
Nutrient strategy after year one
Focus on steady organic inputs rather than heavy feeding. Each spring, apply a thin top‑dress of finished compost and water it in. Where soil tests show low phosphorus or potassium, add a balanced slow‑release fertilizer at label rates, keeping granules out of contact with stems. In alkaline soils, plan periodic pH checks and continue light sulfur programs until readings return to the 6.0-6.8 range. Containers benefit from a dilute, regular feed during active growth because nutrients leach faster from potting mixes.
Structural training and support upkeep
Vining jasmine performs best when leaders are tied in and laterals are directed early. Replace ties before they constrict. Check trellis anchors at the start of each season and tighten hardware that carries wind load. Guide new shoots to open spaces on the frame to keep light moving through the canopy. Shrub forms keep shape with a light reduction after the main bloom, not repeated shearing that removes next season’s buds.
Seasonal protection by zone
Cold pockets, heat spikes, and strong winds stress established plants. In zones at the edge of a variety’s tolerance, wrap the base with breathable fabric before hard freezes and add a thicker mulch ring to buffer roots. During heat waves, provide afternoon shade for tender types and maintain moisture at depth so buds hold. Coastal wind requires staking in exposed sites and a windbreak that reduces leaf scorch without blocking airflow.
Soil health monitoring and compaction management
Healthy roots depend on oxygen in pore spaces. Once a year, probe at 6-8 inches after irrigation to confirm infiltration and at 24-48 hours to confirm drainage. If water lingers, loosen soil around the drip line with a garden fork inserted and rocked gently to relieve compaction without inverting layers. In high‑traffic areas, add stepping stones to keep feet off root zones. Recheck pH and organic matter every one to two years and adjust programs accordingly.
Long‑term success comes from a stable root environment, modest feeding, and regular adjustments that match weather and site conditions. With maintenance on a steady cadence, jasmine keeps its shape, holds buds, and flowers on schedule without rescue work later.
Common Planting Mistakes and How to Avoid Them
A jasmine planting succeeds or fails on a small set of decisions made on day one. Depth, drainage, root handling, timing, and surface management determine how fast roots leave the pot and anchor into native soil. Correcting errors after the fact costs time and usually slows the first year of growth.
Planting at the wrong depth
Burying the crown invites stem rot, while setting the plant high dries roots and exposes the root ball. Set the crown level with the surrounding grade, then water to settle the backfill. Recheck after the first deep soak; if the plant sank, top up with native soil so the crown returns to grade. On heavy clay, shape a wide, shallow bowl rather than a deep hole so water cannot collect around the stem.
Skipping drainage and grade preparation
Planting without a percolation check hides slow-draining pockets that suffocate roots. Time the drop in a pre‑wetted, 12‑inch test hole; if water lingers beyond four hours, move to a raised bed 8-12 inches high or improve structure before planting. On slopes, build a gentle terrace and a low basin to pause water. Keep the final grade even so stormwater does not flow toward the crown.
Creating soil layers with amendments
Filling the hole with rich mix while leaving native soil untouched creates a bathtub effect. Water stops at the interface and roots circle the pocket. Backfill with the native soil you removed. Incorporate compost and fine bark across the entire bed to a uniform depth of 6-8 inches before digging the hole. Avoid mixing sand into clay; use compost and bark to open pore space instead.
Mishandling root‑bound plants
Tightly wound roots keep circling after planting. Slide the plant from its pot and inspect the sides and bottom. Make three to four shallow vertical slices down the root ball and a light shave across the base to interrupt the spiral and promote lateral regrowth. Do not tear roots by hand; uneven ripping delays recovery. If the root ball is dry, hydrate it in a bucket until air bubbles stop rising before planting.
Planting during heat spikes, cold snaps, or saturated soil
Extreme conditions raise failure rates. In warm regions, avoid planting during hot, windy weeks; wait for a cooler stretch or provide temporary afternoon shade and wind protection. In cold zones, plant after the risk of a hard late frost or shift to early fall so roots can settle in cooling soil. Skip planting when soil is waterlogged from storms; wait until the surface firms and the percolation test shows movement.
Misusing mulch and surface covers
Mulch supports moisture balance, but poor placement causes problems. Keep a clear collar of 3-6 inches around the stem. Spread 2-3 inches of organic mulch across the bed, and place drip lines on soil before mulching so water reaches the root zone. Avoid plastic sheeting that traps water and creates sour soil conditions. Refill depressions as soil settles so the crown stays at grade.
A planting succeeds when six points are checked before soil goes back in: crown set at grade, drainage confirmed, amendments spread uniformly across the bed, root ball corrected, weather timing chosen carefully, and mulch applied with a clear collar.
Covering those details eliminates most early failures and lets jasmine transition directly into steady growth.
Conclusion
Successful jasmine planting is less about individual steps and more about the consistency of the process. Soil testing, correct planting depth, balanced amendments, and careful early care all serve one outcome – a root system that stabilizes growth for decades. When roots anchor in a uniform, well-prepared profile, the plant withstands drought, resists stress, and delivers reliable flowering each season. Gardeners who apply methodical preparation avoid chronic setbacks and reduce long-term maintenance.
A measured start establishes jasmine as a resilient feature of the landscape rather than a plant that constantly demands correction.
FAQ
Can jasmine grow in heavy clay soil without root problems?
Yes, if drainage is corrected before planting. Run a 12-inch-deep percolation test after pre‑wetting. A second fill should drop at least one inch per hour. If water lingers after four hours, use a raised bed eight to twelve inches high or open structure with one to two inches of finished compost plus ten to twenty percent fine bark in the top six to eight inches. Set the crown at grade and shape a wide, shallow basin so water cannot pool around the stem.
Should the root ball be soaked before planting?
Soak only when the root ball is dry or hydrophobic. Submerge the pot in a bucket until bubbles stop, which usually takes five to ten minutes for a one‑gallon plant. Let it drain, then slice three to four shallow vertical cuts down the sides and shave the matted base lightly to interrupt circling roots. Plant immediately so roots do not dry again.
What soil pH works best for jasmine, and how is it adjusted?
Jasmine takes up nutrients well between pH 6.0 and 6.8. To lower high pH, apply elemental sulfur at one to two pounds per 100 square feet on sand, two to three on loam, and three to four on clay to reduce roughly 0.5 to 1.0 pH unit, then retest in three to six months. In very alkaline sites, use EDDHA‑chelated iron for interim chlorosis relief. To raise low pH, use calcitic or dolomitic lime at rates suggested by a soil test and retest after six to eight weeks.
When is the best time of year to plant jasmine?
In temperate zones, plant in spring after the last hard frost or in early fall while soil remains warm. In frost‑free regions, late fall through early spring offers mild weather that favors rooting. Avoid heat waves, cold snaps, and periods when soil is saturated. Aim for soil temperatures near or above 55°F for reliable root activity.
Do I need fertilizer at planting?
Use a light, slow‑release feed rather than heavy fertilizer. Scratch a small dose into the top few inches of backfill and keep granules away from roots and stems. If a soil test shows low phosphorus, place a minimal band two inches below the root‑ball level. Skip fresh manure at planting; salts and ammonium can burn new roots.
How should mulch be placed around newly planted jasmine?
Spread two to three inches of organic mulch across the bed and keep a clear collar of three to six inches around the stem. Place drip lines or soaker hoses on the soil surface and mulch over them so water reaches the root zone with minimal evaporation. Avoid plastic sheeting, which traps water and creates sour conditions.
How far from a wall or trellis should jasmine be planted?
Set climbers eight to twelve inches from walls so rain reaches the root zone and air can circulate. Space trellis wires eight to twelve inches apart for reliable tie‑in. For shrub forms, use the mature width as the spacing guide; keep hard edges such as paths outside the future canopy to prevent heat reflection and pruning conflicts.