Updated April 17, 2026
The difference between a shovel that lasts 20 years and one that wobbles loose after two seasons often comes down to four inches of steel near the blade. Most gardeners never think about that joint – or any of the other five components – until something breaks or the digging gets harder than expected. Each part of a garden shovel has a specific job, and most have design variations that make them better or worse for particular tasks.
A pointed blade reads undisturbed soil differently than a flat one. A solid-socket collar holds under repeated load in a way a strap socket cannot sustain. Understanding these differences takes a few minutes, and it changes how you buy, use, and maintain the tool for the rest of your gardening life.
Key Takeaways:
- Choose blade tip shape based on soil condition – pointed for undisturbed ground, flat for moving loose material
- Check for a solid-socket collar before buying – it is where most shovels fail under repeated stress
- Match shaft length to your height: grip should reach approximately chin height when the blade rests on flat ground
- The step (foot peg) transfers body weight through the full sole of your foot, not just the toes – use it on every stroke
- Avoid replacing a straight-handled shovel with a D-grip without testing the balance – the swap changes leverage entirely
Table of Contents
The Blade – Shape, Dish, and Tip Design Define What the Shovel Is Actually For
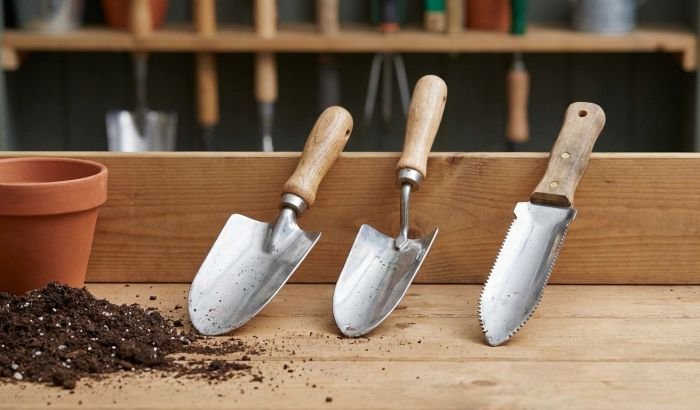
Pick up two shovels at a hardware store and the blades will look similar from a distance. Hold them side by side and the differences become clear: blade width, tip profile, and the degree of dish – the forward curve that gives the blade its scoop shape – vary significantly, and each variation serves a different purpose.
A round-point blade, the most common type in American gardens, tapers to a single point at the tip. That point concentrates downward force into a small contact area, which lets the blade penetrate dense, undisturbed soil with less effort. True Temper, one of the oldest garden tool manufacturers in the US, has built this shape into their standard garden shovel for over a century because the geometry works that consistently on native soil. There is no mystery to it – it is the same principle as driving a nail versus pressing a flat piece of metal into wood.
Flat or square-point blades work differently. The straight edge across the bottom is not meant for breaking ground – it is for cutting sod lines, edging beds, or moving material that is already loose. The wider contact area transfers force across the full edge, which is useful when you need a clean cut rather than penetration depth.
Blade Width and Dish Angle
Standard round-point shovels run 8 to 9 inches wide. A transplanting shovel narrows to 5 or 6 inches, allowing it to enter the soil cleanly along a root ball without disturbing adjacent plants. The dish angle – how far forward the blade curves away from the shaft centerline – typically sits around 40 degrees on a standard garden shovel. A deeper dish holds more material per load when moving compost; a shallower dish allows more precise placement and cuts a cleaner edge when dividing perennials.
Blade thickness matters more than most buyers check. Pressed steel blades are stamped from flat sheet – lighter but prone to flex under load. Forged or rolled-steel blades maintain consistent thickness from edge to center and hold a working edge longer, particularly when the tip is used to cut through roots. Oregon State University Extension recommends sharpening digging tools at the start of each season; a forged blade responds to a few passes with a mill file where a pressed steel blade may require repeated work to hold any edge at all.
The Step – The Most Underrated Part on Any Shovel
The step is the folded or welded ledge at the top edge of the blade, sometimes called a foot peg or tread. On well-made shovels it runs the full width of the blade shoulder. On cheaper models it may be a thin stamped lip that bends after a season of regular use.

Its function is more mechanical than most gardeners realize. The step gives your foot a flat surface to press against when driving the blade into the ground, transferring your body weight through the full sole of your boot rather than concentrating force on the toes. Penn State Extension’s ergonomic tool guidelines point out that driving a shovel without a proper step puts repeated pressure on the metatarsal bones of the forefoot – an accumulation that becomes noticeable during any session longer than 30 minutes on firm soil, and cumulative over a season.
A step that is 3/8 inch thick or more distributes that weight cleanly across the shoe without deflecting. A thin stamped step deforms over time and eventually becomes a sharp edge you are pressing your boot against rather than a stable platform. When evaluating any shovel before buying, press your thumb firmly against the step. If it flexes, it will fail in the field well before the blade ever wears out.
Pro Tip: Wear boots with a rigid sole when using the step – soft-soled shoes concentrate the step edge against a small section of your foot arch, which defeats the entire ergonomic purpose and can cause soreness within a long digging session.
The Collar – Where Cheap Shovels Show Their Age First
The collar connects the blade to the shaft. It is the highest-stress joint on the tool, and it is where a low-quality shovel begins to fail.

There are two main construction types. A strap socket (also called an open socket or tang-and-ferrule) wraps a flat strip of steel around the shaft and secures it with rivets. This method is cheaper to manufacture and sufficient for light use, but the repeated flex of digging in clay or rocky soil works the rivets loose over time. Once wobble starts, it accelerates – loosening increases lateral movement, which widens the gap, which puts more stress on the remaining rivets. Most homeowner-grade shovels sold at mass-market retailers use this construction. It is not a defect; it is a cost decision with a predictable lifespan.
A solid socket or full socket is forged as a single seamless sleeve that accepts the shaft from above. There are no rivets. The shaft seats inside a steel sleeve that is continuous with the blade itself, and every load transfers through the metal rather than through fasteners. Professional-grade and contractor shovels almost always use this construction. It adds a few ounces, but on a tool used every week across multiple seasons, the durability gap becomes obvious within three or four years.
There is a third variation worth knowing: a closed-back socket, where the sleeve is sealed with a weld at the back as well. This prevents water from collecting inside the socket where it contacts the end grain of the shaft – which is exactly where wood handles rot from the inside before showing any visible damage on the surface. If you buy a wood-handled shovel and want it to last, a closed-back socket is worth looking for specifically.
The Shaft – Length, Bend, and Material Are Three Separate Decisions
The shaft is what most people notice first when picking up a shovel, and it is what most people misjudge. Shaft choices involve three independent variables – material, length, and geometry – and each affects performance in a different direction. Getting one right while ignoring the others is a partial solution.

Material: Wood, Fiberglass, and Steel
White ash has been the standard handle wood in American tools for generations. Its grain structure gives it a slight springiness – enough to absorb the shock when the blade strikes a buried rock or root, which would otherwise travel directly to your wrists and elbows. White ash can be shaped, refinished, and replaced when worn. Its vulnerability is the end grain at the collar: water that pools inside an open socket works into that end grain, and the handle can feel solid for years while quietly rotting from the inside.
Fiberglass does not rot, does not crack from UV exposure, and does not swell with moisture. Modern fiberglass shafts are engineered with a slight flex in the layup that approximates the shock absorption of wood without the maintenance requirement. The weight is close to ash at the same length – not meaningfully lighter. The surface can become slippery when wet unless the manufacturer has added a textured or rubberized section, which is worth checking before buying.
Steel shafts are rigid – useful when pure lever force is the priority, such as prying rocks or breaking hardpan. They are heavier, transmit full vibration to your hands, and get cold in a way that penetrates thin gloves. Most professionals avoid steel shafts for repetitive digging specifically because of vibration fatigue across a long session. For occasional prying tasks, the leverage is useful. For regular soil work, wood or fiberglass is the better choice.
Length and Shaft Bend
Standard shaft lengths run 48 inches for full-size garden shovels. University of Florida IFAS Extension recommends choosing a handle that reaches chin height when the blade rests on flat ground – a practical fit method that works across most body types. For someone over 6 feet, this often means a 52-to-54-inch shaft. A handle that is too short forces you to round your shoulders on every stroke, and the cumulative effect across a 90-minute planting session is noticeable in the lower back by the following morning.
Some shafts have a slight forward bend near the collar – sometimes called a kick or D-bend. This shifts your grip position back and slightly upward compared to a straight shaft, which changes the lever angle during the carry phase when you lift and move loaded soil. For open-bed digging and transferring compost to a wheelbarrow, that bend reduces wrist flex under load. For working in tight planting areas or driving the blade at a consistent angle around existing perennials, a straight shaft gives more control. Neither is universally correct – the use pattern determines which works better.
The Grip – Handle Style Changes More Than Just Feel
The grip is the top of the shaft – either a continuation of the shaft itself (straight handle) or a D-shaped loop attached to the shaft end. The choice affects leverage, control, and where the tool is comfortable to use.
A straight handle extends the full shaft length with no separate grip piece at the top. It gives you the most leverage for moving heavy loads because you can shift your hand position along the shaft to adjust the lever ratio dynamically. Straight handles are better for shoveling large volumes of soil into a wheelbarrow, moving mulch, or any task where you are throwing material and want full arm extension with both hands wide apart on the shaft.
D-grip handles – a closed loop, typically 4 to 5 inches wide – fix your hand at one position at the top of the shaft. You lose some leverage flexibility, but you gain control in confined spaces where a long protruding handle catches on stakes, wire supports, or adjacent plants. In an established perennial bed, the controlled movement matters more than raw power, and a D-grip is noticeably better for that kind of work. The same logic applies to a garden trowel – the handle angle and grip style determine the tool’s precision range, not just its size.
The D-grip attachment is a failure point worth checking. A D-grip that is welded to the shaft end is stronger than one secured with a bolt through the shaft. Grip the D-loop with both hands and apply rotational force – if you feel any movement between the loop and the shaft, that play will widen with use. A tight, welded connection should feel like one piece of metal.
I often notice that gardeners who switch from a straight-handled spade to a D-grip shovel feel the tool is weaker at first – it is not the collar or blade, it is the reduced leverage range from the fixed grip position. The adjustment takes a few sessions, and most gardeners find the control trade-off worth it for bed work.
Reading a Shovel From Its Parts – What to Check Before You Buy
Most gardeners pick a shovel the same way they pick a broom – lift it, assess the weight, and assume quality if it feels solid. Knowing what the parts do gives you something more reliable to check in less than two minutes.
Start at the collar. Grip the blade firmly and apply lateral pressure against the shaft – left, right, then rotational. Any movement, even a slight tick, means a strap socket that has already started loosening or a solid socket with a poor shaft fit. Neither improves with use. Then look at the back of the collar where the shaft enters. An open back means water collects at the end grain of a wooden shaft – which is fine for a fiberglass handle but is where wood handles begin their slow rot.
Next, press your thumb firmly against the step. A step that deflects under thumb pressure is going to become painful and then useless within a single full season on firm soil. Check that the step runs the full width of the blade shoulder rather than a narrow folded lip at the center only.
Finally, stand the shovel upright and look down the shaft for straightness. A warped shaft on a new tool means either a manufacturing defect or poor storage – it will torque your wrists on every stroke. Flex the shaft lightly if it is fiberglass: a shaft with absolutely no give at all will transmit every rock strike to your joints. A small amount of flex is a feature, not a sign of weakness. Good soil composition affects how hard a shovel has to work, but even soft loam will expose a poorly matched shaft over time.
Conclusion
A garden shovel looks like one of the simplest tools in the shed. It is not. The blade tip, step thickness, collar construction, shaft material, and grip style each carry specific design logic – and the quality of each decision is what separates a shovel that improves with age from one that becomes a liability by the third season.
The most useful single check before buying is the collar: grip the blade, apply lateral force, and see if anything moves. If the collar is solid, assess the step and shaft material – that is where manufacturers cut cost quietly. A shovel with a forged full-socket collar, a 3/8-inch step, and a properly fitted ash or fiberglass shaft at the right length for your height will outlast any pressed-steel shovel with a riveted strap socket, regardless of the initial price gap. After a few seasons of real use in the garden, that tool becomes the only one you want to reach for.
FAQ
What are the parts of a garden shovel called?
A standard garden shovel has six main components: the blade (the metal scoop at the bottom), the tip (the leading edge at the base of the blade), the step or tread (the folded ledge at the blade shoulder where you place your foot), the collar (the metal sleeve joining blade to shaft), the shaft or handle rod, and the grip (the top of the shaft, either straight or D-shaped). Some shovels also include a bolster – a raised rib running down the back of the blade that adds rigidity under heavy load. Each name refers to a functional part, not a decorative one, and each has design variations that affect what the shovel is good at.
What is the step on a shovel for?
Most people assume it is a footrest for when you stop digging. Its actual purpose is mechanical. The step provides a wide flat surface to press against with the full sole of your boot, which converts your body weight into downward force on the blade. Without it, the top edge of the blade concentrates force on a narrow strip across your toes – manageable for an occasional push, but genuinely damaging over a full digging session on firm soil. Penn State Extension’s ergonomic tool guidelines note that repeatedly pressing a bladeless edge against the forefoot accumulates stress on the metatarsal bones. A proper step that is at least 3/8 inch thick distributes that force cleanly; a thin stamped step bends over time and eventually creates a sharp edge instead of a stable platform.
What is the difference between a round-point and a flat blade shovel?
If you are breaking new ground – grass, compacted native soil, an area never dug before – a round-point blade is what you want. The single pointed tip concentrates downward force into a small contact area, which lets it penetrate dense earth with far less effort than a flat edge would require on the same material. A flat or square-point blade works better once soil is already loose, or when you need a clean vertical cut for bed edging and sod removal. Using a round-point for clean edging leaves a ragged line; using a flat blade to break unworked soil is significantly harder work than it needs to be. The blade shape is a function selector, not just an aesthetic difference.
Can you replace a broken shovel handle yourself?
Yes, and it is worth doing on any shovel with a good collar and blade. Remove the old handle by driving it out from below the socket, or by cutting it flush and drifting the remainder out with a punch. Replacement ash handles in standard lengths are available at most hardware stores. The critical step is seating the new handle fully into the socket – the shaft end should sit flush or slightly proud at the blade, and a metal expansion wedge driven into the top of the shaft locks it inside the sleeve. An unseated or unwedged handle will loosen within the first season, replicating the exact failure you replaced. Closed-back socket shovels require a slightly different method – check the socket opening before buying the replacement handle.
What happens if you never use the step when digging?
You rely entirely on arm strength to drive the blade, which is tiring and inefficient. The more lasting consequence is foot strain. Pressing the blade edge repeatedly against the upper part of your toes – which is what happens when you drive a stepless blade into the ground – accumulates stress across the metatarsal area of the forefoot. Over a full day of digging in firm soil this becomes painful. Over several seasons without correcting the technique, some gardeners develop chronic lower leg and foot discomfort that is not obviously connected to shovel use until someone points out the habit. The step is there to redirect that force through your full sole, which distributes it across a much larger area of the foot.
What is the biggest mistake people make when buying a garden shovel?
Choosing by weight and appearance while missing the collar construction entirely. A shovel can look well-made – thick blade, solid-feeling shaft – while having a strap socket collar held with two small rivets. That collar will begin to loosen under the lateral stress of digging clay or rocky soil, usually within two to three seasons of regular use. The wobble starts small and then accelerates because loosening increases lateral movement, which widens the gap further. Checking the collar takes five seconds: grip the blade and push it sideways against the shaft. Any detectable play tells you more about long-term durability than anything else you can assess standing in a store aisle.
How long should a garden shovel handle be?
University of Florida IFAS Extension offers a practical fitting method: stand the shovel upright and the grip should reach approximately chin height when the blade rests on flat ground. For most adults this falls between 46 and 54 inches. A handle that is too short forces a noticeable forward shoulder bend on every stroke – the lower back feels this most over a session of 45 minutes or longer. Shorter handles (around 42 inches) offer more control for precise planting work in tight spaces. Longer handles (52 inches and above) reduce waist bend during open-bed digging. If you do both kinds of work regularly and can only have one shovel, a 48-inch shaft handles most situations without compromising either task significantly.
What is the collar on a shovel, and why does the construction type matter?
The collar is the metal sleeve or band that joins the blade to the shaft – the joint through which every digging stroke transmits force in three directions: downward when driving the blade, lateral when levering soil, and rotational when turning a loaded scoop. Collar construction falls into two main types: a strap socket wraps flat steel around the shaft and uses rivets; a solid or full socket is forged as a seamless sleeve continuous with the blade itself. The difference in long-term durability is significant for anyone digging heavy or rocky soil regularly. Rivets loosen under repeated lateral stress; a seamless socket has no fastener to loosen. The weight difference between the two is a few ounces – a trade-off that almost every professional tool user makes in the direction of the solid socket.