Last Updated May 22, 2026
The first challenge of container gardening starts with control before planting. Too much sun, water that lingers, a pot that dries before lunch, or a tight root ball can stall growth before the plant has a fair start.
Once the setup comes into balance, roots breathe, foliage holds shape through the afternoon, and daily care becomes a short routine instead of a rescue job. Start by reading moisture, light, heat, and access before you add the first seedling.
A beginner container garden works best when the first few pots teach you a pattern. Place them where you can reach them, match pot volume to plant vigor, water from a morning check instead of a calendar, and adjust quickly when heat changes the rules.
Key Takeaways:
- Start with two or three containers you can reach every morning.
- Choose pot volume by plant vigor instead of nursery transplant size.
- Water from a root-zone check, then change frequency when heat, wind, or pot size changes.
- Feed edible container crops on a light routine and watch leaf color, growth speed, and runoff behavior.
- Use self-watering planters as a risk reducer only when the plant, mix, and season fit the reservoir.
- Move or shade pots before heat stress becomes leaf scorch.
Table of Contents
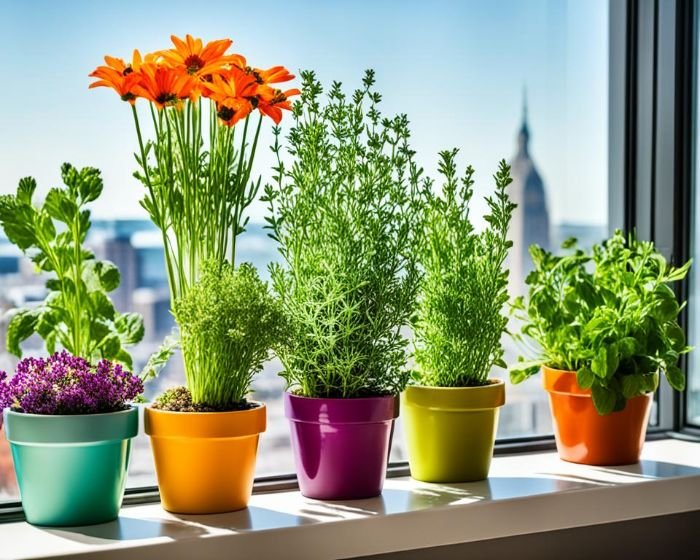
Start Here: Minimal Kit and Smart Placement
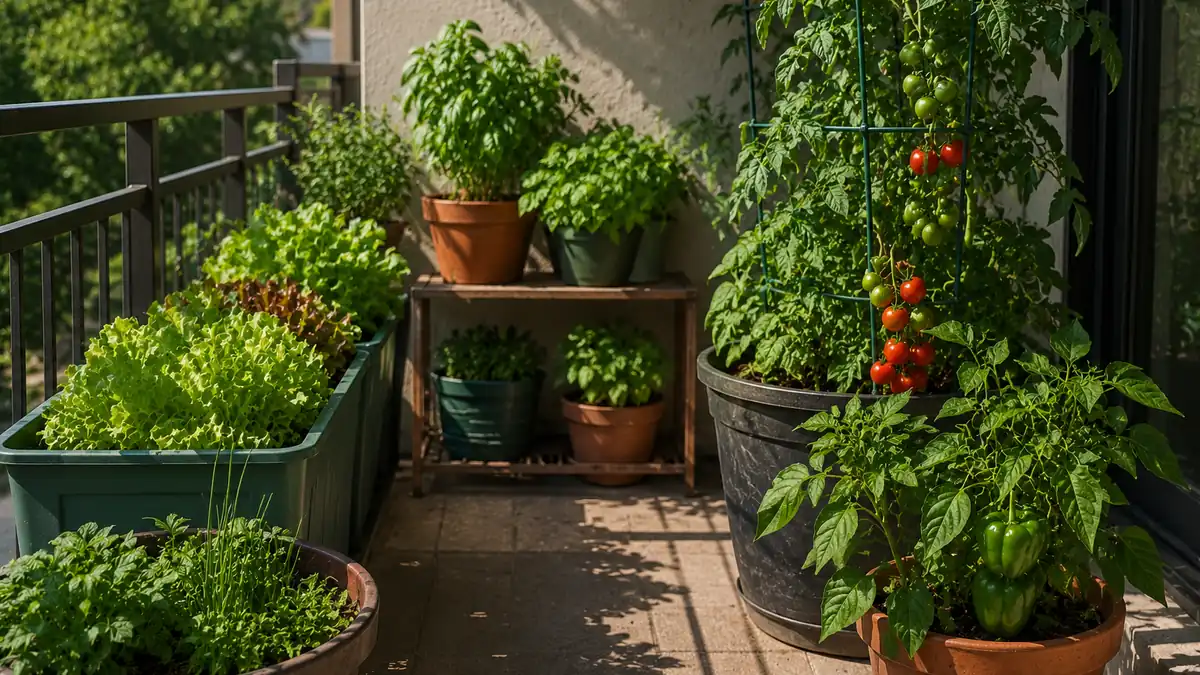
Container gardening for beginners works best when the first setup is small, reachable, and easy to repeat. A few reliable tools and a safe place to water matter more than a crowded patio full of plants that all dry at different speeds.
How do I start a container garden?
Begin with one or two medium containers, a quality potting mix, and a simple morning watering plan. Fill each pot three-quarters full, set the plant at the same height it held in the nursery pot, backfill around the root ball, and water until excess exits the holes.
Place containers where you can reach them without moving furniture and where wind does not tip tall plants. The best beginner spot balances sun with access, weight, and a watering routine you can repeat.
Pro tip – If you can carry a full watering can from the sink to the pots without stopping, the setup distance is right for daily care.
Starter kit checklist
You only need a short list to get growing. Keep it durable, easy to store, and sized for the number of pots you can actually monitor.
- Two or three mid-size containers with factory drainage holes
- Saucers that protect surfaces without trapping standing water
- Bagged potting mix labeled for containers
- Hand trowel and a narrow-spout watering can
- Plant labels and a permanent marker for dates and varieties
- A wooden skewer or chopstick for checking moisture below the surface
If stairs or long walks are involved, add a lightweight hose with a shutoff near the pots to cut daily effort.
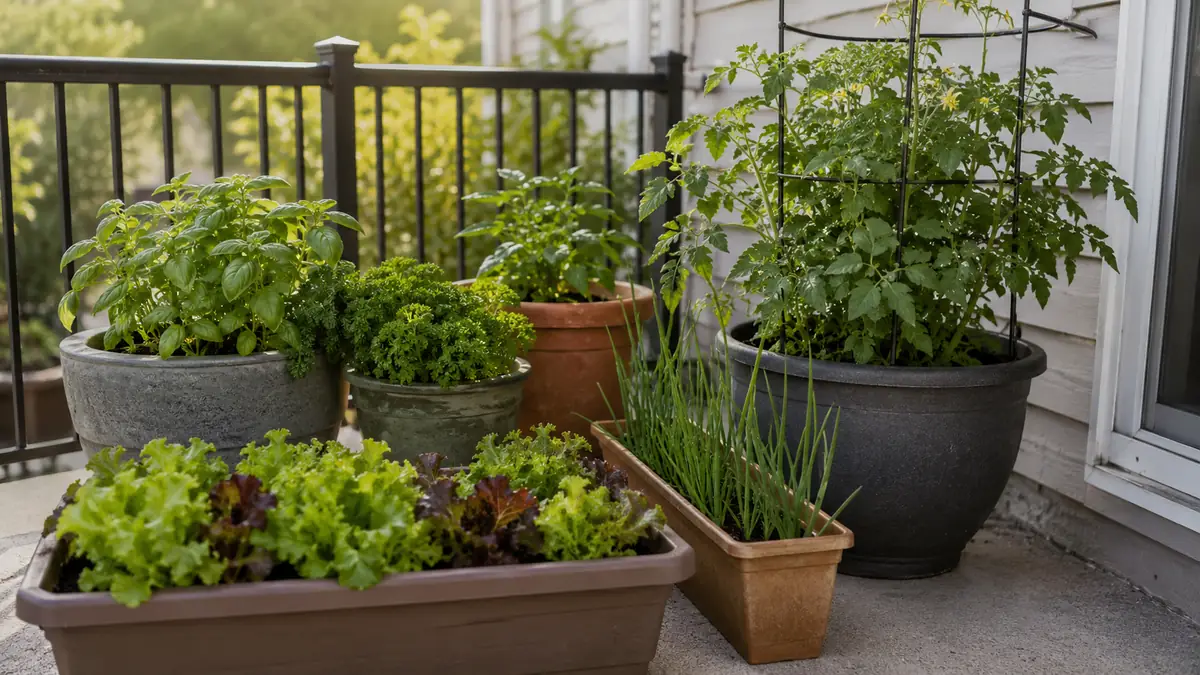
Placement basics
Pick locations you can visit every morning. Access to water beats a perfect view. Keep pots on flat, stable surfaces, and use pot feet or small blocks so water can leave the base instead of pooling under saucers.
Watch wind. Tall or vining plants act like sails, so tuck them near a railing or wall. Many residential balconies have load limits, so spread containers on trays or boards instead of concentrating water-filled pots in one corner.
Heat builds fast on dark decks, stone, and tight balcony corners. If leaves droop by late afternoon on hot days and recover after sunset, slide pots a few feet to a cooler patch before you change the watering routine.
A lean kit and reachable placement turn daily care into a two-minute habit, which is the real start line for a healthy container setup.
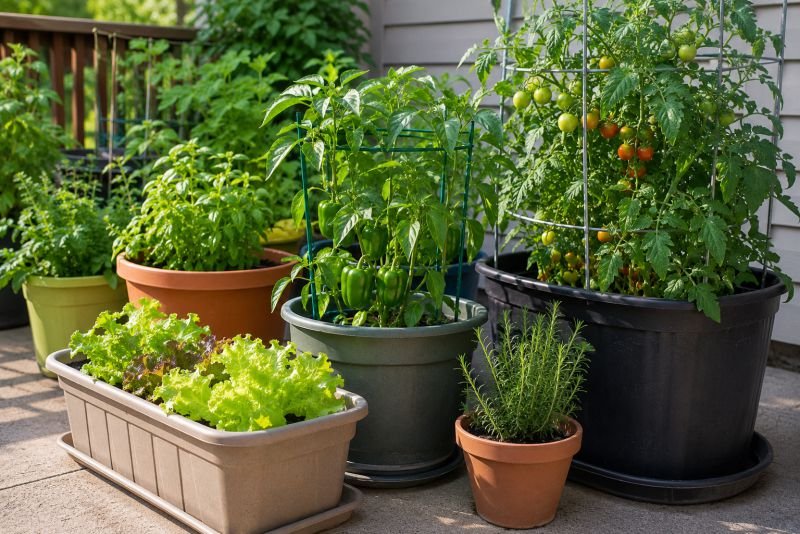
Containers and Drainage: Size, Holes, Saucers
Right-sized containers and working drainage keep roots oxygenated and temperatures manageable. Think volume for vigor, width for stability, and a clean exit path for excess water.
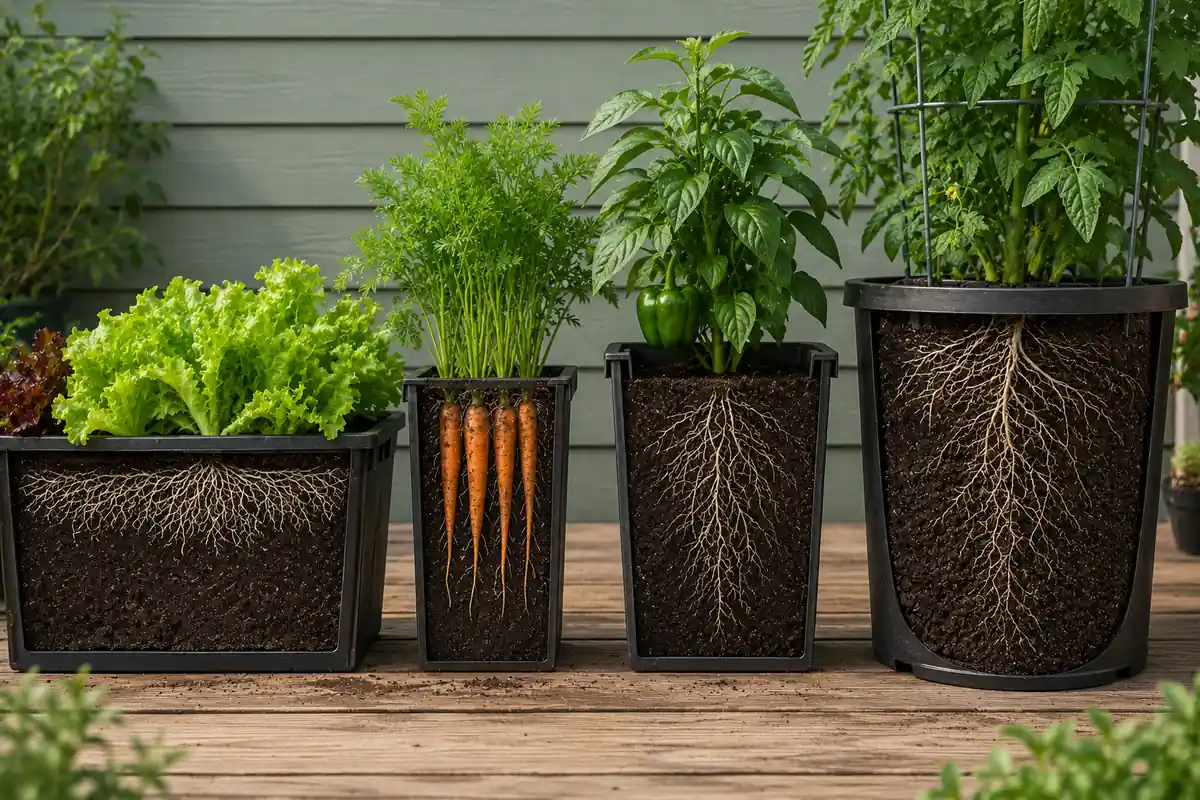
Size selection by plant vigor
Match pot volume to the plant’s growth habit. Compact herbs tolerate smaller quarters; fruiting crops need more depth and mass for root run and moisture buffering. If plants wilt by midday and the top third dries within hours, upsize one class.
If containers tip in wind, choose a wider pot or add stable mass at the base. When plant height exceeds pot diameter, the canopy starts stressing the root ball during gusts.
| Plant habit | Examples | Minimum volume | Depth target | Beginner note |
|---|---|---|---|---|
| Compact herbs and flowers | Basil, marigold, pansy | 1-2 gal | 8-10 in | Check daily in hot weather because small volumes heat fast. |
| Leafy greens | Lettuce, chard, bok choy | 2-3 gal | 10-12 in | Give afternoon relief when leaves soften before evening. |
| Bush vegetables | Pepper, bush bean, dwarf tomato | 5 gal | 12-14 in | Use this as the beginner baseline for edible crops. |
| Vining or large fruiting crops | Indeterminate tomato, cucumber, eggplant | 10-15 gal | 14-18 in | Add support at planting so roots are not torn later. |
Larger volumes buffer heat and watering gaps, which lowers daily labor. Depth adds anchor and reduces blowover on exposed balconies.
Do container gardens need drainage?
Yes. Every outdoor container needs open drainage holes so excess water exits and fresh air can re-enter the root zone after watering. Aim for several holes rather than one large slot.
Cover holes with a square of mesh or a shard set flat to slow media loss without blocking flow. Use saucers only to protect surfaces; empty them after watering or rain so roots do not sit in a saturated zone.
If a pot stays glossy a full day after watering, check the base before blaming the plant. Persistent glossy mix, blocked holes, and tight saucers need a deeper soil drainage for containers check before more water or fertilizer makes the root zone worse.
When to use self watering planters
Reservoir designs help during hot spells, travel weeks, and busy routines. They work best for thirsty annuals, leafy crops, and fruiting vegetables that prefer a more even moisture supply.
A self-watering planter suits thirsty crops better than dry-leaning plants. Rosemary, lavender, cactus mixes, and drought-leaning herbs can suffer if the root zone stays cold and wet. Use an airy mix, keep the fill tube clear, and let the reservoir run lower during cool weather.
Choose container volume for plant vigor, guarantee an exit for water, and use reservoir planters where routine or heat makes hand watering unreliable.
Potting Mix, Planting Depth, First Soak
Good root growth starts with a light potting mix, correct crown height, and one thorough settling drink. Get those three right and plants anchor fast without lingering stress.
Why potting soil belongs in containers
Use bagged potting soil formulated for containers. The lighter structure holds moisture while keeping air spaces open, so roots expand rather than stall in heavy particles. Break up compressed chunks before filling.
If the mix dries out between store and home, pre-dampen it in a tub until it clumps when squeezed and falls apart when tapped. Avoid garden soil in pots; dense particles collapse in confined space and starve roots of air. A weak container blend may need more aeration, moisture buffering, or compost balance, especially when roots stall after watering inside potting soil for container gardening.
For hot balconies, blend in a small portion of fine bark or perlite to keep pore spaces open during heat waves.
Planting depth cues
Set the plant at the same line it had in the nursery pot unless you have a clear reason to change. Leaves should clear the rim, and the crown should sit just above the finished surface to reduce rot splash.
- Leave about a finger’s width below the rim for clean watering and mulch.
- Keep the crown visible and dry after irrigation.
- Support tall starts at planting with a single tie to stop wobble.
If the transplant leans after watering, add a temporary stake for one week; remove it once new growth locks the root ball.
First soak that settles roots
After backfilling, water slowly across the whole surface so moisture moves through the entire column and exits the base. Pause midway to let air rise, then continue until you see even drips from the holes.
Lift the pot slightly from the side to feel weight after the soak. The container should feel noticeably heavier, and the surface should be darker but not soupy. If water pools on top, stop, open a few channels with a narrow tool, and resume at a gentler flow.
Check the next morning. If the pot still feels very heavy and the top looks glossy, wait before watering again to avoid early root stall.
A breathable mix, correct crown height, and a deliberate first soak lock roots into fresh media and set up reliable growth in the weeks ahead.
Light, Watering, Feeding, and Heat Rhythm for the First Month
The first month decides whether a container garden becomes a routine or a string of emergencies. Young roots need light that matches the crop, water that reaches the lower mix without drowning it, and feeding that supports growth while keeping foliage compact.
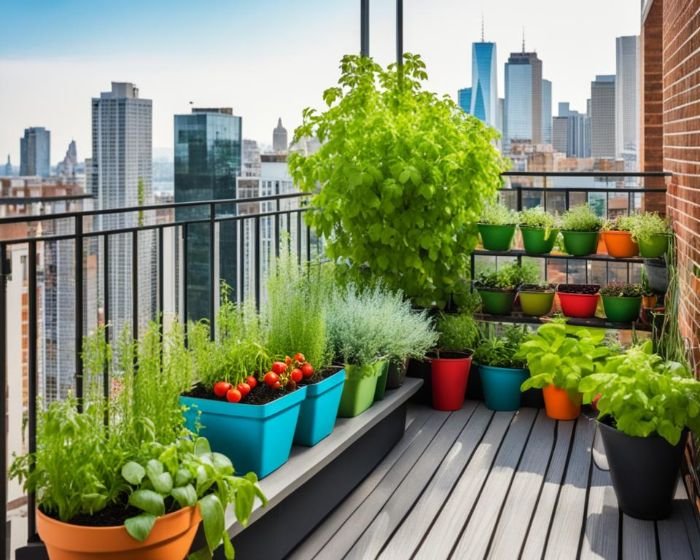
Sunlight targets by space
Patios and driveways often pull the most light. Aim for about 7 hours or more where fruiting crops live, with wind breaks to limit leaf scorch. If reflections from siding raise leaf temperature, shift pots a few feet or add a pale tray under containers to cut radiant heat.
Balconies swing with orientation. East balconies favor greens and herbs with 3-5 hours before noon; south and west exposures suit peppers and tomatoes if you buffer late afternoon with a trellis shadow or a light fabric screen. Ground-level stoops rarely get all-day light, so cluster plants at the brightest edge and keep tall pots to the back to avoid self-shading.
Pro tip – Log one light scan on a clear day by the hour. If a location drops below target by early afternoon, rotate in lower-light plants and move high-demand crops closer to the sun path.
Morning watering frequency chart
Check moisture in the morning when leaves read true. Push a wooden skewer into the mix, pull it out, and read the lower half instead of the dry-looking surface. A cool, lightly tinted skewer means moisture is still present. A dry skewer below mid-depth means the pot needs water.
| Container condition | Morning check | Watering move | Heat adjustment | Risk to avoid |
|---|---|---|---|---|
| New transplant in fresh mix | Pot feels heavy, surface darker, skewer cool | Wait and recheck the next morning | Shade the pot, not the wet root zone | Watering again before roots need it |
| Leafy greens in 2-3 gal pots | Top zone pale, skewer dry by mid-depth | Water slowly until the base gives a brief drip | Add a light afternoon splash above 90°F if leaves soften | Letting shallow pots hit full wilt before evening |
| Fruiting crop in 5 gal or larger | Canopy softens before noon and pot feels light | Water deeply and consider upsizing one class at transplant time | Move 2-4 feet out of late sun before doubling water | Using frequent shallow drinks that keep roots near the surface |
| Reservoir planter | Indicator drops fast, upper mix still evenly damp | Refill the reservoir and top-water only if the upper root zone dries | Keep the tank lower during cool spells and fuller during heat | Leaving stagnant water in cool weather |
| Cool, cloudy, or rainy stretch | Surface stays glossy or pot stays heavy after 24 hours | Skip watering, elevate the base, and improve airflow | Pause feeding until active growth resumes | Following a hot-weather schedule after conditions change |
| Hot, windy, exposed balcony | Skewer dries quickly and leaf edges curl on the sun side | Water in the morning, then cool only shallow pots later if needed | Add shade from 2-4 pm and group small pots near larger ones | Treating heat stress as a fertilizer problem |
Water slowly until the surface darkens and moisture reaches the base holes. Pause midway to let air pockets collapse, then finish until you see a brief, even drip. If water beads and refuses to sink, pierce a few channels with the skewer and resume at a gentler flow.
Pro tip – If two pots of the same size dry at different rates, water the one with the denser canopy first; broad leaves drive higher use.
Feeding routine for edible container crops
Container vegetables need routine monitoring because nutrients leave the pot through harvest, watering, and runoff. A rich mix at planting helps, but it does not carry tomatoes, peppers, greens, or herbs through a long season on its own.
Use the label rate for a slow-release fertilizer at planting, then watch the plant before adding more. Pale new growth, slow leaf expansion, and weak fruit set point toward a feeding gap only when moisture, heat, and drainage are already in range. If the rim shows white crust or leaf tips brown evenly, flush first and reduce feed strength instead of adding more.
| Signal | Likely cause | What to check first | Safer correction |
|---|---|---|---|
| Pale new leaves with normal moisture | Feed is running low | Last fertilizer date and growth stage | Add a light liquid feed or refresh slow-release at label timing |
| Brown tips plus white crust at rim | Salt buildup from feed or hard water | Runoff behavior and crust pattern | Flush on a cool morning and pause feeding until growth steadies |
| Soft growth that wilts fast | Too much nitrogen or too little light | Light hours and feed strength | Reduce feeding and move toward a brighter morning window |
| Flowers drop during heat | Heat and water stress before nutrition | Afternoon leaf temperature and pot weight | Shade late sun, stabilize watering, and feed only after recovery |
Pro tip – Feed after watering, not into a dry root zone. Dry mix pulls salts unevenly and can mark tender roots before the plant can use the nutrients.
Self-watering containers: setup and risk reduction
Self-watering containers reduce risk when your main problem is missed watering, fast dry-down, or hot exposure. They are most useful when the plant wants regular moisture and the mix still has enough air space above the reservoir.
Set them up deliberately. Pre-moisten the potting mix before filling. Plant at the normal crown height. Top-water once after planting so the upper root ball settles. Fill the reservoir only after water moves through the column and exits cleanly. During the first week, check both the indicator and the upper mix because young roots may not reach the wicking zone yet.
| Setup step | Why it matters | Beginner check |
|---|---|---|
| Use an airy container mix | The reservoir supplies moisture, so the upper mix still needs oxygen | Mix should crumble after a squeeze instead of smearing |
| Top-water once after planting | Young roots need contact before they can use the lower wick zone | Water exits the base before the reservoir becomes the main source |
| Keep the fill tube clear | Blocked tubes hide reservoir level and invite stale water | Indicator moves freely after each refill |
| Run the tank lower in cool weather | Cold, wet media slows roots and yellows lower leaves | Let the indicator drop before refilling during cloudy stretches |
| Use reservoirs for thirsty crops first | Greens, basil, peppers, and tomatoes use the buffer better than dry herbs | Leaves hold shape longer between morning checks |
Reservoirs do not remove the need to inspect the plant. If lower leaves yellow while the mix smells sour or stays wet, let the tank run down, raise airflow, and check that the overflow path is open.
Heat stress signals and location adjustments
Container heat stress is a location problem as much as a watering problem. A pot can have moisture in the lower mix while leaf edges still curl because the canopy, pot wall, and deck surface are hotter than the roots can support.
Read timing before you react. Leaves that droop by late day and recover overnight usually need relief from late sun or reflected heat. Leaves that stay limp the next morning need a root-zone check, not more shade alone. Brown margins on the sun-facing side point to exposure. Yellow lower leaves with wet mix point to oxygen loss.
| Heat symptom | What it usually means | First adjustment | Watering adjustment |
|---|---|---|---|
| Late-day droop, recovery by morning | Afternoon heat load is outrunning the plant | Move 2-4 feet out of late sun or add a slim shade band | Keep the morning deep drink; add only a light cooldown for shallow pots |
| Crisp edges on the sunny side | Leaf surface is overheating | Add a pale tray, screen, or trellis shadow from 2-4 pm | Do not add fertilizer until new growth looks normal |
| Pot dries before lunch | Volume is too small for canopy and exposure | Upsize one class or cluster pots to reduce heat | Water deeply in the morning and mulch the surface lightly |
| Wet mix plus yellow lower leaves | Roots are staying too wet after heat passes | Elevate the base and increase airflow | Skip the reservoir refill or extend the interval |
Change one variable at a time. Move the pot or add shade first, then adjust watering the next day if the morning check still shows a dry root zone.
Weekly care reset
Give containers a small reset every 7 days. Turn pots a quarter turn to even out light, trim crossing shoots, and remove tired leaves so air can move through the canopy. Top up with a thin layer of fine bark or fresh mix to reduce splash and moderate afternoon heat.
Scan for salt crust at the rim and rinse it away with a brief flush. Wipe fill tubes on reservoir planters and confirm indicators move freely. If you see droop each evening despite morning watering, step up container volume on the next transplant date or reposition to reduce late-day heat.
A morning check, a measured drink, and one weekly tune-up keep container gardening on track without daily firefighting.
Beginner Pitfalls and Fast Fixes
Most early failures trace back to water control, tight roots, and heat exposure. Triage fast, correct one variable at a time, and growth usually responds within a week.
What is the most common mistake made with container plants?
Overwatering leads the list. Water that cannot exit or that arrives too often displaces air and stalls roots. Open a drain path first. Empty saucers, set pots on feet, and confirm holes are unobstructed with a thin stick.
Water in the morning only while recovering. Let the surface lose its sheen and watch for a slight pullback of mix from the pot wall before the next drink. If the container still looks wet 24 hours later, extend the interval and improve airflow under the base.
Pot too small or root-bound
Roots that circle the pot or form a dense mat cause fast dry-down and nutrient stalls. Upsize by one class, not two, to keep the root ball active. Make three or four shallow vertical slices through the outer mat, tease lightly, and set into fresh media.
Support tall growth for a few days to avoid wobble while new roots take hold. If water races through in seconds, you either need more volume or a mix with better structure.
Sun mismatch and heat stress
Afternoon collapse with crisp edges points to excess heat or too much late sun. Slide pots a few feet to break the beam, or add a pale board under dark decks to cut surface heat.
Create a slim shade band with a trellis or fabric screen during the hottest hours. Group smaller containers around a larger one to share shade, and add a thin top-up of fine bark to cool the surface. For reservoir planters, let the tank run lower during a cool spell to avoid cold, wet media.
| Symptom | Likely cause | Fast fix |
|---|---|---|
| Leaves droop by late day and perk up overnight | Late sun or radiant heat | Move to an earlier light window or buffer late sun with a screen |
| Mix stays glossy a day after watering | Drainage or interval problem | Raise the pot on feet and extend the watering interval |
| Water pours straight through in seconds | Root-bound plant or collapsed media | Upsize one class and refresh media around the root ball |
| Brown leaf margins on the sun side | Heat exposure | Shift 2-3 feet, add a light-colored tray, and thin the densest shoots |
Fix drainage first, then container volume, then light and heat. Tackle one change per day so you can see which correction solved the problem.
Practical Wrap-Up
Run containers like a small system and decisions get easier. If foliage runs tall and internodes stretch, increase light by 1-2 hours or move two feet toward the sun path. If a pot feels light by mid-morning and leaves soften before noon, increase container volume one class or tighten your mulch layer.
When afternoon readings climb past 90°F, add a brief cooldown drink for shallow pots only; deep volumes should still feel cool beneath the surface. If leaf edges crisp on the sun side, fix location before feeding. If lower leaves yellow while the mix stays wet, fix airflow and drainage before adding water.
Use the same inspection rhythm until the plant or weather gives a reason to change it. Do a morning moisture check daily, a quick spin and tidy every 7 days, and a deeper reset at the 4-week mark to reevaluate placement, pot size, reservoir use, and plant mix. If surface crust forms or rims show salt, schedule a gentle flush on the next cool day and elevate bases to improve airflow.
Start simple, then scale by pattern. One edible, one herb, and one color plant will show you how light, volume, feeding, and watering interact on your site. When two out of three grow without daily rescue for two straight weeks, add a new pot using the same rules and position it within 2-3 feet of the best performer.
- Morning check, one action, move on
- Rotate pots weekly to balance light
- Elevate bases to dry faster underfoot
- Upsize one class when dry-down hits before midday
- Add shade from 2-4 pm during heat spikes
- Feed lightly after watering when growth shows a real nutrient gap
FAQs
How many containers should a beginner start with to keep care simple?
Start with two or three mid-size pots so you can track light and dry-down patterns without spreading attention thin. When two pots hold shape between waterings for 24-36 hours and show new growth at the tips, add one more of the same size and place it near the strongest performer.
How do I measure sun hours without special tools?
Pick a clear day and mark sun presence on the spot at the top of each hour from breakfast to dinner. Count only the hours with direct light on the leaves, then confirm on a second day within a week to account for shadows from nearby structures.
What’s a safe way to manage container weight on a balcony?
Spread pots on a rigid board or tray to distribute load, keep the heaviest containers close to support points like walls or posts, and avoid stacking many water-filled planters in one corner. If rain is forecast, empty saucers beforehand so added weight does not arrive all at once.
I can only water every other day. How do I adapt the setup?
Use larger volumes, cluster pots to shade each other, and choose plants with moderate thirst. Reservoir designs help during hot spells; keep the fill tube clear and run the tank lower during cool snaps to prevent soggy media in self-watering planters.
Can I reuse potting soil next season, or should I buy fresh?
Reuse is fine if previous plants were healthy. Remove roots and debris, break up clumps, and re-wet evenly before planting. Refresh with a portion of new mix so structure and moisture behavior stay predictable for young roots.
How much potting soil should I buy for a small starter setup?
A 1.5-2 cubic foot bag typically fills two medium round pots or one large planter with a bit left for top-ups. Keep a small reserve sealed for midseason refills after pruning or when settling creates a dip near the rim.
What is a quick success signal in the first week of container gardening for beginners?
New leaf tips appear compact, stems hold their angle through late afternoon, and the pot feels lighter the next morning without leaf droop. That pattern says light and moisture are in range and roots are extending into fresh media.
Is tap water okay for containers, or do I need filtered water?
Tap water works for most setups. If you see white crust at the rim or leaf tip burn, flush with a longer watering on a cool morning and allow full drainage. Where water is very hard, alternate with collected rainwater or a diluted flush to reduce mineral buildup.