Updated April 22, 2026
Composting for beginners works when wet scraps get buried in dry browns, the mix stays damp like a wrung-out sponge, and oxygen keeps the center warm instead of sour. Miss one of those three conditions and the pile stalls, smells, or attracts flies fast.
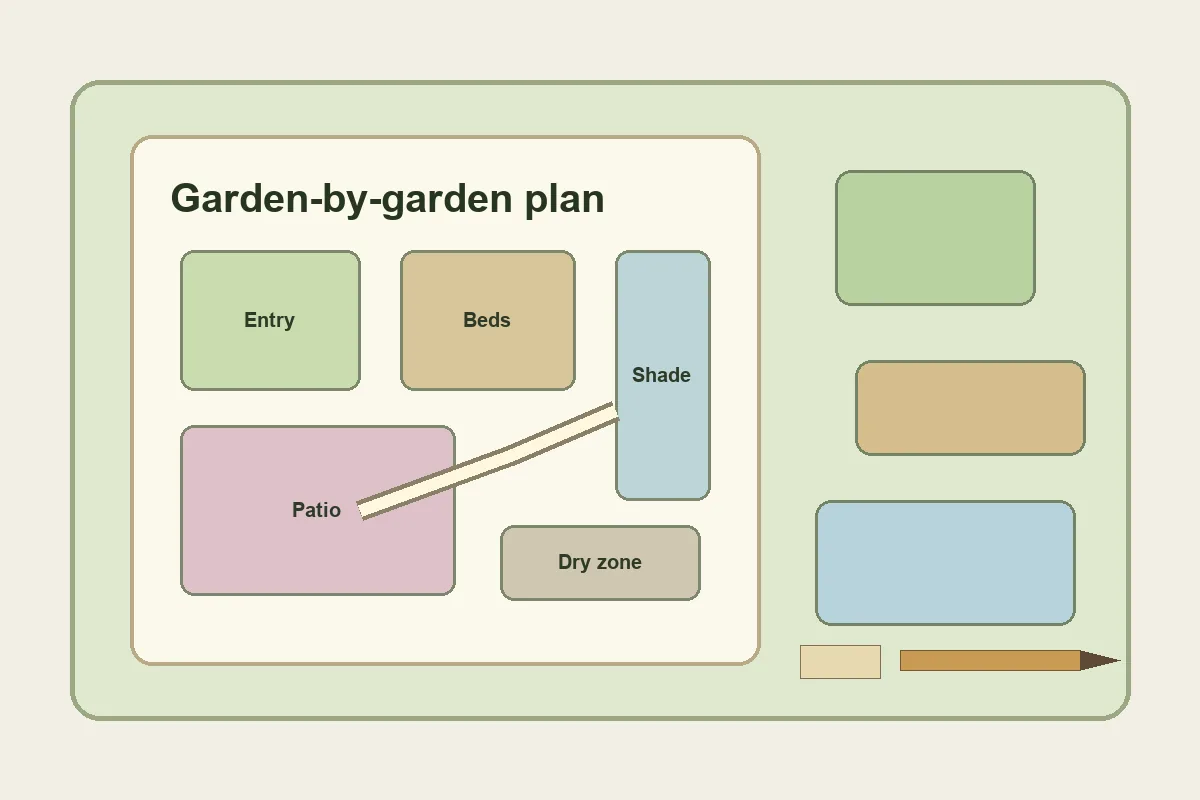
A first compost setup does not need fancy gear. It needs reachable placement, enough mixed material to hold warmth, and an easy field rule you can remember on a busy weeknight: keep roughly two to three parts browns for every one part greens by volume and hold the mix near the feel of a wrung-out sponge.
Key Takeaways:
- Keep two to three parts browns for every one part greens
- Bury fresh scraps and cap them with dry material every time
- Build enough mixed volume before expecting heat
- Read smell, texture, and temperature before making corrections
- Use compost after it turns dark, crumbly, and earthy
Table of Contents
Quick Start Decisions – The Fastest First Move For Your Situation
Most beginner mistakes show up before the first real batch finishes. The right first move depends on your space, the kind of scraps you generate, and what the pile is already telling you.
| If this is your situation | Do this first | What it prevents |
|---|---|---|
| Small space, mostly kitchen scraps | Use a compact bin or worm setup and keep a tote of dry browns beside it | Surface mess, fruit flies, and a wet compacted core |
| Backyard with leaves, trimmings, and regular garden waste | Build an enclosed bin or wire-sided pile with enough volume to hold warmth | A half-sized heap that never heats up |
| Wet, smelly, or fly-prone pile | Open the center, add structured browns, and bury the next food scraps deeper | Anaerobic odor and repeated pest attention |
| Dry, cool pile with scraps that look unchanged | Add a modest green charge, moisten lightly, and rebuild mixed mass | A dusty pile that sits still for weeks |
Those four moves prevent most first-month failures: a pile that stays too wet, too dry, too small, or too exposed at the surface.
What Keeps Compost Active – Air, Moisture, Carbon, And Nitrogen
When a pile turns sour, dries to paper, or sits cold for too long, one of four conditions slipped: air, moisture, carbon structure, or nitrogen fuel. Compost forms through aerobic decomposition. Bacteria, fungi, and other decomposers feed on carbon for energy and nitrogen for cell growth, then release heat as respiration rises in the core. Open texture keeps oxygen moving and breakdown stays clean. Compressed wet zones push the same material toward sour odors, slime, and stalled decay.
Heat is only a signal, not the finish line. A well-kept backyard pile can reach 130 to 160 F in the center. That warmth tells you microbial respiration is active and weed seeds are losing viability. A pile that never heats still becomes compost, though the timeline stretches out and the gardener needs cleaner inputs.
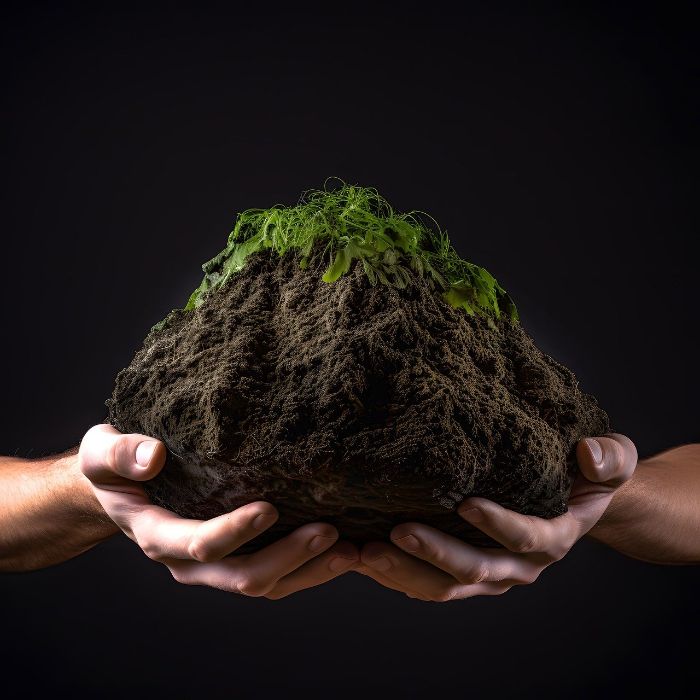
Finished compost helps sandy ground hold moisture and opens heavy soil so roots and water move more freely. The end product is biologically stable humic material. In practical terms, the pile stops stealing nitrogen from the bed, smells like forest floor, and breaks into loose crumbs, not paste.
A Beginner Setup Should Match Access, Drainage, And Working Size
Once the setup type is clear, location and working size decide whether the system stays usable. Access is part of compost success, not a minor detail. A bin at the back fence line gets ignored during rain, cold snaps, and busy weeks. One near the kitchen path and near the bed where the compost will be used gets fed, checked, and corrected on time.
A contained pile roughly 3 to 5 feet wide works well when it sits close to where the compost will be used, out of drying winds, and in partial sunlight that helps the core warm without baking the surface. Choose good drainage and avoid wedging the pile tight against a fence.
Bare soil under the bin helps in another way. Ground contact lets native decomposers move upward into the pile, and excess moisture drains away faster than it does on a sealed slab. If the setup must sit on hard ground, leave room for airflow under the mass and pay closer attention to wet spots along the bottom edge.
Choosing a compost bin affects airflow, working volume, access, and how easily the setup stays tidy.
Build The First Batch So Odor And Fruit Flies Never Get A Head Start
A beginner backyard pile works best when it solves drainage, surface moisture, and pest attraction in the right order.
- Pick a drained spot on bare soil or use a breathable bin with floor airflow.
- Lay a 4- to 6-inch base of coarse browns such as twigs, chopped stems, or wood chips.
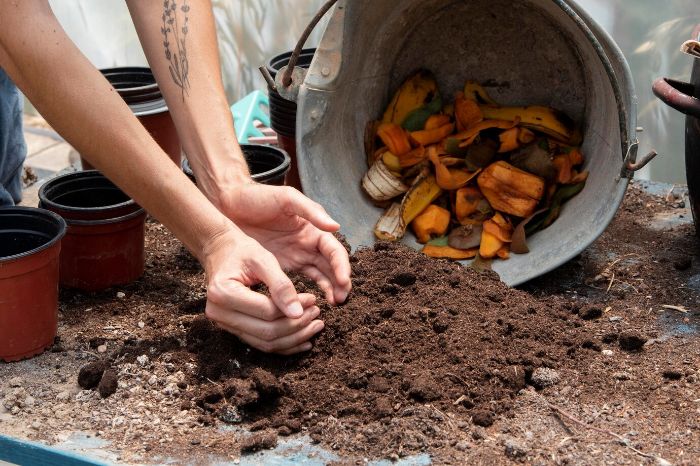
- Add greens in thin layers and follow each one with two or three layers of browns.
- Chop bulky scraps to palm-size or smaller so microbes reach more surface area fast.
- Wet lightly as you build until the handful feels damp and springy, not muddy.
- Keep adding until the pile has enough mixed mass to warm, then shift into a weekly check routine
Pro Tip: Store one lidded tote of dry browns beside the bin. The pile stays cleaner when the cover material lives within one arm reach of the lid.
The first 7 days set the pattern
Day 1 is for building the mixed batch, not for chasing heat. Day 2 through Day 4 are mostly hands-off unless the pile turns soggy or starts smelling sour. By Day 5 through Day 7, check the center for mild warmth, pull a sample to confirm damp springy texture, and bury any new scraps under fresh browns. That early rhythm teaches more than constant turning ever will.
That coarse base matters more than beginners expect. It lifts the working mix off the wettest ground, leaves air channels at the bottom, and catches the juice that would otherwise settle into an anaerobic layer. A pile built flat on soaked ground turns foul faster than a pile that starts with structure.
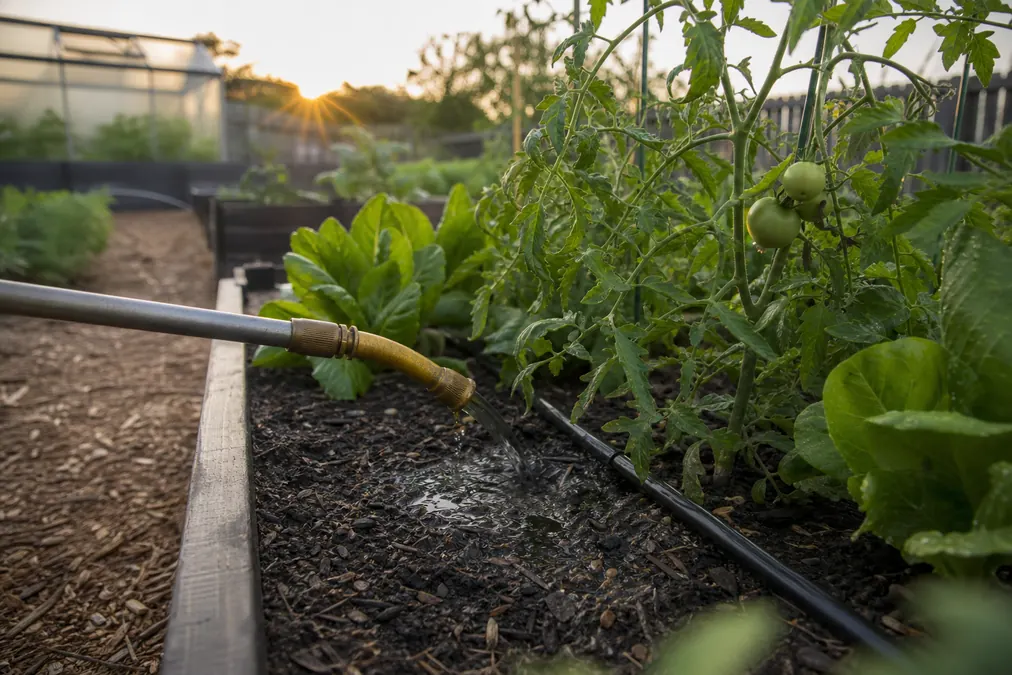
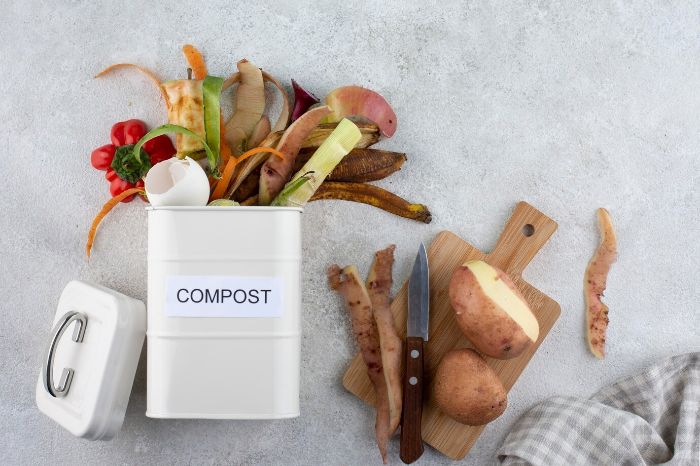
Kitchen scraps, coffee grounds, and fresh grass clippings belong under a brown cover every single time. Bury food scraps under 4 to 8 inches of dry material when pests are a concern. That one habit cuts smell, fruit flies, and raccoon interest in the same move.
Moisture is next. Grab a handful from the middle, squeeze hard, and open your hand. A good mix holds shape for a second, feels cool and damp, and leaves no stream of water on your wrist. If it drips, fold in more browns. If it falls apart like dry confetti, mist and turn.
Keep the first batch focused on the safest routine inputs: dry browns, fresh greens, air, and moisture. Best compost materials separate routine inputs from questionable ones, while the EPA home composting guide keeps the household keep-out list clear.
Leave out meat, dairy, oily leftovers, pet waste, glossy paper, and diseased plant material from a cool backyard pile. Those items either attract trouble fast or ask for higher temperatures than most home systems hold consistently.
Read The Pile By Smell, Texture, And Temperature Before You Fix Anything
A healthy pile gives clear signals long before it turns into a mess. The center feels warm, the surface stays dry enough to remain tidy, and a handful from mid-depth breaks apart with spring, not slime.
Signs the biology is on track
Within the first week or two, a working batch darkens in the middle, sheds some original shapes, and starts smelling like damp leaves or fresh soil. On a cool morning you may see a faint thread of steam when the lid opens. A realistic hot-pile window is about three to six months from build to finished compost, so the early goal is not instant black soil. The early goal is visible microbial activity.
Beginners often trust temperature more than texture. Texture tells the truth faster. A working mix feels springy and fibrous in the hand, not pasty.
The weekly check only takes a minute or two. Lift the lid, pull a small sample from the center, smell it, squeeze it, and look for recognizable scraps that are shrinking, not sitting untouched. If those signals stay positive, leave the pile alone after a light turn.
What wet, sour, or sharp smell is telling you
A rotten or sour note means oxygen dropped. A sharp ammonia smell points to excess nitrogen. Low C:N mixes are prone to nitrogen loss as ammonia gas, which is exactly why a wet pile heavy on food scraps smells harsher after the lid opens. Open the mass with a fork, separate matted zones, and fold in dry material with structure, not powder.
Fruit flies point to the same surface problem from another angle. Fresh scraps sat too near the top, juices stayed exposed, and the brown cover layer was too thin. Bury the next load deeper, then cap it properly and leave the lid closed for a few days. The population drops when the food cue disappears.
What cool, dry, unchanged material is telling you
A cool core after the pile has reached working size points to one of three things: too much carbon, too little moisture, or too little total mass. Dusty newspaper, intact leaves, and pale cardboard corners say the microbes ran short on water or nitrogen. Add a modest green charge, moisten lightly, and turn once.
If the batch still looks unchanged after another week, the pile needs more blended material, not more hope. New gardeners judge too early when the heap is still half-sized and mostly dry leaves. Heat only builds when the mass holds moisture and microbial food in close contact.
Common composting problems usually follow the same signal pattern: earthy and springy means keep the routine; sour and slimy means add air and browns; cool and dusty means add moisture and greens.
How To Know Compost Is Finished And What To Do Next
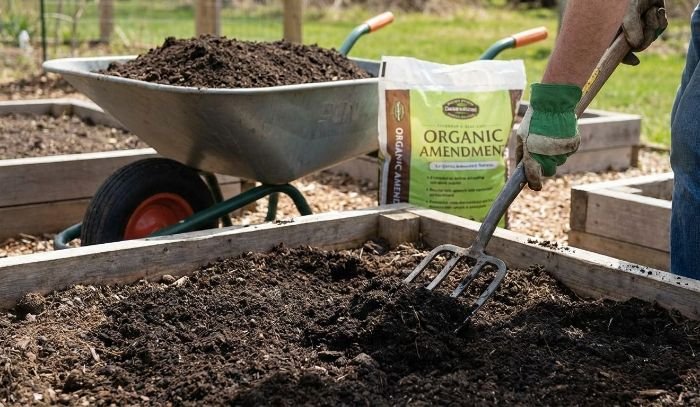
Finished compost looks dull brown to almost black, breaks into loose crumbs, and smells like forest floor after rain. The pile quits reheating after turning, most feedstocks lose their original shape, and the volume drops hard from the first build. A few eggshell flakes or twig pieces are normal. Whole vegetable scraps and sharp odors are not.
After the pile stops heating, give it a curing period of at least four weeks. That cure time matters because dark color alone does not mean stability. A batch that still heats in a sealed bag or smells sharp after sealing is still active enough to tie up nitrogen in the bed.
| Where to use it | How to apply it | What to watch |
|---|---|---|
| Vegetable and flower beds | Spread 2 to 4 inches and work it into the top 6 to 9 inches before planting | Keep chunky unfinished bits out of seed rows |
| Around shrubs and perennials | Use a thin topdressing across the root zone surface | Keep compost off crowns and trunks |
| As a surface mulch | Lay a loose layer a few inches away from stems | Use cured compost only, never hot or sour material |
| In containers | Blend screened compost lightly into potting mix | Remove twigs, pits, and large shell fragments first |
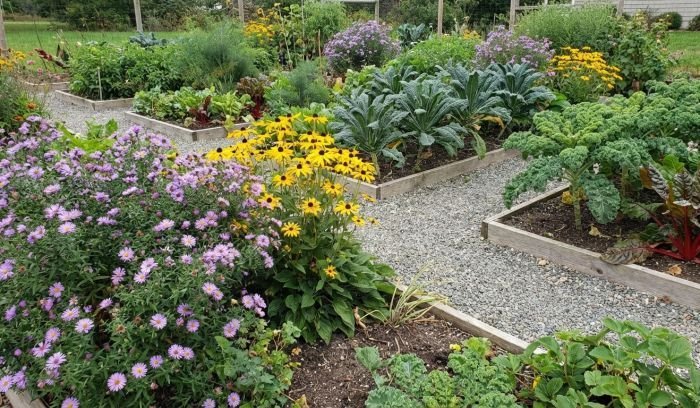
Compost earns its place in sandy and heavy soils for opposite reasons: sandy soil gains moisture-holding capacity, while heavy soil gains drainage and pore space. Soil health improvement depends on that same root-zone structure, but finished compost should only be used when it smells earthy, feels crumbly, and stays cool after turning.
Conclusion
Keep one tote of dry browns beside the bin, bury every fresh food addition, correct texture before odor arrives, and let the finished batch cure before it reaches the bed. That short routine keeps the surface tidy and the center active.
The payoff shows up under the trowel fast. Beds amended with finished compost stay friable after watering, hold irrigation longer in the root zone, and take transplants with less slump because pore space and biological activity have both improved.
FAQ
Can you compost citrus peels and onion skins?
Yes, in normal household amounts. Chop them smaller, mix them into the warm middle of the pile, and cover them with browns so the surface stays dry. Trouble starts when a small bin gets loaded with a heavy run of wet peels and no dry cover. In that case the issue is the ratio, not the citrus.
What happens if you use compost before it is finished?
The pile may look dark enough long before it is stable. If that half-finished material goes straight into a seed bed, microbes keep feeding and pull nitrogen from the surrounding soil as they work. Seedlings respond with slow growth, pale leaves, or patchy emergence. Give questionable compost more curing time and test the smell again before using it.
Does composting need sun or shade?
Partial sun with shelter from drying wind fits most backyard piles best. In partial sunlight, the core warms more easily and the surface dries less brutally than it does in all-day exposure. Full shade still works if the pile is large enough and the ratio is right. Full blazing sun asks for closer moisture checks in summer.
Can you compost through winter in a cold climate?
Yes. Decomposition slows, the outer layer cools fast, and the center may keep working if the pile holds enough mass. Keep adding browns with each kitchen load, avoid leaving wet scraps exposed, and expect a slower finish. Once spring returns, the pile wakes up again as temperatures rise.
Is a tumbler better than a backyard bin for beginners?
If your yard is small and you care about neat edges, a tumbler fits well. If your garden drops lots of leaves, stems, and seasonal trimmings, a backyard bin or wire-sided pile handles volume more gracefully. Tumblers turn easily and stay tidy. Open bins win on capacity and on the ability to build the larger mass that heats up faster.
How often should you turn a beginner compost pile?
Oxygen drives the faster, cleaner side of decomposition, so turning is really an aeration job. One light turn every 7 to 10 days is enough for many beginner piles after the first build, and a faster cadence only makes sense when the batch is hot and active. Constant flipping dumps heat and dries the edges. In a cool passive pile, occasional turning plus good layering works fine.
What happens if the pile attracts flies?
Flies gather because food scraps stayed exposed near the surface. Bury the next additions deeper, cover them with dry leaves or shredded cardboard, and wipe any residue from the lid rim. The breeding cycle breaks once the wet food odor disappears from the top layer. A small outbreak is a surface-management problem, not proof that the whole pile failed.
Do you need a compost starter product?
Most starter products solve a problem the pile did not have. A new batch already receives decomposers from the soil, the scraps, the leaves, and the surrounding air. Better carbon balance and better moisture do more for a slow pile than a bag of inoculant. Save the money for a fork, a lidded kitchen scrap caddy, or a dry-brown storage tote.