Updated April 16, 2026
Getting started with gardening comes down to three upstream decisions made before a single seed goes in the ground, and making them in the wrong order is why most first-season gardens underperform. Pick location last and your best plants end up in the worst light. Skip soil prep and you spend the summer feeding roots nothing. Plant what excites you rather than what actually germinates reliably and you watch bare dirt through April. None of this is bad luck. It is sequence.
Before planting day, choose a spot from actual sun hours, read the soil before amending it, buy only the tools that earn their place, and start with plants that give a first-time gardener visible results within weeks.
Key Takeaways:
- Map your yard for sun hours before choosing any planting spot
- Test soil pH before adding any amendments – guessing costs a full season
- Water deeply once a week rather than shallowly every morning
- Start with fast-germinating crops before attempting slow-maturing vegetables
- Skipping soil prep is the most predictable and avoidable first-year mistake
Table of Contents
Garden Location – Sun Hours Are Non-Negotiable
Most beginners measure sunlight loosely. They glance at a spot, decide it looks sunny enough, and plant. Then they spend summer wondering why their tomatoes are sulking while a neighbor’s identical setup produces weekly. The difference is almost always hours – specifically the difference between 5 and 7.
Most vegetables and herbs need 6 to 8 full hours of direct, unobstructed sun per day. A spot that reaches 5 hours might support lettuce and spinach. It will not support peppers, tomatoes, cucumbers, beans, or most herbs. Partial shade is not a compromise – it is a different growing environment with a different plant list.
One fact worth knowing before you survey your yard: a spot with 7 hours of sun in early May can drop to 4 hours by July as neighboring trees fully leaf out. The canopy that does not exist in April absolutely exists in August. Survey your space at the height of the season if you can, or plan conservatively by noting where neighboring trees will throw shade once they fill in.
How to actually map your light
Note shadow positions at 8am, 12pm, and 4pm on a clear day. Where you find full sun at all three observations, you have a 6-plus hour zone. Do this once in late spring and the guessing stops. If your only viable location hits 4 to 5 hours, leafy greens – lettuce, kale, arugula, spinach – are your crop list. Some herbs, particularly parsley and mint, tolerate partial shade better than most plants. Fighting the available light does not end well.
Two secondary factors matter after sun: access to water and proximity to where you cook. A vegetable bed 180 feet from the hose becomes a reason not to water on busy days. A herb garden that requires a long walk stops getting harvested regularly. Both distances have an outsized effect on how consistently the garden actually gets tended.
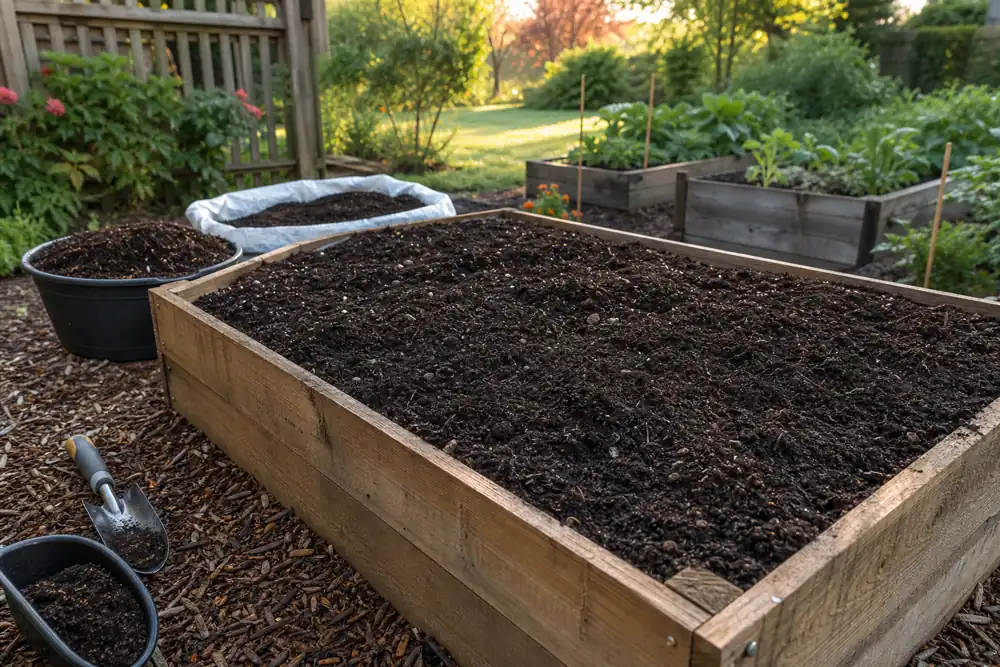
Soil Preparation – What Goes Underground Before Anything Else
Soil is the investment beginners most commonly skip. It is also the one with the clearest return. The difference between well-amended soil and native clay or compacted ground becomes visible within three weeks of planting – in germination rate, in leaf color, in how fast seedlings establish.

The USDA Natural Resources Conservation Service estimates that under natural conditions, topsoil forms at roughly one inch every 500 years. A single afternoon with good compost and a garden fork does what natural processes cannot do in a lifetime. That context is useful when the bag of compost feels expensive.
What soil preparation actually involves
Start with a pH test before anything else. Most vegetables thrive in a range of 6.0 to 7.0. Basic test kits cost around $10 at any garden center and take minutes to read. If your result is below 6.0, you are in acidic soil – garden lime raises it. Above 7.0 means alkaline – elemental sulfur or acidic compost brings it down. Skipping the test and adding amendments anyway is the gardening equivalent of treating a patient without diagnosis. According to the University of California Agriculture and Natural Resources, pH affects nutrient availability more than any other soil factor – even plants in nutrient-rich soil can show deficiencies if pH is outside their range.
Once pH is in range, work in 2 to 3 inches of compost to a depth of about 8 inches. Use a digging fork rather than a rototiller. Aggressive mechanical tilling destroys soil structure and kills the fungal networks and beneficial organisms that roots rely on – networks that take years to rebuild once broken. The soil should smell dark and earthy after amendment, not sour or sharp. A metallic or ammonia smell indicates decomposition problems that need addressing before planting.
Let the amended soil rest for at least a week before planting. Microbial activity needs time to stabilize after disruption. For a fuller look at what happens when soil structure degrades over time and how to address each specific condition, the soil health improvement guide covers amendment strategies by problem type.
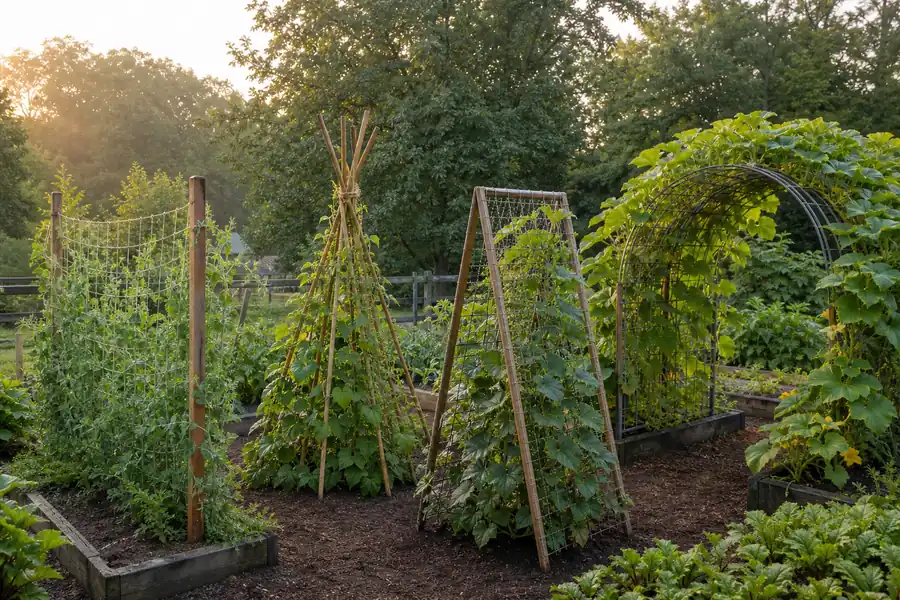
Essential Tools for Beginner Gardeners – The Short Useful List
The gardening tool industry sells complexity well. Specialty bulb planters, long-handled cultivators, wheel hoes, soil blockers, pH meters with digital displays. Most of it sits unused after the first season. For a beginner working a 4×8 raised bed or a 10×12 in-ground plot, the working set is five items.
| Tool | Primary use | What to look for |
|---|---|---|
| Hand trowel | Transplanting seedlings, digging holes, spot amendments | Solid-tang construction – metal running through the handle, not stopping at the grip |
| Digging fork | Breaking up compacted soil, working in compost | Four flat tines, full-size handle – more useful than a spade in established beds |
| Bypass pruners | Clean cuts on live stems, harvesting, deadheading | Bypass style only – anvil pruners crush rather than cut, damaging tissue |
| Garden gloves | Hand protection without loss of grip or feel | Thin nitrile-coated or synthetic leather with reinforced fingertips – test grip before buying |
| Watering can or hose with rose head | Gentle, even water delivery to seedlings and seed rows | Rose head (perforated cap) slows water to a shower – a direct stream disturbs seeds and small transplants |
The trowel choice reveals the most about tool quality. The gap between a $12 trowel and a $30 forged-steel version becomes visible after one season – the cheap one bends mid-dig in clay soil and the blade separates from the handle after consistent use. Solid-tang construction, where metal runs the full length through the handle, is the indicator to look for. The garden trowel guide covers the specific differences between blade shapes and which work best in different soil types.
Buy these five before spending money on anything else. Every tool beyond this list is situational. You will know what you actually need after one season better than any pre-season checklist can tell you.
Pro Tip: Check estate sales and secondhand shops before buying new. Older American-made forged tools – Corona, True Temper, Ames – frequently appear there for a few dollars and outlast most modern imports. The steel quality in tools made before the 1990s is genuinely difficult to replicate at current retail prices.
What to Plant First – Wins Before Ambition
Beginners almost always plant what they most want to harvest. Tomatoes and peppers lead that list by a wide margin. Both are warm-season crops that need soil temperatures above 60°F, cannot tolerate late frosts, and take 70 to 85 days from transplant to first edible fruit. That is a long, visible wait with multiple points of potential failure and no useful feedback until late summer. For a first garden, that is a poor trade.
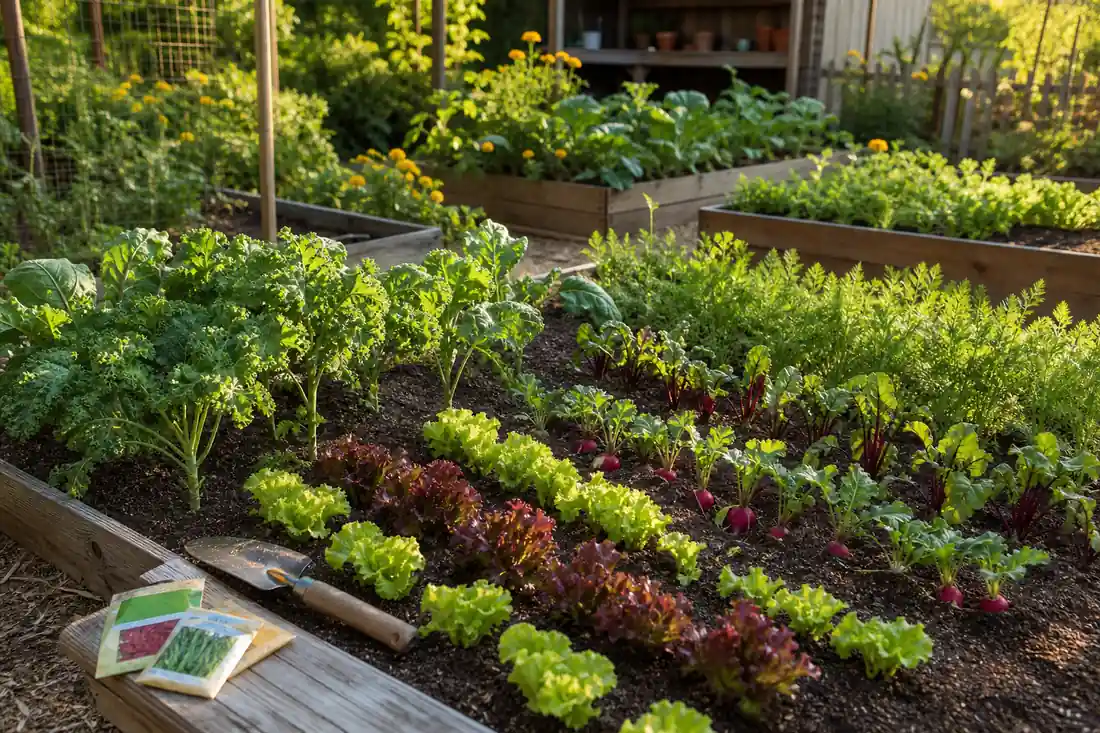
The more reliable approach starts with crops that close the feedback loop quickly.
Radishes germinate in 3 to 5 days and reach harvest size in 25 to 30 days. They teach soil texture, spacing, and watering rhythm inside a single month. Lettuce produces harvestable outer leaves in 45 days and keeps producing if you cut rather than pull. Green beans direct-sow in warm soil and yield heavily with minimal input once established. Zucchini grows with such reliability that it has its own reputation among first-time gardeners for overproduction – one plant fed an entire household through August is a common first-season outcome.
Before you ask yourself what you want to harvest, ask a more useful question: which crops will still be in the ground and producing in August when summer heat, vacation schedules, and novelty-fatigue all pressure the garden? Starting with resilient, fast-feedback plants makes it far more likely you are still gardening by September.
When to add warm-season crops
Tomatoes and peppers make sense in a second planting round, once soil temperature confirms above 60°F and frost dates have passed for your specific area. The Old Farmer’s Almanac frost date finder is the most reliable free reference for US last and first frost dates by zip code – knowing your zone’s last spring frost date is the single most useful calendar fact a beginning gardener can learn. Plant warm-season crops before that date and a late frost can remove weeks of work in a single night.
Penn State Extension recommends planting cool-season crops like lettuce, spinach, and peas as early as 4 to 6 weeks before your last frost date, while the soil is still cold. This sequence – cool-season crops first, warm-season crops after frost risk passes – structures your growing calendar around your climate rather than against it. For a broader look at plant combinations by season and conditions, the guide to choosing plants for vegetable gardens covers pairings by light, climate, and space.
Watering and Feeding Your Garden – Frequency Beats Volume
The most common cause of plant failure in first-time gardens is not drought or poor soil. It is overwatering. Roots require oxygen as much as moisture. Soil that remains continuously saturated creates anaerobic conditions that cause root rot – and root rot presents identically to drought stress: wilting leaves, yellowing, slowed growth. Beginners diagnose the wilt as underwatering and add more water, which accelerates the problem.

I often notice that struggling seedlings in regularly watered beds are more frequently drowning than thirsty – the symptoms are the same and the impulse to water more is exactly wrong.
The rule that produces consistent results: water deeply, infrequently, and only when the top inch of soil is dry. In most US summer climates this means once or twice per week depending on heat and rainfall. After watering, push a finger 4 to 5 inches into the soil – it should feel moist at that depth. If it still feels wet from the previous day, skip the scheduled watering. The National Gardening Association notes that more than 90% of houseplant deaths and a significant proportion of outdoor plant failures trace back to incorrect watering frequency, not nutrient deficiency or pests.
Deep, infrequent watering also trains roots to grow downward rather than laterally near the surface. Surface-rooting plants are far more vulnerable to heat stress and short dry spells than plants with established deep root systems. The physical structure you build with watering habits in the first month determines how your plants perform through August. For a detailed look at how different crops respond to varying moisture levels, the article on understanding plant water needs covers thresholds by plant type and season.
When and how to fertilize
Well-amended soil with compost does not need additional fertilizer for the first 6 to 8 weeks. Over-fertilizing early – particularly with high-nitrogen formulas – produces lush green growth at the direct expense of fruit and root development. The plant puts energy into leaves rather than production.
When you do fertilize, a balanced 10-10-10 granular handles most vegetable gardens. Tomatoes and heavy-fruiting crops respond well to a shift toward lower nitrogen and higher phosphorus once flowers appear. Scatter granules at the drip line of the plant rather than against the base, water in after application, and do not exceed the label rate. The label rate is a production recommendation, not a minimum.
Mistakes Worth Making Early – What Year One Actually Teaches
No beginner gets through a first season without errors. The ones that teach the most are also the most predictable – which makes them worth knowing in advance rather than discovering in August.
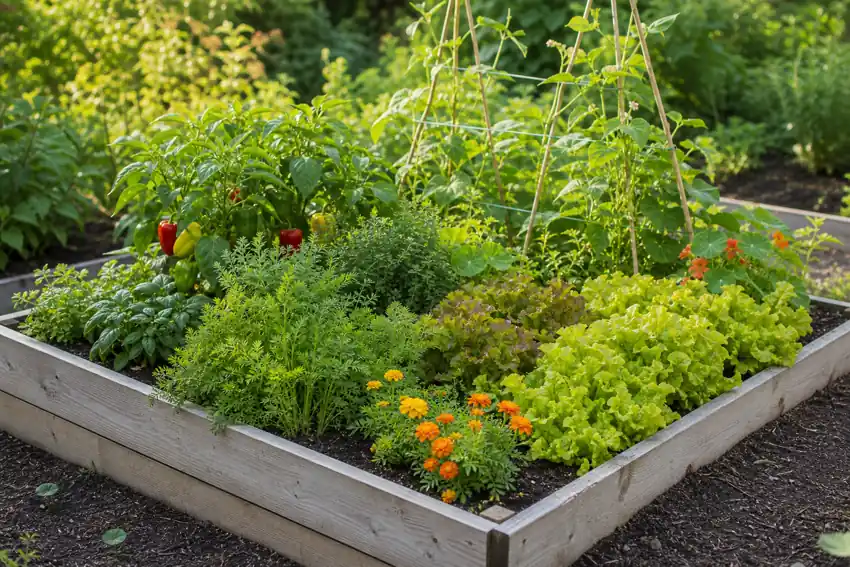
Planting too much too soon is the most universal first-season mistake. A 4×8 raised bed planted efficiently in May can produce more vegetables than a small household eats through August. Beginners who fill a 10×20 plot in April often find themselves overwhelmed by mid-summer and exhausted well before harvest ends. Start with a third of what you think you need. You can always expand.
Spacing recommendations feel excessive until you see what ignoring them produces. Tomatoes planted 18 inches apart instead of 36 create a dense canopy that traps moisture against leaves and invites fungal disease. Beets seeded without thinning produce small misshapen roots. The distances on seed packets are not suggestions – they reflect the mature plant’s actual space requirement. Following them feels wasteful when beds look empty in May. It feels correct in July.
Keep a notebook through the first season. Not a detailed journal – a rough log is enough. Record what you planted, when, and what happened. A photo on your phone with a date is sufficient. Without any record, the lessons from year one largely evaporate by the time year two begins. The difference between a gardener who improves rapidly and one who repeats the same first-year mistakes for three seasons is usually this: one of them wrote things down.
Conclusion
Your first garden does not need to be ambitious to be productive. A 4×8 bed in a verified-sun spot, with amended soil and four or five fast-producing crops, will teach you more in a single season than a year of reading guides.
The sign that the fundamentals are working is specific: seedlings that stay upright after a week in the ground, leaves that hold their color through afternoon heat rather than wilting by 3pm, and roots you can feel resistance from when you tug gently on a stem. When those three things are true, you have built the foundation that every more complex gardening decision rests on. Everything else comes after.
FAQ
How many hours of sun does a beginner vegetable garden need?
Most vegetables require 6 to 8 hours of direct, unobstructed sun per day. Fewer than 6 hours shifts your crop options toward leafy greens – lettuce, spinach, kale, arugula – and shade-tolerant herbs like mint and parsley. Tomatoes, peppers, cucumbers, and beans produce poorly below 6 hours and should not be attempted in marginal light conditions.
What is the easiest vegetable for a beginner to grow?
Radishes are the most forgiving first vegetable for three reasons: they germinate in 3 to 5 days so you know quickly whether planting conditions were right, they mature in 25 to 30 days giving fast feedback, and they fail visibly rather than quietly – a radish that is not thriving shows it within two weeks. That feedback loop makes them unusually useful for a first-time gardener learning to read their soil and watering conditions.
Can you start a garden without buying soil amendments?
You can, but the results from native soil without amendment vary widely and are impossible to predict without a soil test. Native soil in most US suburban and urban settings is either compacted fill, depleted topsoil, or heavy clay – none of which supports strong root development without improvement. The cost of a soil test kit ($10) and a bag of compost ($15 to $25) is small relative to the investment in seeds, transplants, and time. Skipping it to save money at the start commonly costs more in the outcome.
What happens if I plant seeds too deep?
Seeds planted deeper than the recommended depth may germinate but run out of energy before the shoot reaches the surface. The general rule is to plant seeds at a depth of two to three times their diameter – so a small lettuce seed goes in at roughly 1/8 inch, while a bean seed can go 1 to 1.5 inches deep. Most seed packets specify this directly. When in doubt, plant shallower rather than deeper. Seeds close to the surface can be covered by rain; seeds too deep run out of stored energy before they emerge.
How do I know when to water my garden?
Push your index finger into the soil to a depth of about one inch. If the soil feels dry at that depth, water deeply. If it still feels moist, skip that day and check again tomorrow. This check takes 10 seconds and is more reliable than any fixed schedule, because soil dries at different rates depending on heat, wind, cloud cover, and soil composition. Consistent shallow watering – a few minutes every day – keeps the top inch moist while the root zone stays dry, which encourages shallow rooting and makes plants more vulnerable to heat stress.
Can you start gardening in summer if you missed spring planting?
Yes, with an adjusted plant list. In most US zones, a summer start means skipping cool-season crops that bolt or fail in heat and focusing on warm-season vegetables: beans, cucumbers, zucchini, and cherry tomatoes from transplant rather than seed. Fast-maturing varieties – look for “days to maturity” of 60 days or fewer on the seed packet – are the most practical choice for a late start. A second cool-season window opens again in late August to early September in most zones, which works well for lettuce, spinach, and kale planted for fall harvest.
What is the single biggest mistake first-time gardeners make?
Overwatering, by a wide margin. It is counterintuitive because the instinct is to care for plants by giving them more – more water, more fertilizer, more attention. But root rot from waterlogged soil presents identically to drought stress: wilting leaves, yellowing, slowed growth. Beginners see the wilt, add more water, and the problem compounds. Learning to check soil moisture before every watering session, and being willing to skip a scheduled watering when the soil is still moist, is the single habit change that most improves first-year outcomes.