


Crepe myrtles (Lagerstroemia indica) are among the most widely planted ornamental trees in warm U.S. regions – and for good reason. With vivid blooms, striking bark, and low maintenance needs, they thrive in landscapes from Texas to the Carolinas. But long-term success begins at planting. This guide covers the essential steps to correctly plant crepe myrtles, including how to choose the right location, prepare the soil, and set the proper spacing and depth to give your tree a strong start.
Key Takeaways
- Choose crepe myrtle varieties based on mature size, hardiness zone, and flower color.
- Select a planting site with full sun and good air circulation – away from structures and power lines.
- Test and amend soil to ensure proper drainage and nutrient availability.
- Plant during dormancy (late fall to early spring) for best root establishment.
- Dig a hole twice as wide as the root ball and set the tree at grade level.
Table of Contents
Preparing the Site – Variety, Location, and Soil Basics
Crepe myrtles vary widely in height, spread, and bloom characteristics – from compact dwarf shrubs to stately flowering trees. Selecting the right variety means considering your available space, regional climate, and desired visual impact. Matching the plant to your site conditions ensures healthy growth and a balanced garden design.
Tip: The right selection prevents overplanting, poor airflow, and long-term pruning headaches – especially in tight residential settings.
Choosing the Best Crepe Myrtle Cultivar for Your Climate and Space
Start by checking your USDA hardiness zone – crepe myrtles thrive in zones 7 to 9, but cold-hardy cultivars exist for zone 6b with winter protection. Dwarf types (under 5 feet) suit containers, patios, or small gardens, while medium and tall varieties (10 to 30+ feet) work better as specimens or privacy screens.
Pay attention to mature height, canopy spread, and bloom color listed on the plant label. Matching cultivar size to your available space ensures long-term balance and reduces future maintenance.
Selecting a Planting Site with Proper Sunlight and Airflow
Choose a location that receives full sun for at least 6 hours daily – this is essential for abundant flowering and disease resistance. The site should also allow good air circulation to prevent powdery mildew and other fungal issues.
Avoid planting near structures, fences, or beneath utility lines. For multiple trees or hedge applications, space plants according to their mature width: 3–5 feet for dwarf types, and 8–12 feet for standard trees. Overcrowding leads to airflow problems, poor bloom production, and structural pruning down the line.
Soil Preparation – Creating the Right Foundation for Root Establishment
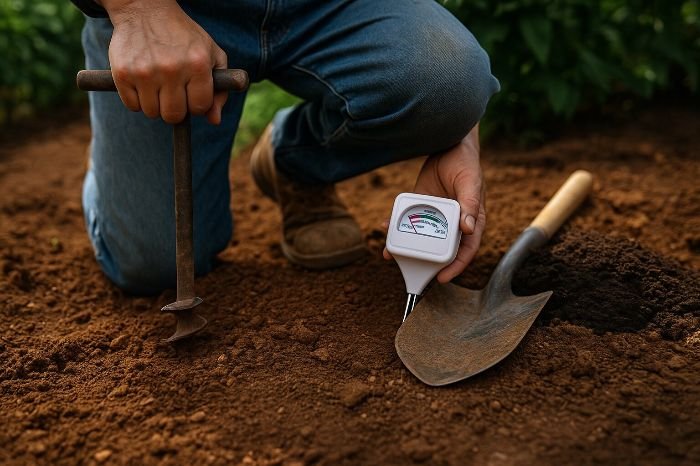
Crepe myrtles grow best in well-drained, slightly acidic soil that retains moisture without becoming waterlogged. Preparing the soil before planting is one of the most critical steps in establishing strong root systems. Testing the pH, improving structure, and addressing drainage issues in advance will prevent root stress and increase transplant success.
Testing and Improving Soil Before Planting
Start by conducting a soil test to determine pH, texture, and nutrient levels. Crepe myrtles prefer a slightly acidic to neutral pH (6.0 to 7.0). If the pH is too high, amend with elemental sulfur; if too low, add lime. Soil tests also reveal deficiencies that can be corrected with compost, aged manure, or balanced organic fertilizers before planting.
Incorporating organic matter improves both nutrient retention and drainage, particularly in sandy or compacted soils. Avoid synthetic fertilizers at this stage – they can burn roots in newly planted trees.
For detailed guidelines on soil preparation techniques, refer to the Mississippi State University Extension’s publication on soil preparation.
Fixing Drainage Issues for Healthy Root Growth
Poor drainage is one of the leading causes of transplant failure in crepe myrtles. If your soil stays soggy after rainfall, it must be corrected before planting. For clay-heavy soils, amend with coarse sand, pine bark fines, or composted leaf mold to improve aeration.
Raised beds or mounded planting areas 6–12 inches above grade are highly effective in areas with chronic drainage problems. These solutions allow excess water to escape while encouraging deeper, healthier root development.
Planting Process – Timing, Depth, and Tree Positioning
Planting crepe myrtles correctly from the start sets the stage for long-term health and abundant flowering. Timing matters – planting during dormancy allows roots to establish before heat stress. The hole’s depth and width, along with proper root ball positioning, directly impact stability, water absorption, and growth rate.
Best Time of Year to Plant Crepe Myrtle Trees
The ideal time to plant crepe myrtles is during their dormant season – late fall through early spring, when temperatures are cool and the tree isn’t actively growing. This gives the roots time to establish before the stress of summer heat.
In USDA Zones 7–9, late fall planting is preferred, especially in warmer climates. In cooler regions or borderline zones, wait until early spring after the risk of deep frost has passed.
Digging the Hole and Setting Planting Depth
Dig a hole that is two to three times wider than the root ball and just as deep as the root ball itself. The top of the root flare – the area where roots begin to spread, should sit at or slightly above ground level. Planting too deeply can suffocate roots and lead to poor establishment.
Loosen the soil at the base and sides of the hole to help roots expand. If the root ball is wrapped or container-grown, gently tease apart the outer roots to prevent circling.
Positioning the Tree for Stability and Root Health
Ensure that the top of the root flare is even with the surrounding soil grade. Position the tree so it’s upright and centered before backfilling. Remove all burlap, containers, or synthetic wrappings – they can restrict root growth or retain moisture around the trunk.

Backfill the hole halfway with native soil, water to settle it, then complete the fill. Gently tamp down without compacting. Create a shallow berm around the edge to retain water during initial establishment.
Post-Planting Care – Watering, Mulching, and Initial Feeding
The first 4 to 8 weeks after planting are critical for root establishment. Consistent moisture, proper mulching, and light feeding can reduce transplant shock and help your crepe myrtle settle into its new environment. Avoid overwatering or aggressive fertilizing – early care should focus on stability, not rapid growth.
Watering and Mulching Newly Planted Crepe Myrtles
Water thoroughly immediately after planting to settle the soil and eliminate air pockets. For the next 6–8 weeks, keep the root zone consistently moist, but not saturated, checking soil moisture regularly.
Apply a 2–3 inch layer of mulch around the base using pine bark, wood chips, or shredded leaves. Keep mulch at least 2–3 inches away from the trunk to prevent rot and pest issues. Mulch helps regulate soil temperature, suppress weeds, and conserve moisture.
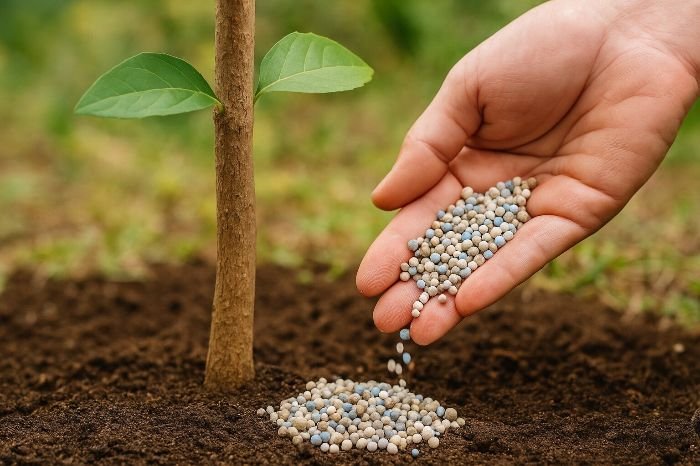
Fertilizing After Planting – What to Use and When
Avoid heavy fertilization during the first few months. If needed, apply a light dose of balanced, slow-release fertilizer (e.g., 10-10-10) once new growth appears. In nutrient-poor soils, compost can be gently mixed into the top layer instead.
Over-fertilizing too early can lead to leggy growth and weak stems. Focus on establishing the root system first – leaf and flower production will follow once the plant is stable.
Early Maintenance – Pruning Caution and Monitoring for Problems
Once your crepe myrtle is planted, minimal intervention is best during the first growing season. Avoid structural pruning until the tree is fully established, but stay alert for early signs of transplant stress, pests, or fungal issues. Gentle monitoring, not aggressive shaping, is the key to healthy long-term development.
Skip Pruning in the First Year – Let the Tree Settle
During the first growing season, avoid all major pruning. Young crepe myrtles should focus on root development, not canopy shaping. Structural pruning can wait until the second dormant season. The only acceptable actions in year one include:
- Remove any broken, crossing, or damaged branches immediately after planting to prevent infection or structural weakness.
- Do not “top” or hard-cut the tree, a harmful practice known as crepe murder, which leads to weak regrowth and poor flowering.
- Refrain from shaping or thinning unless branches pose a physical problem – let the tree adapt naturally during its first year.
This low-intervention approach supports better root anchoring and sets a healthy baseline for future growth and form.
Monitoring for Transplant Stress, Pests, and Fungal Signs
Checking your plants often helps spot pests and diseases early. Aphids and powdery mildew are common iIn the weeks after planting, regular checks can help you catch issues before they become serious. Newly planted crepe myrtles may show stress or become vulnerable to pests and fungi. Focus on observation, not reaction.
- Watch for yellowing, wilting, or leaf drop, especially if watering seems adequate. These are signs of transplant shock or poor drainage.
- Inspect new growth for aphids or powdery mildew, both common in crepe myrtles. Most minor outbreaks resolve without treatment.
- Avoid using pesticides or fungicides in the first month, unless a severe infestation develops. The plant is still adjusting.
- Check planting depth and soil moisture if symptoms persist – stress is often caused by site conditions, not disease.
Let the tree acclimate with minimal interference. Early vigilance, not early treatment, supports healthy long-term growth.
Long-Term Maintenance – Seasonal Routines and Regional Adjustments
After establishment, crepe myrtles require minimal but consistent care to perform at their best. A seasonal routine ensures strong flowering, healthy foliage, and structural integrity. Regional climate differences, especially winter lows, should also guide how you protect and support your trees over time.
Year-Round Maintenance at a Glance
Crepe myrtles thrive when their care aligns with natural growth cycles. Here’s a high-level seasonal breakdown:
- Spring – Light pruning before new growth, balanced fertilization, pest inspection.
- Summer – Deep watering during dry spells, monitor for mildew or aphids.
- Fall – Final feeding (if needed), leaf cleanup to prevent overwintering pests.
- Winter – Structural pruning (if mature), mulching base to insulate roots.
Each task supports a different aspect of health – root resilience, flower production, or disease prevention. Over time, consistency matters more than intensity.
Adjusting Care for Cold or Challenging Climates
While crepe myrtles are hardy in USDA Zones 7–9, cold snaps or unexpected frosts can cause damage in marginal areas. To protect your tree:
- Choose cold-tolerant cultivars if growing near zone limits.
- Apply mulch generously in late fall to shield roots.
- Wrap young trunks with burlap or tree wrap in winter if frost is expected.
- Delay pruning until after last frost in spring to avoid exposing sensitive tissue.
If dieback occurs, crepe myrtles often regrow from the base. Avoid removing them prematurely – wait for signs of regrowth before acting.
Conclusion – From Planting to Establishment
Crepe myrtles offer more than vibrant blooms – they bring structure, seasonal interest, and regional character to any landscape. By selecting the right variety, preparing the site carefully, and following early care best practices, you lay the foundation for decades of reliable growth.
Their adaptability across soil types, shapes, and climates makes them one of the most rewarding flowering trees for both novice and experienced gardeners. Whether you’re planting a dwarf cultivar in a courtyard or lining a driveway with tall growers, the process begins with proper timing, technique, and observation.
Frequently Asked Questions – Planting and Early Care
When is the best time to plant crepe myrtle?
Late fall through early spring is ideal, when the tree is dormant. This gives roots time to establish before summer heat.
How deep should I plant a crepe myrtle tree?
The root flare (where the roots begin to spread) should be level with or slightly above the soil surface. Avoid planting too deep, which can suffocate roots.
What kind of soil do crepe myrtles prefer?
Well-drained soil enriched with compost or organic matter. They tolerate a range of pH levels but perform best in slightly acidic to neutral conditions.
Do newly planted crepe myrtles need fertilizer?
Minimal fertilizer is recommended in the first year. Use a light dose of slow-release fertilizer only once new growth begins.
Should I prune my crepe myrtle after planting?
No. Avoid structural pruning in the first year. Only remove broken or crossing branches if necessary.
How often should I water my crepe myrtle during establishment?
Water deeply once or twice per week, depending on rainfall and soil type. Keep the soil evenly moist but not saturated.
Can I plant crepe myrtles in cold climates?
Yes, but choose cold-hardy varieties and protect young trees with mulch and trunk wrap in winter. Avoid planting in frost pockets.


