An overfertilized garden can recover if you act in sequence. Confirm salt injury with a simple white-ring saucer test or a visible soil crust. Use a two-pass leach with measured volumes by soil type, remove leftover granules, and keep soil evenly moist without puddling. Work with staged checks at 24-72 hours to judge progress and decide on pruning, second leach, or a small soil swap. Protect drainage and keep runoff on-site so salts exit through root zones, not storm drains. The outcome is calmer plants, stable color, and a clean restart at half strength when new tips appear.
Key Takeaways
- Two-pass leach – 1.0-1.5 gal per sq ft loam
- Saucer white-ring test confirms salt buildup without meters
- Dawn wilt after 48 hours triggers second, lighter leach
- Prune no more than 20-30% to avoid shock
- Lawn rescue – mow 3-3.5 in, reseed 3-5 lb/1000 sq ft
- Dawn wilt after 48 hours – what next?
Table of Contents
Confirm Fertilizer Burn In An Overfertilized Garden
Real fertilizer burn shows up fast after a feed. Confirm the cause first so every gallon of water and minute of effort goes to the right fix.
Visual and timing cues
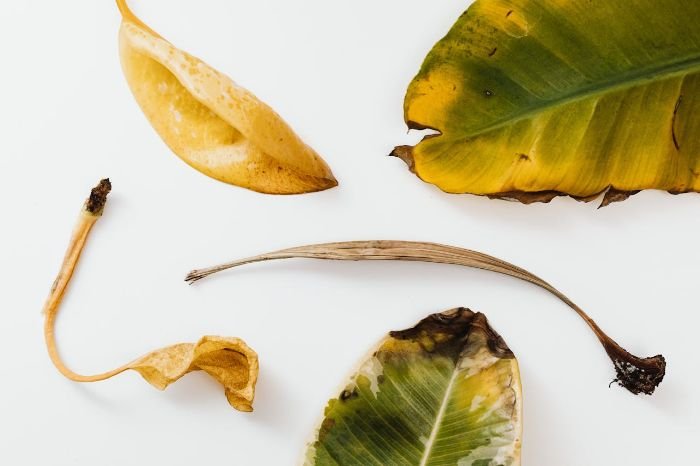
Fertilizer burn appears within 12-48 hours of fertilizing. Look for crisp brown tips, browned edges with a green center vein, and a fine white crust on the soil or pot rim. Lawns show straw-colored patches that feel dry and scratchy.
Pro tip: scrape the soil surface with a spoon. A powdery, whitish film that reforms after watering points to salt buildup.
Rule-outs in minutes
Run a quick triage so you do not chase the wrong problem. Heat or drought causes a soft whole-leaf wilt that rebounds overnight and leaves no white crust. Overwatering makes leaves soft and pale and the soil smells sour. Herbicide drift twists new leaves into cups or claws. Speckled spots or fuzzy growth suggest disease pressure.
Pro tip: lift containers. A very light pot with scorched tips points to salts plus dry roots; a heavy pot with yellowing points to poor drainage, not salts.
Simple checks without tech
You can confirm salt stress with plain household steps. Place a saucer under a container and water until some runoff collects. Let it dry and look for a thin white ring where the water evaporated. For beds, run a slow hose soak and watch how quickly water disappears. Loam should pull 1 inch of water down within about an hour; if puddles linger and leaves are scorched, salts are likely trapped near the roots. I start with timing after the feed and the white-crust test before moving to any treatment.
| Symptom pattern | Points to | Quick check | First move |
|---|---|---|---|
| Brown tips, edge scorch, white crust within 1-2 days of feeding | Fertilizer burn | Dried runoff leaves a white ring or powder | Leach soil and pause all feeding |
| Afternoon droop that perks up overnight, no crust | Heat or drought | Soil 2 inches down is dry and crumbly | Deep water and mulch |
| Soft, pale leaves, sour soil smell | Overwatering | Pot feels heavy; drainage is slow | Improve drainage and hold water |
| Twisted or cupped new leaves | Herbicide drift | Recent spraying nearby or mower transfer | Rinse foliage and isolate source |
| Spots or fuzzy patches that spread plant-to-plant | Disease pressure | Pattern spreads even without feeding | Prune affected tissue and improve airflow |
When the timing lines up with a recent feed and the crust test is positive, treat the overfertilized garden for salt injury right away. Clear diagnosis keeps the recovery on track.
First-Hour Actions For Fertilizer Burn Treatment
Speed matters now. The goal is to drive salts below the root zone, stop any fresh dissolution on the surface, and calm plant stress without adding new variables.
Flush and leach correctly
Start with water, applied in measured passes. For beds and lawns, deliver enough volume to move salts down 2-4 inches without causing runoff. For containers, water until a steady stream exits the drain holes, then repeat once more after 10-15 minutes. Good drainage is mandatory before you begin.
Pro tip: Stage the leach in 2 passes rather than one flood. Split the total water in half, wait 10-15 minutes, then finish. Staging moves salts deeper with less runoff.
Clear residues safely
After the first pass, remove anything that keeps feeding the problem. Hand-pick visible granules, then skim the thin crust from the top 0.25-0.5 inch of soil. In pots, spoon off the top layer and replace with fresh mix. If fertilizer touched foliage, rinse leaves for 10-20 seconds to prevent spotting.
Pro tip: Use a plastic dustpan as a soil skimmer in raised beds. It rides flat and lifts the crust without gouging roots.
Stabilize plants
Pause all feeding and soil additives for 24 hours. Give temporary shade in hot sun and keep airflow moving to reduce leaf stress. Do not drown the soil; after the leach, let water settle and check moisture at knuckle depth before any follow-up sip.
| Setting | Soil type | Water amount | How to apply |
|---|---|---|---|
| Containers 6-12 in | Any | Water to full saturation until steady runoff, twice | Two passes 10-15 minutes apart; verify open drain holes |
| Raised bed | Sandy | 0.75-1.0 gal per sq ft | Two passes; watch for fast percolation, top up if dry pockets appear |
| Raised bed | Loam | 1.0-1.25 gal per sq ft | Two passes; pause between to let salts move downward |
| Raised bed | Clay | 1.25-1.75 gal per sq ft | Three lighter passes; avoid puddling and sideflow |
| In-ground bed | Loam | 1.0-1.5 gal per sq ft | Slow hose soak; relocate every 1-2 minutes to keep surface from sealing |
| Lawn turf | Any | 0.5-0.75 inch of water | Run irrigation long enough to reach 2-3 inches depth; check with a screwdriver probe |
Short lawns and shallow beds respond faster to staged volumes. If water sheets off clay, reduce flow, add a third pass, and break the surface gently with a hand fork to open channels.
- First-hour protocol:
- Verify drainage openings and route runoff away from drains and streams.
- Apply the first leach pass per table amounts.
- Remove granules and skim any surface crust.
- Rinse fertilizer from foliage briefly.
- Apply the second leach pass after 10-15 minutes.
- Pause feeding, add temporary shade, and let soil settle for 24 hours.
Good first-hour work sets the recovery window. Keep the soil evenly moist but not saturated while plants stabilize, and hold all fertilizers until you see clear rebound.
Next 48 Hours – Prune, Rehydrate, Monitor
The first leach is done; now guide plants through the delicate phase of fertilizer burn treatment. Clean, conservative pruning and controlled moisture prevent fresh stress while roots reset.
Prune damage cleanly
Remove tissue that will not recover so plants stop wasting energy. Cut back to firm, green growth and leave at least one healthy node per stem. Take no more than 20-30% of foliage in a single session to avoid shock. Sterilize blades between plants with alcohol and keep cuts angled and close, without stubs.
Pro tip: if a leaf is half burned, keep the green half for a day or two. It still photosynthesizes and buys time while new leaves form.
Watering rhythm after the leach
Aim for evenly moist, never soggy. After the flush, wait until the top 1-2 inches feel cool and slightly dry before the next drink.
- For containers, water when a finger at knuckle depth meets faint resistance;
- For beds, a screwdriver should slide in 2-3 inches with gentle pressure.
Sandy soils may need a light drink every 24 hours; loams often hold 24-36 hours; clays can stretch 36-48 hours. Add 1-2 inches of mulch to maintain temperature and slow evaporation.
I check at dawn and late afternoon. Dawn wilt points to low root moisture; afternoon-only wilt points to heat stress. Each calls for a different response: a measured morning drink versus temporary shade.
Pro tip: if water pools or the surface seals, pause, roughen the top half inch with a hand fork, and resume at a slower flow.
Recovery signals and when to intervene again
Look for small new leaves, firmer petioles, and color that shifts from dull olive to a stable green within 24-72 hours. Margins may stay brown where burn occurred, but the interior should stop advancing. If tips keep browning or plants still wilt at dawn, schedule a second, lighter leach and reassess. A sour smell or mushrooms signal saturation; increase airflow and extend intervals between waterings. If you are asking over fertilized plants what to do after 5-7 days with no improvement, the situation has moved beyond first aid and needs escalation.
Careful hands win here. Trim only what is truly dead, water by feel and timing rather than habit, and let early recovery cues set the pace for the next move.
Rebalance Soil And Over Fertilized Lawn Fix
Once salts are pushed below the roots, shift from emergency work to gentle soil rebalance. The aim is to restore structure and biology without reigniting fertilizer burn treatment symptoms. Containers and lawns each need a tailored approach.
Gentle rebalance after salts drop
Use light organic matter to buffer nutrients and wake up soil life. Top-dress beds with 0.25-0.5 inch of fine compost and water it in with a soft rose. Keep high-nitrogen products off the garden for 10-14 days while roots rebuild. If soil forms a hard crust after watering, roughen the top 0.5 inch with a hand fork and reapply a thin compost veil rather than digging deep.
If leaf color stays dull after 7 days but new tips look clean, add a micro-dose: 1-2 cups of sifted compost per square yard as a sprinkle, then pause. If margins keep browning, stop amendments and reassess moisture before any further input.
Containers vs in-ground: when to swap soil
Container mixes concentrate salts quickly. If a white rim reforms on the pot or leaves keep tipping after the first recovery window, remove and replace the top 1-2 inches of mix. For persistent burn, lift the plant and replace 25-33% of the potting volume with fresh mix. Confirm open drainage holes and upgrade structure with 10-20% coarse perlite for faster outflow.
In-ground beds recover with surface work. Open channels by shallow forking 2-3 inches deep between roots, then add a 0.5 inch compost layer and a 1-2 inch mulch cap. If water still ponds for more than 60 seconds after a low-flow soak, improve edge drainage or add a narrow gravel trench outside the bed rather than mixing gravel into the root zone.
How to repair a lawn that has been over fertilized?
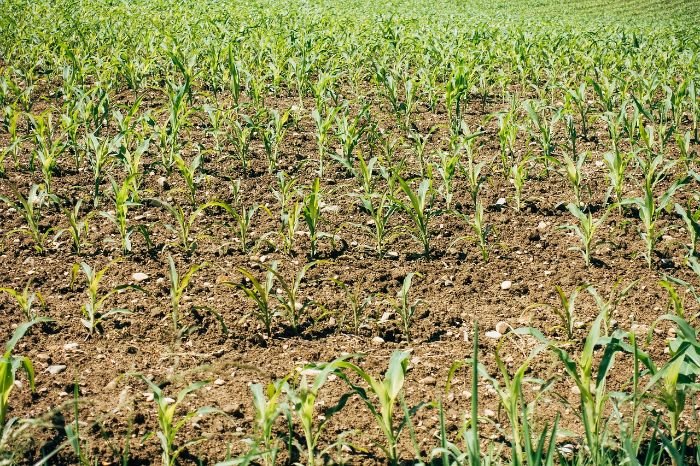
Lower stress, restore even moisture, and reseed burned spots once growth steadies. Set mowing height to 3-3.5 inches and bag clippings on the first pass if granules are visible. Irrigate 0.25 inch daily for 3-4 days to settle salts, then shift to 0.5 inch every 2-3 days until color returns. Top-dress with 0.25 inch screened compost and rake lightly to touch the soil.
Overseed thin patches at 3-5 lb per 1000 sq ft for cool-season turf. Keep the seedbed evenly moist for 10-14 days. Delay any starter fertilizer until after 3-4 mowings. Failure signals include a gray cast or spongy thatch (too wet) and continued straw color at dawn after a week (salts still near roots). If those appear, run a lighter follow-up leach and repeat the moisture schedule.
Soil rebalance is a light hand and steady cadence. Small, measured inputs help roots regain function while avoiding a second salt spike.
Over Fertilized Plants – What To Do When Recovery Stalls
Most gardens show first improvement within 24-72 hours after the leach. If stress keeps advancing beyond that window, move from patience to action. Set clear thresholds and take the next step without adding fresh inputs that complicate recovery.
Red flags after initial treatment
Use timing and pattern to decide if the first aid worked. Continued dawn wilt after 48 hours points to salts still near roots. Advancing brown tips 3-5 days after the leach suggests incomplete movement of salts or poor drainage. Blackened feeder roots or a sour, swampy smell indicate saturation, not dryness. No new buds or leaf tips after 7 days on fast growers means the recovery has stalled.
Pro tip: track three checkpoints on a sticky note – day 2, day 4, day 7. Notes beat memory when stress patterns are subtle.
Escalation choices
Pick one action based on what you see, then reassess before combining steps. If tips keep browning and soil drains, run a lighter second leach in staged passes and keep irrigation slow to prevent runoff. If water lingers on the surface for 60 seconds or more, open shallow channels with a hand fork, then consider a partial soil swap where it matters most – top 1-2 inches in beds, 25-33% of pot volume in containers. If a plant is collapsing while neighbors recover, transplant to a fresh, well-drained spot or step up one pot size with new mix.
Cost and effort matter. A targeted partial swap is faster than full bed work and avoids disturbing stable roots. Whole-plant replacement makes sense when root systems are largely black and hollow.
Get help and prevent relapse
Call a local pro when damage covers a wide area, when trees or shrubs are involved, or when runoff could reach drains or waterways. Ask for a compact recovery plan – drainage fix, watering schedule, and a minimal feeding restart date. I keep a one-week check cadence after escalation and push any fertilizer restart out until two healthy flushes of new growth appear.
- Escalation thresholds checklist:
- Dawn wilt beyond 48 hours after the first leach
- Advancing tip burn at day 3-5 despite steady moisture
- Standing water or sour odor after normal irrigation
- No new buds or leaf tips by day 7 on quick growers
- Blackened feeder roots or mushy crowns on inspection
Stalled recovery is a signal, not a verdict. Act on the threshold that fits the pattern, take one clean step, and hold inputs steady while the plants respond.
Practical Wrap-Up
Recovery is a cadence, not a single move. Set a 7-day field routine: inspect at dawn and late afternoon, check moisture at 1-2 inches, and log changes. If morning turgor is firm for 3 consecutive checks and margins stop advancing for 48-72 hours, hold steady. If water pools for more than 60 seconds, open the surface 0.5 inch and slow the flow. If only one bed declines while neighbors stabilize, isolate that spot for the next intervention rather than treating the whole overfertilized garden.
When color stabilizes and new tips look clean, trial a restart on a small area first. Use 25-50% of the normal label rate, applied once, then wait 72 hours before any second pass. If tips bronze or wilt returns, stop and extend the recovery rhythm. For lawns, treat one 100 sq ft patch with the restart dose and compare color and density after 3-5 days before scaling.
Build a small response kit so the next incident is routine work, not a scramble. Keep a marked 2-5 gallon bucket for measured leaches, a soft-rose watering head, a plastic dustpan for crust removal, a hand fork, a flat-blade screwdriver for quick soil checks, fine compost for thin top-dressing, and a roll of 30-50% shade cloth with clips.
- Dawn and late-day checks, written log
- Two-pass leach only when indicated
- Prune dead tissue, leave green nodes
- Maintain even moisture, no puddling
- Trial any feeding at half rate first
FAQ
Will heavy rain fix an overfertilized garden or make it worse?
Heavy rain helps leach salts in open beds if water drains within 30-60 minutes, but it can drown roots in containers and flat clay. Before a storm, raise pots on feet, empty saucers, and cut a shallow edge channel so runoff moves across turf instead of into a drain. After the rain, check for crust re-forming at the surface; if it returns, run a staged flush under calm conditions.
Should I remove mulch before flushing salts?
Keep a thin mulch in place if it is open and drains well, because it slows surface sealing and helps water move evenly. Strip mulch only when it mats or sheds water like a tarp, then reapply a loose 1-2 inch layer after the flush. Wood chips are fine; compost-heavy mulch can smear on clay and should be raked light before watering.
Is Epsom salt, vinegar, or baking soda safe as a quick fix for fertilizer burn treatment?
No. All three add new chemistry that plants must process and can worsen stress. Salts leave by dilution and drainage, not by neutralizing reactions. Use plain water at moderate flow, then small amounts of fine compost later in recovery if structure needs support.
How do I deal with slow-release pellets left on the soil after overfeeding?
Scoop the top 0.25-0.5 inch of media and discard it. On beds, a light hose pass floats many pellets; skim them with a dustpan. On lawns, sweep with a stiff broom and make one high mower pass with a bagger. Remove what you can see first, then run the leach.
Can I use softened water to flush an overfertilized bed or pot?
Avoid softened water because it carries sodium that compounds salt stress. Use rainwater, unsoftened tap, or well water. Aim for cool to lukewarm water around 50-70°F to prevent temperature shock, and apply in 2-3 lighter passes rather than one flood.
How can I revive overfertilized houseplants without repotting right away?
Flush in a sink or tub until runoff flows clear and steady for 2-3 minutes, then drain fully and tilt the pot for 10-15 minutes to release trapped water. Replace the top inch of mix, move the plant to bright indirect light for 48 hours, and hold fertilizer for 10-14 days. If tips keep browning, repot and replace 25-33% of the mix.
How do I leach salts without sending them into storm drains or streams?
Work in stages and keep water on your property. Build a shallow soil berm at the low edge, direct flow into turf or a gravel swale, and avoid flushing near driveway gutters. For containers, catch runoff in a tray or bin and pour it onto lawn where it can spread and filter through root mass.
Is lawn aeration helpful after an overfertilized lawn fix?
Yes, but wait until turf regains basic elasticity and color for 10-14 days. Core aeration then improves percolation and reduces surface sealing. Aerate when soil is moist, not wet, and resume normal irrigation at 0.5 inch every 2-3 days while seedlings establish if you overseed.