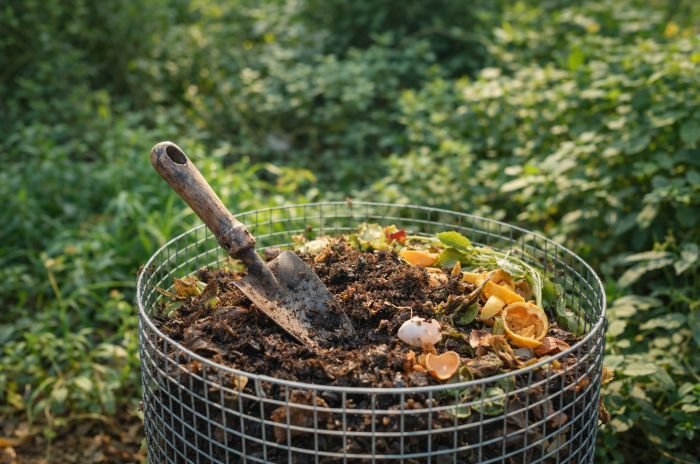
Compacted soil traps water on the surface and starves roots of air. Soil aeration breaks that seal, giving oxygen and nutrients a direct path underground. The payoff is visible – healthier foliage, fewer runoff puddles, and plants that grow deeper instead of wilting at the first dry spell.
Gardeners who ignore compaction often watch crops stall mid-season, even when fertilized. With the right method, you can reverse the damage and restore soil that actually breathes again.
Key Takeaways
- Spot the warning sign of compacted soil before plants collapse
- Time your aeration work around seasonal moisture windows
- Avoid the mistake of overworking soil when it is too wet
- Track recovery by watching infiltration speed after rainfall
- Build long-term resilience with rotating aeration and rest cycles
Table of Contents
Diagnose Compaction and Choose How to Aerate Soil
Confirm compaction first, then match the fix to depth, access, and plant roots. A quick probe and infiltration check tell you whether light loosening will do or if you need plug removal over a wider area.
Field checks that confirm compaction
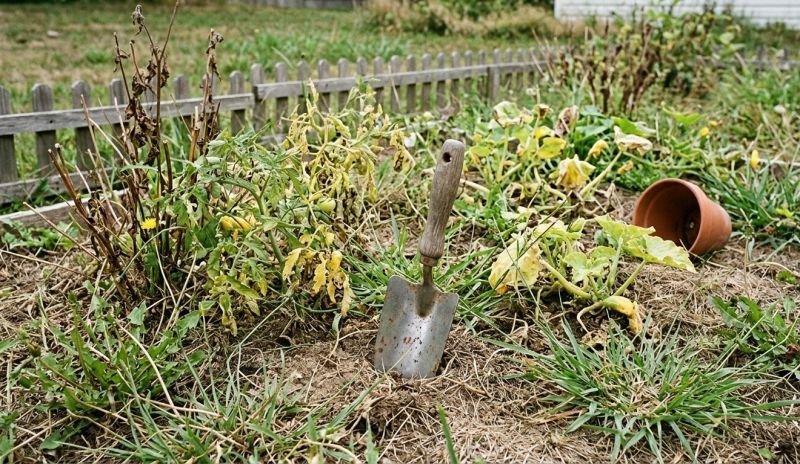
Look for hard crusts after dry spells, rain that lingers in shallow sheets, and plants with shallow, wiry roots. Press a long screwdriver or soil knife straight down; if it stops in the top layer while nearby mulch is soft, resistance comes from compaction, not dryness.
Do a small pour test with a watering can – if the water sits on the surface before soaking, pores are pinched. Probe in at least three spots – near a path, mid-bed, and a low corner. Note where the tool stalls to estimate the layer you must open.
Pro tip – if worms avoid the topsoil and you find matted roots just under the surface, plan for a deeper pass rather than a light rake.
What is the best way to aerate compacted soil?
The best method depends on depth, site size, and root sensitivity. For large, dense areas like lawns, a core aerator that pulls plugs opens durable channels. For garden beds, a broadfork or garden fork lifts and loosens without shredding roots. In tight strips along fences, a narrow slicing tool makes relief cuts where bigger tools will not fit. Avoid simple spikes in wet clay because they glaze sides and seal pores.
If roots sit close to the surface, work between crowns and keep tools vertical to avoid tearing. Where traffic created a single hard lane, focus on that strip first; spot relief in the worst path often restores the whole bed’s intake.
Access and priority map
Plan how you will step before you start. Lay boards to spread weight, begin at the far edge, and back your way out so fresh channels are not crushed. Mark irrigation lines and shallow cables, and choose paths that avoid trunks and feeder roots. Prioritize bed entrances, wheelbarrow turns, and pet trails; those areas repay the effort fastest. A rental plug machine covers big spaces quickly, while hand tools trade speed for precision where roots are tight.
- Decision checklist:
- Confirm compaction with a probe and a quick pour.
- Map the worst lanes and set clear entry and exit.
- Choose fork for beds, core machine for broad areas.
- Use slicing tools only where access is narrow.
- Protect roots and utilities before any pass.
A short diagnosis and a matched method save time and prevent damage. With a clear plan, the next steps go smoothly and the soil starts breathing again.
Soil Aeration Methods Compared by Site and Tool
Pick tools by what you’re fixing – depth of the hard layer, site size, and how close roots sit to the surface. Each method trades speed, disruption, and recovery time differently, so match the tool to the bed rather than the other way around.
Core aeration (plug removal)
Plug machines pull cylinders of soil and leave real channels for water and air. Use a core aerator on broad areas that show tight surface layers and shallow puddling. Cores roughly two to four inches long give lasting relief without tearing turf crowns.
Run on firm but penetrable ground so tines fill and release cleanly. If plugs smear or the machine skates, conditions are off or the layer is deeper than the tines can reach. Clean clay from hollow tines frequently so they keep cutting instead of stamping.
Broadfork and garden fork
Broadforks lift beds with minimal root damage and suit perennials and vegetables. The wide tool works best where you can step back and rock the handles to crack the layer beneath without flipping soil. Expect relief down around 7-10 inches with a broadfork and a bit shallower with a standard garden fork.
Choose this when you need precision around crowns or drip lines. If soil resists and the fork pries up large slabs, you are forcing it; move to shorter bites or pick a plug machine for that zone.
Slicing and spiking tools
Slicers and narrow spikers open narrow slits in tight strips along fences or in narrow access paths. They shine where bigger tools simply cannot fit. Their relief is short lived in sticky clay because blade faces can polish and close back up under foot traffic. Use light, repeated passes at two angles and keep pressure modest. If slots glaze or close shortly after a pass, step up to a plug method for the worst lanes and keep slicers for edges and tight corners.
| Tool | Typical depth | Best site | Root safety | Effort | Notes |
|---|---|---|---|---|---|
| Core aerator | 2-4 in | Lawns, large beds | Good if crowns firm | Medium | Leaves plugs, durable channels |
| Broadfork | 7-10 in | Vegetable beds | Very good | High | Lifts without turning layers |
| Garden fork | 5-8 in | Mixed borders | Good with care | Medium | Precise around plant clusters |
| Slicing aerator | 3-5 in | Narrow strips | Fair | Low | Risk of glazing in sticky clay |
| Spike roller | 1-2 in | Temporary relief | Low | Low | Short-lived, avoid in wet soil |
Choose the method that matches the site and the layer you need to open. When the tool aligns with the problem, channels stay open longer and beds recover faster.
When to Loosen Compacted Soil: Timing and Moisture Cues
Right timing makes channels open cleanly and stay open longer. Work when soil holds together under light pressure but breaks into moist crumbs, and you avoid smearing that seals pores or dry shattering that adds dust.
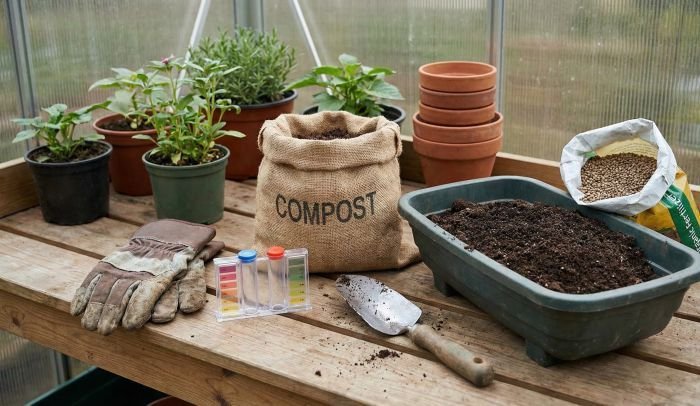
Moisture readiness cues
Moisture decides whether tools cut channels or polish walls. Squeeze a handful and ease it open in your palm – it should hold shape, then break into small pieces with a light tap. Push a knife or trowel in and watch the blade on the way out; a dull sheen means too wet, a dusty film means too dry.
Boot tests help too. If a firm step leaves a clear print without water flashing on top, conditions are workable. If the heel glosses the surface, wait. If crumbs skate away and the top lifts in flakes, water the area and return after it has soaked through.
Pro tip – test in three places that see different traffic so you don’t judge the whole bed by one corner.
What is the best time to aerate soil?
Aerate during active root growth and mild weather, avoiding frozen ground and peak heat. Cool-season turf responds best in early fall or early spring. Warm-season turf wakes up in late spring. Beds with perennials take work well as new shoots emerge and before heavy summer foot traffic.
After a soaking rain, loam is usually workable the next day, sandy ground sooner, and sticky clay later. If the area stayed waterlogged, postpone until the surface dulls and no longer smears. If drought has baked the surface, water deeply first, then return once the top layer softens.
I schedule checks at dawn and late day; temperature and wind can swing conditions between those times.
| Condition | You observe | Action | Next step |
|---|---|---|---|
| Too wet | Shiny smear on blade or boot gloss | Wait | Recheck after surface dulls |
| Ready to work | Moist crumbs that break with light tap | Proceed | Start with light, even passes |
| Borderline dry | Crumbs skate, surface lifts in flakes | Pre-water | Return after soak-through |
| Too dry | Dusty film on blade, brittle chunks | Pre-water | Recheck once top softens |
Time aeration to the soil’s feel, not the calendar. When the surface shows dull, crumbly structure and roots are pushing, tools do more good than harm and recovery comes fast.
Execute Aeration in Beds, Lawns, and Tree Zones
To aerate compacted soil without harming roots, match pass patterns to the site and keep weight off fresh channels. Work methodically, read the soil’s response, and adjust depth and angle before damage spreads.
Beds and borders
Beds reward precise tool work and careful footing. Set down access boards to spread weight, start at the far edge, and back your way out so you do not crush fresh openings. Slide mulch aside before you work, then return it after passes to protect moisture.
With a broadfork or garden fork, insert tines vertically between plants and rock the handles just enough to lift and relieve pressure rather than flipping slabs. Run a second pass at a different angle only where resistance remains. If crowns lift or roots shear, shorten the bite and reduce leverage.
Pro tip – tight clusters around perennials respond better to several light bites than one deep pry.
Lawns and paths
Large areas need consistent patterns and clean equipment. With a plug machine, make straight passes and offset the next set at a different angle to avoid dead zones. Avoid tight turns that smear turf or tear holes. Leave extracted plugs to weather in place or rake them into thin spots as natural topdressing.
Give a gentle soak after the work so soil settles without collapsing the openings. On wheelbarrow lanes or pet paths, follow up with a thin dressing that resists compaction, and shift traffic slightly for a week. If plugs smear or stick in the tines, pause, clean the tubes, and wait for firmer surface conditions before continuing.
Around trees and shrubs
Roots near woody stems sit close to the surface and hate sudden leverage. Keep tools clear of the trunk flare and work in a loose ring under the outer canopy, taking short bites between feeder roots. Use hand tools in tight beds and keep pries small so bark and fine roots stay intact.
Where roots are already exposed at the surface, make narrow relief cuts between them and lean on mulch to moderate drying and foot pressure. If you hear snapping or see the soil plate up around a tool, stop and reset with shallower entries and wider spacing.
- Safety and handling checklist:
- Mark irrigation lines and shallow utilities first.
- Lay boards to spread weight in soft areas.
- Start far edge, exit without crossing fresh work.
- Clean tines often to prevent polishing.
- Pause if soil shines or roots tear.
Clean execution protects plants and keeps the new pores open long enough to matter. Finish the area, then step back and let the soil settle before any heavy traffic returns.
Aftercare and Maintenance so Pores Stay Open
Aeration pays off only if the new channels stay intact. Right after you aerate compacted soil, settle the profile gently, add light protection on top, and set a simple cadence that prevents traffic from sealing everything again.
Immediate aftercare
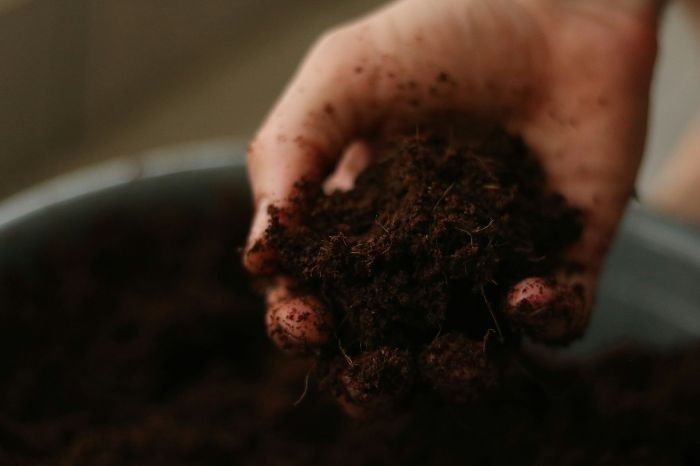
Help the soil set without collapsing openings. Give a gentle soak with a watering wand so moisture moves down rather than blasting the surface. On lawns, leave pulled plugs to dry and crumble; sweep the crumbs into thin spots during the next pass with a rake. In beds, a thin sifted compost dressing followed by fresh mulch protects moisture and buffers light foot traffic.
Hold off heavy use while the structure firms. Delay mowing until footprints no longer imprint and wheels don’t leave sheen on turns. If puddles linger after a normal soak, repeat a light pass only on the worst lanes rather than reworking the whole area.
Pro tip – check the wetting ring around plants the next morning; an even, dull surface without crust tells you the profile settled well.
Keep compaction from returning
Change the patterns that caused the hard layer. Nudge wheelbarrow routes and pet paths a few feet, rotate mowing lines, and add stepping stones or boards where hands work the same strip often. In beds, maintain mulch so sun and rain don’t bake the top into a crust, and refresh high-traffic edges more frequently than the interior.

Build a light maintenance cadence. Recheck infiltration at the change of each season and after big storms. If water beads on the surface or mower tracks print after rain, spot-relieve those lanes with a quick, shallow pass and top up the protective layer. Around trees, keep work outside the trunk flare and add a breathable mulch ring so feeders stay active near the surface. I keep a short note in the shed of which areas compact first; those get eyes-on first after weather swings.
A little aftercare preserves the voids you worked to create and keeps air, water, and nutrients moving where roots can use them. With habits that steer traffic and a simple inspection rhythm, the gains hold through the growing season.
Practical Wrap-Up
Treat aeration like commissioning a tool – verify, act, and set a rhythm. If a spade stalls in the top third of its blade, plan plug removal over broad areas; if it moves past halfway with steady pressure, lifting with a fork usually suffices. Where roots sit shallow, make two light passes at different angles instead of one deep pry, and keep body weight off fresh openings until the surface firms.
Run a simple cadence so gains hold. Recheck high-traffic lanes after the first good rain and at each season change. Warning signs are easy to spot: a shiny skin that scuffs underfoot, wheel marks that linger, or turf that springs back slowly. When you see them, relieve only the affected strips, add a light topdressing, and shift traffic a few feet. I keep a short map of habitual routes; it tells me where to aerate compacted soil first when time is tight.
- Start when a spade cuts to mid-blade smoothly.
- Mark utilities, then lay boards for access.
- Work from the far edge toward the exit.
- Clean tines the moment clay starts polishing.
- Shift wheel paths and recheck after the next storm.
FAQ
Is liquid aeration enough to fix compacted soil?
It can help water slip into tight pores, but it won’t create physical channels. Use it as a follow-up on mild compaction after mechanical relief. For areas where a probe stalls early or water lingers on the surface, run a core aerator first, then apply liquid as maintenance.
Can I use a tiller to break hard ground?
A tiller chops but also smears and can create a dense layer below the blades. Reserve it for full bed rebuilds with added organic matter. For recovery work, choose soil aeration methods that lift and open without grinding, like a broadfork in beds or plug removal on lawns.
How do I aerate near tree roots without damage?
Work outside the trunk flare and focus under the outer canopy. Take short bites between feeder roots and keep tools vertical. If you hear roots snap or the soil plates upward, stop and reset with shallower entries and wider spacing, then mulch to protect surface moisture.
Can I aerate during summer heat?
Yes, but only with care. Pre-water the day before, work at dawn on small sections, and cover disturbed soil with mulch so it doesn’t bake. Skip windy afternoons that dry the top too quickly. If the surface tightens again by evening, conditions are too harsh; wait for cooler weather.
What signals tell me it’s time to aerate again?
It’s time to aerate compacted soil when a firm heel print lingers, water beads on the surface longer than a brief moment, or a screwdriver stalls high in the profile where it used to slide. Target the lanes that fail first rather than reworking the entire area.
Is it safe to punch through landscape fabric or plastic weed barrier?
No. Piercing fabrics traps water in the wrong layer and weakens the barrier. Fold back woven fabric, relieve the soil, then switch to breathable mulch. If plastic sheeting is present, remove it before any aeration and replace it with materials that do not seal the surface.
What’s the fastest way to loosen a narrow path between beds?
Make two light passes with a slicing tool at crossing angles, then top with chips to spread foot pressure. If slots glaze after a few days of use, upgrade that strip to plug removal and redirect traffic slightly to keep pores from closing.
Do earthworms replace the need for aeration?
Worm activity improves structure, but it won’t lift a compacted layer by itself. If you can push a thin rod well into the profile with steady pressure, you’re in good shape. If not, perform spot relief where traffic concentrates and let worm channels maintain the gains.