Updated October 20, 2025
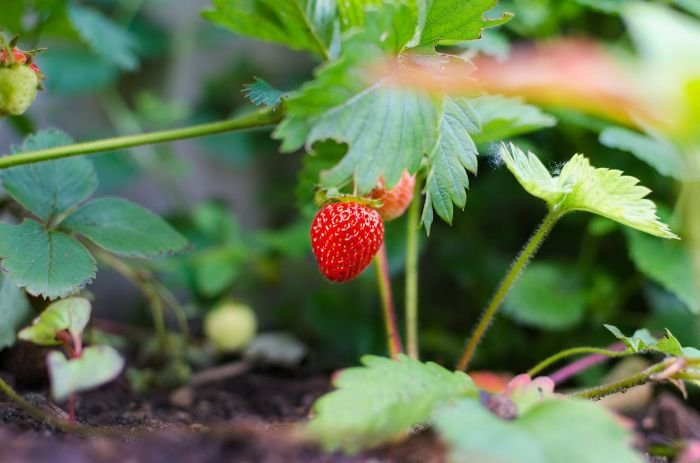
Prepare soil for a vegetable garden by spotting early red flags and correcting only what the ground asks for. A single composite sample shows where pH and nutrients truly sit, while field cues keep you honest – a glossy smear on the trowel means wait, quick beading after a light sprinkle hints at surface sealing, and a clean slice through the profile says structure can take blending.
The payoff is practical – firmer roots, cleaner harvests, fewer midseason fixes. You will decide where to adjust chemistry, when organic matter helps rather than cools the bed, and how to time fertilizer by crop demand instead of habit. Work in a short window when the surface holds shape yet breaks under light pressure, then plant into a stable, oxygenated zone.
Key Takeaways
- Catch early red flags with one composite soil test
- Use texture and drainage cues to target amendments
- Time nitrogen to flowering or leaf harvest windows
- Avoid blanket feeding that hides underlying soil issues
- Schedule seasonal retests and write short field notes
Table of Contents
Test and diagnose the soil before any fixes
Accurate diagnosis saves time and materials. Start with a clean composite sample, then confirm pH, nutrients, texture, and drainage so every correction targets a real need.
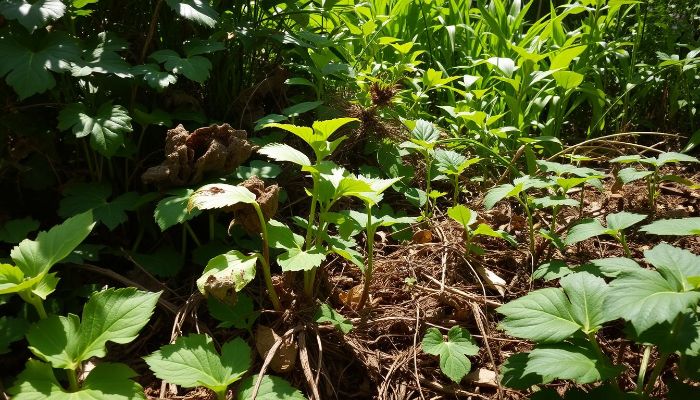
Collect a clean, representative sample
Use a stainless trowel or probe and a plastic bucket. Sample when the bed is workable, not saturated or powder-dry.
Take 8-12 cores from across the bed at 5-7 inches depth, avoiding fertilizer bands and paths. Remove surface debris, combine the cores in the bucket, mix well, then air-dry a small subsample for a kit or lab.
Pro tip – Label each bed and resample the same spots every spring to track trends, not one-off readings.
- Scrape mulch aside and sample mineral soil only
- Keep tools free of rust and fertilizers
- Mix cores thoroughly before taking the subsample
- Fill the lab bag or test tray exactly to the mark
Read pH and nutrients into actions
Convert numbers into decisions. For most vegetables, pH around 6.0-7.0 supports nutrient availability; values outside that band often coincide with stunted growth or leaf issues.
Use a fresh kit or a county lab. Record pH plus N, P, K levels. If pH is below 6.0, flag a future pH correction step; if above 7.0, mark that as well. Low phosphorus or potassium calls for a pre-plant feed in the plan, while nitrogen is better scheduled in-season based on crop demand.
Pro tip – Retest pH 4-6 weeks after any correction in the off-season to confirm the shift before planting.
Texture and drainage checks
Texture and pore space control root spread and oxygen. Run two fast field tests to reveal compaction or excessive sand.
Jar test – Fill a clear jar half with soil and half with water, shake hard for 60 seconds, and let it settle 24 hours. A thick lower layer with slow settling points to heavy fines; a thin band with quick settling signals a sandy profile. Note the proportions for your records.
Infiltration check – Sink a bottomless cylinder 2 inches into the bed, add 1 inch of water, and time the drop. Less than 5 minutes indicates rapid leaching risk; more than 30 minutes hints at tight structure or pans. If water ponds or the surface smears under light pressure, flag a structure fix in the amendment plan.
Close your notes with clear flags – pH outside target, low P or K, rapid or slow intake, compaction signs. Those flags drive the exact amendment and rate decisions later, without repeating tests or revisiting numbers.
Target soil ranges for a productive vegetable bed
When you prepare soil for a vegetable garden, aim for a workable loam that holds shape when squeezed, then breaks with a tap, with nutrients available across the season. Set clear targets now so later amendments hit a defined finish line rather than drifting by feel.
What is the best soil composition for a vegetable garden
The best composition balances air, water, and contact with roots. A workable loam carries a coarse fraction for drainage, a finer fraction for water holding, and enough clay to bind stable crumbs without turning sticky after rain.
As a rule of thumb, aim for a profile that resists smearing under light pressure, breaks into small crumbs at hand strength, and does not pond after a moderate shower. If texture trends too sandy, you will see fast dry-down and poor nutrient retention; if it trends too fine, footprints linger and the surface seals. Those signals tell you which amendment path to choose in the next steps.
Pro tip – Track a simple feel index in the same spot each season by noting how easily the soil crumbles, whether it smears under pressure, and how long a footprint lasts after stepping. Compare those cues year over year to see real structural progress.
pH and organic matter targets
Most vegetables grow well with pH in the 6.0-7.0 band, which keeps micronutrients available and minimizes lockout. Brassicas tolerate the upper side of that range; potatoes prefer the lower side to reduce scab pressure. Hold the number within that window before you think about heavy feeding.
Organic matter around 4-5 percent keeps aggregates resilient and moderates moisture swings. Too little leads to fast drying and brittle structure; too much can slow spring warm-up and push soluble salts if sources are manure-heavy. Recheck pH after any correction during the off-season, and confirm organic matter trends every 1-2 years.
Safety flags before you plant
Screen for risks when history suggests them. Urban fill, roadside edges, or former industrial lots warrant a one-time heavy metal panel before food crops. Barn-sourced composts or hay-fed manures call for a simple bean or pea bioassay to rule out residual broadleaf herbicides.
Salinity risk rises in arid zones, with frequent fertilizer use, or when using manure-based inputs. If seedlings show leaf tip burn or slow emergence, run a soluble salt check and pause further feeding until numbers drop with irrigation and time.
Hit these targets and note any flags now. The next steps will tie each deviation to a specific amendment or timing choice, without rehashing measurements already set here.
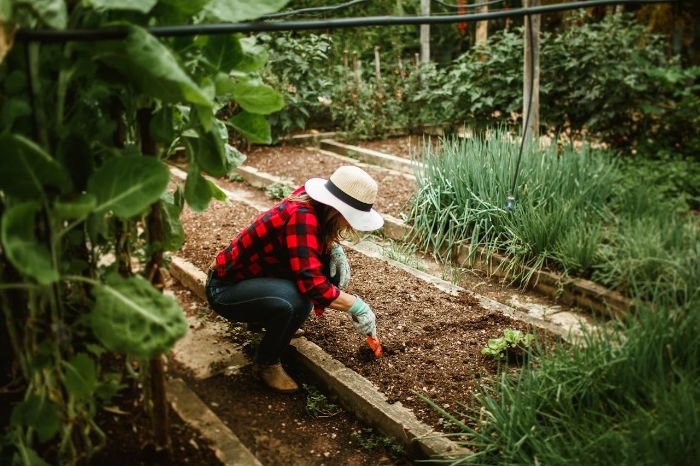
Match problems to soil amendments and rates
Soil fixes land best when a specific symptom drives a specific material and rate. Use the test notes you recorded earlier, pick the amendment that fits the problem, and apply enough to move the needle without overloading the bed.
What are the best soil additives for vegetable gardens
“Best” depends on the diagnosis. Compost improves structure and biology, aged manure adds organic matter plus nitrogen, and mineral conditioners adjust texture or chemistry when tests say so.
Choose compost for vegetable garden beds that need better crumb structure and moisture balance. Use aged manure when nitrogen is short and salts are low. Reach for gypsum when sodium or tight clay shows up in the history, and apply lime or sulfur only when a pH report calls for it.
Pro tip – Stick to fully finished compost with no ammonia smell and a dark, crumbly texture – immature inputs slow germination and invite salt issues.
Mineral and texture fixes
Mineral amendments solve specific physical or chemical constraints. Perlite and vermiculite increase air space in tight mixes; coarse sand can help only when added at high ratios and blended thoroughly through a shallow layer. Gypsum flocculates certain clays and helps with sodium issues without raising pH.
If infiltration is slow and surface crusting appears after rain, work in a modest dose of gypsum and organic matter, then retest infiltration next month. If beds dry out within hours after watering, add a coarse organic fraction plus vermiculite to moderate moisture swings.
Pro tip – Avoid adding small amounts of sand to heavy clay – the mix can cement and get harder, not looser.
Incorporation and rest periods
Rates matter, but so does placement. Blend amendments through the top 4-6 inches for annual beds so roots can immediately use the improved zone. Keep salts and high-nitrogen inputs away from seed furrows by at least 2 inches.
Give fresh blends time to settle. After major amendments, wait 7-14 days before planting to let microbial activity cool and structure stabilize. For pH correction, apply in the off-season whenever possible and recheck with a quick kit before spring planting.
| Problem | Amendment | Typical rate | When to apply | Notes |
|---|---|---|---|---|
| Low organic matter | Finished compost | 1-2 inches blended | Pre-plant | Improves structure and water holding |
| Tight clay, poor infiltration | Compost + gypsum | 1 inch + 2-4 lb per 100 sq ft | Pre-plant | Gypsum aids flocculation in many clays |
| Too sandy, dries quickly | Leaf mold + vermiculite | 1-2 inches + 1-2 cu ft per 100 sq ft | Pre-plant | Boosts moisture retention |
| Compacted surface crust | Compost topdress | 0.5-1 inch mulched | After planting | Reduces sealing, protects soil skin |
| pH tested low | Garden lime | Follow lab, commonly 3-7 lb per 100 sq ft | Off-season | Work into top layer, recheck later |
| pH tested high | Elemental sulfur | Follow lab, commonly 1-3 lb per 100 sq ft | Off-season | Keep granules away from seed lines |
| Sodium issues or saline inputs | Gypsum + leaching | 2-4 lb per 100 sq ft | Pre-plant | Apply, then flush with several irrigations |
Retain a log of what went in, where, and when. That record lets you fine-tune the next round rather than starting from scratch each season.
Fertilize by crop demand and season timing
To fertilize vegetable garden beds effectively, match product and timing to what the crop pulls from the soil. Base rates go in before planting; small, targeted feeds keep growth on track without driving excess foliage or salt stress.
Choose NPK sources wisely
Pick sources for how they release and what they bring with them. Slow mineralizers like composted poultry manure or feather meal release over weeks, while urea or ammonium sulfate act fast and need careful placement to avoid seed burn.
I lean on organic vegetable garden fertilizer for long beds that need gentle, season-long supply, and reach for a quick nitrogen source only when leaves pale before a key growth stage. Always read the label for guaranteed analysis and form, then calibrate by crop group rather than by brand.
Pro tip – Granular products belong in the root zone, not on stems or leaves – brush granules off foliage right after application.
Base application vs side-dressing
Use soil test numbers to size a single pre-plant application, then schedule side-dressings only if growth or color shows demand. Heavy feeders want more upfront; light feeders respond better to lean base rates and a single in-season touch-up.
Set base phosphorus and potassium at planting if tests call them low. Keep most nitrogen flexible for in-season decisions. If a crop greens up but stalls in size, the issue may be water or compaction rather than fertility; correct the limiting factor before adding more N.
How often should I fertilize my vegetable garden
Fertilize once at planting to meet the base need, then side-dress only at clear trigger points for each crop group. Leafy greens take small, frequent doses every 2-3 weeks during active cutting. Fruiting crops benefit from one feed at first flower and another when fruit set ramps. Root crops prefer a light front charge and no mid-season nitrogen unless leaves fade early.
If the bed already carries moderate residual nutrients, skip mid-season feeding until a visible cue appears. Over-feeding pushes lush tops, delayed flowering, and salt stress, which costs yield later.
Avoid salt burn and imbalances
Burn shows as dry, brown margins on young leaves within days of a heavy application. If that appears, water deeply to leach salts below the top few inches and pause further feeding for 10-14 days. Iron lockout shows as yellow new leaves with green veins when pH sits high; extra nitrogen will not fix it, so address chemistry at the next window.
Keep fertilizer off dry soil on hot afternoons. Apply on slightly moist ground, then water in enough to move nutrients into the root zone without runoff.
| Crop group | Base NPK focus | Side-dress trigger | Typical side-dress rate |
|---|---|---|---|
| Leafy greens | Moderate N, low P-K | Pale leaves mid-harvest | 0.05-0.1 lb N per 100 sq ft |
| Fruiting (tomato, etc.) | Balanced NPK, extra K | First bloom and early fruit set | 0.1-0.2 lb N per 100 sq ft |
| Roots (carrot, beet) | Low N, adequate P-K | Only if foliage fades early | 0.05 lb N per 100 sq ft |
| Brassicas | Moderate N, adequate K | After transplant takeoff | 0.1-0.15 lb N per 100 sq ft |
| Vines (cuke, squash) | Moderate N, strong K | First female flowers | 0.1-0.15 lb N per 100 sq ft |
Use the lower end for fertile beds and cool weather, the upper end for light soils or rapid growth windows. Record dates, products, and crop responses so the next season starts with real numbers, not memory.
One clear prep workflow before planting
Lock the prep into a short, repeatable sequence. Work only when soil structure will hold up to tools, then move from diagnosis to correction without backtracking.
Check workability first
Soil is ready to work when it holds together under a squeeze yet fractures with light thumb pressure. If it sticks to the trowel in a shiny layer, wait for a drier window; if it powders and drifts, add a light irrigation and return the next day.
Use footprints and edge crumble as quick cues. A footprint that springs back within minutes signals good resilience; edges that break cleanly when you slice a spade indicate the profile is ready for blending.
Pro tip – Press a walnut-sized ball between finger and palm – if it flattens to a short pancake with cracked edges, you can start.
Sequence the tasks
Start with what sets direction, end with what feeds growth. Keep tasks grouped so you disturb the bed only once.
Run the tests you planned, then correct chemistry before you add structure. Blend organic inputs and any texture fix through the upper layer, rake smooth, and water lightly to settle particles. Apply the base fertilizer only after the blend, so nutrients sit where roots will explore.
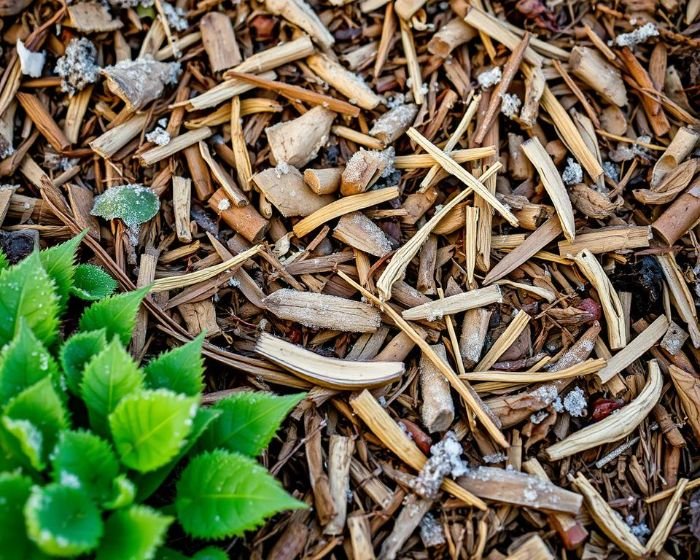
If the plan includes a mulch skin for crust control, lay it after planting, not during prep. Mulch early can hide surface feedback you need for final adjustments.
- Day 1 – Sample and mark flags from results
- Day 2 – Correct pH if needed, then blend structural inputs
- Day 3 – Light settle irrigation, then apply base fertilizer
- Planting window – As soon as surface is friable and tools cut cleanly
Refreshing old beds
Old beds carry memory. If the surface shows crusting or the top inch is exhausted, add a thin organic layer and work it shallowly to protect established channels. If last year ended with compaction or salt stress, rebuild the top zone with a deeper blend and plan a brief rest.
Give fresh mixes a short pause so microbial activity cools and the surface firms. In warm weather, a few days is enough; in cool spells, stretch that window before you set transplants. Before planting, pull a shallow slice – a clean, crumbly face without smears tells you the structure is ready.
Close the workflow by logging dates, materials, and simple field notes. That record trims decisions next season and keeps the steps from creeping out of order.
Practical Wrap-Up
Run soil work like a maintenance program, not a one-off project. Before each spring, take a baseline test, set the season’s targets, and plan only the amendments that move numbers toward those targets. During the growing window, watch crops and soil behavior, then make small, timed adjustments instead of wholesale changes. That approach keeps structure intact and nutrient levels predictable when you prepare soil for a vegetable garden.
Use clear field cues to steer decisions. If water beads and sheds within a minute, loosen the top layer with a shallow fork and wet lightly to re-wet hydrophobic pockets. If transplants stall with thick stems and undersized leaves, probe for resistance at 3-5 inches; fix compaction, not fertility. Pale tops right before a key growth stage call for a light in-season feed; pale tops with cool, saturated ground call for drainage and patience, not more nitrogen.
Keep a cadence that catches drift early. Recheck pH and salts during the off-season, confirm organic matter trends every 12-24 months, and log what you applied within 24 hours while memory is fresh. Tight records and small course corrections do more for yield than any single product choice.
- Log date, material, rate, and crop response
- Set spring targets from one fresh soil test
- Change one variable per week, then observe
- Probe at 3-5 inches to detect hidden compaction
- Water in amendments on slightly moist soil
FAQ
Is fall the best time to prepare soil for a vegetable garden?
Fall is ideal because pH corrections and organic matter have 3-5 months to integrate. Lime or sulfur reacts more predictably in cool, moist soil, and winter freeze-thaw improves aggregation. If you miss fall, do structural fixes 2-3 weeks before planting and reserve fertilizer decisions for just before active growth.
How long after adding lime or sulfur can I plant vegetables?
For shallow incorporations, wait 2-4 weeks, then confirm pH with a quick kit. For heavier rates or cool soil below 55°F, give 4-8 weeks so reactions progress. Transplants tolerate shorter waits than direct-sown seed; sow only after pH lands inside your target band.
Do I need to till before planting a new bed?
Only if a hard layer blocks roots within the top 6-8 inches. If a spade meets uniform resistance and the slice face crumbles, use shallow mixing and keep channels intact. If the blade stops abruptly at one depth, break that layer once, then switch to shallow blending and organic additions in future seasons.
Can I put new soil on top of a tired bed instead of mixing it in?
A thin cap works for transplants but not for seed. A 1-2 inch layer of clean, well-textured soil can refresh the surface, yet roots still need the underlying zone open and fed. If seedlings struggle after emergence, blend lightly through the top few inches to reconnect layers.
Is wood ash safe for vegetable beds?
Use small amounts only on acidic soils. Ash raises pH and adds potassium but can spike salts. If pH already trends above 7.0, skip it. If you do apply, keep it under 1-2 pounds per 100 sq ft once per season, distribute thinly, and recheck pH before the next application.
What should I do if soil flooded before planting?
Let the surface dry until it slices cleanly, then run a shallow fork to reopen pores without smearing. If odors persist or seedlings stall, apply finished compost across the top zone and delay fertilizing for 7-10 days. Salts may concentrate after drying; if leaf tips burn on young plants, flush with a deep irrigation and retest.
How do I time fertilizer for fast crops like lettuce and radishes?
Set a light base charge at planting and reassess color after 10-14 days. If leaves pale before the first harvest window, add a small nitrogen feed and water it in. If color holds and growth is on schedule, skip mid-course feeding to avoid soft tissue and off flavors.
Are soil amendments different for container vegetables vs in-ground beds?
Yes. In-ground beds benefit from compost and mineral conditioners, while containers need a peat- or coir-based mix with perlite for air space. Avoid heavy garden soil in pots; it compacts and sheds water. For containers, incorporate slow-release nutrition at fill time and top up with light feeds every 2-3 weeks during peak growth.