Updated October 30, 2025
Composting for beginners should feel like relief the moment you lift the lid – no sour whiff, no fruit fly cloud, just warm, dark crumbs that slip into dry soil after a hot afternoon.
The risk is simple scraps left exposed turn messy and attract pests, while a reachable setup with a clean cover habit flips the outcome fast.
Build a small, workable station and a rhythm you will keep, and the biology turns kitchen waste into something plants respond to with stronger push and better color.
Key Takeaways:
- Choose a bin, pile, or tumbler that fits space.
- Layer browns to greens at roughly three to one.
- Keep moisture like a wrung out sponge to avoid odors.
- Turn the pile weekly for airflow and faster breakdown.
- Exclude meat, dairy, and oils to prevent pests.
Table of Contents
Why Composting Works and What You Gain
A warm, earthy pile turns kitchen scraps into dark crumbs that hold moisture and feed roots. Learn the compost basics and you cut trash, improve soil structure, and grow plants with fewer store-bought inputs.
Microbes Do The Heavy Lifting
Bacteria and fungi break down carbon rich browns and nitrogen rich greens, releasing heat as they work. Heat speeds enzyme activity, so materials collapse into humus faster when airflow and moisture sit in the sweet spot.
Brown materials supply carbon that microbes use as energy. Green materials deliver nitrogen that builds microbial cells, so the population expands and keeps the process moving. When both are present and breathable, the pile runs like a small bio-reactor.
I often notice that an even, earthy smell tracks with balanced moisture, while sour notes point to excess water and sluggish airflow.
Tangible Payoffs In The Yard
Finished compost changes how soil behaves under your hand. Particles bind into crumbs that resist crusting and accept water evenly. Roots push through with less effort, so you see better top growth and fewer midday droops after irrigation.
One wheelbarrow of finished material, roughly 3 cubic feet, amends about 30 square feet at a light half inch. That thin blanket is enough to improve surface structure and reduce runoff during hose watering.
- Softer tilth that takes a trowel easily
- Fewer dry patches after a sprinkler cycle
- Less need for synthetic fertilizer in potting mixes
- Smaller trash output from the kitchen each week
What A Healthy Pile Looks And Feels Like
Color deepens from mixed tan and green to uniform brown. Texture shifts from recognizable scraps to crumbly pieces that no longer show leaf veins or peels. The pile feels warm inside when you part it by hand, and the surface rebounds after you step beside it.
Moisture should read like a wrung sponge when you grab a handful. The pile holds together briefly, then breaks apart with a light squeeze. An earthy forest-floor smell signals active biology instead of anaerobic conditions.
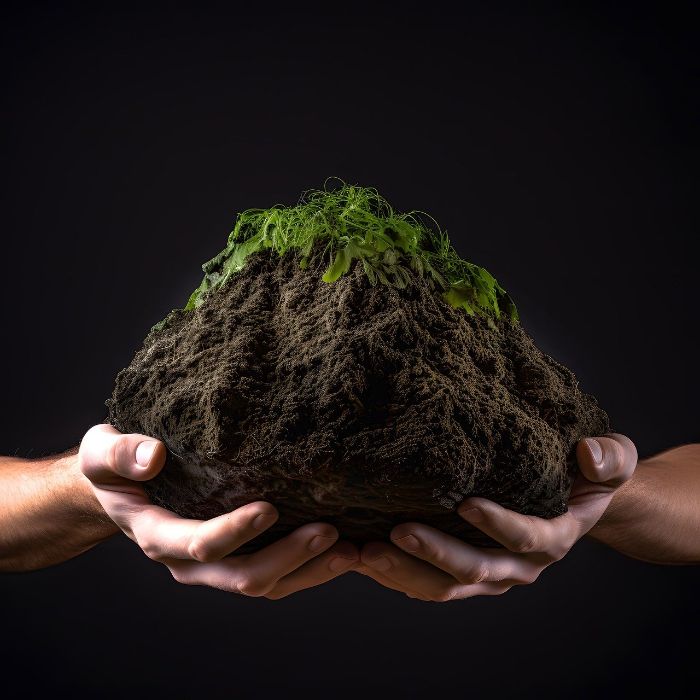
Composting works because living microbes rebuild the soil’s texture and water-holding ability. What starts as waste ends up as crumbly, dark material that roots grip easily and gardeners can trust for consistent results.
The Simple Recipe – Browns, Greens, Air, and Water
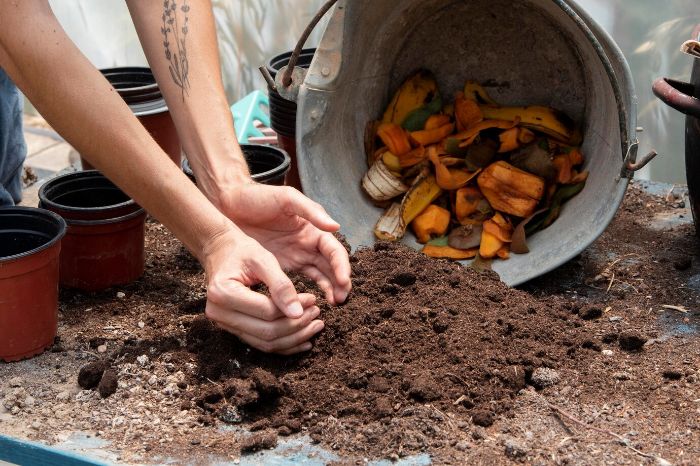
A fresh bucket of scraps can turn sour if it goes in without dry cover. The right mix keeps microbes working cleanly, so the pile heats and breaks down fast without smell or flies. If you want a one-line start to how to compost, think dry to wet at about 2-3 parts to 1 by volume and keep the mix breathable.
Browns And Greens – Roles And Everyday Sources
Dry browns power the process with carbon. Think leaves, straw, twiggy prunings, shredded paper, and torn cardboard. Greens supply nitrogen to build microbial cells. Use vegetable trimmings, fresh plant pullings, grass clippings, and small amounts of herbivore manure.
Aim for roughly 2-3 buckets of browns to 1 bucket of greens. The ratio works because carbon drives energy while nitrogen lets the population multiply, so materials collapse rather than sit cold. Keep pieces fist-size or smaller to speed contact and airflow.
Pro tip – Keep a paper shred sack or a bin of dry leaves right beside the compost area so every wet addition gets an immediate dry cover.
Moisture And Air – The Hand Squeeze Test
Moisture and oxygen control the pace. Grab a handful, squeeze hard, then open your hand. The clump should hold briefly, show no free water, and then crumble with a light tap. If it drips, fold in dry browns. If it falls apart like dust, mist while turning.
Turn with a fork to open channels, but do not grind the mix into paste. Air spaces let heat build evenly because aerobic microbes work faster than anaerobes that thrive in soggy pockets. One light aeration pass after new kitchen waste goes in keeps the pile breathing.
- If material mats together, tear it by hand before adding.
- If the top crusts, rake it loose and cap with a thin dry layer.
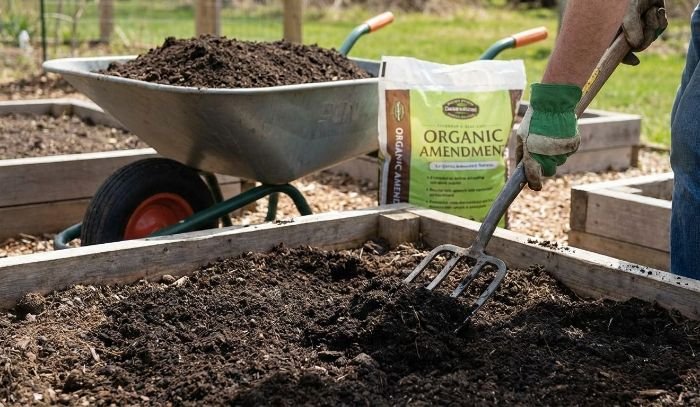
Starter Volume And Layering That Gets Things Moving
Small piles cool off. Build at least 3 cubic feet of blended material so the core holds warmth and activity. Start with a fluffy brown base for drainage, then alternate thin lifts of greens and browns until you reach knee height.
Cap every fresh green lift with a dry blanket. The cap absorbs surface moisture and blocks fruit flies, which reduces disturbance later. Keep the exterior looser than the core so rain penetrates but does not pond.
This simple mix runs clean because carbon, nitrogen, air, and moisture stay in balance without constant fixes. Once the bin holds that working volume, you can move to a weekly check and quick corrections as needed.
Set Up Home Composting – Spot, Container, Daily Flow
A bad location turns into mud, fruit flies, and skipped maintenance. A good setup stays tidy, drains well, and lets you work fast with clean hands. Build the station once and the pile will run with light touch-ups.
Choose A Spot You Can Reach In All Weather
Place the bin on bare soil where water can drain away, not on a low pocket that holds puddles. Keep a hose within 15-20 feet so rinses and moisture checks take seconds rather than chores.
Partial shade helps the surface stay moist while the core stays warm. Leave 18 inches of clearance on two sides for a fork and a small tote of browns. Hard surfaces like concrete work only with a raised pallet for airflow and leachate control.
- Good drainage underfoot
- Hose access without dragging
- Elbow room for turning
- Short, clean path from kitchen door
I often notice that bins sited within easy hose reach get turned and moistened on schedule, while distant bins get ignored after wet weeks.
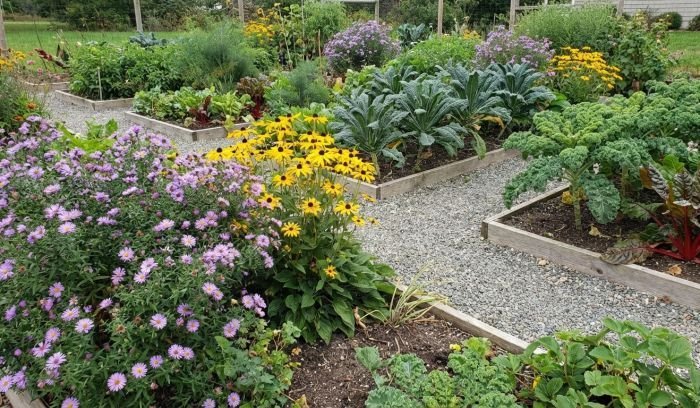
Container Or Open Pile – Pick For Space And Discipline
Use a bin when you want neater edges, smaller footprint, and a lid that blocks pests. Slotted sides move air and control bulging. A tumbler suits small yards where you add in batches and want quick, contained turns, but total volume is limited.
Choose an open pile if you have room and materials arrive often. A free pile builds heat faster once it reaches 3-4 feet wide because the core holds warmth. Edge with pallets or welded wire if you want a cleaner outline without losing airflow.
Daily Flow That Prevents Mess
Keep two small stations next to the bin: a caddy for kitchen scraps and a container of dry browns. Every time wet material goes in, cap it with a thin dry layer so the surface stays clean and flies do not land.
Set a simple cadence. Add scraps as they appear, cap with browns, then once a week lift and fluff the top 12-18 inches to open channels. If the lid collects condensation, the mix is running wet and needs extra dry cover before the next turn.
A reachable site and a container that matches your space cut the time you spend wrestling with the pile. When the path is short and tools live nearby, you keep the routine and the bin stays productive.
Weekly Routine For Composting Beginners – Build Heat, Avoid Odor
A clean surface and a warm core mean the pile is on track. A quick, repeatable rhythm keeps microbes busy so scraps vanish without smell or flies, and you are not stuck fixing problems later.
Add And Balance Without Re-Mixing Everything
Work from the top. Each time fresh material goes in, cap it with a thin blanket of dry browns so the surface stays dry to the touch and fruit flies do not land. During the weekly check, fold only the upper 12-18 inches toward the center to open channels and blend the newest additions.
If the top looks glossy or feels tacky, add extra dry cover during the turn. If the surface looks dusty and lifts in flakes, mist lightly as you fold. This light correction keeps the core fueled while avoiding a full flip that cools the pile.
Airflow And Moisture – Quick Checks And Corrections
Vent paths need to stay open. Use a fork to lift and set, not mash, so pockets of air remain. A damp sheen on the underside of the lid or heavy condensation on bin walls points to excess moisture. Reduce watering for a few days and add a second dry cap after the next kitchen load.
A clean, earthy smell signals aerobic activity. Sour or sulfur notes indicate oxygen loss, often from tight mats or too much liquid. Break mats apart by hand and fold in coarse browns like twiggy prunings or stiff leaf bits to rebuild structure.
Weekly checkpoints – cap new scraps, lift and set the top layer, correct wet or dry, break any mats
Timeline And Milestones – Know When The Core Is Working
An active pile warms within 7-14 days after you reach working volume. A basic compost thermometer reads 110-140 F during the peak, then gradually drops as fuel is used. Without a tool, test progress by feel and visuals – darker color in the interior and fewer recognizable pieces week over week.
I often notice a faint wisp of steam on cool mornings when the core has good airflow and enough fuel. That cue means keep the cadence, not add more water. As the temperature falls and texture turns uniformly crumbly, reduce turns to every other week to finish without drying out the outside layer.
A short, predictable routine protects the core and keeps the surface tidy. Stay with the same day and the same five-minute check so the pile runs hot and clean without extra work.
Quick Answers For First-Timer Questions
A clean lid and a quiet surface mean the system is under control. Small adjustments to common items and seasonal rhythm keep the bin tidy and productive without extra work.
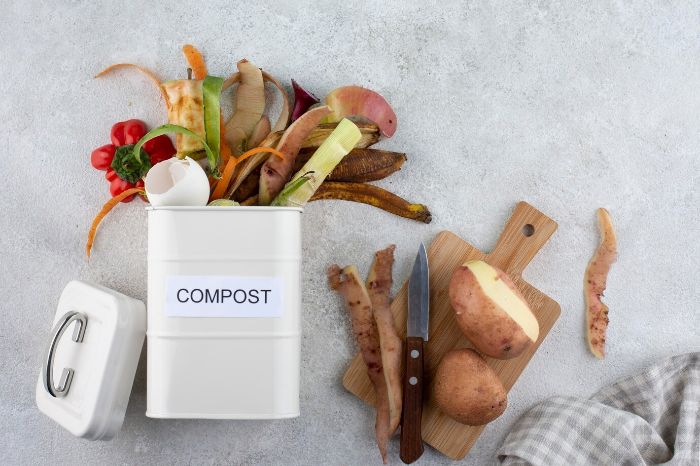
Kitchen Scraps – Banana Peels, Coffee Grounds, Eggshells
Coffee grounds belong in a home bin when applied as a thin scatter, not a mat. Spread grounds in layers under 0.5 inch and mix lightly into the top to avoid crusting that blocks air. Grounds run closer to “green” in behavior, so follow them with a dry cap to balance moisture at the surface.
Banana peels break down faster when cut into strips before adding. Tuck the strips into the warm interior to keep fruit flies away. Eggshells resist decay in large pieces, so crush them to under 0.25 inch; the calcium still contributes, and you will not see white flakes in finished material.
I often find that thin, mixed-in grounds disappear by the next check, while thick cakes hold together and smell sour along the top edge.
Winter Slowdowns – What To Expect And Do
Decomposition slows in cold weather because microbial activity tracks with temperature. Expect longer timelines and fewer visible changes week to week. Keep inputs small and cover every wet addition with dry material so the surface stays clean in freezing cycles.
Build volume rather than chasing heat. A full bin holds warmth better than a half bin. If the lid shows frost inside, lift and fluff a few inches of the top and add a dry blanket; airflow resumes while the cover limits evaporative cooling.
When The Compost Is Ready
Finished compost looks uniform and breaks apart easily in the hand. Original shapes fade, the color turns even brown, and the smell reads earthy rather than sharp. A handful dropped from knee height should fall as loose crumbs, not clumps.
Time varies by season and volume, but a well-run bin commonly reaches a usable, siftable texture in 8-12 weeks during warm months. Once most pieces are indistinct and crumbling, pause new scraps on that side and let the batch finish while you start a fresh layer elsewhere.
A few small tweaks with common scraps and a realistic winter pace remove most early headaches. Clear signals at the end tell you when to use the material without second-guessing the process.
Practical Wrap-Up
Run compost like a small weekly program, then switch to a calm finish. Start with one active side and one curing side so fresh scraps never mix with nearly finished material. Move new inputs only when the active side’s interior temperature falls within 5-10 F of the outside and pieces look uniformly brown.
Use decision rules, not long routines. If the lid shows beads of moisture or the top feels tacky, add a dry cap and lift the top layer once. If you see thin wisps of fruit flies at opening, bury fresh scraps 4-6 inches below the surface and cover with browns. In hot, windy spells, turn less and water lightly during the cool part of the day so the exterior does not dry into a crust.
Keep a cadence and a finish line. Work a 1-week rhythm for light lifts and small fixes, then extend to every other week as the texture turns crumbly and the smell reads earthy. When interior and exterior look alike and the handful falls as loose crumbs, hold additions and let that side cure for 2-4 weeks before use.
- Cure finished batches 2-4 weeks before use
- Set two zones – active side, curing side
- Cap every wet addition with a dry layer
- Lift top layer weekly, avoid full flips
- Bury scraps if flies appear, then cover
FAQ
Can you compost weeds without spreading seeds?
Yes, but manage heat and timing. Mix weeds into an active core and hold 135-150 F for at least 3 consecutive days before the next turn. Skip mature seedheads in cool piles, or solarize bagged weeds in full sun for 2-4 weeks and then add them in thin layers.
What happens if the pile smells like ammonia?
A sharp ammonia note signals excess nitrogen and compressed texture. Add a double dry cap, break clumps by hand, and fold in coarse browns until the surface stops feeling tacky. Back off turning for two to three days so the structure sets before the next light lift.
Can you compost citrus peels and onions?
Yes, if you cut them small and mix well. Keep citrus and onion trimmings under roughly 10 percent of weekly volume in small bins, bury them in the warm interior, and cap with dry browns so the surface stays clean and odor does not build.
How do I keep raccoons or rats out of a backyard bin?
Block access from below with 0.5 inch wire mesh, use a tight lid, and avoid meat, dairy, and oily leftovers. Bury fresh scraps 4-6 inches below the top and finish with a dry cap so there is no visible food cue at opening.
What is the fastest way for home composting to finish a batch?
Run a single-batch approach with at least 3 cubic feet, chop inputs to palm-size or smaller, and keep the core in the 125-150 F band. Turn the top every 3-4 days during peak heat, then shift to weekly lifts as the interior color evens out.
Can you compost paper towels and cardboard?
Plain paper towels and uncoated cardboard work well as browns. Tear into 1-2 inch strips, pre-dampen if they are very dry, and mix through the top lift so they do not clump. Avoid glossy coatings and heavy waxed packaging.
What happens if I add diseased plant material?
Add only to a hot, well-managed pile that consistently reaches 145 F or higher in the core for multiple days. If you cannot maintain heat, keep diseased foliage out of the bin and use municipal green waste services instead.
How much weekly time does composting for beginners usually take?
Plan on 5-10 minutes once or twice a week for a backyard bin. That window covers adding scraps, laying a dry cap, and lifting the top layer to refresh airflow; larger adjustments wait until the next check unless odor or pests appear.