Ever thought a simple paint job could change a room’s feel? Wall painting techniques are back, and they’re all about expressing yourself. From ancient times to today, painting walls has always been a way to show who we are. We’ll look at easy painting methods for beginners. These will help you make your home truly yours with simple design tips.
Key Takeaways
- Wall painting allows for personal expression and enhances living spaces.
- Beginners can easily adopt painting techniques to achieve stunning results.
- Proper preparation and tool selection are crucial for a smooth finish.
- Various creative techniques like ombré and stenciling heavily contribute to unique styles.
- Investing time in understanding color impact can elevate your room’s mood.
- Patience in the process, such as waiting to remove tape, ensures quality results.
Table of Contents
Why Try Creative Wall Painting?
Exploring creative wall painting lets you make any space your own. You can use colors and designs that show off your personality. This makes your home feel truly yours.
Trying different painting techniques can change a room in amazing ways. It can make your space feel fresh and exciting.
Benefits of Adding Personality to Your Space
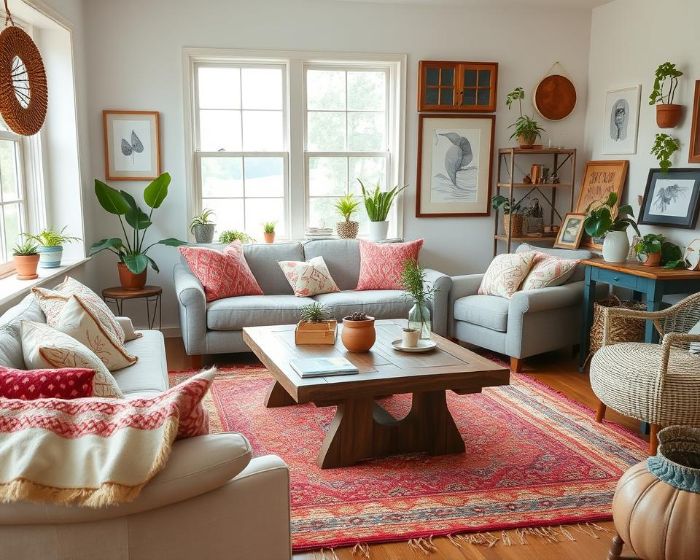
Adding your personality to your home makes it feel like a true home. Colors can change how you feel in a room. Bright colors can make a room lively, while soft colors can calm it down.
Wall painting not only looks good but also makes you feel better. It can make your home a happier place to be.
The Impact of Wall Colors and Patterns on Mood
Colors and patterns greatly affect how a room feels. Dark colors can make a room cozy, while light colors can make it feel open. For inspiration on balancing bold patterns with simple aesthetics, explore minimalist décor trends, which emphasize uncluttered layouts that highlight your creative wall designs. Patterns add depth and interest to walls.
Using creative techniques like color blocking or murals can really change a room. For those inspired by organic themes, consider incorporating biophilic design ideas into your wall projects – such as botanical murals or earthy hues that bring the calming essence of nature indoors. Adding textured finishes or chalkboard walls can also spark creativity. It shows how design choices can make a big difference.
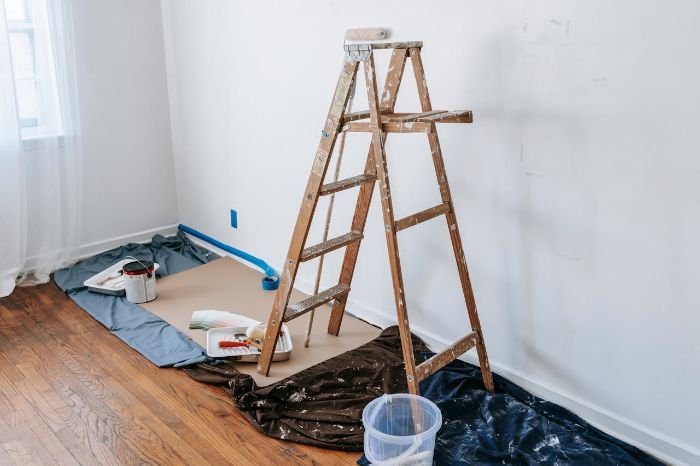
Tools and Materials for Wall Painting
To paint a wall well, you need the right tools and materials. Knowing what you need makes painting easier and looks better.
Basic Painting Tools You’ll Need
Having the right painting tools is key for a smooth job. Here are some must-haves:
- A standard 9-inch roller with a synthetic core and a 3/8-inch nap for even paint application.
- Natural hair brushes are ideal for oil-based paints while synthetic brushes are preferred for water-based options.
- Quality painter’s tape, such as products from 3M or Frogtape, is essential for crisp lines.
- Canvas drop cloths offer superior protection and durability compared to plastic alternatives.
- A putty knife aids in preparing walls by addressing imperfections before painting.
- Extension poles for rollers extend your reach to high areas without the need for a ladder.
- Consider a paint multi-tool for various tasks to simplify your process.
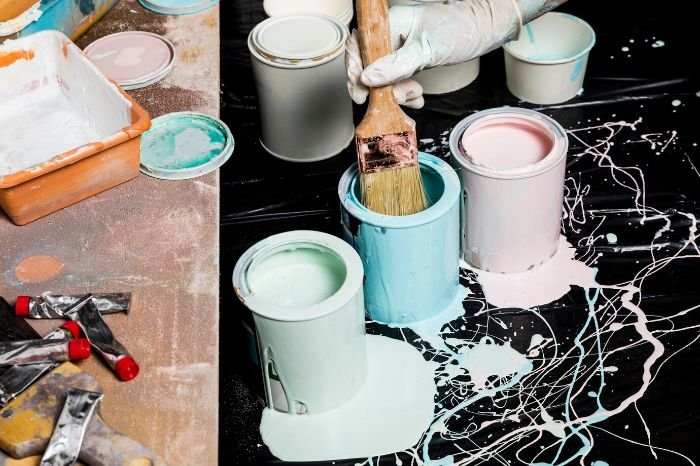
Choosing the Right Paints and Supplies
Choosing the right paint and supplies is important. Here’s what to think about:
- Latex paints are great for easy cleanup, while oil-based paints offer durability for specific applications.
- Understanding the finish is key – flat for minimal sheen, satin for a soft glow, and glossy for reflective surfaces. Pairing the right paint finish with appropriate smart lighting solutions for better ambiance can dramatically enhance the mood and depth of your painted walls.
- Quality roller covers, such as Ace and Shur-Line brands, improve paint application and minimize streaking.
- For those tackling unique textures, different types of paint sprayers are available to accommodate various needs.
- Remember that a gallon of paint typically covers 350 to 400 square feet, so plan accordingly.

Preparing Your Walls for Painting
Getting your walls ready for painting is key to a great finish. Cleaning and priming surfaces makes a big difference. It helps paint stick better and look better on your walls.
Cleaning and Priming for a Smooth Finish
Begin by cleaning the walls well. Use strong cleaners to get rid of grease and dirt. This step is important because dirt can stop paint from sticking.
If there are holes or rough spots, fix them with spackle and sand them smooth. Then, think about using a primer. A tinted primer can make colors pop, especially dark ones.
When priming, use a thick roller for smooth areas. For tight spots, an angled brush works best. Let the primer dry fully before painting.
Taping and Protecting Surfaces
Protecting surfaces is important for clean lines and avoiding spills. Before starting, consider decluttering strategies for the modern minimalist to create an open and organized space, making it easier to paint efficiently. Use painter’s tape to cover edges and protect baseboards, windows, and trim. This tape helps make your edges sharp and professional.
Take off switch and outlet plates before painting. This keeps them safe from paint and makes your work look better. Also, lay down canvas drop cloths to catch any spills. These steps help get your area ready for painting.
Step-by-Step Techniques for Beginners
Exploring creative wall painting techniques is exciting. It can change your living space. We’ll look at two easy methods: stripe painting and the ombre wall technique. Each method needs some prep but can look amazing if done right.
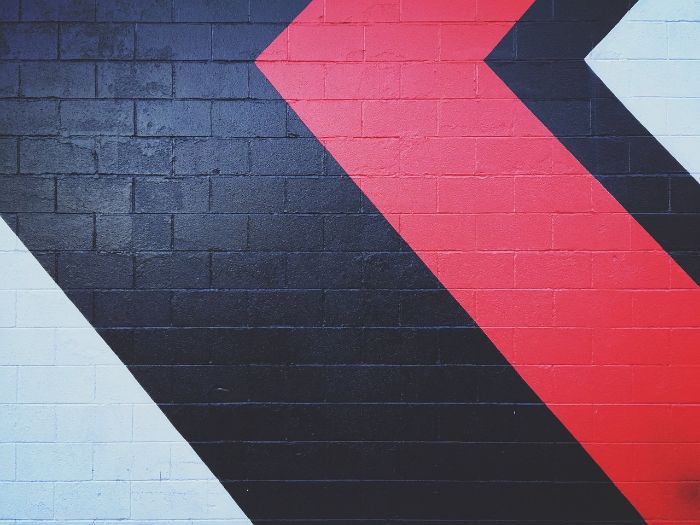
Technique 1 – Stripes and Geometric Patterns
Stripe painting can make a room look new, especially with geometric designs. First, get your tools ready. You’ll need painter’s tape, a level, and a measuring tape. Here’s how to begin:
- Measure and mark where you want your stripes or geometric designs.
- Use painter’s tape to create clean, straight edges. Make sure the tape is pressed down well to avoid paint bleeding.
- Apply a primer if needed, especially on uneven surfaces to help the paint stick better.
- Paint the first color, usually a lighter shade. Let it dry completely before adding a second coat for full coverage.
- Once dry, carefully peel away the tape to show sharp lines.
Using these techniques can make your walls look great. It also lets you show off your style.
Technique 2 – Ombre and Gradient Effects
The ombre wall technique makes colors blend softly, adding depth to a room. Here’s how to do it:
- Choose two colors that go well together. The lighter color goes at the top, and the darker at the bottom.
- Mix a bit of the darker color with the lighter one to make shades in between for blending.
- Start with the lighter color. While it’s still wet, use a blending brush to mix it with the darker shade.
- Blend the edges slowly, mixing the two colors for a smooth look.
- Let each layer dry fully before you adjust or add more paint.
With patience and the right steps, you can get a beautiful ombre wall. It will make your room look even more charming.
Fun Painting Techniques to Add Texture
Textured painting makes any wall special and creative. Techniques like sponge painting and stenciling designs let you express your art. They add fun and personality to your space. Let’s look at two easy techniques for beginners.

Sponge Painting for a Unique Finish
The sponge technique is great for beginners. It gives walls a textured look without needing to be a pro. Use a sponge to dab paint on the wall for cool patterns.
Try layering colors for depth and interest. Warm tones can make a room cozy, while cool hues are refreshing. Don’t be afraid to try new things and find what you like.
Stenciling Patterns for Precision and Style
Stenciling designs add sharp, clear patterns to walls. It’s important to prepare well to get clean lines. Choose a stencil that fits your style, like geometric shapes or flowers.
Place the stencil on the wall with tape, then paint it with a sponge or brush. You can use different colors for a beautiful look. Stenciling can be a main feature or add to your decor.
Accent Wall Ideas to Transform a Room
Accent walls are a key design element that can change a room’s feel. By picking a bold color or pattern, you can make a focal point. This draws the eye and boosts the room’s look. Let’s look at some creative wall ideas that focus on color and new techniques.
Using Bold Colors on One Wall
Choosing a vibrant color for one wall can change a room’s mood. Here are some top color picks:
- Red and green tones are great in dining rooms, adding energy and warmth.
- Blue is perfect for entryways, welcoming guests with calmness.
- Brown accent walls bring vibrancy to dining areas without being too much.
- Pink accents make spaces cheerful, ideal for living rooms and kitchens.
- Gray and pink together add class to kitchens.
- Orange walls energize bathrooms, while dark blue adds depth and calm.
Creating a Focal Point with Artful Patterns
Patterns and textures can make your walls more interesting. Here are some ways to add unique touches:
- Wallpaper, used in 35% of designs, adds detailed designs and interest.
- Natural materials like brick or stone, making up 20%, bring warmth and texture.
- Paint, used in 25%, offers endless customization options.
- Creative designs, at 10%, tell unique stories or themes, making rooms special.
- Upholstered walls, at 5%, add luxury, improving comfort and style.
Tips for a Professional Finish
Getting a professional finish in your wall painting project takes some key steps. One important thing is to let each layer dry fully. This helps avoid mistakes like uneven texture and color.
Experts say to start with a primer coat, then two coats of paint. This makes sure your walls look even and smooth. Following these steps will help your painting look great.
Allowing Sufficient Drying Time Between Layers
Keeping your walls clean is also key. For an eco-friendly approach, explore DIY natural cleaning solutions that help safely remove paint drips, maintain indoor air quality, and avoid harsh chemicals. Use a soft cleaner and gentle scrubbing to avoid damaging the paint. Regular cleaning keeps your walls looking good and makes your paint last longer.
By following these tips, your painted walls will stay beautiful for a long time. They will keep their color and shine for years.
Don’t skip any steps in your painting. Using top-notch tools, like the best brushes and rollers, helps a lot. It makes your walls smooth and needs fewer fixes.
Make sure to let each layer dry well and clean up right. This way, your painted walls will look amazing for years.
FAQ
What are some beginner-friendly wall painting techniques?
Beginners can try stripes, geometric patterns, and ombre effects. These are easy and need basic tools like tape and brushes.
How do I choose the right paint color for my space?
Think about your style and the mood you want. Blue is calming, while yellow is cheerful. This helps pick the right color.
What tools do I need for wall painting?
You’ll need rollers, brushes, tape, drop cloths, and trays. Use quality materials for a lasting finish.
Why is wall preparation important before painting?
Good prep ensures paint sticks well and looks smooth. Clean the walls, prime, and tape off areas you don’t want to paint.
How can I create a textured finish on my walls?
Try sponge painting or stenciling for texture. Sponge painting is easy and creative. Stenciling makes designs that pop.
What is the purpose of an accent wall?
An accent wall highlights a room’s feature. It uses bold colors or patterns to add interest and depth.
What tips can I follow to ensure a professional finish when painting?
Let paint dry fully between layers for a smooth finish. Clean up well and use gentle cleaners to keep your walls looking good.