Container garden design pays off when the yard feels composed the moment someone steps in, and sightlines glide toward the places you want attention. The reward is a landscape that looks intentional without tearing up hardscape. The risk is a fussy scatter that blocks movement, throws glare, and dies on the second glance.
I build intrigue with one calm anchor, then use planters to bend the eye at natural pauses and wake up blank edges.
Watch for two red flags before planting – a bright flare on pot faces in late afternoon and scuffed corners where traffic clips rims. Solve those early and the whole layout reads confident and quietly bold.
Key Takeaways
- Hook pauses and corners so sightlines drift where you want
- Use one quiet anchor, then let accents spark the scene
- Prove flow with a chalk dry fit during busy hours
- Avoid clutter that turns planters into obstacles and eye noise
- Keep a simple seasonal swap rhythm to refresh without rework
Table of Contents
Set the Design Goal and Read the Site
Containers only add depth when they have a clear job. Start by reading how people move, where the light lands, and which views deserve attention. Then set one purpose per zone and place planters to do that job, not to fill space. Use this section to plan before integrating container gardens into the layout.

Pick a single goal per zone
Give each area one role – frame, anchor, screen, or lead the eye. Two roles in one spot cancel each other.
If a front entry feels flat, assign “anchor” and plan for one substantial piece that holds the view. For long side runs, set “lead the eye” and space smaller forms to carry sightlines to the next feature. Where neighbors look in, choose “screen” and place containers where the view originates, not where it lands.
If a zone already has a strong focal element, skip anchoring there. Redirect the effort to a blank end point or a natural pause in foot traffic.
Read light, wind, and foot traffic
Place for the light you actually have. Full sun near walls often reflects heat between 1 pm and 4 pm, so tall, thin forms handle it better than wide bowls. Morning shade with afternoon sun suits show pieces that read best under softer light.
Wind matters. Corner gusts and side-yard funnels tip light planters even when they look stable at noon.
I often notice that tall, narrow pots near a side gate rock after a breezy hour unless the base is weighted with gravel or a hidden slab.
Watch circulation for a day. Stand where people pause, turn, or wait. Those are placement candidates. Avoid the middle of a walking line and the outside edge of tight curves.
Map conflict points
Conflicts make good ideas fail. Find them now and mark ground, not just the drawing.
Flag door swing arcs, hose routes, trash-bin paths, grill lids, and mower turns. Keep clearances generous so the display survives busy days. Where pets run a track along a fence, shift the cluster inward and align with a post to avoid side hits.
If glare bothers entry cameras at midafternoon, move the pot 1-2 ft so the face catches light at an angle, not straight on. If drainage from a roof edge splashes, shift outside the drip line to protect finishes.
| Yard zone | Goal | Container form | Typical height range |
|---|---|---|---|
| Front entry | Anchor | Tall cylinder or square | 30-40 in |
| Patio corner | Frame | Wide bowl or low cube | 16-24 in |
| Path bend | Lead the eye | Staggered trio, tallest inside curve | 18-32 in |
| Along fence | Screen | Narrow rectangles in a line | 24-36 in |
| Blank wall | Create depth | Slim columnar pair | 28-36 in |
| Pool edge | Soften hard line | Low, stable bowls | 12-18 in |
| Driveway turn | Direct view | Single robust piece | 26-34 in |
| Deck stairs | Mark transitions | Matched pair, lower than rail top | 18-26 in |
Quick site read – 4 checks:
- Count sun by hours in the target season, not by feel.
- Note the strongest wind direction and any funnel points.
- Walk common routes and mark pause points and tight turns.
- Identify drip lines, glare hours, and camera views to avoid conflicts.
A clear job per zone and a clean read of light, wind, and movement keeps integrating container gardens intentional and stable. Lock the goals before you think about layouts, forms, or color.
Placement and Arrangement That Guide the Eye
Good placement turns containers into wayfinders and focal points. Use clear sightlines and simple layouts to create impact without clutter. Keep moves deliberate and sized to the space. Use container garden placement ideas once, then rely on plain language.
Best locations for impact
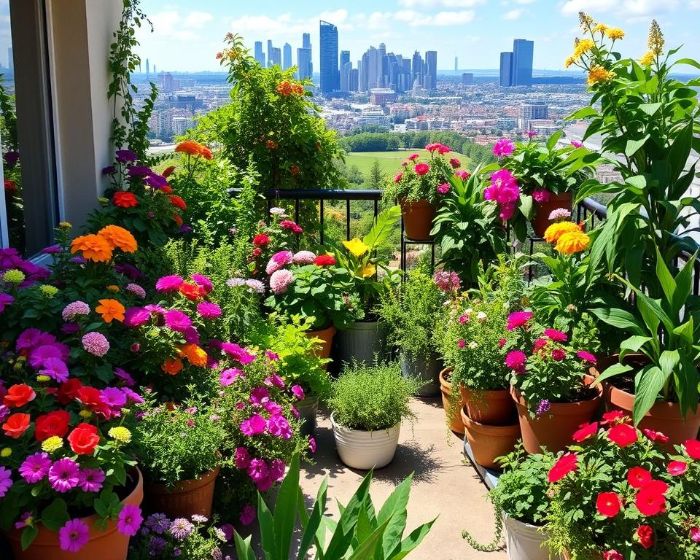
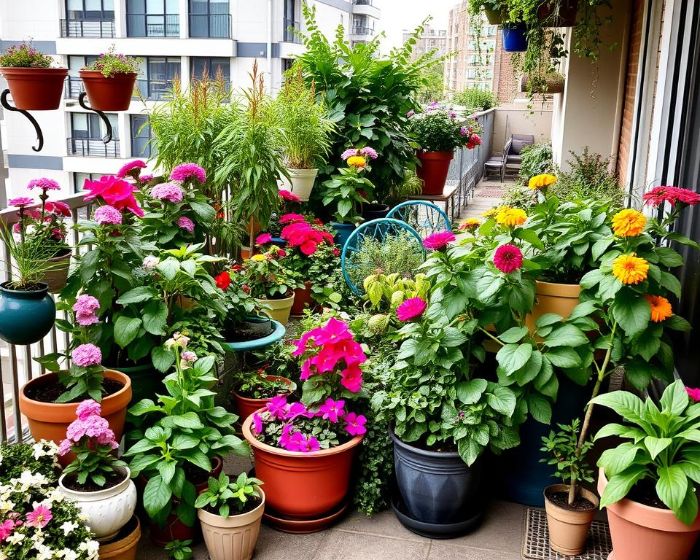
The best places for a container garden are entries, path bends, view termini, blank walls, and other natural pause points.
At an entry, one robust piece near the hinge side steadies the view and keeps the handle free. On a path bend, set the group on the inside of the curve so walkers see mass first, then detail as they pass. At the end of a long sightline, a single, taller form stops the eye and prevents scanning past the feature. Against a bare wall, tuck a compact cluster close to the surface so the composition reads as one unit, not as scattered dots.
If a corner collects bags, toys, or tools, skip decor there. Shift the display one panel over so maintenance traffic does not chew the edges.
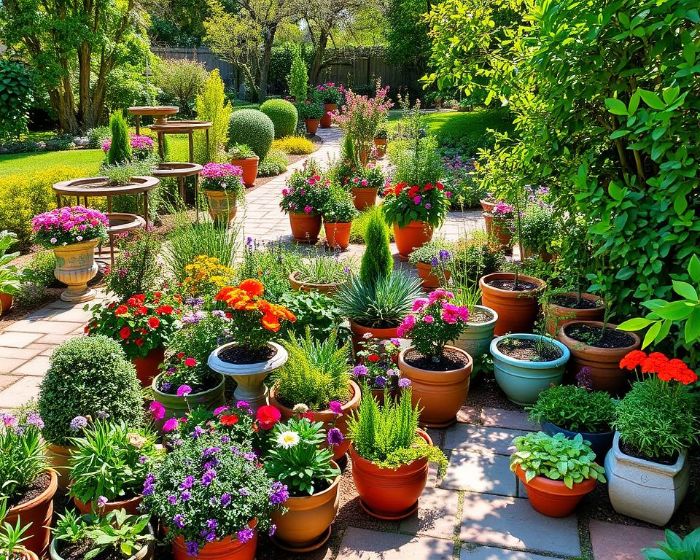
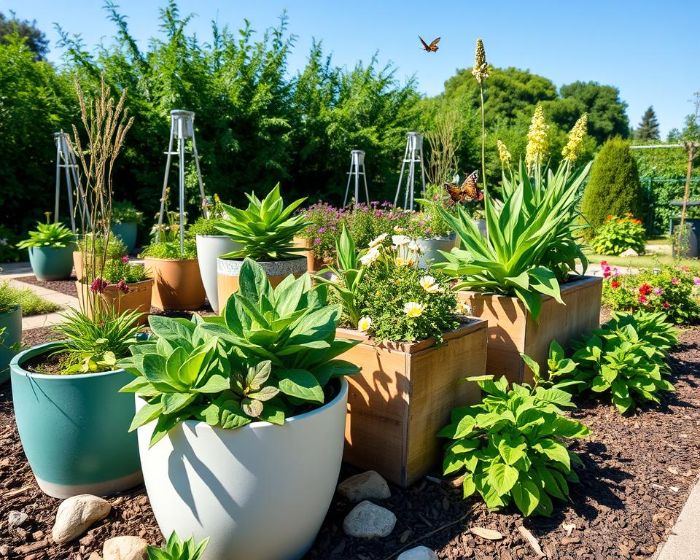
Arrangement patterns that work
To arrange container gardens well, pick one pattern and size it to the scene.
Single anchors suit tight spots where a pair would pinch movement. Mirrored pairs fit symmetrical entries or stair landings when both sides have equal room. Asymmetrical trios build depth in open corners; use a tall element, a medium mass, and a low piece to create a clean triangle. Linear runs calm long edges like fences or hedges; break the line every 8-12 ft with a slightly taller unit to prevent monotony. Compact clusters at a wall or column bring depth forward without blocking circulation.
Pro tip – Place the tallest piece on the inside of a turn so the sightline curves around it, not into it.
Clearance and spacing for clean flow
Clearances make arrangements feel intentional. Keep a minimum of 36 in of walkable width on primary routes. Leave 2-3 in beyond the full door swing to avoid grazed rims. On steps and landings, keep rims 4-6 in below the top of the tread or rail so feet and hands move cleanly. Along a path, offset pots 6-10 in from the edge; closer than that, shoes scuff finishes and leaves shred.
Watch for failure signals. Scuffed corners and tilted soil mean pots sit too close to traffic. Wobble after a bump means the base is too narrow for the height or the surface is uneven. Add a hidden leveling shim or widen the footprint with a tray stand rated for outdoor use.
| Layout | Best setting | Visual effect | Spacing guideline |
|---|---|---|---|
| Single anchor | Tight entry or view end | Strong stop | Rim 8-12 in off jamb or wall |
| Mirrored pair | Symmetrical doorway or stair | Formal balance | Centerlines aligned, 30-42 in apart |
| Asymmetrical trio | Open corner | Layered depth | Tall-medium-low within 18-30 in triangle |
| Linear run | Long fence or hedge | Calm rhythm | Units every 6-8 ft with a taller break at 8-12 ft |
| Cluster at wall | Blank facade or column | Forward depth | Back pot 2-4 in from surface, fronts 12-20 in out |
Use the smallest pattern that still reads at a glance. If movement rubs the setup within a week, shift the whole group a foot rather than trimming pieces until the display loses presence.
Scale, Proportion, and Pot Style That Fit the Setting
Right size and shape make containers look intentional, not random. Work from nearby anchors like doors, rails, and low walls. In landscape design with containers, set clear ratios first, then choose forms and finishes that repeat what the house already shows.
Proportion rules to nearby anchors
Measure what sits next to the planter and set height from that number.
Use quick ratios that read well at typical viewing distances. If a door is the anchor, a planter that lands between one-third and one-half of the door height holds the entry without crowding the handle. Along a low wall, rims near two-thirds of the cap height feel tied in and avoid blocking sightlines from seated areas.
I often notice that undersized pots at tall entries read as clutter until one larger piece anchors the scene and clears the handle by a comfortable span.
Key checks for common anchors:
- Front door height 78-84 in – target planter height 28-42 in.
- Railing top 34-38 in – rim near 22-26 in keeps hands clear.
- Low wall 18-24 in – rim near 12-16 in for layered depth.
- Column base 30-36 in – planter height 18-24 in, width within 60-75 percent of base.
Forms that echo architecture
Pick shapes that repeat massing you already have.
Cylinders soften hard lines and suit round columns or curved steps. Cones and tapered squares tighten footprint at grade and work near path edges where shoes pass close. Cubes and straight-sided rectangles read modern and align with clean facades or fence posts. Wide bowls relax patios and pool edges by keeping weight low and spread.
If two architectural elements meet, choose the form that agrees with the dominant line. For example, a cube set against horizontal cladding looks calm; a tall cone beside a turned column competes less with the curves.
Finishes and color ties
Match finishes to textures that exist within the same view.
Matte surfaces reduce glare near cameras and west-facing entries. Lightly textured ceramic or fiber cement hides scuffs on tight routes. Powder-coated metal handles sun well and pairs with darker window trim. Natural stone tones blend with pavers; warm terracotta links to brick or clay coping.
Use a restrained palette. Pick one container color that connects to trim or stone, plus a secondary accent used sparingly across the yard. Keep plant color decisions separate and let foliage and bloom carry the lift.
Close with one check – step back 15-20 ft and confirm the planter reads as part of the structure first and a plant holder second. If the eye sticks on finish or odd scale, adjust height or sheen before planting.
Styling Plants and Pots for Cohesion and Seasonal Lift
Styling starts with restraint. Use container garden design to build a clear structure, then add color and motion without clutter. Keep one quiet base, then rotate highlights on a simple schedule so the display reads clean year-round.
Structure, filler, and trailer roles
To style a container garden well, assign clear roles to plants and size them to the pot.
Set structure first. One upright form sets height and gives the eye a place to land. Aim for a leader that rises 1.5-2 times the rim height so the cluster reads from a distance without feeling top heavy. Fillers add mass around that leader; use 2-3 mid growers to close gaps without touching the rim. Trailers finish the edge; stop them when they drop 4-6 in below the rim so pathways stay clean and foliage does not snag.
If the composition feels busy from 12-18 ft, reduce count before changing species. Pull one filler, then trim trailers to the first strong node. If the top feels weak, upsize the leader by one container size rather than stacking more mid plants.
Color and texture rhythm
Color and leaf texture set the mood and tie zones together.
Pick one base foliage color family and repeat it across the yard, then allow one accent hue per cluster. Limit textures to one broad-leaf look and one fine-cut look in any single pot so the silhouette reads cleanly. Repeat that pair in the next group so the eye recognizes the rhythm.
Failure signals show up fast. If leaves blur into one tone in midday light, add contrast with a different leaf size, not more colors. If tones fight, remove the loudest accent and let foliage carry the weight. Check spacing between like accents across nearby clusters; 10-14 ft between repeats keeps the pattern visible without looking staged.
Seasonal swap plan
Keep the bones fixed and change small parts on a rhythm.
Hold the anchor plant in place for the full year and swap accents on a 6-10 week cadence, timed to your climate. In warm months, refresh when blooms fade or foliage loses edge definition. In cool transitions, change ahead of the first nights near 40 F to avoid mushy damage on tender material. Stage new inserts on a bench, then swap during the coolest hour to reduce shock.
Pro tip – Keep one evergreen anchor per cluster and replace only accent bloomers on a fixed schedule; the bed reads refreshed in minutes without reworking soil or irrigation.
A restrained palette, clear roles, and a simple swap rhythm create depth that holds up at a glance and still looks fresh on close inspection.
Standards and Checklist for Long-Term Harmony
Good displays stay safe, readable, and easy to live with. Set simple standards for footing, access, and refresh rhythm. When using planters in landscape projects, confirm these controls before planting so the composition survives daily use and weather.
Stability and footing
Stable footing prevents wobble, chips, and tip events.
Match base to height. For tall forms, aim for a base width that is at least 30 percent of overall height; go to 40 percent in wind-prone spots. On slopes, shim the downhill side until the rim reads level to the eye, then test by nudging at the top edge. Add hidden ballast like gravel bags or a paver – when gusts exceed 20-25 mph or when the planter sits in a wind funnel.
Protect surfaces. Use thin rubber pads on pavers and wood to stop creep and rim chatter. Keep drain paths clear so overflow does not streak stone or lift sealers. If a pot rocks after a minor bump, widen the footprint with a rated stand or choose a lower, heavier form for that location.
Access and sightlines
People need clean routes and clear views for entries, stairs, and cameras.
Keep primary routes open. Maintain walk widths that match use – main walkways at about 36 in, side paths at no less than 28 in. At doors, leave a buffer around handles so sleeves do not touch rims; a 4 in gap from hardware to the nearest edge prevents rub marks. On stairs and landings, keep the rim below the handrail and set the pot back from the tread edge so toes and hands clear.
Control glare and blind spots. Run a quick check around 3 pm on sunny days. If the camera image washes out or the pot face throws a bright patch across the door, shift the planter 12-24 in or swap to a matte finish for that spot. Where views align down a path, keep pot tops below the bottom edge of the focal feature so the sightline stays clean.
Refresh cadence
A light, regular rhythm keeps the setup aligned without turning into maintenance work.
Do a 10 minute audit monthly. Re-level shims, wipe mineral crust on rims, and check for scuffs on high-contact sides. Rotate planters a quarter turn when one face fades or the sun path changes with the season. After big wind or a hard rain, walk the line within 24 hours to catch tilt and splash marks before they set.
Time deeper edits to your local calendar. Before the first frost window, confirm trays are drained and pads sit flat. In spring, re-seat any pot lifted by freeze-thaw and test stability again. Keep seasonal plant swaps on the styling schedule, but handle those choices outside this checklist.
- Stability – base width at least 30 percent of height, more in wind
- Clear routes – main 36 in, side 28 in, rims back from tread edges
- Glare test – check at 3 pm; move 12-24 in or go matte if bright
- Hose and bin paths – mark and keep clear to stop scuffs and snags
- Finish wear – pads under heavy pots; clean streaks before they etch
- Rhythm – monthly 10 minute audit; post-storm quick walk-through
Standards like these keep the containers working with the hardscape and traffic, so the design looks intentional long after the first season.
Practical Wrap-Up
Before planting, run a quick field test that proves the composition works. Dry-fit empty pots, mark footprints with chalk, then live with the setup for 48-72 hours. If a sightline stalls, raise the tallest element 4-6 in or pull the group 10-14 in toward the focal point. Where wind is common, add ballast equal to roughly 10 percent of soil volume before the first storm over 15 mph.
Lock a simple cadence so the yard stays readable all year. Do a 2-week post-install check to re-level rims and confirm walk widths feel natural during busy hours. Set a 60-90 day styling swap for accents and a quarterly layout review where you take phone photos at eye height from two fixed spots; if the photo looks crowded, remove one piece rather than shrinking everything. Use container garden design once where it matters most, then repeat the rhythm across zones without cloning exact setups.
- Photograph from fixed points each quarter and edit
- Dry-fit pots and mark footprints for 48-72 hours
- Add ballast when wind gusts exceed roughly 15 mph
- Re-check levels and walk widths after 2 weeks
- Swap seasonal accents every 60-90 days
FAQ
Where should containers sit near a driveway so sightlines stay safe?
Keep planters 2-3 ft back from the curb and below 30 in tall within 10 ft of the driveway apron. Maintain a clear triangle where the walk meets the drive by stepping height up as you move 8-12 ft away from the street. If mirrors clip views, shift the cluster 12-18 in toward the house and lower the front piece.
How many planters should I use across a long facade without clutter?
Start with one focal cluster about every 14-16 ft of wall length, then add a single accent only where a sightline ends. If the view feels busy from 20 ft away, remove the smallest unit rather than shrinking all pieces. Hold at least 3 ft of clear walking width anywhere you add a cluster.
How do I keep containers level on a sloped patio without rebuilding the surface?
Orient the longest pot axis across the slope and level the rim with low-profile rubber shims or a concealed paver under the downhill edge. If the slope exceeds 3 degrees, pick forms with a base at least 40 percent of height and keep the tallest unit upslope so weight bears into the grade.
What is a quick way to validate container garden placement ideas during busy hours?
Mark footprints with chalk and observe for a 30 minute window at school drop-off or dinner time. Count shoulder rubs and bag taps. If you see more than two minor contacts in that window, pull the nearest rim back 4-6 in or raise the piece 2-3 in so handles and elbows clear.
How do I avoid sprinkler overspray and drip lines staining finishes?
Place rims 12-18 in outside the throw of spray heads and keep planters beyond roof drip lines. If fixed heads cannot move, add a low baffle behind the pot or switch that zone to a drip ring hidden under mulch. Rinse splashes the same day in hot, dry spells to prevent mineral etching.
Can containers define outdoor rooms without blocking circulation?
Yes. Use clusters as thresholds with a clear opening of 42-48 in for everyday passage and 60 in if furniture moves through. Keep heights under 24 in within 3 ft of edges so sightlines remain open while the space feels framed.
Which finishes hold color near pools and west sun in landscape design with containers?
Powder-coated metal with UV-stable coatings resists fade in 2-4 hour late sun, and high-fired stoneware keeps color near chlorinated water if you rinse splashes weekly. Fiber cement with integral pigment hides scuffs on tight routes; choose matte or low-sheen to reduce afternoon glare.
What is a compact starter blueprint for container garden design on a new build?
Test one anchor at the entry first, then add a path bend marker 8-12 ft inside the curve. After two weeks of living with that layout, mirror the rhythm at the far end of the main sightline and stop. If all three points read cleanly from 15-20 ft, continue the cadence to secondary areas.