Updated October 19, 2025
Planters set the tone for growth and how a space looks. Pick the wrong container and you fight toppled pots, sour media, and floors that stay wet. Pick the right one and watering is cleaner, moves are easier, and plants push new growth without drama.
Start with root needs, then choose a body that fits your climate and how you handle weight on site. Build a clean exit path for water so salt crust never forms on the rim, and use a simple touch-and-weight check to confirm the profile dries evenly.
On balconies and patios, stage heavier pieces where gusts fade and keep a clear path so upkeep stays quick. Add sub-irrigation only when the plant’s pace matches the reservoir, and treat smart pots as a cue you verify by feel.
Key Takeaways
- Match container volume to root drive and growth habit
- Choose climate-fit bodies that resist heat swings and frost heave
- Build drainage that clears fast and keeps floors spotless
- Avoid top-heavy setups that wobble after watering or wind
- Schedule quick walkarounds to test exits, casters, and balance
Table of Contents
Choose the Right Planter Size for Root Depth and Growth
Right-size containers keep roots aerated and growth consistent while reducing the need for repotting. For big, hungry crops or woody specimens, step up to large plant containers early to avoid stress and topple risk.
Root Depth Guide by Plant Type
Match container diameter and height to the mature root profile, not just foliage. Shallow roots live near the surface and spread; deep feeders want vertical room for stable moisture and anchoring.
| Plant group | Typical root depth | Min diameter | Min height | Repot window |
|---|---|---|---|---|
| Leafy herbs, pansies | 4-6 in | 7-9 in | 6-8 in | 6-9 months |
| Lettuce, strawberries | 6-8 in | 10-12 in | 8-10 in | 6-9 months |
| Peppers, bush tomatoes | 10-14 in | 12-14 in | 12-14 in | 9-12 months |
| Indeterminate tomatoes | 16-24 in | 18-24 in | 16-20 in | 12-18 months |
| Dwarf citrus, blueberries | 14-20 in | 16-20 in | 16-20 in | 18-24 months |
| Compact shrubs, small roses | 12-18 in | 14-18 in | 14-18 in | 12-18 months |
Pro tip: when in doubt between two sizes, pick the larger diameter if the plant is top-heavy or grown in windy spots.
Growth Allowance and Repot Timing
Plants fill containers faster than most folks plan for. Leave 1-2 inches of side clearance at transplant so fresh mix surrounds the root ball and wicks moisture evenly. If roots circle the wall, water streams down the sides, or the plant dries out in under a day, step up one container class. For woody plants, plan a root prune or a size increase every 12-24 months, depending on vigor.
One Container, One or Many Plants?
Shared containers work when root zones do not collide. Pair shallow, slow growers together; keep deep feeders solo. I space compact herbs 4-6 inches apart in bowls so crowns breathe and mildew stays down.
Quick sizing rules:
- Tall crops need height first; bushy crops need diameter.
- Heavier tops need wider bases to resist tipping.
- Faster drying than 24 hours signals an undersized pot.
- Repot when roots circle or growth stalls despite feeding.
- Group only plants with similar watering pace.
A good size match reduces stress, cuts watering peaks, and buys you more stable growth before the next repot.
Outdoor Planters – Material Trade-Offs, Climate, and Care
Material choice sets weight, insulation, and lifespan before the first watering. Match the body to site conditions, then plan light maintenance so the container keeps its shape and finish through the seasons.

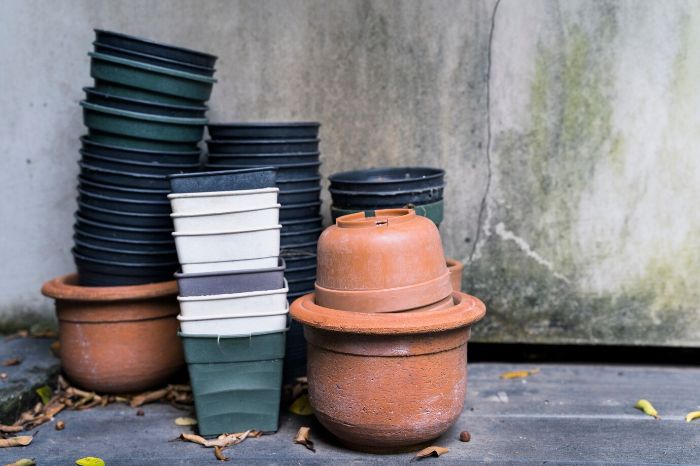
Material trade-offs
Each body behaves differently under sun and moisture. Plastic runs light and forgiving, ceramic and terracotta stabilize roots with thermal mass, fiberglass keeps weight down with decent stiffness, metal takes impacts but heats fast, wood insulates well when sealed, and concrete rides out storms at the cost of bulk.
Pro tip: if the site bakes at midday, light-colored shells and thicker walls keep root temps steadier than thin, dark bodies.
| Material | Weight | Insulation | Durability | Care | Cost | Best use |
|---|---|---|---|---|---|---|
| Plastic | Low | Low | Medium | UV-safe grade | Low | Rentals, railings, moves |
| Ceramic | Medium | Medium | Medium | Avoid impact | Medium | Patios, shade, interiors |
| Terracotta | Medium | Medium | Medium | Seal if outdoors | Low | Arid sites, herbs, succulents |
| Fiberglass | Low | Medium | High | Wipe, mild soap | Medium | Roofs, balconies, large forms |
| Metal | Medium | Low | High | Line to insulate | Medium | Windy sites, modern looks |
| Wood | Medium | High | Medium | Seal yearly | Medium | Cool roots, edible beds |
| Concrete | High | High | High | None beyond wash | High | Ground level, windy corners |
Thin shells move heat faster than thick shells, which matters for shallow-rooted plants that scorch easily.
Climate tolerance and maintenance
Freeze-thaw breaks porous bodies and finishes. If winters drop below 20°F, pick fiberglass, sealed wood, or high-density plastic; store terracotta and ceramic dry or under cover. In hot sun, metal shells can hit leaf-scorching temps; add a liner or slip a nursery pot inside to create an air gap. UV chalks cheap plastics after a season; use UV-stabilized grades and wash grit off so dust doesn’t sand the surface.
Annual wood care is simple – scrub, dry fully, then reseal all faces, including feet and inner walls.
I move vulnerable containers off saturated ground before hard freezes so bases do not bond to ice and crack when shifted.
Inherent weight classes
Weight helps or hurts depending on wind and access. A concrete trough stays upright in 30-40 mph gusts but needs a dolly and two people. Fiberglass in the same volume lifts safely and sits on casters without sagging. Use heavier bodies for tall, top-heavy shrubs; use lighter shells for upper floors, long spans, and frequent re-staging.
Pro tip: load a light shell with a low center of gravity by placing clean gravel bags at the base under the liner instead of filling the whole pot with stone.
A good material match cuts failures you can’t fix later: no midseason cracks, no cooked roots, and no strained backs on move day.
Drainage and Water-Handling – Holes, Saucers, and Smart Options
Good drainage keeps roots supplied with air and stops salts from building up. On an indoor planter, water control also protects floors and furniture, so the base hardware matters as much as the mix.
Drainage fundamentals
Container gardens need drainage because roots fail in saturated media and salts accumulate without a flush. Aim for at least one clear hole 3-6 mm wide per 6-8 inches of pot diameter; large tubs do better with three or more spaced across the base. Screen the inside with a square of mesh so mix stays put without blocking flow. Use a saucer with 0.5-1 inch of stand-off under the pot feet or risers so the exit stays above the water line. If water lingers in the saucer for more than 20 minutes, add more riser height or enlarge a hole.
Pro tip: drill from the inside out at low speed on plastic or fiberglass to avoid cracks; for ceramic, use a carbide bit, mist the area, and let the tool do the work.
Self-watering inserts and reservoirs
Sub-irrigation stabilizes moisture during heat waves and busy weeks. A reservoir 10-20% of total volume suits leafy herbs and most annuals; thirsty crops like tomatoes handle 20-25% if the wicking column stays open. Keep a capillary channel by packing a 2-3 inch core of mix from the pot down through the fill neck into the reservoir.
Flush the system every 4-6 weeks by watering from the top until a steady trickle exits, then drain the base to clear salts. If foliage yellows from the bottom up and media smells sour, the wick is smothered or the reservoir is staying full; pull the insert, wash biofilm, and rebuild the channel.
When to consider smart pots
Smart pots with moisture sensors and simple alerts help where overwatering is common or access is limited. They shine for large planters on balconies, offices with rotating staff, and travel periods longer than 3-5 days. Pick units that read at root depth, not just near the wall, and set alert thresholds after a week of observing real dry-down.
I set a seasonal check – recalibrate at the first hot spell and again at the first cold snap, since evaporation shifts. Keep smart gear as a cue, not a crutch – verify by feeling deeper in the profile and tracking weight changes after irrigation.
Clean hardware, open exits, and a reservoir sized to the plant’s pace keep containers steady without flooding floors or starving roots.
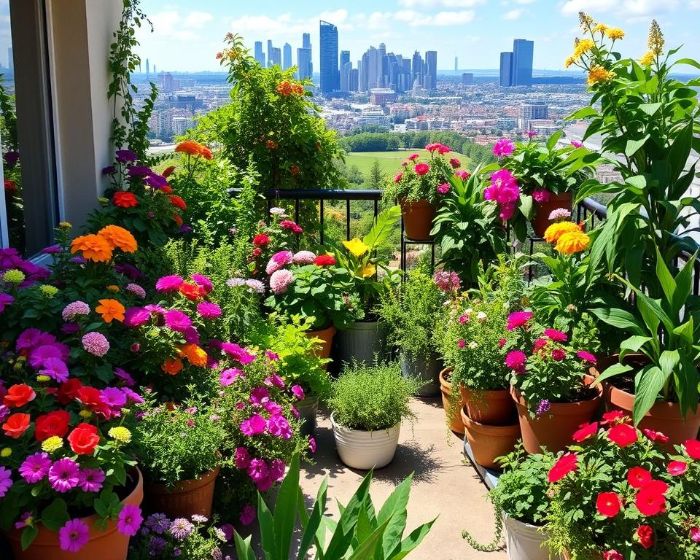
Placement, Weight, and Safety for Decks, Balconies, and Patios
Site conditions decide whether a container thrives or tips. When you run large plant pots outdoor on raised surfaces, plan for wind, heat, and load before you plant, then keep access clear for fast watering and cleanups.
Sun, heat, and wind exposure
Hard surfaces reflect light and push temperatures higher than open ground. South and west faces can add 10-20°F around dark shells at midafternoon, so park heat-sensitive crops where walls cast shade during the hottest hour. Wind amplifies transpiration and leverage on tall canopies. Keep tall planters behind a railing line or corner return, and group containers so they shelter one another without blocking airflow.
Pro tip: on bright patios, place light-colored shells nearest the wall and darker ones outboard; the gradient reduces leaf scorch and evens out dry-down.
Weight and load limits
Weight keeps planters upright, but suspended slabs have limits. Many residential balconies target 40-60 lb per square foot; distribute mass so no small area carries a full trough. If a planter plus wet media and plant exceeds what you can lift safely, set it on a dolly with locking casters rated above the combined weight.
Stability rule: aim for a base width at least one-third of total assembly height (container plus plant). In gusts above 30-40 mph, add ballast low in the shell or run a concealed strap to a fixed point the structure allows. I stage moves before storms so nothing slides, and I never drag heavy pots across composite boards.
Access and maintenance
Good placement leaves room to work without stepping over roots or hoses. Keep a clear strip 18-24 inches along doors and hose bibs so you can water, prune, and rotate containers without tripping. Use ribbed mats at traffic points to stop slips from wet saucers. On multi-level setups, cap drip ends over gravel trays so runoff lands where you can collect it, not on neighbors or stairs.
Pro tip: mark caster locks with a paint dot so you can see at a glance if a pot is secured after servicing.
Smart placement and sensible massing prevent cracked slabs, scorched leaves, and sudden tip-overs, which saves time and keeps the space usable all season.
Style, Finish, and Budget – Match Pots to Your Space
Design choices steer how plantings read from the street or sofa. Treat containers as part of the room – scale, color, and surface finish should frame foliage without stealing the show. Use planters as anchors, then repeat shapes or tones so the scene feels intentional.
Form follows plant habit
Pot silhouette should echo plant structure for clean lines and easy care. Upright shrubs and grasses look balanced in tall cylinders or tapering cones where vessel height equals roughly 1/3 to 1/2 of plant height. Trailing plants need low bowls, window boxes, or tall vessels with a clean rim that won’t snag vines. Mounding annuals carry best in wide rounds or cubes so the foliage spills slightly past the edge.
If the container looks undersized compared to the canopy, the eye reads clutter and maintenance gets fiddly. Step up one vessel class and keep the rim visible so pruning and deadheading stay fast.
Pro tip: group odd numbers of similar forms in a simple triangle layout to create depth without crowding paths.
Color and finish choices
Color ties the scene to the house. Pull one hue from trim or stonework, then add a neutral so the foliage stays the star. Dark bodies visually recede and make blooms pop; light bodies advance and brighten shaded nooks. Matte finishes hide water spots and fingerprints, while high-gloss needs regular wiping to stay clean. Textured surfaces camouflage soil splash and minor scuffs on busy patios.
Limit finishes to one hero tone and one support tone across a small area to cut visual noise. If a setup feels busy, standardize finish first before swapping plants. I wipe glossy shells during weekly walkthroughs and do a seasonal audit at the first warm spell to retire scuffed pieces to less visible corners.
Stretch the budget
Spend on one statement container where eyes land first, then backfill with sleeves or baskets that hide lightweight grower pots. Use nested setups: a decorative outer shell with a simple inner pot makes replanting fast and cheap. If viewing distance is over 15 ft, choose larger, simpler shapes and skip intricate textures that disappear at range. Rotate the hero piece seasonally and keep the supporting vessels consistent so only plant color changes.
A tight palette, right-sized silhouettes, and a single focal container create order and make refreshes quick, which keeps the space looking curated with less work.
Practical Wrap-Up
Choose containers the same way you plan irrigation or pruning: set thresholds, make a call, and revisit on a schedule. For wind, treat 30-40 mph gusts as the stability line for tall plantings and add ballast or a wider base before storms. For freeze-prone zones below 20°F, rotate porous bodies under cover well before the first hard freeze. If a container rocks more than a quarter inch at the rim when nudged, widen the footprint or relocate behind a wind break. Salt crust on the rim means residue is building; flush from the top until runoff is clear and reset saucer height.
Use a simple cadence to keep planters working. Do a 10-minute check at season change – inspect feet and casters, clear exits, and verify liners or inserts sit flat. Midseason, reassess weight distribution after growth spurts and trim to bring the center of gravity down. Before a heat wave, shade the pot wall on west exposure or move vulnerable crops one position inward. After heavy rain, lift the container edge briefly; if water sheets out, add risers or increase exit area.
A compact starter blueprint keeps projects on rails. Measure the site, choose container volume from the plant’s mature footprint, then pick body material for climate and access. Decide the base hardware next so drainage and floor protection are solved before soil goes in. Mark a maintenance date on the calendar at the first warm spell and the first cold snap so the setup stays stable without emergency moves.
- Schedule seasonal checks and pre-storm moves
- Confirm wind and freeze thresholds for your site
- Match container volume to mature plant footprint
- Select body material for climate and access limits
- Set drainage and floor protection before filling
FAQ
How can I estimate safe soil volume from a container’s dimensions?
Measure internal diameter and height in inches, convert to feet, then use volume ≈ π × (radius²) × height for rounds or length × width × height for rectangles. Multiply cubic feet by 45-55 to approximate wet mix weight in pounds. If the spot has a posted limit in lb per square foot, divide container weight by the footprint area to check compliance.
Are metal planters workable in full sun without cooking roots?
Yes, if you decouple heat. Drop a plastic grower pot inside to create an air gap, wrap the inner wall with 0.25-0.5 inch foam, and water early morning so the profile starts cool. If leaf edges crisp by late afternoon, shift one position off the reflective wall or raise a short screen that breaks direct bounce light.
What maintenance cadence keeps a self-watering setup from turning sour?
Top-water to a brief drain every 4-6 weeks, empty the base, and wipe biofilm from the insert. Reset the wicking column firmly from pot to reservoir and confirm refill intervals by weight, not just the sight tube. If odor develops or lower leaves yellow first, clean the insert and aerate the upper 2 inches with a narrow stake.
How do I stop saucers from staining concrete or deck boards?
Use rigid risers so the pot feet sit at least 0.5 inch above any standing water, pair the saucer with a breathable mat that dries within an hour, and seal porous concrete in spring. If you see a rusty ring after rain, switch to glazed saucers or install a drip tray filled with rinsed gravel that catches spill and dries fast.
For a windy balcony, how do I keep tall planters upright without overloading the slab?
Load weight low with sealed gravel bags under the liner, pick a base width at least one-third of total assembly height, and cluster tall pieces behind railing posts where turbulence drops. If the rim shifts more than a quarter inch when nudged, widen the footprint or add a discreet tie to a structural point cleared by building rules.
Do herbs and annuals like indoor planter reservoirs, or do they prefer top-watering?
Many herbs and bedding plants perform well with a small reservoir if the wick stays open and the surface can dry between refills. If the top never dries by morning, throttle back by partially blocking the fill port for a week. Fragrant herbs that resent wet crowns benefit from occasional top-watering to flush salts, then a full drain.
What’s a quick way to choose caster size and rating for mobile planters?
Add the wet weight of soil, container, and plant, then select four casters with a combined rating at least 1.5 times that number. Use wheel diameter of 3 inches or more on textured concrete and soft tread on finished floors. Locking pairs should face opposite directions so the pot cannot creep under vibration.
Which outdoor planters hold up best through freeze-thaw cycles without garage storage?
High-density fiberglass, sealed hardwood boxes, and thick-walled plastic ride through winter better than porous clay. Elevate feet so meltwater clears, keep soil slightly drier ahead of a cold snap, and rotate porous pieces under shelter when a week of repeated freeze-thaw is forecast.