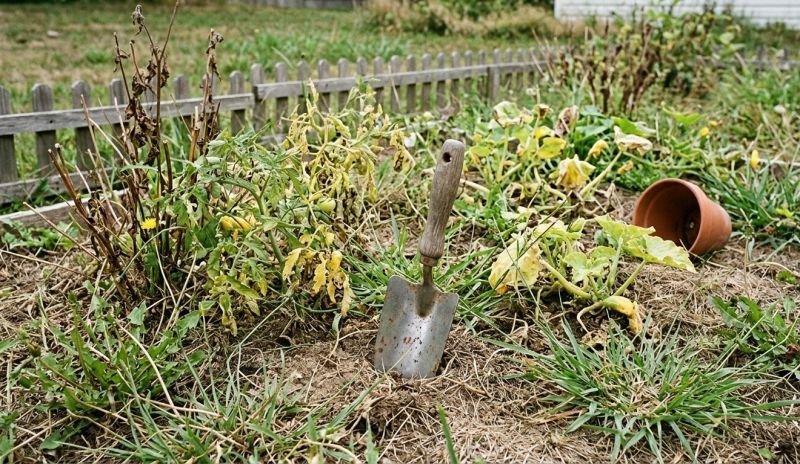
A single night of rain can undo months of work on a sloped garden.
Runoff cuts ruts, exposes roots, and washes away the soil you’ve built with care.
You can prevent that damage before the next storm hits – by guiding water, securing cover, and letting the slope absorb instead of shed.
It’s not about fighting nature, but shaping flow so every drop slows, sinks, and feeds the ground instead of eroding it.
Key Takeaways:
- Spot early signs of slope erosion before roots are exposed.
- Use natural contours to guide rain without harsh barriers.
- Combine living groundcovers with mulch for long-term slope hold.
- Test how your slope drains after each heavy rain.
- Avoid the single mistake that speeds up soil loss during storms.
Table of Contents
Read the Site – Water Paths, Soils, and Slope
Good erosion control starts with reading how water moves. Walk the site after rain, mark the flow lines, and size the problem before choosing fixes.
Map runoff and low spots
Trace where water starts, gathers, and leaves the yard. Begin at the high edge, follow rills and silt fans, and note any blocked curb cuts or compacted paths that push water sideways. Mark lines with washable spray chalk or flags so the pattern is still visible once the ground dries.
Confirm entry and exit points. If two or more feeder lines converge into one narrow run, plan for a control feature there later. Shiny, freshly scoured strips show higher velocity zones, while dull, sandier deposits show where water slows. Photograph each mark so you can compare after the next storm.
Pro tip – During a rain, drop short stakes at each place water turns or splits; measure stake spacing later to estimate reach and concentration without relying on memory.
Check soil type and cover
Identify weak surfaces that shed quickly. Rub a small sample between fingers. Gritty and non-sticky feel points to sandy ground that drains fast but needs strong surface cover. Smooth and sticky feel that forms a short ribbon points to finer particles that seal when pounded by rain.
Scan for bare patches and crusted areas where mower tires or foot traffic compacted the top layer. Where mulch thins or fabric edges lift, expect early rilling. Note canopy gaps too; open sun dries the top layer faster, which reduces cohesion before storms.
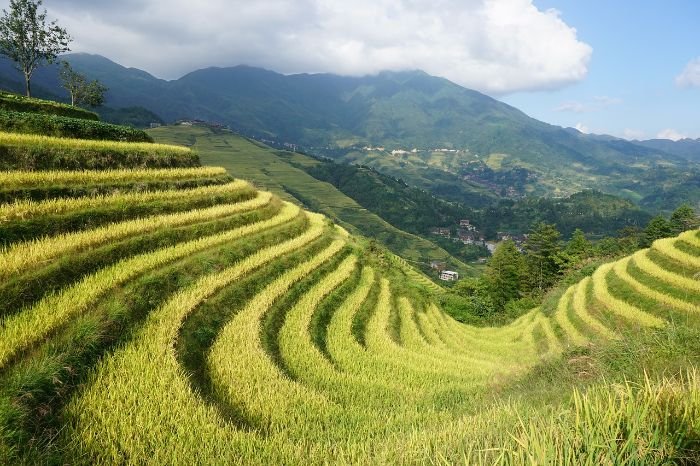
Measure grade and slope length
Quantify steepness so you can match controls to risk. Use a 2-4 ft level on a straight board or a digital level. Record rise over run in percent or degrees, and write the longest uninterrupted drop on each face. As a field rule, short slopes under 15 percent respond well to surface shaping; longer runs or grades near 20-30 percent call for added structure.
Measure slope length in practical segments. If a run exceeds 20-25 ft without a break, plan for at least one interrupt feature later. Note where the grade flattens near property lines, sidewalks, or beds; those plateaus are good places for a soak zone or an outlet that will not scour.
Reading the site with marks, simple soil cues, and measurements turns a broad problem into a map of fix points. With the path charted, every control you add later works in the right spot.
Slow and Spread Water With Contours, Swales, and Infiltration
Surface-level erosion control starts with slowing water on the slope and giving it time to sink. Shape the grade on contour, create absorbent travel lanes, and finish with a soak zone for overflow.
How to stop erosion on a sloped yard?
Cut shallow contour features that interrupt flow and force water to spread. Use a level, mark lines across the slope, then carve mini-swales 6-10 in wide and 3-4 in deep, keeping the bottom level along the contour for even soak. Pull the excavated soil to the downslope side to form a low berm and compact it with foot pressure so it resists the first heavy rain.
Space swales by slope length and rainfall intensity. On short runs under 20 ft, one contour feature near the midpoint often holds. On longer or steeper runs, add a second line 8-12 ft upslope. If water overtops during a storm, lift the downslope berm by 1-2 in at the high points rather than deepening the channel, which preserves infiltration.
Permeable paths and mulch lanes
Create low-resistance routes that absorb water rather than shed it. Lay a 2-3 in base of angular gravel for grip, top with 1-2 in of coarse wood chips. Chips slow surface velocity and protect soil pores; angular stone locks the layer in place so it does not slide.
Run paths parallel to contour where possible. Where a path must descend, break the run every 8-12 ft with a narrow cross bar of set pavers to interrupt flow. If a path edges a bed, add a thin check along the upslope edge using split branches or a single course of pavers set just proud of grade to hold chips during downpours. At the lowest corner, include a discreet outlet point so path water drains into a planned yard drainage feature rather than cutting across beds.
I often notice that water slips past a swale or path edge where the upslope lip is lower than surrounding grade, which shows up as a narrow bright line of fresh wash; bump that lip by an inch and compaction fixes the bypass.
Rain gardens as final soak zones
Give overflow a place to settle and infiltrate. Sink a shallow basin at the natural collection point, 8-12 in deep with gently sloped sides. Keep inlet and outlet at the same elevation so the basin fills like a level pan before any water exits. Use a loamy mix or sandy loam for the top 6 in to speed intake, then plant with species that tolerate both wet and dry cycles.
Size the basin by catchment. A practical field rule is 1 sq ft of basin for 30-40 sq ft of contributing roof or slope in moderate rainfall areas. If water stands longer than 48 hours, loosen the base with a garden fork and blend in coarse sand to open the pore space.
Close checks after heavy weather confirm performance. If you see sediment fans at the inlet, add a small rock apron to spread flow before it enters the basin.
Hold the Soil With Plants, Mulch, and Erosion Fabrics
Soil stabilization starts at the surface. Lock loose ground with living roots, protect it with cover, and pin weak spots until plants knit the slope.
Groundcovers and grasses for slopes
Can plants stop soil erosion? Yes, when roots form a continuous net across the slope and foliage shields bare ground. Match species to sun and moisture first, then plant densely enough that leaves touch by the first growing season.
On hot, dry banks, use fibrous, clumping grasses and drought-tolerant groundcovers that root at nodes as they creep. On cool or part-shade runs, mix deep-rooted shrubs at wide spacing with quick-spreading groundcovers between them. Plant in a diamond grid, offsetting rows so gaps close faster. Water to settle, then taper to deeper, less frequent soaks so roots chase moisture below the surface.
Erosion blankets and netting
Use jute or coir blankets when rainfall or irrigation threatens fresh seed, new plugs, or bare repairs. Roll fabric downslope, keep seams tight, and pin every 18-24 in in a staggered pattern. At inlets or high-velocity zones, add extra pins along edges and around any cutouts.
Choose jute for short slopes and fast plant takeoff. Choose coir for longer support on steeper grades or where establishment may lag. Seed under the blanket or slit and tuck plugs through. The fabric reduces impact splash and holds mulch, buying time for roots to grip.
Pro tip – At the toe of the slope, trench the blanket edge 2-3 in into the soil and backfill before pinning. That buried edge prevents undercutting during the first heavy storm.
Low edging to lock mulch on slopes
Keep mulch from migrating by adding a subtle check at the upslope edge. Use a narrow strip of pavers, split branches, or steel edging set just above grade. The goal is a small shoulder that catches chips without damming water.
Set checks on contour and break them at intervals so water can pass through in wide, shallow gaps. If mulch still drifts, switch to coarser chips or a blend of chips over angular gravel so the top layer keys into the base. Re-top after major storms to keep a uniform, protective layer.
Plant choices for common slope conditions
| Plant type | Root habit | Sun-moisture fit | Slope fit | Establishment time |
|---|---|---|---|---|
| Creeping groundcovers | Nodes root along stems | Full sun to part shade – moderate | Gentle to moderate | Fast – one season |
| Clumping grasses | Dense fibrous roots | Full sun – low moisture | Moderate to steep | Medium – one to two seasons |
| Shrub anchors | Deep structural roots | Sun or part shade – variable | Steep sections with pockets | Slow – two seasons |
| Meadow mixes | Mixed fibrous roots | Full sun – moderate | Gentle with broad area | Medium – one to two seasons |
Mixing one shrub anchor row into a field of fast groundcovers adds depth anchoring without slowing coverage, and it reduces wash lines around isolated plants.
Strong plant cover, pinned fabric where needed, and simple edging work together to hold the face of the slope while roots take over the long-term job.
Redirect Flow to Reduce Slope Erosion: Drains, Terraces, Rock
When surface fixes are overwhelmed, move water through built paths. Match the method to slope, flow volume, and soil so the outlet works without scouring beds.
French drains and outlet basics
A French drain moves subsurface water to a safe daylight point. Use perforated pipe wrapped in fabric within washed gravel, then cover with soil or a path layer.
Set fall at 1-2 in per 10 ft so water moves without stripping fines. Keep trench depth below the root zone where seepage persists, usually 14-24 in. At the outlet, lay a geotextile pad and a small riprap apron so discharge spreads and drops energy. Add a cleanout at the high end for flushing after storm seasons.
Failure signals are simple to spot. Water bubbling up along the trench shows a flat or clogged run. A narrow scour line at the outlet means the rock apron is undersized. Increase apron width and stone diameter before deepening the trench.
Small terraces and retaining thresholds
Short grade breaks slow a long run and give water places to pause. Cut benches 18-36 in deep on moderate slopes and back them with compacted fill. Where height exceeds 24-30 in or soil is prone to slip, step in a low wall rated for the load and include weep holes every 3-4 ft to relieve pressure.
If the bank faces frequent storms, keep each lift below 24 in and stack two or three shallow benches rather than a single tall face. Tie each bench to a catch path that moves overflow sideways into the planned outlet from the drain system. Terraces add labor, but they reduce maintenance because the shorter drops limit rill formation.
I often notice damp stains and fine silt stripes along the base of small walls when weep holes clog; clearing those holes after big rains stops bulging and keeps the backfill dry.
Do rocks help with erosion?
Yes, when stone is sized to the flow and placed where energy peaks. Use rock check dams in narrow channels and riprap pads at pipe outlets or along short gullies. Key each dam into sidewalls by 6-8 in, keep the crest lower in the center, and space dams so the toe of an upper unit meets the crest of the next one below.
Size stone to channel width and drop. For a 1-2 ft wide run with moderate flow, fist to palm size rock works. For 3-4 ft or high-velocity discharge, move to head-sized pieces. If fine sediment piles behind dams and water starts cutting around the edges, widen the footprint and reset side keys deeper.
Hardscape options by slope and flow
| Method | Best use | Slope range | Flow volume | Maintenance |
|---|---|---|---|---|
| French drain | Seepage and perched water | 3-20 percent | Low to moderate | Flush and clear outlet each season |
| Terrace bench | Long runs that need grade breaks | 10-30 percent | Moderate | Inspect weep holes and backfill yearly |
| Rock check dam | Narrow swales or rills | 5-25 percent | Moderate | Repack side keys after major storms |
| Riprap apron | Pipe outlets and short gullies | 5-20 percent | High | Replace displaced pieces as needed |
Use the table to match method to slope and volume, then size outlets first. When the discharge point is calm and armored, upstream features hold longer and need fewer repairs.
Built features that move water on purpose protect plantings and keep the face of the slope intact while living roots mature.
After-Storm Maintenance and Fix-Now Checklist
High-flow events expose weak points. Walk the slope while the soil is still damp, read the marks water left, and correct small failures before they grow.
Inspect after heavy rain
Start at the top and move downslope. Look for new grooves, silt fans, floating mulch, and cloudy water still seeping from outlets. Check swale lips for low spots, fabric edges for lift, and drain outlets for displaced rock.

Touch the soil. If the surface crusts and sheds water after one squeeze, open it lightly with a fork to restore intake. If outlet water runs discolored for more than 2 minutes, flush the line from the cleanout and rebuild the rock apron wider by 6-12 in to spread discharge.
Repair rills and settle washouts
Treat narrow rills immediately. Backfill with the same soil, tamp in thin lifts, and regrade level with surrounding ground. Where depth exceeds 1.5-2 in or runs longer than 4-6 ft, break the run with a shallow cross check on contour before backfilling so the groove does not reform.
Re-pin any lifted jute or coir with staggered pins every 18-24 in and add extra pins along edges. Replace lost mulch with a coarser top layer so chips interlock. If a swale overtopped, raise the downslope berm by 1-2 in at the high point rather than deepening the channel, which preserves infiltration capacity.
I often notice a bright, clean stripe along fence lines where roof discharge hits bare ground; add a small splash pad or redirect the downspout before patching soil there.
DIY vs pro thresholds and codes
Keep repairs in-house when slopes are short, rills are shallow, and any wall is below 24 in. Call a contractor when a bank shows slipping soil, when terrace faces approach 30 in, or when drainage routes cross utilities.
Check local requirements before altering outlets near sidewalks or property lines. Call before you dig if trenching is part of the fix.
Quick fix list – cleanout cap key, extra outlet rock, pins, short jute strip, coarse chips, marking paint, short level, garden fork.
Small, timely fixes after each storm keep the system working while roots and structure mature, and they cost less than rebuilding after a season of neglect.
Practical Wrap-Up
Treat erosion control as a cycle you revisit, not a one-time fix. Use simple thresholds to pick the next move. Under 10 percent slope, rely on contour shaping, absorbent paths, and a modest soak basin. At 10-20 percent, add root-dense plantings and temporary fabric across exposed faces. Once a face approaches 25-30 percent or carries roof discharge, introduce a controlled outlet and break long runs with short benches before planting.
Follow a tight cadence while the system settles. Walk the site after the first 3 storms, then at the start of spring and fall. If outlet water runs brown for more than 60-120 seconds, widen and thicken the rock pad. If mulch forms curved tide lines, raise the upslope check by 1 inch and switch to coarser chips. If a swale lip shows low spots, build those points up rather than deepening the channel so infiltration stays high.
A compact starter blueprint keeps work moving. Mark live flow during rain, set one contour feature where water concentrates, plant a fast-cover ground layer, and create a calm outlet you can reach with a shovel. Maintain that loop until rills stop appearing between storms.
- Recheck after three storms, then seasonally
- Mark flow paths during a real rain
- Add one contour feature on the worst run
- Plant dense groundcover in a diamond grid
- Build a reachable, armored outlet
FAQ
Can you fix slope erosion without heavy equipment?
Yes, on small banks you can phase work over a few weekends by shaping one shallow contour feature, anchoring the face with dense groundcover plugs, and adding a reachable outlet. Keep DIY scope to slopes under 30 percent, runs shorter than 40 ft, and walls under 24 in; beyond that, bring in a contractor for safe grading and drainage.
What happens if a rain garden holds water longer than 48 hours?
Prolonged standing water signals a tight subsoil. Fork the basin floor 6-8 in deep, blend in coarse sand to open pore space, and raise the outlet lip by 1 in so the basin spreads water before it exits. If water still lingers after the next storm, add a small underdrain to daylight.
Do I need fabric under mulch on slopes?
Use jute or coir under mulch when new seed or small plugs face early-season storms or when slope runs exceed 25 ft. Skip fabric once roots tie the surface and switch to coarser chips over angular gravel, which locks the top layer so it resists sliding without a membrane.
How do I know a French drain is undersized?
Cloudy discharge that lasts more than 2 minutes after peak flow, bubbling along the trench, or outlet scour are clear signals. Upsize the rock apron, verify 1-2 in of fall per 10 ft, and add a cleanout for seasonal flushing; if seepage persists, increase pipe diameter or add a parallel line.
Can you redirect a downspout into the yard without causing erosion?
Yes, diffuse the flow first with a splash block or perforated diffuser, then send it across a short armored path into a small soak zone. Keep outlet grade level for the first 2-3 ft and tie the path into planned yard drainage so water never cuts across beds.
Is native grass seeding enough for first-season erosion control?
Typically no on active slopes. Pair seed with a jute blanket and a light mulch cap so rain does not dislodge seedlings. Expect usable cover in 6-10 weeks in warm soil; until then, keep foot traffic off the slope and patch any thin areas after major storms.
When is a slope too steep for DIY terraces?
Avoid benching work once faces approach 30 percent or when soil shows slip planes after rain. At that point the risk of sloughing rises, and engineered walls with proper weep holes and base prep become the safer route.
Which small mistakes cause most erosion-control failures?
Low lips on the upslope side of swales, fabric edges left unpinned at the toe, and undersized rock at outlets. Correct by lifting the lip by about 1 in where water bypasses, trenching and backfilling the fabric edge, and widening the rock pad so discharge spreads before it accelerates.