Updated October 20, 2025
Leaving home even for a short stretch can undo weeks of growth. A few hot afternoons are enough for pots to bleach, soil to crust, and stems to fold overnight.
The fix isn’t complicated, but it’s never luck – it’s a short rehearsal that locks in moisture and removes every silent leak before you leave. With the right placement, a shaded surface, and one dependable delivery method, you’ll walk back in to find leaves upright and color untouched, as if time paused in your garden.
Key Takeaways
- Discover the small pre-trip move that stops midday wilt
- Use one watering system per zone for perfect balance
- Learn the test that reveals hidden leaks before you leave
- Find the airflow tweak that cools roots and saves water
- Avoid the single mistake that cooks plants while you’re gone
Table of Contents
Pre-Trip Countdown – Actions 7-1 Days Before Leaving
A short timeline keeps vacation plant watering simple and reliable. The goal is lower water demand and a root zone charged with moisture before you lock the door.
7-3 days out – light pruning and drainage check
Cut a little growth to reduce transpiration and confirm every container drains cleanly.
Remove soft tips and a few leaves from fast growers. Take no more than 10-15 percent of foliage. Skip pruning on recently stressed plants.
Run water through each pot and time the exit. If it takes longer than 5 minutes to see runoff in a typical 10-12 inch container, loosen the mix with a thin dowel or add a few extra side holes near the base.
If a saucer holds water, elevate the pot on two sticks or feet so the base can dry between cycles. For fabric pots, shake the sides to break dry channels.
I often notice that freshly repotted plants shed moisture faster than established ones, so I give them extra surface cover later in this timeline.
2 days out – deep soak and surface cap
Fully charge the profile so roots start with a full tank, then slow evaporation at the top layer.
Water each container in two passes, 10-15 minutes apart, until the mix darkens through and the pot feels noticeably heavier. Aim for even wetness down to 2-3 inches.
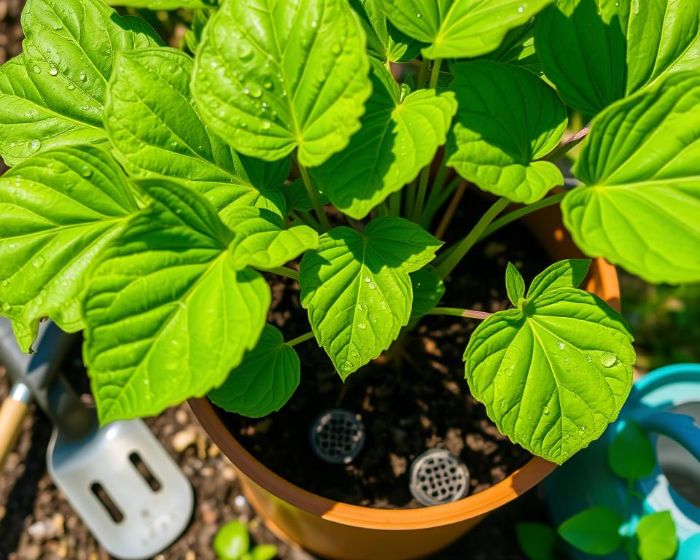
Add a thin surface cap to cut airflow across the soil. Use 0.5-1 inch of fine bark, pre-wet coco chips, or a mesh of moistened burlap for small pots. Keep material off the stem to avoid rot. For garden beds, top up existing cover so you reach your usual depth without burying crowns.
If the pot still feels light within 12 hours, repeat a single pass and re-check weight.
Final 24 hours – move off heat sources and final checks
Limit heat and confirm any aids are positioned correctly.
Slide containers off hot concrete, metal grates, or dark decking. A 5-10 degree drop at the base can extend intervals by a day. Pull pots 12-18 inches back from west-facing glass to avoid late-day spikes.
Top off any reservoirs you plan to use and secure lines so emitters cannot shift. Pre-measure one watering can for a helper and label it by area or plant group. Note the date you leave on a visible tag near the door.
Quick check before you go:
- Soil color should be uniformly dark, and the container heavier than usual.
- No standing water in saucers; bases sit on feet or spacers.
- Pots are off hot surfaces and away from afternoon heat pockets.
A clear countdown prevents last-minute scramble and starts every setup with a moist, stable root zone.
Pick a Vacation Watering Method That Matches Trip Length
Match the trip length and plant load to one approach and keep setup simple. Use one primary method per zone so troubleshooting stays clear when you water plants while on vacation.
DIY choices – plant wick method and bottle drippers
Use wicks and bottle drippers for short trips or small pots.
For a wick, thread cotton cord through the drain hole or lay it on the soil and route the other end into a raised container of water. Pre-soak the cord, then keep the reservoir 2-4 inches above the pot rim so capillary flow stays consistent. One wick suits up to an 8-10 inch pot. Use two for larger diameters.
Bottle drippers work for a weekend or a long weekend. Puncture a pinhole near the cap edge, invert into a pilot hole at the soil edge, and test on a spare pot to confirm a slow drip rate. If you see surface crusting or a wet crater, enlarge the pilot hole and pack it tighter to spread moisture.
Pro tip – Prime wicks in warm water, then run them downhill without sharp bends to avoid air pockets that interrupt flow.
Set-and-forget options – drip irrigation timer and self-watering planters
Scale up for patios and mixed container groups.
A drip irrigation timer paired with 1 gph emitters covers 7-21 days. Start with 10-15 minutes every 24 hours for mild weather. For hotter spells, run two shorter cycles 12 hours apart. Use pressure-compensating emitters on uneven surfaces to avoid dry pots at the high end.
Self-watering planters carry plants for multiple days based on reservoir size and leaf area. Large tubs with deep reservoirs last far longer than small cachepots. Keep the fill tube capped, and seat the wicking shelf fully so roots contact the moist zone without sitting in free water.
When to use a plant sitter
Bring in a helper when you have many mixed containers or thirsty crops in heat.
Leave one labeled can per area with the day and amount written on tape. Move fragile pots to eye level and group by thirst so a single pass covers each group. A short video or two photos with arrows prevents miswatering better than a long note.
| Method | Typical duration | Setup time | Cost range | Failure risk | Best for |
|---|---|---|---|---|---|
| Plant wick method | 3-7 days | Low | Low | Air gaps, dry reservoir | Small indoor pots |
| Bottle dripper | 2-4 days | Low | Low | Surface channeling | Weekend trips |
| Drip irrigation timer | 7-21 days | Medium | Medium | Battery drain, emitter clogs | Patios, plant groups |
| Self-watering planters | 5-14 days | Low | Medium | Mis-seated shelf, empty tank | Large containers |
| Plant sitter | Any length | Low | Variable | Instruction errors | Mixed collections |
Timers need fresh batteries and a test cycle before departure. Wicks and planters depend on a full reservoir and correct height relationships.
A single, well-chosen system per zone keeps water delivery predictable and easy to verify at a glance.
Test and Calibrate – 24-Hour Dry Run Before You Go
A short dry run exposes weak links before you leave. Set your drip irrigation timer, run one full day of cycles, then adjust based on measured output and soil feel.
Measure output and soil feel after 12 hours
Confirm that each pot receives a slow, even dose.
Place a marked cup under one emitter and run a timed cycle. For 1 gph emitters, a 10-minute run yields about 6-7 ounces. If the cup shows far less, clean the emitter or replace it. Lift each container; the pot should feel noticeably heavier and the surface should darken without puddles.
Push a slim dowel 2 inches deep and check the tip. Damp with no smeared mud is the target. If the tip comes up dry, lengthen the run by 2-3 minutes. If it comes up muddy, shorten the run or widen the interval.
- 12-hour checks – output volume, pot weight change, dowel moisture, and surface color.
Adjust timer for forecast heat or mild weather
Tune runtime and interval to match expected highs.
If the 3-day forecast shows highs above 90 F with wind, split the daily total into two cycles 10-12 hours apart to control losses. Keep the same daily volume, just divide it. If highs sit near 70 F and wind is low, run a single cycle and reduce runtime by 20-30 percent.
Stagger zones by a few minutes so water pressure remains stable across lines. For porous clay pots, add 1-2 minutes per cycle compared with plastic of the same size, since clay vents more water.
Check lines, emitters, and reservoirs for leaks or clogs
A quick inspection prevents dry spots and messes.
Walk each line while the system runs. Look for pinhole sprays, wet fittings, or drips at connections. Replace brittle tubing and push-fit connectors until they seat firmly. Clean clogged emitters in warm vinegar or swap them out.
Top off reservoirs and confirm lids fit tight so debris cannot enter. If you use battery power, install new cells and run at least two timed events to confirm cycle start and stop.
I often notice that timers with low battery warnings slip cycles within a day, so I replace batteries before the dry run and write the date on the housing.
A 24-hour test locks in flow rates, timer behavior, and soil response so your setup performs as expected once you are away.
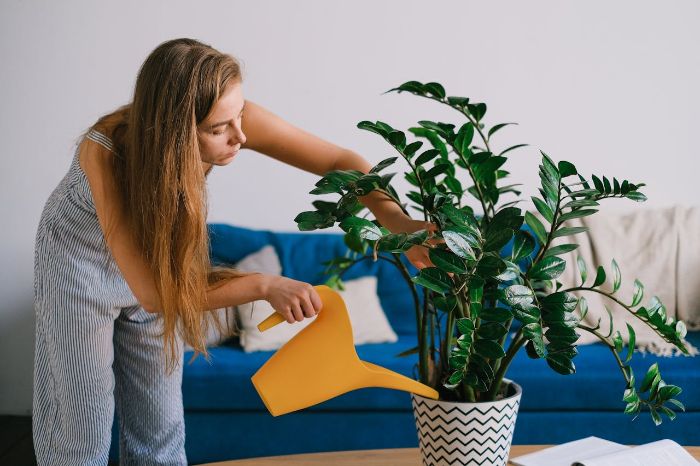
Indoor Plants – Light, Humidity, and Safe Vacation Watering
Indoor setups work best when demand drops and a clean water source is in place. Aim for moderate light, room temperatures in the low 70s F, humidity near 40-60 percent, and simple delivery that cannot spill.

Light and temperature control
Reduce exposure so leaves transpire less while you are away.
Pull pots 12-18 inches back from west or south windows, or draw sheer shades to cut harsh afternoon rays. Keep foliage off glass to prevent heat spikes. Move plants away from heaters, appliance tops, and vents that run automatically.
Hold the room near 68-74 F. If the space swings hotter than 80 F in late day, relocate the collection to an interior room with consistent light. Avoid direct AC blasts; cool air drops leaf temperature fast and dries small pots.
Humidity aids and air movement
Create a humid pocket around foliage without wetting the crown.
Set pebble trays under planters and keep the water line just below the top of the stones so pots do not sit in water. Cluster containers 2-4 inches apart to retain moisture in the air film between leaves.
Run a small fan on low for 6-8 hours per day to prevent stagnant corners. Good airflow keeps leaf surfaces dry while the air holds more moisture. If you see condensation on nearby glass, shorten fan time and lower water levels in trays.
Small pot strategies indoors
Tiny containers dehydrate first; give them a controlled supply that will not flood.
For 4-6 inch pots, insert a thin cotton wick into the root zone and route the tail to a jar placed 1-3 inches above the rim. Use a jar with a tight lid and a small hole for the cord to limit evaporation. Mini domes or clear produce clamshells with a few vent holes can slow loss for succulents and herbs without creating heat build-up.
If a helper visits, pre-fill one labeled container per shelf with the exact volume and leave a single line of directions. Keep fragile plants at eye level so the person watering can see soil color changes and avoid overfills.
Pro tip – Place a shallow tray or folded towel under any indoor reservoir to capture condensation and protect floors.
Quick indoor checks before leaving:
- Blinds set, pots pulled back from hot glass and vents.
- Pebble trays filled below stone tops, fan timer programmed.
- Wicks primed, jars capped, and helper cans labeled.
Lower demand plus a tidy indoor supply keeps houseplants hydrated without spills or surprises.
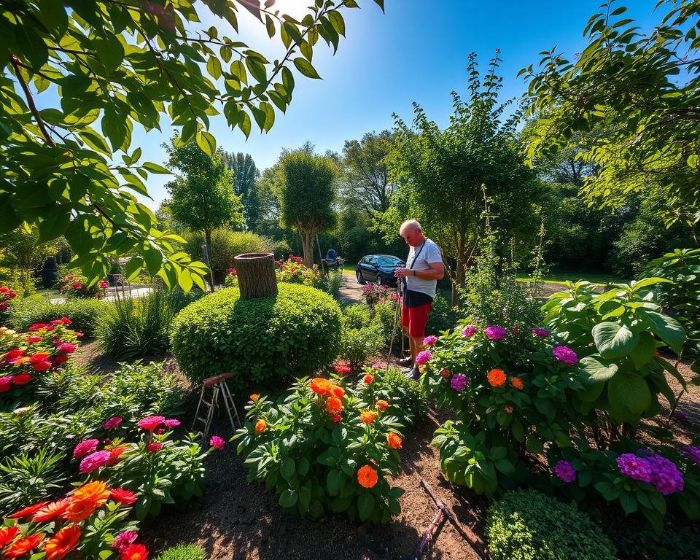
Outdoor Containers and Beds – Shade, Wind, Mulch, and Realistic Durations
Outdoor setups survive trips when exposure drops and the root zone holds moisture. Prioritize shade in the hottest window, break wind at pot height, cap the surface, and set realistic timelines for self-watering planters.
Create shade and block wind for patios and balconies
Reduce heat load during the 2-5 pm window and cut airflow across soil.
Aim for 40-60 percent shade over containers that face west or sit on dark decking. Hang a sail or clamp a portable panel so it shades the pot, not just the foliage. Lift pots 0.5-1 inch on feet to let air move under the base and cool the bottom.
Use a wind break at container height. A lattice panel or plant screen 12-24 inches up reduces gusts that strip moisture and tilt tall pots. If afternoon highs run above 90 F with dry wind, cluster containers 2-4 inches apart to share humidity without trapping heat.
Quick placement checklist:
- Shade aimed at 2-5 pm sun; pot bases lifted off hot surfaces.
- Wind break set at rim height; tall pots secured against tipping.
- Groups arranged with gaps for airflow, not pressed leaf to leaf.
Mulch choices for pots and beds
Cap the surface to limit evaporation without sealing air exchange.
For containers, use 0.5-1 inch of fine bark, pre-moistened coco chips, or a thin layer of clean gravel. Keep material away from stems by 0.5 inch to prevent rot. In beds, top up to a total depth of 2-3 inches with chipped wood or shredded leaves, keeping crowns visible.
Gravel sheds heat on dark decks and metal stairs. Coco holds water well but needs pre-wetting. Fine bark balances airflow and moisture on mixed plantings. If you see pale, crusted soil between particles, add a little more material or switch to a finer mesh to close gaps.
I often notice that dark decks raise container base temperatures 10-15 F by late afternoon, so risers and a light-colored saucer under the feet help keep potting mix from drying out early.
How long can plants go in self-watering pots
Duration depends on reservoir volume, plant size, and weather.
Expect roughly 3-5 days from small inserts with 0.5-1 quart tanks in mild weather. Medium tubs with 1-2 gallons often reach 7-10 days. Large planters with 3-4 gallons can hold for 10-14 days when highs stay below the upper 80s F.
Shorten expectations by 30-40 percent when highs exceed 95 F or wind is frequent. Lengthen by 20 percent if containers sit under 40-60 percent shade and air is humid. Seat the wicking shelf firmly and fill the tube until overflow appears so the capillary path stays continuous.
Outdoor control comes from exposure, surface cover, and honest timelines. Set those three right and containers bridge vacations without mid-trip failures.
Practical Wrap-Up
Treat vacation watering like risk management. Rank containers by thirst, then set backups where failure hurts most. Small terracotta under 10 inches, fine roots, and dense foliage push demand; plastic and glazed ceramic hold longer. If highs will exceed 95 F or wind runs 15-20 mph, add shade at pot height and split delivery into two shorter cycles that total the same volume.
Use clear failure signals to trigger fixes. A pale ring at the rim while the core stays damp means surface loss outpaces delivery – lengthen runtime slightly or add a thin surface cap. Algal sheen near emitters points to excess runtime – shorten cycles and increase airflow. Tipping from dry, light pots signals base heat – add risers and move off dark decking. After the trip, run one audit round: weigh a few pots, note hours-to-wilt for the thirstiest plant, and adjust the next plan by that measured gap.
Compact blueprint for the next trip: set one method per zone, build one backup per high-risk pot, and document settings. A single labeled photo of each zone saves errors and speeds setup. Use the phrase water plants while on vacation once in your notes so any helper understands the exact context.
- Schedule a post-trip audit and update notes.
- Sort pots by thirst and exposure risk.
- Pick one delivery method per zone.
- Add one backup to the thirstiest container.
- Photograph settings and label runtimes.
FAQ
How long can plants go in self-watering pots while I’m away?
Expect 3-5 days from small inserts with 0.5-1 quart tanks, 7-10 days from mid-size planters with 1-2 gallons, and 10-14 days from large reservoirs holding 3-4 gallons when highs stay under the upper 80s F. Cut those numbers by 30-40 percent if highs exceed 95 F or wind is frequent, and extend by about 20 percent with 40-60 percent shade and humid conditions.
Can you leave houseplants in a bathtub with water?
Only if pots sit above the water line on towels or a rack and draw moisture via wicks. Submerging drain holes invites root rot. Keep water 0.5-1 inch below pot bases, run a fan on low for 4-6 hours daily, and cap the room near 68-74 F to slow loss without creating a damp, stagnant microclimate.
How long can I leave outdoor containers without attention in a heat wave?
In 95-100 F with wind, unshaded 12-inch containers can wilt in 24-36 hours. Add 40-60 percent shade, raise pots 0.5-1 inch off hot surfaces, and split irrigation into two cycles per day to reach 48-72 hours. Terracotta loses water faster than plastic or glazed ceramic, so reduce intervals for clay by a third.
What happens if a wick stops siphoning while I’m away?
The surface dries first, then leaves flag even though the reservoir is full. Prevent it by fully soaking the cord before install, keeping the reservoir 2-4 inches above the rim, and avoiding tight bends that trap air. If testing shows intermittent flow, switch to a thicker cotton cord or shorten the run so gravity helps.
How should I program a drip irrigation timer for a 7-10 day trip?
With 1 gph emitters, start at 10-15 minutes every 24 hours in mild weather. In 90 F plus conditions, split the same daily total into two runs 10-12 hours apart. Replace batteries before departure and run a 24-hour dry check to confirm cycle start and stop times for the drip irrigation timer.
Is wrapping soil with plastic to cut evaporation a safe plan?
No. Plastic traps heat at the surface and blocks gas exchange, which pushes roots toward anaerobic conditions. Use a breathable cap instead, such as 0.5-1 inch of fine bark or pre-wet coco chips, keeping material 0.5 inch away from stems and crowns.
Can you group containers to extend watering intervals without causing disease?
Yes, if you leave 2-4 inches between pots and keep foliage from touching. Grouping raises local humidity and lowers wind impact, but prevent leaf-to-leaf contact and maintain airflow with a small fan on low for 4-6 hours if the area is enclosed.
What’s the simplest way to communicate watering needs to a helper when you water plants while on vacation?
Photograph each zone, write the runtime or volume on tape placed on one watering can per area, and tag the date you leave near the door. Ask for a single check at the same time of day, and request one feedback photo so you can spot pale rims, droop, or overflow and tweak the plan next time.