Soil texture analysis decides whether your garden thrives or struggles. Misread it once and you’ll chase water problems all season, from shallow roots that dry too fast to heavy beds that stay soaked long after rain.
A quick jar and feel test shows how your soil behaves under pressure – how fast it drains, how long it holds air, and how much it feeds the roots. Once you understand those reactions, you can water with precision, match plants to their ground, and stop fighting what the soil is trying to tell you.
Key Takeaways
- Jar test reveals sand, silt, and clay percentages.
- Feel method confirms texture quickly without equipment.
- Texture class predicts drainage and water-holding behavior.
- Results guide plant selection and irrigation scheduling.
- Amendments target problems typical of each texture.
Table of Contents
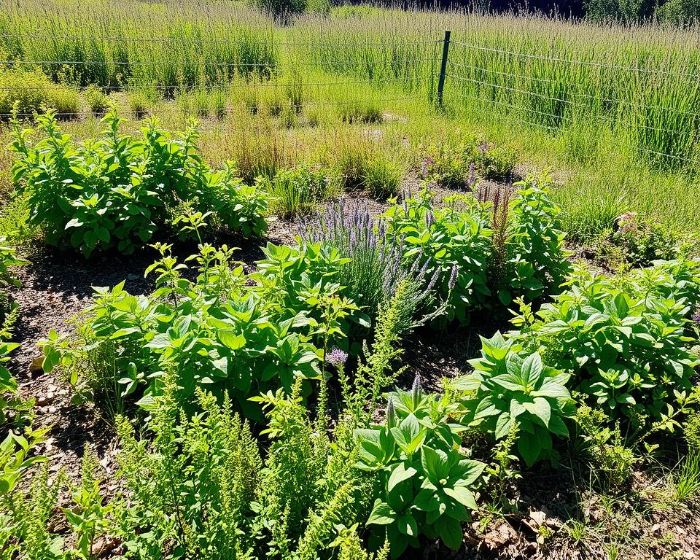
Why Texture Matters for Plant Health
Before any soil texture analysis, understand how particle mix controls water, air, and nutrients around roots. Texture tells you how fast water moves, how long moisture stays, and how easily roots push through.
Texture vs structure – one clean boundary
Texture is the ratio of sand, silt, and clay. Structure is how crumbs and channels form over time. Texture changes slowly unless you physically replace soil. Structure shifts seasonally with organic matter and traffic. Keep the concepts apart so field checks stay clear and actions stay targeted.
Particle size and pore space – how it drives root conditions
Particle size sets pore size. Large pores drain quickly and refill with air. Fine pores hold moisture longer and can exclude oxygen after heavy irrigation.
Use simple ranges to read behavior in the field:
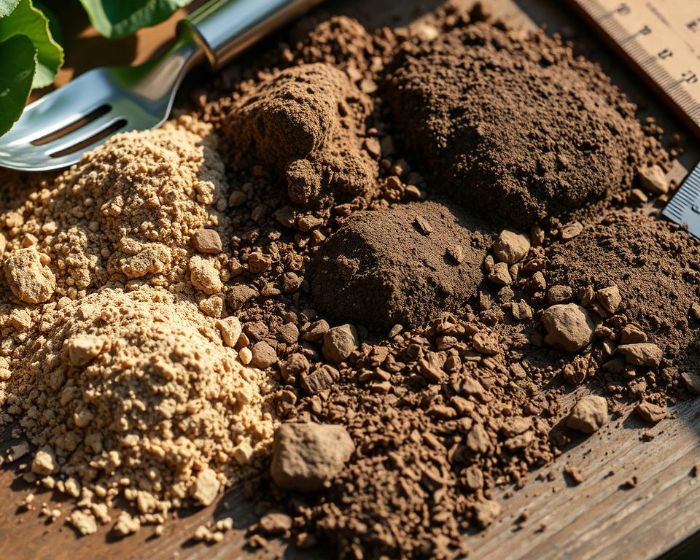
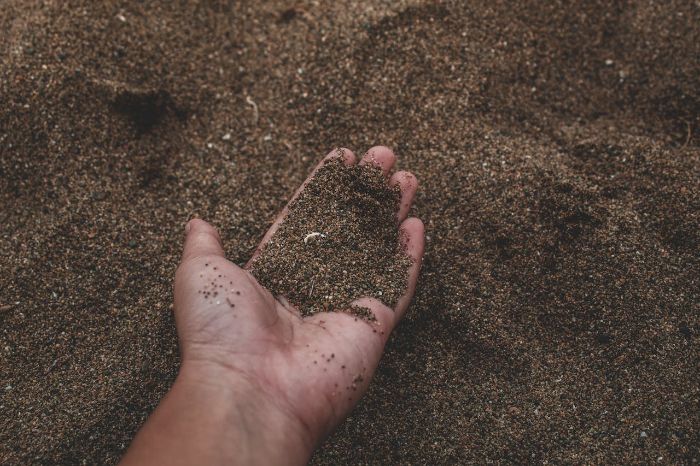
Sand is roughly 0.05-2 mm, silt is about 0.002-0.05 mm, clay is under 0.002 mm. More sand means fast drying and lower cation holding. More clay means slower drying, higher nutrient holding, and higher compaction risk when worked wet.
If light watering still leaves a surface sheen after 2-3 minutes, expect a clay-heavy mix. If a hand sample goes from damp to dry in under 30 minutes on a breezy day, expect a sandier blend.
Common texture classes in home gardens – quick orientation
Sandy loam favors quick turnaround crops and deep watering intervals, but nutrients leach faster. Loam balances drainage with holding, giving wider margins for scheduling. Clay loam keeps moisture and nutrients longer, yet roots struggle if you irrigate right before a cool night.
Failure signals to watch:
Fast midday wilt that recovers at dusk hints at sand-dominant beds. Persistent puddles, algae film, or sticky footprints a day after rain point to clay-rich soil. Leaf tips that brown after frequent light watering often indicate poor aeration around roots.
Close reading of texture sets expectations for water movement, oxygen, and nutrient behavior. With that baseline, testing methods and interpretation become straightforward and decisions in the garden become consistent.
At-Home Soil Texture Analysis Methods
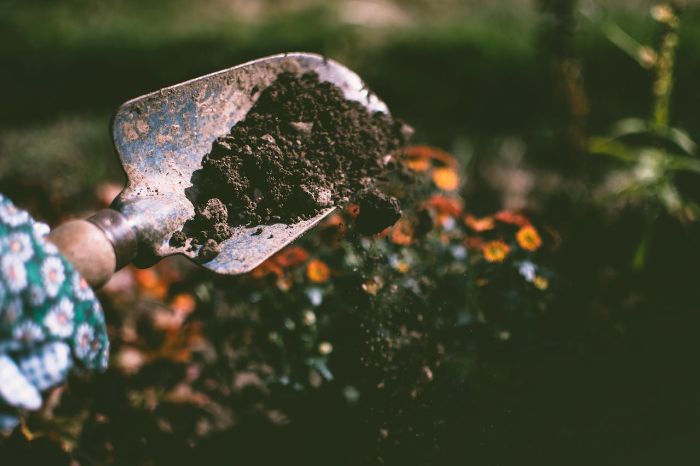
You can run a reliable soil texture analysis with simple tools and a clean sampling workflow. Collect representative material, then use a jar test for particle layering and a quick feel method for a field check before you irrigate or plant.
Sampling that avoids bias
Representative sampling matters more than fancy gear. Take small cores from 6-10 spots across the bed, mix them in a clean bucket, then pull a composite sample.
Sample beds to roughly 4-6 inches and turf to about 2-4 inches so you study the active root zone. Skip drip lines, compost pockets, and obvious high spots. If rain hit within 24 hours, wait until the surface dulls and footprints no longer smear.
Pro tip – Label bags by bed and date, then dry the composite sample on newspaper overnight so moisture doesn’t skew the feel test.
Jar test – step sequence and timing
The jar test separates sand, silt, and clay into readable layers for simple math later.
- Fill a clear 1-quart jar half full of the dried composite sample.
- Add water to near the shoulder plus 1 teaspoon of non-foaming dish soap.
- Shake hard for 60 seconds to fully suspend particles.
- Set the jar down and mark the sand layer at 1-2 minutes.
- Mark the silt layer at 1-2 hours as the middle band forms.
- Mark the clay top after 18-24 hours when the water clears.
Read layer heights in millimeters against a strip of tape. If the top water stays cloudy after 24 hours, add a pinch of gypsum, shake again for 30 seconds, and recheck in the morning.
Pro tip – I score the tape at 2-minute, 2-hour, and 24-hour checks so the marks line up cleanly when you convert to percentages later.
Feel method basics – moisture and ribboning cues
How to determine soil texture by hand? Moisten a small pinch until it molds like putty without dripping, then form a ribbon by pressing it between thumb and forefinger.
Gritty feel with a short ribbon under 1 inch suggests a sand-leaning mix. Silky flour-like feel that forms a ribbon near 1-2 inches points to silt-rich loam. Smooth and sticky with a ribbon beyond 2 inches signals higher clay. If the sample smears on your palm and shines, let it dry a touch and retest so moisture doesn’t mask grit or silk.
Pro tip – Rub a pea-sized ball across your front teeth; distinct grit indicates sand presence when fingertips disagree.
Good sampling plus two simple tests give you repeatable field data. With marked layers and hand cues recorded, you’re ready to translate numbers into a texture class.
Interpreting Results with the Soil Texture Triangle
Turn jar measurements and hand cues into a texture class you can use for irrigation and plant selection. Convert layer heights to percentages, then read the soil texture triangle to assign the class and log it for future work.
Convert layer heights to percentages – quick math and rounding
Use the same jar you marked earlier. Measure total settled height, then measure the sand band, the silt band, and the clay cap.
Calculate each fraction as height divided by total, multiplied by 100. Round at the very end. If totals come out to 98-102 due to marks or meniscus, normalize to 100 and adjust the largest fraction by the difference.
If percentages sit within 2-3 points of each other, repeat the read on fresh daylight and confirm with a second jar drawn from the same composite. Record moisture, weather, and sample location so you can compare runs later.
Pro tip – Tape a flexible metric ruler to the jar and mark zero at the glass bottom. Millimeter marks cut down on rounding errors.
Use the soil texture triangle – axes and a working example
The triangle uses three axes: clay on the left side, sand along the base, silt on the right side. Plot clay first because it controls the diagonal lines across the diagram.
Example workflow – a jar shows 60 percent sand, 25 percent silt, and 15 percent clay. Plot 15 on the clay axis and draw a line across. Plot 60 on the sand axis and draw a line upward. Where the two lines meet is the class, in this case sandy loam.
Common misreads to avoid:
- Plotting silt on the sand axis or vice versa
- Rounding each band before calculating percentages
- Using wet slurry height instead of settled layers
- Measuring in inches on one band and centimeters on another
- Totals that do not equal 100 after rounding
Borderline mixes – tie-breakers and recordkeeping
If the point lands within one grid of a boundary, write down both candidate classes. Use the feel ribbon length as the tiebreaker and keep the class that matches ribbon behavior within about 0.5-2 inches.
When results straddle lines due to small errors, keep the original marks on the jar and re-measure after another 12-24 hours of clearing. If two runs within a week fall on different sides of the same boundary, log the range and manage as the finer-textured option for irrigation planning.
Recheck texture after any large soil replacement or after a heavy season of organic matter additions. A quick repeat in spring keeps your records aligned with current field conditions.
Clear, repeatable numbers make the triangle quick to use and easy to revisit. With a confirmed class on record, garden behavior predictions will land much closer to reality.
What Your Texture Class Predicts in the Garden
Texture class sets water movement, oxygen access, and nutrient behavior long before weather or irrigation choices. Read the patterns below to plan watering rhythm, fertilizer timing, and foot traffic limits with fewer surprises.
Water movement and oxygen risk by class
Water runs fastest through sandy blends and slows as clay content rises. Fast flow means quick air return after irrigation, while fine pores in clayey mixes hold moisture longer and can delay oxygen recovery.
If the surface darkens, then lightens within 20-40 minutes on a breezy afternoon, expect a sand-leaning bed that needs deeper but less frequent watering. If footprints still print hours after rain, expect a clay-rich mix that benefits from longer intervals and slower application rates. When puddles linger past 2 hours in mild weather, pause irrigation and let pores vent before rewatering.
Short roots flag low oxygen first. Watch for limp growth the morning after a heavy soak in cool conditions; stagger irrigation and reduce event volume by 20-30 percent when that pattern shows.
Nutrient retention and leaching patterns
Clay and organic surfaces hold cations well, so nutrients stick around longer in clay loam than in sandy loam. Sand loses nitrate quickly with frequent light watering, especially during warm spells.
If fertilizer fades within 10-14 days on a sand-leaning bed, switch to smaller doses more often and water in with a single pass. If a clay-rich bed holds color for 4-6 weeks but tips show burn after hot afternoons, reduce dose size and avoid feeding right before a cool night.
Granular products move slowly in clay and can sit near the surface. In that case, water long enough to move nutrients into the root zone without pushing them beyond it. A 15-25 percent increase in event duration works better than an extra feeding.
Seasonal temperature and moisture swings
Sand warms early in spring and cools quickly at night. Clay warms late and holds heat after a warm spell. That lag drives irrigation timing and crop timing.
In spring, seed warm-season crops earlier on sand-leaning beds and later on clay-leaning beds. During heat waves, sandy plots may need shorter intervals with more depth; clay plots may tolerate longer intervals but suffer if watering lands right before a cool night. After a week of rain, delay foot traffic on clay loam by a day to avoid compaction; sandy loam can often take light work once the surface loses its sheen.
A simple calendar cue helps: revisit texture-based watering intervals at the first prolonged warm week and again when nights drop under 55 F, because pore behavior changes with temperature.
| Texture class | Drainage | Water-holding | Nutrient retention | Compaction risk | Management focus |
|---|---|---|---|---|---|
| Sand | Fast | Low | Low | Low | Deeper, less frequent watering |
| Sandy loam | Moderately fast | Moderate-low | Moderate-low | Low-moderate | Split feedings, mulch to slow loss |
| Loam | Moderate | Moderate | Moderate | Moderate | Flexible scheduling across seasons |
| Clay loam | Slow-moderate | Moderate-high | High | High | Longer intervals, avoid traffic when wet |
| Clay | Slow | High | High | Very high | Slow application rates, strict no-wet traffic |
Use the table as a baseline, then fine-tune by watching how long the surface stays dark, how quickly plants recover after hot afternoons, and how long fertilizer effects last between feedings.
A confirmed texture class turns irrigation and feeding into a repeatable routine. Adjust volume and timing to the class first, then refine for crop type and weather.
Actions After Soil Texture Analysis
Turn the class into field moves you can repeat. Set plant choices, irrigation rhythm, and surface management to match what the soil will actually do.
Match plants to texture strengths
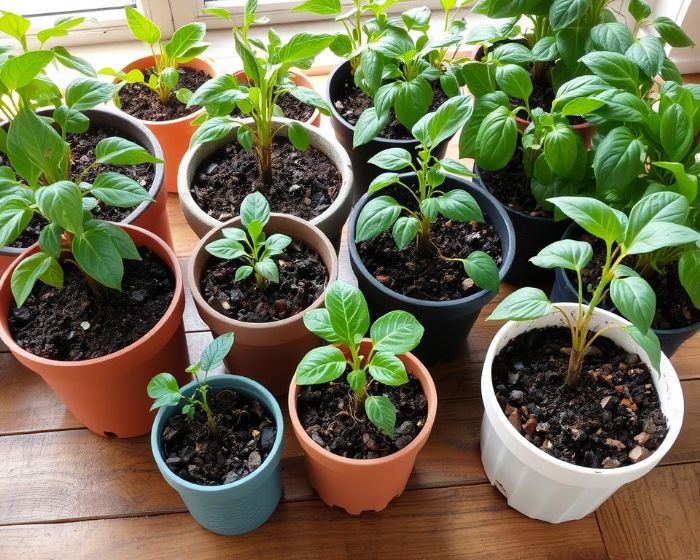
Pick crops and ornamentals that naturally fit the pore pattern. Deep-rooted vegetables, Mediterranean herbs, and prairie grasses handle sand-leaning beds because roots can chase moisture between events. Clay-leaning beds favor crops that tolerate slow drying and cooler spring soil, like brassicas and many shade perennials.

If you must plant a moisture-hungry crop in a sand-leaning plot, group it in one zone and build a wider root volume with composted fines before planting. If you must grow a drought-tolerant plant in clay, raise the bed 3-5 inches to give oxygen a head start after rain.
Pro tip – When in doubt, choose cultivars with fibrous roots for sand and taproot types for clay, then train irrigation to that root habit rather than forcing the soil to act differently.
Irrigation timing and volume cues
Use interval and dose as the two levers. On sand-leaning beds, extend the dose and shorten the interval during warm spells so water reaches the deeper profile that still holds moisture. On clay-leaning beds, keep the interval longer and split the dose into two passes about 20-40 minutes apart to reduce surface saturation.
If water disappears on contact and leaf tips flag by midday, increase event depth by 0.2-0.3 inches and hold the interval. If puddling forms within 60-90 seconds, halve the pass, wait until the surface loses shine, then finish the event. Recheck intervals after new mulch, after a heat wave, and after a cool snap, because pore behavior shifts with temperature.
A monthly spot check helps – run one zone until moisture reaches 6-8 inches by probe or spade, then time how long that takes. Use that time as your event benchmark for that zone until weather changes.
Mulch and organic matter strategy
Mulch controls evaporation and surfacing crusts while organic additions tune pore balance over seasons. For sand-leaning beds, use a denser mulch like shredded bark at 2-3 inches and refresh midseason to keep the cover intact. For clay-leaning beds, use a looser texture like coarse chips at 1.5-2 inches to reduce surface sealing after rain.
Work in composted material 1-2 times per year rather than dumping heavy loads once. In sand, composted fines boost water holding without collapsing pore space. In clay, well-finished compost plus coarse leaf mold opens channels without turning the top into paste when wet.
Avoid mixing raw wood chips into the root zone. Keep chips on top and let microbes work downward. If a crust forms after storms, use a fork to lift only the top half inch before re-mulching so you preserve the structure you already built.
Tying actions to the class keeps watering, feeding, and surface care predictable. Log plant fit, event timing, and mulch depth by bed so small adjustments add up over the season.
Practical Wrap-Up
Soil texture analysis only earns its keep when it drives a routine. Set a cadence: one baseline in spring, a quick recheck after the first long heat week, and another pass when nights fall under 55 F. Retest after any big change such as adding a full wheelbarrow of compost per bed or replacing topsoil. Keep a simple log with date, jar percentages, class, irrigation interval, and mulch depth so adjustments build over time.
Use clear triggers to change course. If a zone still flashes puddles after 90 seconds, split the next watering into two lighter passes. If midday flagging shows up two days in a row during a warm spell, increase event depth by a small notch and hold the interval. After storms, wait until footprints stop smearing before any traffic on clay-leaning beds. When a bed’s class drifts on repeat tests by more than 5 percentage points of clay or sand, re-map plant groups and tweak irrigation blocks rather than forcing the old schedule.
- Re-map plants if class shifts on repeat tests
- Log jar percentages and class by bed
- Set spring baseline and two seasonal spot checks
- Adjust irrigation when puddles exceed 90 seconds
- Delay traffic until footprints stop smearing
FAQ
When should I retest after adding organic matter so results stay useful?
Retest when incorporated compost or soil blends exceed about 0.75 inch across the bed in one season, after any topsoil delivery, or after major grading. If you only topdress with a thin layer and do not mix it in, run a quick check once a year rather than each time you mulch.
How precise do my percentages need to be on the soil texture triangle near a boundary?
Within 2-3 percentage points on clay can flip a class at grid edges. Re-measure band heights in millimeters, normalize totals to 100 at the end, and confirm with a second read taken in bright, even daylight before you lock the class.
The jar stays cloudy after a day. How do I fix a slow clearing during a jar test soil texture run?
Decant the top inch of cloudy water, top up gently, add about 1 teaspoon of gypsum to flocculate fines, shake for 30 seconds, and let it settle another 12-18 hours. If turbidity persists, refrigerate the jar for 1-2 hours to reduce convection, then recheck the bands.
Is the feel method reliable in cold weather or with very dry samples?
Cold samples stiffen and mislead ribbon length. Warm a small pinch in your palm for 20-30 seconds, then dampen slowly until it molds without dripping. If you can only form crumbs, wait 2-3 minutes after moistening and try again so water redistributes through fines.
How many sampling points should I take in mixed beds of different sizes?
For beds under 50 square feet, pull 4-6 cores spread evenly. For 50-200 square feet, use 8-12 cores. If a bed has distinct zones such as shade and full sun, composite each zone separately so irrigation decisions match local behavior.
Can I use soil texture analysis on potting mixes with peat, bark, and perlite?
The soil texture triangle assumes mineral particles, so container mixes do not plot cleanly. Use the feel cues for moisture holding, track drainage rate in minutes through the profile, and set irrigation by weight change of the container between waterings.
What irrigation adjustment makes sense if my garden shifts one class finer after retesting?
Reduce application rate by 15-25 percent, extend the interval by about half a day in mild weather, and split large events into two passes if puddling starts early. Recheck leaf posture the following morning and fine-tune from there.
Any camera tricks to make band measurements cleaner on a jar test?
Place a dark card behind the jar, stick a metric ruler on the glass, and shoot at 90 degrees to the surface with gridlines enabled. Save photos with timestamps so you can compare 2-minute, 2-hour, and 24-hour heights without relying on memory.