Solar panels let you turn sunlight into free, clean electricity for your home. But before drilling into your roof or signing any contracts, it pays to understand how the system works, what your options are, and how to avoid costly mistakes.
From choosing panel types to understanding energy output, installation permits, and ROI, solar is as much a planning project as it is a technical one. The more you know upfront, the better your results – and the lower your long-term costs.
Key Takeaways
- Solar panels convert sunlight into electricity and can significantly lower your power bills.
- Not all systems are the same – choose between grid-tied, off-grid, or hybrid setups based on your energy goals.
- Your roof’s angle, direction, and shading directly affect performance.
- Installation may require permits and utility approval – check local rules early.
- Upfront cost can be offset through tax credits, rebates, and long-term savings.
- Maintenance is minimal but essential: keep panels clean and monitor output regularly.
Table of Contents
Why More Homeowners Are Switching to Solar Power
More homeowners are choosing solar because it solves two urgent problems at once: rising electricity bills and growing environmental concerns. Solar power reduces monthly costs while cutting carbon emissions – without compromising comfort or reliability.
Financial and Practical Benefits
“Installing solar panels can significantly lower your electricity bills or eliminate them entirely, making them a smart long-term investment. Many regions offer tax credits, rebates, and net metering programs that improve ROI. With no moving parts and minimal upkeep, solar systems offer decades of low-maintenance energy production.
Environmental Impact
Unlike fossil fuels, solar energy doesn’t pollute or deplete finite resources. Every kilowatt-hour you generate at home offsets emissions from power plants. Over a 25-year lifespan, a typical residential solar system can prevent several tons of CO₂ from entering the atmosphere.
How It Works – Simple Overview
Solar panels convert sunlight into electricity using the photovoltaic (PV) effect. Each panel contains silicon cells that release electrons when exposed to sunlight, creating DC electricity. An inverter converts this into AC electricity, which powers your home. Battery storage can be added to increase independence from the grid.
Switching to solar doesn’t just save money – it changes how households relate to energy. Instead of relying on aging grids and fossil fuels, homeowners take control of their own production. It’s a practical step toward lower costs and a cleaner, more stable energy future.
Is Your Home Ready for Solar? Key Assessment Factors
Before choosing solar panels, it’s important to know whether your home can support the system physically and functionally. Not every roof or location delivers the same efficiency, and even small details can affect how much energy your system produces – or whether it’s worth installing at all.
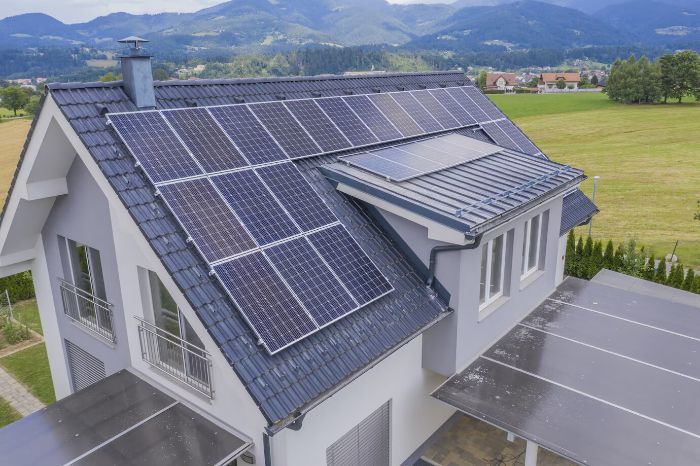
Roof Orientation and Tilt
The ideal roof faces south (in the Northern Hemisphere) and has a tilt between 15° and 40°. East- and west-facing roofs can still be viable but may reduce output by 10–20%. Flat roofs require angled mounting systems.
Shading and Sunlight Exposure
Panels need consistent, unobstructed sunlight during peak hours (10 AM–4 PM). Trees, chimneys, or nearby structures can reduce output and system value. Use online tools or consult an installer for a full shading analysis.
Roof Condition and Available Space
Your roof should be in good condition before installing a 25-year system. Most asphalt, metal, and tile roofs are compatible. Aim for at least 300–400 sq. ft. of usable, unshaded space for a typical home installation.
Electricity Usage and Load Profile
Analyze your utility bills to understand your average monthly use. Lower-consumption homes (under 300 kWh/month) may need only a partial system. Homes with high usage – due to HVAC, electric vehicles, or pools – will benefit from larger systems, possibly with storage.
Regional Solar Potential
Solar output depends on location. Areas like California or Arizona may see 6–7 peak sun hours per day, while northern or cloudier regions may average 4.0–4.5. Use local solar insolation data to plan system size and ROI.
Final Recommendation
A professional site assessment is always the best way to validate your home’s solar potential. This includes checking structural integrity, shading, electrical load, and code compliance before any purchase or installation.
Choosing the Right Solar Panel Type – Efficiency, Cost, and Use Cases
Solar panels differ in how they’re built, how much energy they produce, and how well they perform in different conditions. Some are more efficient but costly; others are budget-friendly but require more space. Choosing the right type starts with understanding the trade-offs between efficiency, cost, and installation needs.
Monocrystalline Panels (High Efficiency, Higher Cost)
Monocrystalline panels are made from single-crystal silicon, giving them a uniform black appearance. They offer the highest efficiency, typically ranging from 18% to 22%, and perform better in low light or limited space.
Pros:
- Highest energy output per square foot
- Longest lifespan (25–30+ years)
- Sleek aesthetics
Cons:
- Most expensive option
- Performance advantage may not justify cost for large open roofs
Best for:
Homes with limited roof space or high energy needs where maximizing output is critical.
Polycrystalline Panels (Lower Cost, Moderate Efficiency)
Made from fragmented silicon crystals, polycrystalline panels have a bluish hue and slightly lower efficiency – usually around 15% to 17%. They cost less to produce, making them a budget-friendly option.
Pros:
- Affordable upfront cost
- Solid performance in full sun
- Widely available
Cons:
- Less efficient than mono
- Slightly larger area needed for same output
Best for:
Homes with plenty of unshaded roof space and tighter budgets.
Thin-Film Panels (Flexible but Least Efficient)
Thin-film panels use a different material—often cadmium telluride or amorphous silicon—and are much thinner and more flexible. Efficiency is lower, around 10% to 13%, but they’re lightweight and easier to install on irregular surfaces.
Pros:
- Lightweight and flexible
- Performs better in partial shade or high temperatures
- Quick to install
Cons:
- Lowest efficiency
- Shorter lifespan (typically 10–20 years)
Best for:
Non-residential or mobile uses (sheds, RVs, greenhouses) or unconventional roof types.
Which Panel Type Is Right for Your Home?
- Choose monocrystalline if you want maximum power from limited space and are ready to invest more upfront.
- Choose polycrystalline if you have plenty of space and want a solid balance of cost and efficiency.
- Choose thin-film only for special cases where weight, flexibility, or portability matter more than output.
Permits, Utility Approvals, and Planning Steps That Matter
Installing solar panels isn’t just about buying the equipment – it also means working within local regulations and utility requirements. A mistake in the approval process can delay your project by weeks or even lead to fines.
Building Permits and Zoning
Most municipalities require a building permit for rooftop solar installations, especially if structural reinforcements or electrical upgrades are involved. Check with your local building department to confirm:
- If your roof needs to be evaluated
- Whether HOA or neighborhood rules apply
- What documentation is needed (system diagrams, load calculations, etc.)
Delays often occur when applications are submitted with missing technical data or without licensed contractor credentials.
Utility Interconnection and Net Metering
If you plan to stay connected to the grid, you’ll likely need utility approval for interconnection. This includes:
- Submitting a system design for review
- Receiving permission to operate (PTO)
- Enrolling in a net metering program, if available
Some utilities charge an application fee or limit system size based on your historic energy use. Submit early – this step can take anywhere from 2 to 6 weeks, depending on the utility.
Planning for Timeline and Budget Impact
The permitting and approval process adds time and sometimes cost. Make sure your contractor includes these factors in their timeline. A typical residential installation, from planning to final inspection, takes 4 to 10 weeks.
Tip: Ask for a permitting checklist upfront and confirm who is responsible – your installer, or you.
How to Choose the Right Solar System for Your Home
The best solar system for your home isn’t always the biggest or most expensive – it’s the one that fits your energy habits, space, and goals. Getting that match right can make the difference between average results and long-term performance.
Match System Type to Your Energy Goals
| Goal | Recommended System |
|---|---|
| Maximize savings | Grid-tied with net metering |
| Increase energy independence | Hybrid (with battery backup) |
| Go fully off-grid | Off-grid with large storage |
| Offset only part of usage | Grid-tied, small-scale |
Consider Roof Size and Sun Exposure
| Roof Profile | System Recommendation |
|---|---|
| Limited roof space | Monocrystalline panels (high efficiency) |
| Large, unshaded roof | Polycrystalline (cost-effective per watt) |
| Irregular roof or shed | Thin-film or ground-mounted panels |
Align System Size with Energy Use
Estimate your average monthly electricity use (in kWh). Then use this rule of thumb:
- 1 kW of panels = ~100–140 kWh/month, depending on sun exposure
- A typical 5 kW system covers 500–700 kWh/month
- Add ~20–25% system oversizing if you plan to buy an EV or install electric heating
Balance Budget and Payback Time
- Grid-tied systems usually have the lowest upfront cost and fastest payback (5–8 years)
- Off-grid or hybrid setups cost more but offer greater independence
- Consider incentives, rebates, and tax credits when calculating ROI
Final Tip
Don’t overcommit. If unsure, start with a smaller system that offsets part of your use and is expandable later. Many inverters and mounting systems support future scaling.
Installation Process Explained
Solar panel installation follows a predictable series of steps, but each phase involves specific technical, regulatory, and logistical elements. Understanding what happens, and when—helps you avoid delays, miscommunication, and unnecessary costs.
Site Assessment and Technical Evaluation
The process begins with a professional assessment of your roof, electrical system, and shading conditions. Installers collect data on structural integrity, usable surface area, and local grid access. This step also includes reviewing your electricity bills to size the system accurately.
Timeline: 1–2 days
System Design and Proposal
Engineers use the site data to design a system that meets your energy needs and fits your roof layout. You’ll receive a proposal detailing panel placement, estimated production, equipment specs, total cost, and projected ROI. Review carefully – this is the plan you’re approving.
Timeline: 3–7 days after assessment
Permitting and Utility Approval
Installers file permit applications and submit documentation to the local authority (AHJ) and utility provider. Approval is needed before physical work begins and often includes inspections or structural review.
Timeline: 2–6 weeks, depending on jurisdiction
Equipment Delivery and Installation
Once permits are secured, materials are delivered and installation begins. This includes mounting hardware, panels, inverters, and wiring infrastructure. A standard residential install takes 1–3 days.
⚠️ Safety Note:
Solar systems operate at high voltage. All wiring, inverter configuration, and grid connection must be handled by a licensed electrician. DIY work on electrical components risks serious injury or fire and may void permits or warranties.
Final Inspection and System Activation
After installation, the local inspector checks code compliance, and your utility grants Permission to Operate (PTO). Once cleared, the system is activated and begins generating power.
Timeline: 3–10 business days after install
Choosing the Right Installation Contractor
A reliable installer prevents 90% of problems. Look for:
- NABCEP certification or licensed electricians on staff
- Transparent contracts with itemized pricing
- Real system performance estimates, not just marketing claims
- End-to-end service (permits, utility submission, warranty handling)
- Clear communication and support
Costs and Financing Options for Solar Panels
The cost of going solar depends on more than just the panels. System size, hardware quality, roof complexity, and your financing method all influence the final price – and your long-term savings. Knowing the numbers upfront helps avoid budget overruns and disappointment later.
Average Installation Costs (Before Incentives)
- $15,000–$25,000 for a typical 6–8 kW residential system
- Cost per watt: $2.50–$4.00, depending on region and equipment
- Battery storage (optional): $7,000–$12,000
- Inverter: $1,000–$3,000 (included in most quotes)
Comparing Solar Financing Models
| Model | Upfront Cost | Ownership | Savings Potential | Notes |
|---|---|---|---|---|
| Cash Purchase | High | You | Maximum | Fastest ROI, eligible for full incentives |
| Solar Loan | Low–Medium | You | High | Pay over time, interest applies |
| Lease | Low | Installer | Moderate | Fixed monthly payments, no ownership |
| PPA | $0 | Installer | Variable | Pay per kWh used, possible long-term cost |
Incentives and Tax Credits
In the U.S., the Federal Solar Investment Tax Credit (ITC) allows you to deduct 30% of your system cost from federal taxes. Many states and utilities offer additional rebates, performance-based incentives, or property tax exemptions.
Check databases like DSIRE for region-specific programs.
Budgeting Tips and Payback Time
- ROI typically ranges from 6 to 10 years, depending on electricity rates and incentives
- Prioritize equipment quality over lowest upfront price – cutting corners here costs more long-term
- Include permit fees, structural upgrades, and maintenance in your total budget
Solar Panel Maintenance – How to Maximize Output and Lifespan
Well-installed solar systems are built to last – but performance depends on more than just hardware quality. Basic maintenance helps protect your investment, prevents efficiency loss, and extends the system’s working life beyond 25 years.
Cleaning the Panels
Dust, pollen, bird droppings, and debris can block sunlight and reduce panel output. Cleaning frequency depends on your location:
- Urban or dusty regions – every 3–6 months
- Suburban areas – 1–2 times per year
- Rainy climates – check once a year; natural rinsing may be enough
Use a soft brush, long-handled squeegee, or low-pressure hose. Avoid abrasive materials and harsh detergents. Clean panels early in the morning or evening to avoid cracking from rapid cooling.
Tip: Never walk directly on the panels. If roof access is risky, hire a licensed cleaning service.
Monitoring Performance
Most systems include an app or online portal for real-time tracking. Use it to:
- Watch for sudden drops in output
- Check inverter status and panel health
- Track daily, monthly, and annual performance
A noticeable decline could signal shading, inverter issues, or hardware failure.
Scheduled Inspections and Long-Term Maintenance
- Inverter replacement – typically required after 10–15 years
- Battery check (if installed) – review charge/discharge cycles annually
- Wiring and mounts – inspect for corrosion, loose cables, or shifting components
Many installers offer annual or bi-annual checkups. These are worth scheduling – even if the system seems fine, especially before major weather seasons.
Monitoring and Optimizing Solar Panel Performance
Once your solar system is online, performance isn’t guaranteed forever. Dust buildup, shading changes, or equipment failure can reduce energy output without obvious signs. Regular monitoring and small adjustments can recover lost efficiency and boost long-term returns.
Key Metrics to Track and What They Mean
| Metric | Normal Range | What It Tells You | Action if Abnormal |
|---|---|---|---|
| Daily output (kWh) | Varies by system size | Overall production and trends | Check weather, shading, or inverter |
| Performance ratio (%) | 75–90% | Actual vs. expected output efficiency | Clean panels, check wiring losses |
| System degradation | ~0.5% per year | Long-term panel aging rate | Compare to installer’s warranty terms |
| Inverter status | “Active” or “Online” | Confirms DC → AC conversion is running properly | Reboot system or call installer |
| Net metering balance | Credit or usage summary | Grid usage vs. excess generation | Adjust consumption patterns if needed |
Tools for Monitoring
Most modern inverters include built-in apps or dashboards (e.g. Enphase Enlighten, SolarEdge Monitoring). These platforms allow you to:
- View production in real time and over time
- Receive alerts for outages or performance drops
- Compare panel-level output (on systems with optimizers or microinverters)
If your system lacks smart monitoring, ask your installer about adding third-party modules.
Optimizing Performance Over Time
- Clean panels regularly (see Maintenance section)
- Trim nearby vegetation if shading increases
- Reevaluate panel orientation if mounting was suboptimal
- Update inverter firmware or system software if applicable
- Replace degraded modules selectively rather than full-system overhaul
Even a 5% gain from optimization adds up to hundreds of kWh annually – and more if you’re on time-of-use billing.
Environmental Impact of Solar Energy
Solar energy is widely promoted as a clean alternative to fossil fuels – and it is. But no energy source is impact-free. Solar systems require mined materials, generate emissions during manufacturing, and raise questions about long-term disposal and recycling. Understanding both the benefits and drawbacks gives a realistic picture of their environmental role.
Positive Environmental Effects
- Reduced greenhouse gas emissions – Generating 1 MWh of solar electricity avoids roughly 0.5 to 0.7 metric tons of CO₂ compared to coal.
- Lower water usage – Unlike gas and nuclear, solar needs no water for electricity generation.
- Improved air quality – Less reliance on combustion-based power reduces smog and particulates.
Over a 25-year lifespan, even a small home solar system offsets the emissions from producing it within 1–3 years.
Material Use and Manufacturing Footprint
- Solar panels require purified silicon, mined quartz, silver, and rare-earth elements.
- Production involves high-temperature furnaces and sometimes hazardous chemicals (e.g. hydrofluoric acid).
- China currently dominates panel manufacturing, often using coal-heavy energy sources.
- Panels and inverters also contain embedded carbon from transport and assembly.
While the operational phase is clean, manufacturing carries a measurable footprint.
Panel Disposal and End-of-Life Challenges
- Solar panels typically last 25–30 years, but early failures, damage, or obsolescence are common.
- As global deployment grows, millions of tons of waste are expected by 2040.
- Most panels today aren’t recycled due to:
- Low material recovery value
- Lack of infrastructure
- Cost (recycling costs more than landfill in many countries)
Europe (via WEEE Directive) mandates solar panel recycling; the U.S. has no national standard.
Battery Environmental Impact
- Home battery systems (e.g. lithium-ion) involve extraction of lithium, cobalt, and nickel.
- Mining these materials has been linked to water depletion, habitat destruction, and human rights issues.
- Batteries degrade after 10–15 years and are difficult to recycle at scale.
- Thermal runaway is a safety concern in poorly managed systems.
Solid-state and sodium-ion alternatives are in development but not yet mainstream.
Net Environmental Balance
Even with manufacturing and disposal impacts, solar remains one of the lowest-emission electricity sources across its lifecycle – significantly cleaner than coal, gas, or biomass. But as solar adoption scales, systematic planning for waste management and battery recycling will become critical to maintaining that advantage.
Conclusion – Is Solar Power Right for Your Home?
Solar energy is no longer niche – it’s a mainstream option for homeowners looking to cut energy costs, increase independence, and reduce their environmental impact. But going solar isn’t one-size-fits-all. Your roof, budget, electricity use, and location all shape whether solar makes sense – and how to do it right.
For most households with good sunlight exposure and stable electricity rates, solar delivers measurable savings and long-term value. With careful planning, informed system choice, and realistic expectations, a home solar system can pay for itself and continue generating clean power for decades.
The key is to treat solar as a strategic investment – not just a green upgrade. Know what you’re installing, who’s doing it, how it will perform, and what to expect over its full lifecycle.
FAQ
How long do solar panels last?
Most panels are rated for 25 to 30 years of production. They continue to work beyond that, but output gradually declines by around 0.5% per year. Inverters and batteries may need earlier replacement.
Will solar panels work during a power outage?
Not always. Grid-tied systems without battery storage shut down during outages for safety. If you want backup power, choose a hybrid system with batteries or integrate an automatic transfer switch.
Do solar panels need direct sunlight all day?
No – but they perform best in full sun. Partial shade reduces output. Panels still generate power under cloud cover, though at lower levels. Orientation, angle, and shading all affect total efficiency.
What happens if I move after installing solar?
You have two options:
– Sell the system with the home (can increase resale value)
– Transfer the loan or lease, if applicable
Some buyers view solar as a plus, especially with documented energy savings.Are solar panels worth it in cloudy or cold climates?
Yes – with proper design. While sunnier regions offer higher production, modern panels still generate power in diffuse light. Germany, for example, has a strong solar sector despite limited sun.