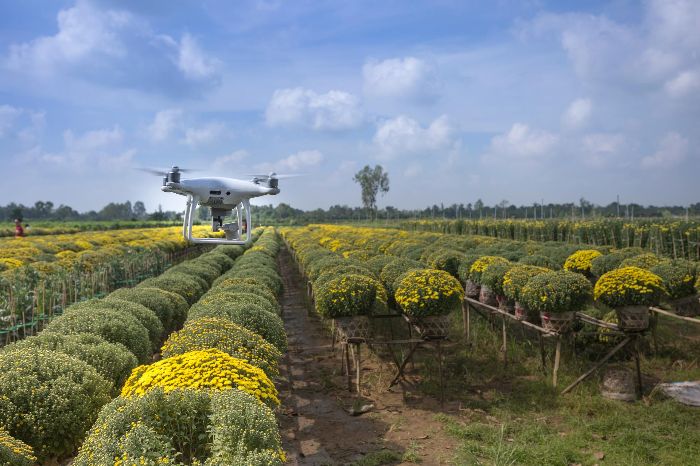
Most gardens fail quietly before the leaves even change color – smart IoT sensors catch it early. They translate small shifts in soil and weather into clear signals you can act on. The goal is simple – protect plants, save water, and stop firefighting.
Start by pairing one garden job with one device and one decisive metric. A quick calibration with your regular watering locks the soil probe to your mix so alerts reflect real plant needs. Mount the weather unit in open air to catch temperature drops and sudden storm bursts.
When the system fits your yard, you get timely nudges, fewer misses, and a calmer gardening rhythm.
Key Takeaways:
- Catch the signal that warns before leaves scorch
- Calibrate once so alerts mirror your soil and roots
- Place weather gear where shade and walls cannot fool it
- Avoid all-in-one bundles that drown you in alerts
- Set a simple cadence to review trends and clean sensors
Table of Contents
Start With Needs – Map Problems To Your Garden Monitoring System
Pick sensors by the problem you want to solve. Match a real garden job to one device type and one key metric, then choose one feature that turns numbers into timely action.
How can IoT technology help plants grow better?
IoT devices help plants by timing actions to real conditions, such as watering when soil moisture falls below your chosen level or covering beds when a frost alert trips. The value comes from trends and alerts that trigger simple tasks at the right moment.
Define the monitoring goal
Decide on one primary job before buying hardware. Typical jobs are watering control for beds or containers, microclimate tracking for heat or cold pockets, and early stress flags for tender plants. If a goal splits in two, buy modular pieces rather than one device that tries to do everything.
Pro tip: One focused metric per area beats a crowded dashboard that no one checks.
Site constraints checklist
- Network reach in the yard – confirm signal where sensors will sit.
- Shade over panels – plan for low light during short winter days.
- Foot traffic, kids, pets – choose low-profile housings near paths.
- Freeze-thaw exposure – avoid water traps inside enclosures.
- Sprinkler overspray – position electronics away from direct jets.
Pro tip: If a spot is harsh, start with a cheaper unit for two weeks to see failure patterns, then upgrade with confidence.
| Garden need | Sensor type | Key metric | Must-have feature | Typical price |
|---|---|---|---|---|
| Containers dry fast on patios | Soil moisture probe | Volumetric moisture | App alerts with adjustable threshold | $ |
| Clay bed stays wet after rain | Soil probe pair in two depths | Moisture trend | Multi-depth readings per zone | $$ |
| Frost pockets in low spots | Compact weather station | Min temperature | Frost alert with push notifications | $$ |
| Heat stress on south wall | Light-temp monitor | Sun hours and peak temp | Daily max-min graph | $ |
| Leaf scorch on herbs | Light monitor | PAR or lux | Target range indicator by plant type | $ |
| Disease-prone humidity | Temp-humidity sensor | Nighttime humidity | High-humidity alert during still nights | $ |
Cost-effort note: Higher accuracy and multi-depth gear cost more and take longer to place correctly, but they cut down on nuisance alerts and rechecks.
When you anchor each purchase to a single job and one decisive metric, sensors stop being gadgets and start solving work in the yard. Keep the table handy as a quick map before you browse models.
Soil Moisture Sensors – Get Readings You Can Trust
A soil moisture sensor for garden work only pays off when the probe matches your soil and root zone. Focus on sensor type, probe length, and a simple calibration pass so alerts match plant demand instead of weather noise.
Sensor types and accuracy
Choose capacitive probes for most beds and containers because plates resist corrosion better than bare-resistance forks and stay stable in fertilized mixes. Consumer TDR-like wands read quickly in coarse sand and barky potting blends, though they cost more and need firmer placement. Resistive forks are fine for short trials or seed trays but drift fast in salty or heavily amended media.
Accuracy lives in repeatability, not marketing numbers. Look for stable trends within 2-3 percentage points day to day under the same irrigation pattern.
Pro tip: If two probes disagree by more than 5 points in identical soil, treat both as uncalibrated and run a quick field check.
Depth, placement, and calibration
Match probe length to roots, not soil depth. Leafy greens and herbs read well at 2-4 in; tomatoes and peppers prefer 4-6 in; shrubs need 6-8 in near the outer dripline. Place the probe where roots actually drink – halfway between emitter and stem on drip, just outside the densest feeder roots on hand-watered beds, and mid-radius in wide containers.
Calibrate to your mix, not a chart. Water the zone to a normal cycle, wait 60-90 minutes for redistribution, then note the “wet baseline.” Let the zone dry until leaves are perky in early afternoon but soil is clearly lighter by feel, then note the “act-now” value. Those two numbers become your practical range for that area.
Pro tip: I log both values once per zone at the start of the season and recheck after any big change in mulch or media.
- Quick calibration checklist
- Pick a representative spot with typical sun and irrigation.
- Insert to root depth with firm contact, no sidewall air gaps.
- Record baseline after irrigation has settled for at least 1 hour.
- Record act-now value just before the next normal watering.
- Set alert midway between baseline and act-now for the first week.
- Nudge the alert by 2-3 points if plants look stressed or soggy.
Reading frequency and alert thresholds
Fast polling burns batteries and floods apps without better decisions. For in-ground beds, 15-30 minute intervals track trends well; containers benefit from 5-10 minute intervals on sunny, windy days, returning to 15 minutes overnight. Use higher frequency during heat waves, then step down to extend battery life.
Set thresholds by crop and media. Mediterranean herbs stay happy in the lower third of your calibrated range; fruiting annuals do better near the midpoint; thirsty turf zones can ride higher during establishment. If alerts fire after every sprinkler pass, widen the deadband by 4-6 points or require two consecutive low readings before a ping. Failure signals include flat lines during obvious wet-dry cycles, wild swings within minutes, or every probe reading the same number. Fix contact first, then swap locations to rule out a bad unit.
Dialed-in probes turn irrigation into a routine instead of a daily debate. Once readings match plant response, you can add schedules with confidence later without changing the core setup.
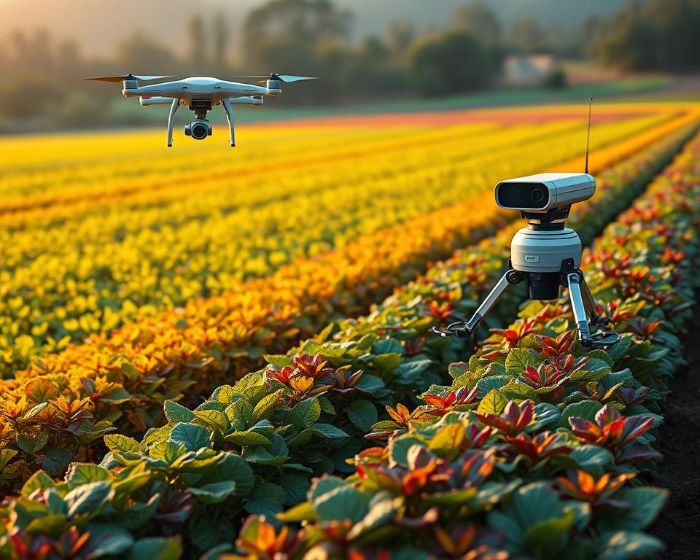
Compact Weather Stations for Yards – What to Measure and Where to Place It
A smart weather station for garden care turns daily readings into decisions you can act on. When it records the right metrics and sits in the right spot, you’ll know when to cover beds, delay watering, or ventilate a greenhouse before problems start.
Metrics that guide real garden work
The most valuable readings are rainfall, air temperature, humidity, wind, and light duration. Focus on those that match the jobs you actually manage. Rain data tells you when soil still carries moisture after a storm. Temperature logs show overnight lows so you can plan covers or row tunnels before frost sets in. Humidity readings help time fungal sprays or shade placement, while wind speeds warn you to delay foliar feeding or spraying.
Pro tip: If you don’t review graphs weekly, at least set threshold alerts for cold nights and heat spikes. A well-timed notification is better than a shelf full of unused graphs.
Siting rules for accurate readings
A compact station measures the conditions right where it sits, so placement decides quality. Mount temperature and humidity sensors about 4-5 ft above open ground with airflow on all sides. Keep at least 10 ft from walls, fences, or thick shrubs that radiate heat at night. For rainfall, position the collector level, with no branches above within 45 degrees of the rim. Avoid paved areas where heat reflection warps daytime highs.
If you garden in a narrow yard, pick the most open central area and mount the pole securely – loose fittings cause vibration errors in wind readings.
- Quick placement check
- Full sun at midday, no nearby reflective surfaces.
- Firm mount, no sway beyond 1 inch under wind.
- Straight rain collector, level bubble centered.
- Cable or solar panel shaded from direct sprinkler spray.
- Recheck orientation twice a year after pruning or fence changes.
Alerts for frost and heat events
Most smart stations let you set alerts through an app or web dashboard. Use frost alerts when temperatures approach 34°F in still conditions – cold pockets can drop another 2-3 degrees before dawn. Heat alerts matter most in late afternoon; 95°F combined with high humidity can wilt plants even with moist soil. Set your system to warn slightly before the danger point so you can act in time – cover, mist, or shade depending on the crop.
Failure signs include daily extremes with identical highs and lows or rainfall readings stuck at zero for weeks. In that case, clean sensors and check for spiders, dust, or leaves blocking openings.
When placed right and cleaned every season, a compact weather station pays back by keeping you ahead of sudden shifts instead of reacting after damage. Accurate data builds the habit of small, early adjustments that save a garden’s best days.
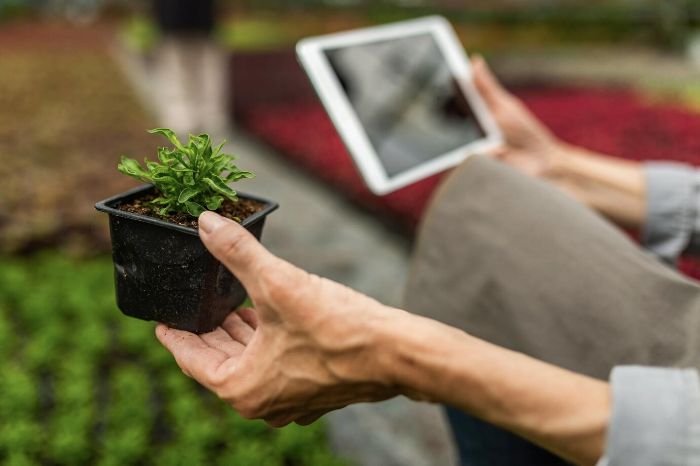
Plant Health Monitors and Light Sensors – Act On Trend Data
A plant health monitor pays off when readings translate into small, timely moves. Track leaf temperature, light exposure, and moisture proxies over several days, then adjust shade, airflow, or watering based on clear patterns rather than single spikes.
What the “health” metrics really signal
Leaf temperature shows how well a plant sheds heat. When full sun pushes leaf temperature 3-5°F above nearby air for more than 30 minutes, stress is building and transpiration lags. Light sensors report usable exposure as hours or intensity; steady midday plateaus point to adequate energy, while sharp midday peaks paired with wilting suggest too much radiation for that site. Some smart plant sensor models estimate moisture indirectly; treat abrupt jumps right after irrigation as noise and watch the slope over the next few hours.
Pro tip: Confirm any extreme with a quick look at leaf posture and surface feel – rigid, cupped leaves often match high leaf-temp alerts.
Light and temperature targets by plant groups
Shade-leaning herbs stay happier with gentle mornings and filtered afternoons. Aim for morning exposure around 2-4 hours and leaf temperatures that track within 1-2°F of air on warm days. Fruiting annuals need a broader light window; maintain 7-9 hours of direct sun and accept brief midday leaf-temperature rises as long as recovery shows after 4 pm. Cool-season greens perform best when midday intensity softens – north or east beds help hold leaf temperature close to air and keep textures tender.
If numbers run hot on reflective patios, move containers a few feet off walls or raise pots on stands to improve airflow and reduce radiant bounce.
Read patterns, then make the smallest useful change
Single readings mislead; the trend line earns decisions. If the 3-day light curve shows a taller midday peak and leaf temperature climbs sooner each day, add a 30-40% shade cloth during the brightest span and recheck curves after two afternoons. If evening humidity rises but leaf temperature drops quickly after sunset, hold watering and review soil data at dawn to avoid soft growth. When morning light hours shrink below last week’s baseline due to new shade, rotate containers a quarter turn or shift one bed width and watch for a steadier midday plateau.
Maintenance cadence matters. Review graphs weekly in mild weather and every 48 hours during heat waves. Clean lenses monthly and after dust storms; cloudy covers underreport light and push you toward unnecessary shade moves.
Cost-effort note: True PAR-capable sensors add expense but help dial high-light crops with fewer trial moves, saving time during peak season.
Trend-driven tweaks keep plants in the comfort band with less fuss. Once patterns stabilize, only small seasonal nudges are needed to hold quality and yield.
Connectivity, Power, and Durability for Smart Garden Sensors
Connections and enclosures decide whether data arrives when weather turns. Pick a protocol that holds signal across your yard, power it for winter and peak season, and use housings that shrug off water and grit.

Do IoT devices need Internet?
Most garden devices work on a local network without Internet, but cloud features, remote access, and push alerts require an online path. If your router goes offline, a hub with local logging keeps data flowing and syncs later; Wi-Fi gadgets without onboard memory usually leave gaps.
Wi-Fi, Bluetooth, Zigbee, Thread – choose the right link
Protocol choice sets range, battery draw, and maintenance. Wi-Fi rides your home router and suits fixed gear near the house; battery life is shorter because radios wake harder. Bluetooth LE sips power and pairs well with close pots or a patio bed, but walls stop it quickly. Zigbee and Thread form mesh networks where each mains-powered node repeats signals, so beds at the far fence can still report in.
Pro tip: If neighbors crowd 2.4 GHz Wi-Fi, move your router to channel 1 or 11 and keep hubs 3-6 ft from the router to reduce bleed-over.
| Protocol | Typical range | Battery impact | Hub required | Offline logging | Interference risk |
|---|---|---|---|---|---|
| Wi-Fi 2.4 GHz | 30-80 ft indoors, 100-150 ft line of sight | Higher | No | Device dependent | High in crowded bands |
| Bluetooth LE | 10-30 ft indoors, 50-100 ft line of sight | Low | Often phone or gateway | Limited on device | Moderate near metal and water |
| Zigbee | 30-60 ft per hop, mesh extends further | Low | Yes | Hub dependent | Shares 2.4 GHz with Wi-Fi |
| Thread | 30-80 ft per hop, mesh extends further | Low | Yes, border router | Hub or device dependent | Lower, still 2.4 GHz |
Mesh shines in long yards because each powered node becomes a relay. Place at least one repeater near the midpoint of the garden, inside a weather-safe box, to stabilize far sensors.
Power and maintenance that survive the seasons
Batteries fail early from cold, rapid polling, and weak radio links. Use lithium AA or AAA in outdoor gear below 40°F and expect 6-12 month cycles at 15-30 minute reporting; shorten the interval only during heat waves or new plantings. Solar caps work well in open beds if panels face south and sit clear of shade between 10 am and 3 pm in winter. Tight enclosures trap moisture, so add a thin vent or a desiccant pouch and keep cable entry points downward.
If alerts go quiet after rain, check for water in battery bays and corrosion on springs. Recoat exposed contacts with dielectric grease and retest at midday when panels produce steady power.
Ratings, apps, and data control
Weatherproofing is worth reading closely. IP65 handles dust and strong jets; IP67 tolerates brief immersion, which helps near sprinklers or low spots. Gaskets age in sun, so plan a yearly inspection when you change batteries. App quality matters because it decides how fast you act: look for adjustable alert deadbands, export to CSV, and local storage when the Internet blinks. A smart garden hub that stores data locally covers power blips and router restarts without losing the day.
- Field checklist for uptime
- Map signal strength at planned sensor spots before mounting.
- Choose one mesh-capable device near the yard center as a repeater.
- Set reporting to 15-30 minutes by default; tighten only during stress.
- Use lithium cells for winter and high-heat zones for summer longevity.
- Pick IP67 near sprinklers or pond edges; IP65 is fine for sheltered spots.
Solid links, stable power, and tight housings turn a sensor set into a reliable partner. Once the backbone holds, every reading you see is one you can act on with confidence.
Practical Wrap-Up
Run a short pilot before buying the full kit. Pick one bed or two large containers, deploy one device per job, and let them record for 10 days without changes. You want clean trends, quiet alerts, and readings that line up with plant behavior. If results look messy, fix placement and reporting cadence first; new hardware comes last.
Use simple, binary checks to keep the system honest. If alerts cluster right after irrigation, add a hold-off timer so notifications wait through the wetting period. If a device drops offline at the same hour each evening, add one mesh repeater near the midpoint of the yard. If leaf posture and soil feel say “stable” while numbers swing, slow sampling and reseat probes with firm contact. Set acceptance criteria ahead of time – low false alerts, stable daily curves, and battery projections that cover the next weather shift.
Keep the backbone tuned on a schedule. Review trend graphs weekly in warm months and after the first cold snap. Clean lenses and vents at the start of each month. Swap batteries in batches before major heat or travel. A small, predictable maintenance block does more for reliability than adding more devices.
- Schedule monthly cleaning and checks.
- Pilot one zone for 10 days.
- Label sensors by zone and depth.
- Run a boundary signal walk test.
- Add hold-off timers for irrigation windows.
FAQ
How do I check if my yard has enough signal for sensors?
Do a quick walk test before mounting. Stand where the device will live and check Wi-Fi strength on your phone; aim for at least 2 bars or roughly -65 to -70 dBm. For mesh protocols, place a mains-powered repeater about 30-60 ft from the router and another hop if needed, keeping each node clear of metal downspouts and large water barrels. If dropouts happen at sunset, move the repeater 3-6 ft to reduce overlap with the router and change the router channel to 1 or 11.
How many sensors cover a typical bed or container area well?
Use one probe per uniform 25-30 sq ft and add a second only when soil texture or sun exposure changes inside the same bed. Large planters over 18 in diameter deserve their own probe. For long drip lines, place a single probe halfway between emitter and stem in the representative plant position and validate with a second location for one week; keep whichever shows trends that match plant behavior.
What should I do when new mulch or potting mix makes readings drift?
Run a fast two-point reset. After the first normal irrigation with the new material, wait 45-75 minutes for redistribution, record the wet value, then let the area dry under normal weather and record the act-now number when plants still look perky at midday. Set alerts midway between those values for 3 days, then tighten by 2-3 points if plants stay happy. Recheck after heavy rain or when mulch depth changes.
Should I choose a smart weather station for garden use with a separate rain gauge?
Yes if you garden under trees or near buildings. A stand-alone tipping bucket placed in open sky catches showers that a combined unit under partial canopy can miss. Look for 0.01 in resolution and a funnel you can pop off for cleaning. If logs show zero rain while decks and beds are wet, move the gauge out from under obstructions and re-level the base.
How can I verify a soil probe is measuring the right zone?
Run a small watering test on a calm day. Apply 1-2 quarts around the probe in a slow ring for containers or a gentle 2-3 minute drip near the probe in beds. You should see a clear rise within 5-10 minutes in containers and within 20-40 minutes in beds. If the curve barely moves, the probe sits outside active roots; reseat at root depth with firm sidewall contact and repeat.
Do garden devices keep working during Internet outages?
Local networks keep talking even when the wider Internet drops, but only systems with onboard memory or a hub will save data. Look for at least 7 days of storage at a 15-minute interval and automatic sync when service returns. If remote alerts matter, add SMS fallbacks or a cellular hub so frost and heat warnings still reach you.
How do I prevent data gaps at the back of a deep lot?
Build overlap between nodes. Place a mesh repeater about mid-yard at 3-5 ft height with clear sightlines and keep spacing so each hop overlaps the next by 10-15 ft. Avoid mounting near large metal fences or stacked firewood that blocks 2.4 GHz. If a sensor still drops, raise the repeater by 1-2 ft or rotate its antenna a quarter turn.
What maintenance routine keeps readings reliable through storms and heat waves?
After any wind event, check mounts for sway and retighten hardware. When rainfall tops 1 inch in a day, clear leaves and grit from funnels and screens. Before a forecast above 95°F, confirm solar panels see sun from 10 am to 3 pm and switch alkaline cells to lithium for better runtime. If night humidity spikes for several days, review deadbands and widen alerts to cut false pings.