Last Updated April 26, 2026
Pea plant growth stages make more sense when nodes, tendrils, flowers, and pods define the plant’s real progress. A row can sit low and quiet one week, then catch the netting with wiry green tendrils and hide tiny flower buds under broad stipules the next.
Each stage shifts demand from water uptake to root anchoring, leaf expansion, tendril attachment, flowering, pod wall growth, seed fill, and dry-down. Miss the flowering-to-pod set handoff and the harvest loss shows later.
Management starts by identifying which structure is expanding: root, leaf, tendril, flower, pod wall, or seed. That read controls watering, support, heat protection, and picking.
Pea plant growth stages include germination, emergence, first true leaves, tendril-bearing vegetative growth, flower bud, open flower, flat pod, green seed fill, harvest, and seed maturity. In cool spring soil, most garden peas reach first picking about 60-70 days after planting, with snap pods ready sooner after bloom than shelling peas.
Key Takeaways:
- Nodes reveal tendrils, flowers, flat pods, and filled pods before height does
- Treat V2 tendrils as the support deadline
- Heat above 80 F hits flowering and pod set first
- Match harvest timing to snow, snap, shelling, or dry peas
- Remove mature pods before they push seed completion
Table of Contents
Pea Growth Stages Timeline – Nodes Tell The Real Story
A pea vine does not finish one stage cleanly before the next begins. The lower nodes can carry filled pods, the middle nodes can hold open flowers, and the upper nodes can keep sending out leaves and tendrils. That overlap is why a calendar alone misleads gardeners.
Most pea varieties need about 60 days of growth before harvest, and good growing temperatures sit between 55 F and 65 F. Temperature and crop duration set the season. Daily decisions depend on which nodes are producing tendrils, flowers, flat pods, or filled pods.
The Bean IPM staging system tracks pea growth from VE through R7. The node-based sequence matters in a home garden too: the first true leaf unfolds without a tendril, the second true leaf carries a tendril, flower buds mark R1, open flowers mark R2, flat pods mark R3, and green seeds filling the pod cavity mark R4.
The mechanism sits in the shoot tip. The apical meristem keeps adding nodes, and each node becomes a decision point for leaf area, tendril attachment, flower initiation, or pod fill. Vegetable growth stages still move through establishment, vegetative growth, reproduction, and harvest; peas are easier to read by node than by plant size.
Pea plant growth stages by week work best as a spring timing range, not a fixed promise. Cool soil stretches week one; early heat compresses flowering and pod fill.
| Timing | Main Stage | What You See | Best Read |
|---|---|---|---|
| Week 1-2 | Germination and emergence | Seed swells, root breaks the seed coat, shoot emerges | Soil moisture and oxygen decide stand quality |
| Week 2-3 | First leaves | First true leaf unfolds, no tendril present | Leaf area starts paying for new growth |
| Week 3-5 | Tendril growth and climbing | Later nodes carry tendrils that catch support | Support timing now controls row shape |
| Week 5-7 | Flowering | Buds and open flowers appear at upper nodes | Cool weather and even moisture protect pod set |
| Week 6-9 | Pod set and seed fill | Flat pods lengthen, then peas swell inside | Harvest timing separates snow, snap, and shelling peas |
| Week 8-10+ | Harvest or seed maturity | Fresh pods shine green, or dry pods yellow and rattle | Fresh eating and seed saving split into different endpoints |
Run your fingers lightly down the vine from the growing tip toward the base. Tender new tendrils feel flexible and slightly sticky; filled shelling pods feel firm and heavy against the stem. Touch checks reveal pod fill and vine maturity more accurately than calendar timing alone.
Germination And Seedling Stage – Cool Soil Controls The Start
Peas tolerate earlier sowing than warm-season beans; cold wet soil still slows emergence and raises damping-off risk. A seed that lies in saturated ground has water, not enough oxygen, and that gap gives soil fungi time to attack.
Pea seedlings emerge in 7-10 days when planted in soil at 55-65 F, and peas germinate better once soil is above 40 F. The soil temperature for planting matters because enzymes inside the seed work slowly in cold soil, even after the seed has absorbed water.
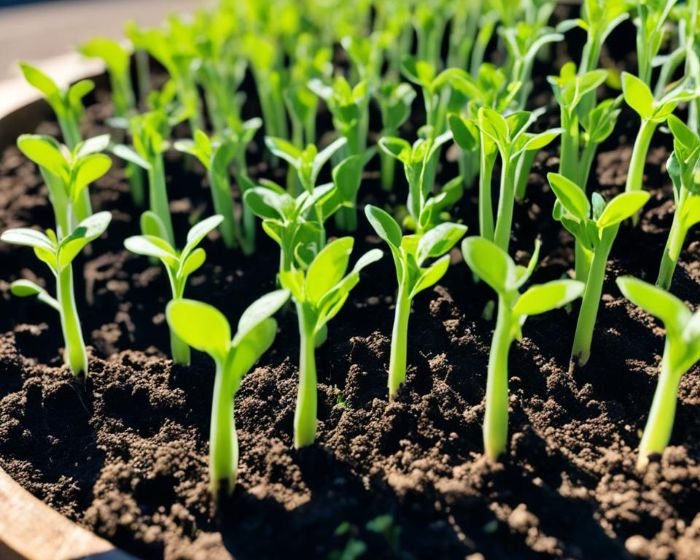
What Healthy Pea Emergence Looks Like
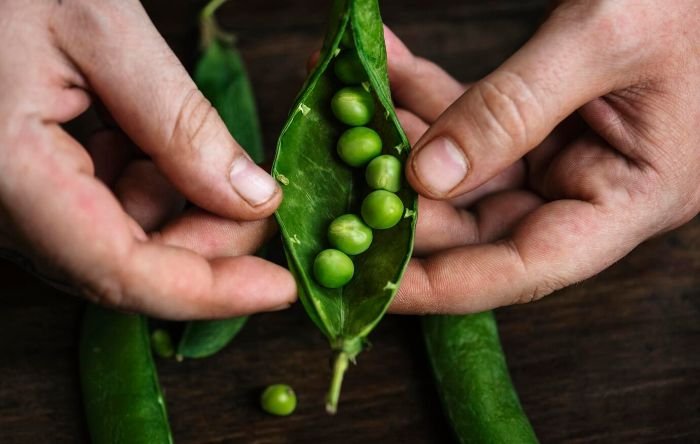
Germination begins with imbibition, the movement of water into the dry pea seed. The seed swells, enzymes convert stored starch into usable sugars, and the radicle breaks out first to anchor the plant. Peas use hypogeal emergence, so the seed leaves stay below ground. The epicotyl pushes the shoot upward.
That detail separates peas from beans. A bean seedling lifts thick cotyledons into the light; a pea seedling sends up a slimmer shoot with tiny scale leaves before the first true leaf expands. If the row emerges as thin green hooks, not chunky seed leaves, the peas are doing exactly what peas do.
Good seed-row soil feels cool and crumbly when pinched, with enough dampness to darken your fingertip. Sour-smelling soil that smears into a shiny ribbon is too wet for clean emergence. Dusty soil at one inch deep leaves the seed waiting for water.
Pro Tip: After a hard rain, press one fingertip across the seeded row. If the surface has sealed into a crust, mist it lightly and loosen only the top quarter inch with your fingers. Do not dig into the seed line.
Seedlings are fragile in this stage because the root system is still shallow and the growing point is close to the soil surface. Cutworms can sever stems at night, and deep hoeing can slice the new roots. Weed now, lightly. Later is harder.
Vegetative Growth And Pea Tendrils – Climbing Begins At The Nodes
Early vegetative growth prepares the plant for climbing before tendrils begin active attachment. Pea seedlings make early leaves, widen their stipules, and then produce tendrils from later nodes that search for support in slow arcs.
The first tendril appears at V2, the second true leaf stage. That is the practical trellis deadline. Once those tendrils start, the plant will grab whatever is closest: netting, twiggy pea brush, neighboring pea stems, weed stems, or the edge of a row cover.

How Pea Tendrils Grab Support
Pea tendrils climb by thigmotropism, a growth response to touch. When a tendril brushes twine or a twig, cells on different sides change expansion rates and water movement, creating a curl. Tendril coiling results from contact-driven differential growth, not directional choice.
Research published in Plant Physiology by M. J. Jaffe and A. W. Galston found that fifth-node tendrils on light-grown Alaska pea plants reached maturity at about 10 days old, then coiled rapidly after tactile stimulation. That tendril response explains why support must be present before vines flop.
Support Timing And Plant Shape
Tall peas need the trellis at planting or by the time seedlings reach 3-4 inches. Tall vine varieties can reach up to five feet and produce over a longer period, while shorter bush types tend to flower and set crops in a tighter window. The support changes how the row breathes.
Bush Vs Climbing Pea Growth
Pea varieties follow the same node sequence; internode length and tendril reach change the way the row behaves. Bush peas pack nodes closer together. Tall climbing peas stretch those nodes into a longer harvest ladder.
| Type | Node And Climbing Behavior | Support Timing | Harvest Pattern And Risk |
|---|---|---|---|
| Bush peas | Short internodes, lighter tendril reach, plants brace each other | Low brush or no support in tight rows | Earlier concentrated picking; dense rows hold moisture |
| Semi-dwarf peas | Moderate internodes, tendrils catch low netting well | Install short netting before V2 tendrils appear | Balanced harvest window; unsupported stems lean after rain |
| Tall climbing peas | Long internodes, active tendril wrapping, pods set up the vine | Install trellis at planting or by 3-4 inches tall | Longer picking window; unsupported vines mat and mildew faster |
A supported pea row dries faster after rain, keeps pods cleaner, and makes daily picking possible without bending stems. An unsupported row becomes a green mat. Inside that mat, the leaves feel cool and damp against your wrist long after the path has dried, a microclimate that favors mildew and hides ripe pods.
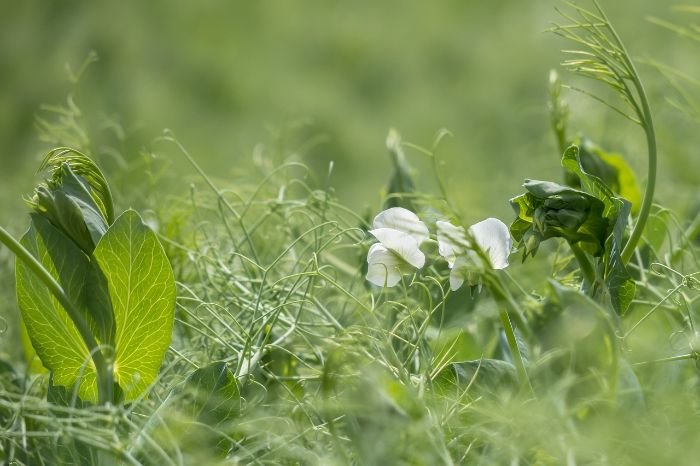
Flowering And Pollination – Pod Count Is Set Quietly
Pea flowers do not announce themselves from the top of the plant like tomato blossoms. They tuck into the leaf axils, partly hidden by stipules. By the time you notice a run of white flowers, the plant has already shifted from building vine length to deciding pod count.
Pea flowers are mostly self-pollinating. Pollen moves from the anthers to the stigma inside the flower, and fertilization starts before many gardeners realize the bloom has fully opened. After pollen germinates on the stigma, a pollen tube grows toward the ovules. Fertilized ovules become peas; the ovary becomes the pod.
When Pea Plants Flower
Flowering commonly begins around 4-6 weeks after planting in a cool spring, with variety and weather shifting the date. Dwarf peas bloom lower and earlier. Tall climbing peas bloom after more nodes have formed, then keep setting pods across a longer section of vine.
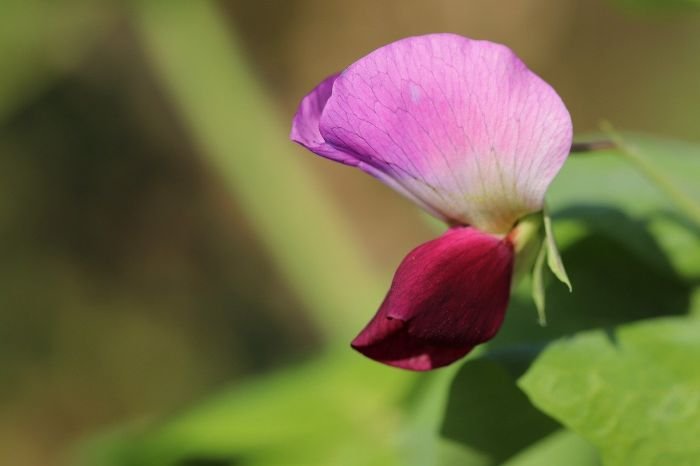
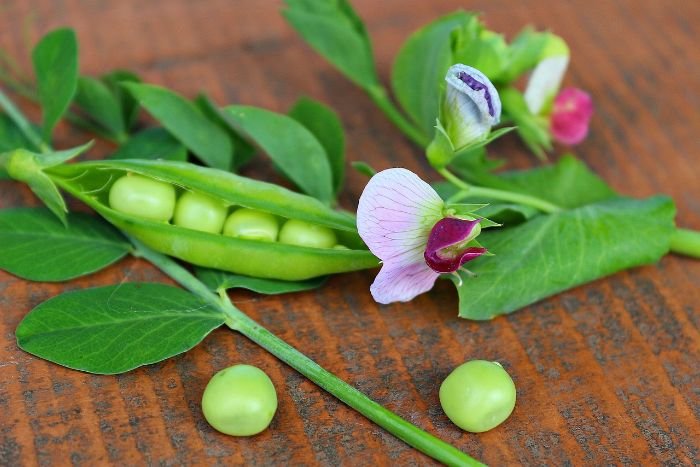
The first flower buds feel like tiny firm beads at the node. Open flowers have a clean folded shape, then the petals soften and dry back. Behind the spent flower, a green sliver appears. That sliver is the first pod.
Why Flowers Drop Before Pods Form
Hot day and night temperatures can cause flower abortion and poor pollination, with fewer pods and smaller peas. Pea flowers are sensitive to temperatures above 80 F, especially when dry conditions arrive near bloom.
Water stress at bloom closes the window from another direction. Roots cannot supply enough water for expanding floral tissue, and the plant sheds flowers before it spends energy on pods. The soil moisture check that matters is 3-4 inches down, not the pale crust on top.
Probe before you irrigate. Soil at that depth should feel cool and gather into a loose ball under finger pressure. If it falls apart as warm grains, water deeply at the base and keep the foliage dry.
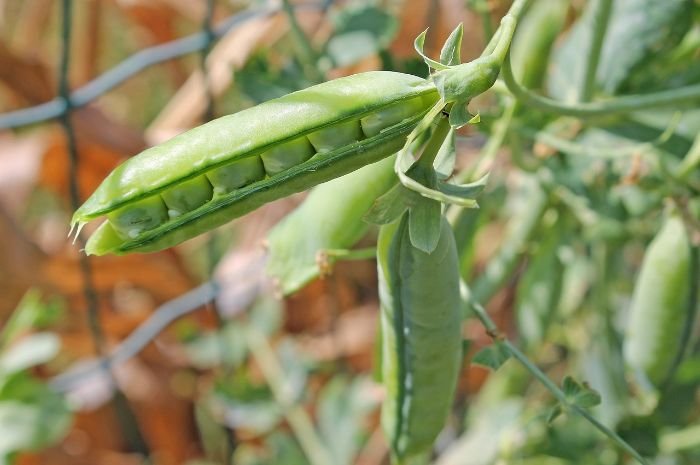
Pea Pod Development – Flat Pods Become Filled Seeds
Pod development begins as a flat green blade behind the fading flower. At first, the pod wall is the obvious part. Then the seeds inside begin swelling, and the harvest stage starts separating snow peas, snap peas, shelling peas, and dry peas.
The mechanism is simple and fast. After fertilization, the ovary elongates into a pod, cell expansion fills the pod wall with water, and the developing seeds draw sugars and nitrogen-rich compounds from the vine. As the seeds mature, sweetness drops as sugars convert toward starch.
Two post-flower windows help separate harvest types: snap peas are ready about 5-8 days after flowering, and garden peas are ready about 18-21 days after flowering. Weather compresses or stretches those windows. A hot dry spell makes the pod fibrous faster.
| Pod Signal | Stage | Best Use |
|---|---|---|
| Long, flat, peas barely visible | Early pod expansion | Snow peas |
| Full-size pod with small seeds | Tender edible-pod stage | Snap peas, early picking |
| Plump pod, peas rounded inside | Green seed fill | Shelling peas |
| Dull pod, ridged seeds, tougher wall | Late fresh stage | Cook immediately or remove from plant |
| Yellow to brown pod, dry seeds rattle | Seed maturity | Dry peas or seed saving |
Texture gives the best field cue. A young snow pea bends easily and has a flat green sheen. A good snap pea gives firm resistance, then breaks with a juicy snap. A shelling pea pod feels filled from end to end without hard ridges pressing through the skin.
Gardeners often wait for shelling pods to look oversized, then wonder why the peas taste floury. The sweetest pods feel full, not swollen hard, and the pod skin still has a fresh green shine without a dull cast.
Pea seed-fill follows a similar shift to green bean growth stages: a tender pod becomes a seed vessel once the plant commits more energy to the seed than the pod wall. Pick before that handoff goes too far.
Harvest Timing By Pea Type – Sweetness Has A Short Window
Pea harvest changes with the part of the plant you plan to eat. Snow peas are picked for the pod wall, snap peas for pod and seed together, shelling peas for the green seeds, and dry peas for fully mature seed.
Pea types separate by harvest use: garden peas are shelled, snap peas have low-fiber edible pods, and snow peas are harvested flat before the peas inside develop. That distinction matters more than pod size alone. A snow pea is harvested before seed fill becomes the dominant stage.
Snow Peas
Pick snow peas when pods reach full length and stay flat, with only tiny seed traces visible. The pod should flex without cracking and feel thin between thumb and finger. Wait too long and the pod becomes fibrous along the edges.
Snap Peas
Pick snap peas when the pod is plump, crisp, and still juicy. The peas inside should be nearly filled, not hard. If the pod snaps cleanly and the broken edge looks moist, the stage is right.
Shelling Peas
Pick shelling peas when the pod is rounded and the peas have reached full size, slightly larger than the dry seed you planted. Mature peas decline quickly in quality and can become inedible as fresh peas within 1-3 days. That is the narrow window.
Seed Maturity And Plant Dry-Down
Leave pods on the plant until they turn yellow to brown and the seeds rattle inside. Dry-down is a dehydration stage, not a fresh harvest stage. The pod wall becomes papery, the seed coat hardens, lower leaves yellow, and the vine begins senescence from the base upward.
Fresh harvest and seed maturity are different endpoints. Fresh peas stop at high-moisture green seed fill, when sugars are still high and pod skins still shine. Seed saving continues until the seed coat hardens and the pod moisture drops enough for storage.
Pick with two hands once the row is producing. Hold the vine with one hand and snap the pod free with the other. Pea stems tear easily, especially where tendrils have tied several stems together.
The main harvest failure is overmaturity. A pod with hard seed ridges is not ruined; it no longer eats like a fresh pea. Strip those pods anyway. Leaving them on the vine tells the plant that seed production is complete.
Stage Trouble Signals – Match The Fix To The Failed Handoff
Pea problems become easier to solve when you name the failed stage. A row that never emerges, a vine that sprawls, flowers that drop, and pods that turn stringy point to different failed handoffs.
Peas form root nodules with nitrogen-fixing bacteria, trading plant sugars for usable nitrogen. That relationship reduces the need for heavy nitrogen fertilizer once the crop is established. Too much nitrogen pushes leaf and vine growth, delays flowering, and reduces pod set.
- Germination: gaps and swollen mushy seed point to cold saturated soil, old seed, or a sealed crust. Replant in workable soil and keep the row damp, not waterlogged.
- Emergence: seedlings cut at soil level point to cutworms feeding at night. Scout at dusk and protect new stems before more plants disappear.
- Vegetative growth: vines tangled on the ground point to support installed too late. Lift stems gently and add twiggy support beside the row.
- Flowering: flowers that dry and drop point to heat above 80 F, dry root-zone soil, or frost. Water deeply, cover during frost, and plant earlier next season if heat repeats.
- Pod fill: short, stringy, or poorly filled pods point to water stress during seed expansion. Keep root-zone moisture even through harvest.
- Harvest: dull pods with hard ridges point to late picking. Harvest daily during peak pod fill and strip mature pods from the vine.
Powdery mildew, aphids, and root rots also track stages. Dense unsupported vines hold humidity around leaves. Aphids gather near tender tips where sap is rich. Root rot takes advantage of low-oxygen soil during germination and early root growth.
Do not fix every pea problem with fertilizer. Identify which stage stopped moving. Seeds need oxygen and moisture. Tendrils need support. Flowers need cool weather and a hydrated root zone. Pods need daily attention once seed fill begins.
A productive pea row shows active tendrils, open flowers above the picking zone, and filled pods lower on the vine.
Conclusion
Pea plant growth stages are easiest to manage when nodes define the stage through tendrils, flowers, pods, and seed fill. V2 tendrils set the support deadline, the flower-to-pod transition sets yield, and pod texture sets the harvest endpoint for snow, snap, shelling, or dry peas.
If soil is workable above 40 F, support is in place before tendrils attach, and pods are sampled daily once seed fill starts, the row stays readable from bottom to top. The success signal is physical: active tendrils above, open flowers in the middle, and pods below that snap, shell, or dry with the right texture.
FAQ
What Are The Main Pea Plant Growth Stages?
The main stages are germination, emergence, first true leaf, tendril-bearing vegetative growth, flower bud, open flower, flat pod, green seed fill, fresh harvest, and dry seed maturity. The most useful field markers are the first tendril at the second true leaf, the first flat pod after bloom, and the shift from shiny filled pods to dull ridged pods.
How Long Do Pea Plants Take From Seed To Harvest?
Most garden peas reach first harvest in about 60-70 days from planting in cool spring weather. Soil below 55 F slows emergence, and heat above 80 F shortens the productive bloom period. Snap peas can be ready about 5-8 days after flowering, and shelling peas take closer to 18-21 days after flowering.
Do Pea Plants Keep Producing After You Pick Pods?
Healthy pea vines keep producing during the cool part of their bloom window. Regular picking removes maturing seed and keeps the plant moving energy into younger pods and flowers. Leaving mature pods on the vine speeds the plant toward seed completion and slows new pod production.
Can You Grow Peas Without A Trellis?
Yes, short bush peas can support each other in a dense row. Tall vine peas need a trellis, fence, or twiggy brush to stay upright and productive. Unsupported tall peas form a damp mat, hide pods, and make mildew problems harder to manage.
What Happens If Pea Plants Flower During Hot Weather?
Hot bloom weather cuts pod set first. Flowers dry, abort, or form pods with fewer and smaller peas, especially when the root zone is dry at the same time. Once daytime heat stays above 80 F, water cannot fully compensate; earlier planting is the better fix for the next crop.
How Long After Flowers Do Pea Pods Form?
A flat pod begins forming soon after the flower fades. Snap peas often reach picking quality about 5-8 days after flowering, and shelling peas commonly need about 18-21 days for full green seed fill. Check every day after the first pods appear because warm weather moves them fast.
What Is The Most Common Mistake When Harvesting Peas?
Waiting for the biggest pod costs sweetness. Shelling peas should feel full without hard ridges, snap peas should be crisp and juicy, and snow peas should stay flat. Once the pod turns dull and the seed ridges press through, sugars have already moved toward starch.
What Week Do Pea Plants Start Flowering?
Week 5-7 is common in cool spring conditions. Dwarf peas can flower earlier because they need fewer nodes before bloom, and tall climbing peas often flower later after more vine growth. Cold soil, shade, and late support can push flowering back.