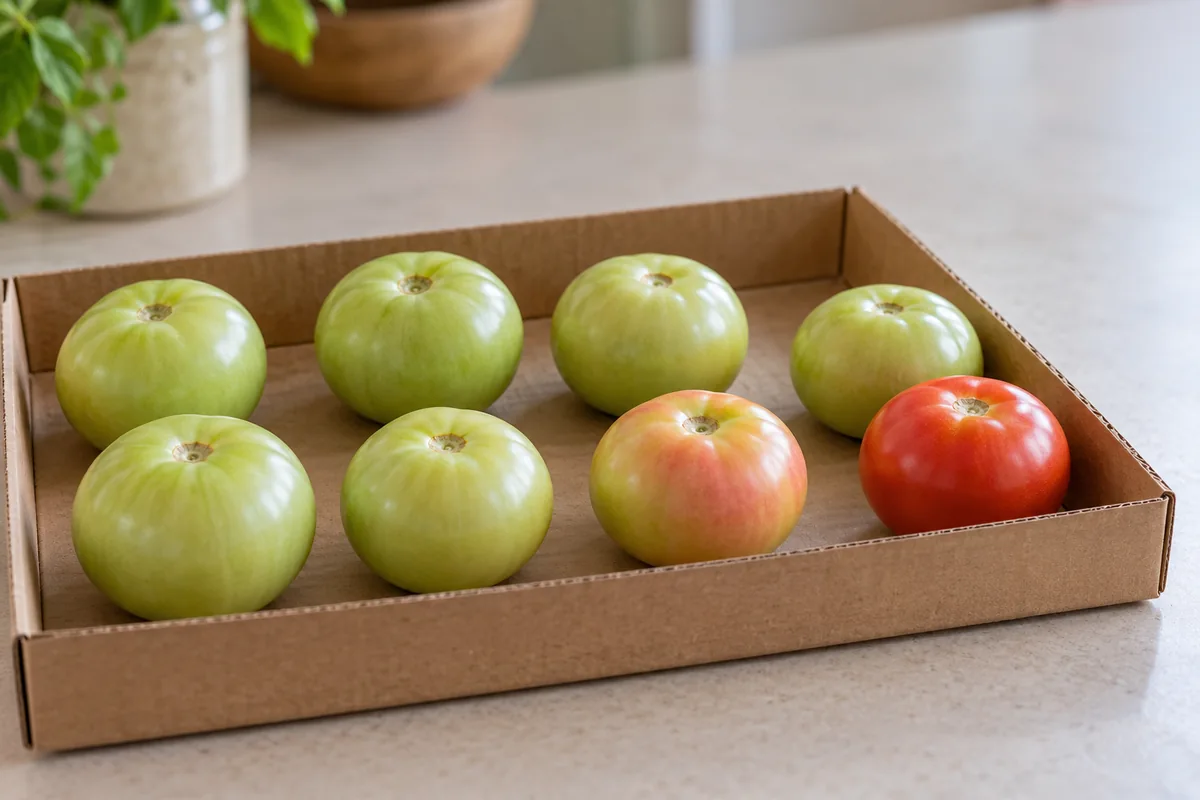
How to ripen green tomatoes starts with choosing fruit that has finished growing: full-size, firm tomatoes with a lighter green or whitish cast have a better chance than small, uniformly dark-green fruit. Pick sound fruit before damaging frost, remove the stems, and arrange it in a dry, ventilated box at moderate room temperature. Direct sunlight is unnecessary. A ripe tomato in a breathable bag can help a small batch color sooner, but it cannot make an immature fruit fully developed.
Sort the harvest before choosing a container. Keep tomatoes showing their first blush apart from mature green ones, and remove cracked, leaking or decaying fruit. Then choose between ripening a few for eating and holding a larger harvest for gradual use. The same cool room that stretches out the harvest also slows color change, so the temperature needs to match your goal.
Sort first, then choose the setup
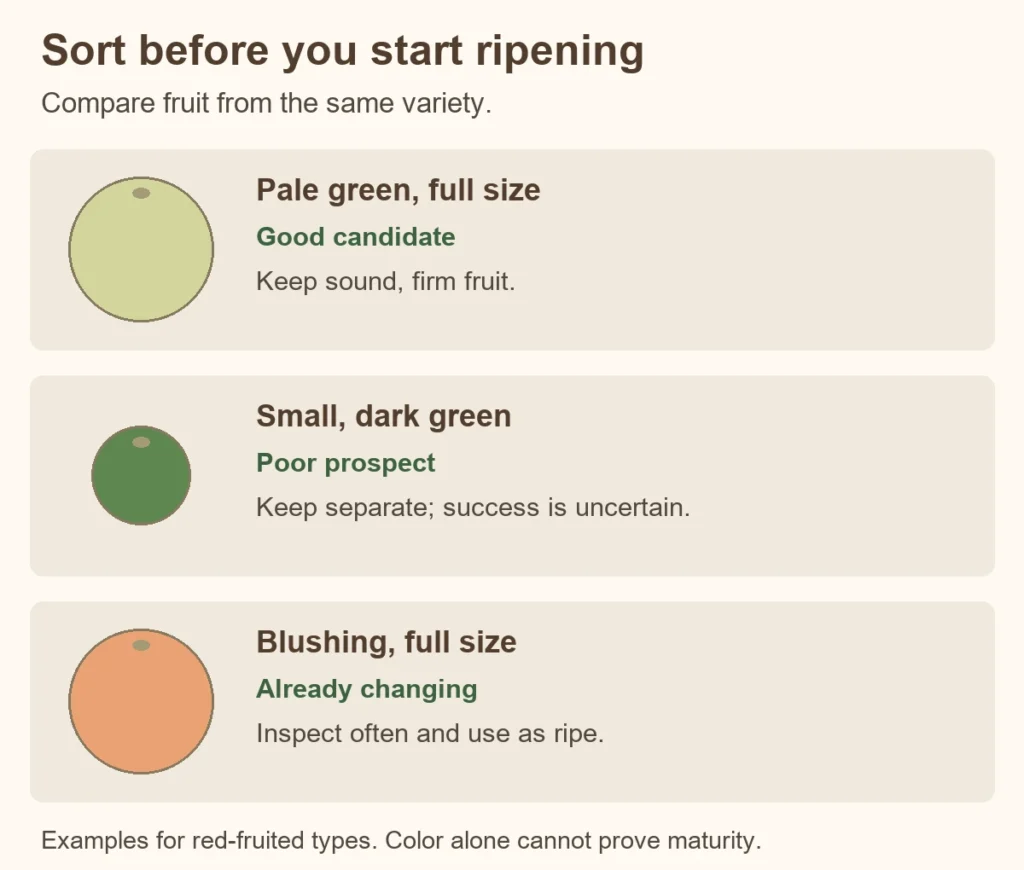
- Full-size, pale green and sound: place one layer deep in a ventilated box around 65-70°F. Check often.
- Already showing pink or yellow: keep separate and use as it reaches the variety’s ripe color and texture.
- Small and uniformly dark green: expect poor ripening. Keep out of the main batch.
- Moldy, leaking or breaking down: discard. A bag will not repair damaged fruit.
For gradual fall storage, sound mature fruit can be wrapped individually and held around 60-65°F, then unwrapped and moved to room temperature when color develops.
Key Takeaways
- Choose full-size, sound tomatoes with a lighter green cast.
- Harvest suitable fruit before damaging frost reaches the plants.
- Space tomatoes in one layer and keep the container ventilated.
- Use a ripe tomato to speed a small, breathable batch.
- Inspect frequently and remove ripe or decaying fruit promptly.
Table of Contents
How to Ripen Green Tomatoes After Checking Their Maturity
A tomato can be green because its color has not changed, or because the fruit itself is still developing. Those are different starting points. A mature green tomato has reached its expected size for that variety. Its surface often becomes glossy and lighter, with a whitish cast.
Compare fruit from the same plant or cultivar. A mature cherry tomato remains much smaller than an immature beefsteak, so size across varieties tells you little. Look at the blossom end, opposite the stem scar. A pale star or streak can help identify a fruit approaching ripening, although no single surface mark proves its internal maturity.
Fruit development comes before color change in the tomato growth stages. If frost is approaching, prioritize full-size fruit and any already showing a blush. A hard little tomato that is dark green all over is a poor candidate for limited indoor space.
Keep the variety’s ripe color in mind
Red is only one possible finish. Yellow, orange and green-when-ripe varieties have different ripe colors, and some keep dark shoulders. Use the cultivar label and familiar ripe fruit as your comparison. A photograph of a conventional red tomato cannot diagnose every variety.
The distinction between mature green and truly unripe fruit appears in University of Minnesota Extension’s home tomato guidance. Fully developed fruit can often finish indoors; very immature fruit may soften or deteriorate without reaching satisfying flavor. Keep uncertain specimens in a separate small trial batch.
Use a Dry Open Box So Air Can Move Around the Fruit
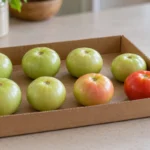
A shallow cardboard box makes the harvest easy to inspect. Choose a clean, dry container with enough room for one layer. Put it on a shelf or table where air can move, away from a heating vent, direct sun and a wet basement floor.
- Remove sharp stems. They can puncture neighboring fruit when a box is moved. Handle each tomato gently and avoid pressing a thumb into the skin.
- Clean off dirt and let the fruit dry. If washing is needed, gently wash and air-dry it before storage. Do not pack wet tomatoes into paper.
- Inspect the entire surface. Turn each fruit to see the blossom end, stem scar and underside. Set aside split or damaged fruit; discard decay.
- Leave space between tomatoes. A single layer without touching allows easier checks and avoids the weight of fruit piled above.
- Group similar stages together. Keep blushing fruit separate so it can be used first without repeatedly disturbing the green batch.
Light does not power the ripening of a picked tomato. The harvested fruit can color in a room without a sunny window. A windowsill may expose one side to strong heat, followed by chilling against cold glass at night. Choose a stable indoor location and check the actual temperature where the box sits.
Keep a simple date label on each batch. You will be able to compare changes without remembering which green tomato came in last. A shelf you pass daily is often more useful than a hidden corner with ideal-looking conditions that you forget to inspect.
Choose Temperature for Faster Ripening or Gradual Storage
Temperature changes the pace of ripening. Mature green fruit held around 65-70°F can color over roughly two weeks in Iowa State University Extension’s AnswerLine guidance. That is an approximate expectation for suitable fruit, not a deadline for every cultivar or maturity stage.
Cooler storage serves a different purpose. Individually wrapped, sound mature green tomatoes held around 60-65°F can be brought along more gradually, as in Iowa State’s fall storage method. Unwrap fruit that begins to color and move it to room temperature. This is useful when several boxes arrive before frost and you want the harvest spread out.
| Your situation | Temperature and setup | What changes |
|---|---|---|
| A small mature green harvest for near-term use | About 65-70°F in a ventilated box | Color may develop over about two weeks; check each fruit. |
| A larger fall harvest for gradual use | About 60-65°F, individually wrapped, with inspections | Ripening is slower. Unwrap and move coloring fruit to room temperature. |
| Fruit already coloring during very hot summer weather | About 70-75°F indoors in Illinois Extension’s hot-weather guidance | This is a partly colored harvest case, not a universal green-fruit target. |
A cold refrigerator is unsuitable for ripening mature green fruit. Cooler is not automatically better: Iowa’s guidance describes slower ripening and poorer quality around 55°F. Likewise, moving fruit into a hot cupboard does not guarantee faster coloring. Use a household thermometer before blaming the container.
Keep moisture from collecting around the skins
Wet paper, beads of condensation and a damp box bottom mean the setup needs attention. Replace wet material and improve ventilation. A leathery, wrinkling skin suggests the fruit is losing water, but a closed wet bag creates another problem. Do not spray the tomatoes to correct shriveling.
Paper wrapping hides the surface, so unwrap fruit during inspections. A brown patch that keeps expanding is not useful progress. Remove the affected tomato and check the neighboring fruit and paper before putting the batch back.
A Ripe Tomato Supplies Ethylene in a Breathable Paper Bag
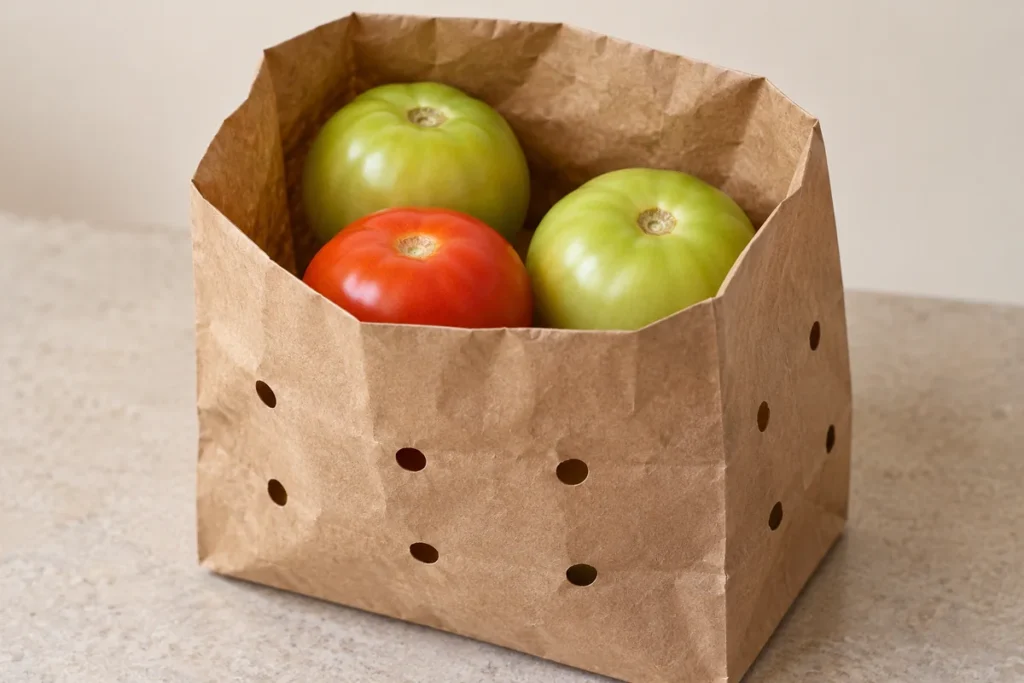
Ripening tomatoes release ethylene, a gas involved in the ripening process. Keeping a ripe tomato with mature green fruit in a small ventilated space can speed color development. The starting fruit still needs to be developed enough to respond; added ethylene cannot replace growth that never happened on the plant.
Use a clean paper bag with air holes and only a small batch of dry, sound fruit. Add one healthy ripe tomato, keep the bag breathable, and open it for frequent inspection. Illinois Extension’s Good Growing advice describes perforating the paper so the fruit is not held in a sealed, damp pocket.
Do not pack the bag tightly or substitute an airtight plastic container. If a tomato begins leaking or growing mold, discard it and inspect the rest. If everything is wet, move sound dry fruit to an open box and replace the damp bag. A box is easier to monitor when you have more fruit than you can see at a glance.
Separate Normal Softening From Leaks, Mold and Expanding Lesions
Check frequently, especially once color starts. Look beneath the fruit as well as at the visible top. Normal ripening brings the variety’s mature color and a gentle change from hard to yielding. Water-soaked patches, leaking juice, fuzzy growth and an unpleasant fermented or rotten odor call for removal.
Handle lightly. Repeated squeezing can bruise a fruit that would otherwise store well. Lift it to examine the bottom, then return sound fruit with space around it. Take ripe tomatoes out for use so they do not become overripe inside the same batch.
Fruit lesions can arise from different diseases and injuries. A dark patch alone does not identify late blight, and a green tomato that stays firm is not automatically diseased. Look for change: a spreading brown area or collapsing tissue matters more than the absence of red color.
Keep the condition of the original plant in perspective. Curled tomato leaves can reflect environmental stress as well as other problems; leaf shape alone cannot certify or condemn the fruit. Use the fruit’s condition and a proper diagnosis when plant disease is suspected.
Seed collection has its own selection standard. Do not choose a hard, undersized tomato merely because it is the last one available. For saving tomato seeds, retain the identity of the parent variety and choose healthy, fully ripe fruit from a healthy plant.
Harvest Before Freezing and Keep Canning Rules Separate
Use the forecast to plan the final harvest. A local freeze warning is more relevant than a fixed date on the calendar. Bring suitable fruit inside before a killing freeze, then sort it under good light. A broader late-fall harvest check also helps separate frost-tender tomatoes and peppers from crops that tolerate colder conditions.
If frost has already reached the garden, inspect the fruit for water-soaking, soft breakdown and other damage. Do not put obviously compromised tomatoes into the storage batch and expect ripening to repair them. Color change cannot reverse tissue injury.
For home canning: do not can tomatoes from dead or frost-killed vines. Use sound fruit and a tested recipe with the required acidification and processing steps. The National Center for Home Food Preservation’s tomato canning precautions make this restriction explicit. Becoming red indoors does not remove it.
That preservation restriction concerns canning. It does not establish that every tomato in a garden that experienced a chilly night has the same condition. Keep frost exposure, visible fruit damage and the intended use separate, and ask a local Extension food-preservation specialist if the vine’s condition leaves a canning decision uncertain.
Check Maturity and Conditions When Fruit Stays Green
If a batch has barely changed, start with the thermometer and the original maturity. A cool cellar will behave differently from a 68°F room. A tray of small dark-green fruit may have little potential even when the room is suitable. Move a few sound, full-size fruit to a better location and compare their progress.
Do not keep adding ripe fruit to a wet, deteriorating bag. Correct the damp setup first. If some tomatoes are coloring and others remain hard and dark green, separate them so the viable batch remains easy to inspect. No method promises that every last fruit reaches good eating quality.
For tomatoes still outdoors during summer heat, the problem may be different. Color development can slow as softening accelerates when air temperatures reach 90°F or more, a distinction in University of Illinois Extension’s tomato harvest guidance. Fruit already beginning to color can be brought into a moderate indoor environment; extra heat is not the remedy.
Hanging an uprooted plant in a sheltered location is an optional way to handle remaining fruit when you have room. It is bulkier than boxes and still requires inspections. It does not remove the maturity requirement or guarantee better flavor.
Conclusion
Start with sound, developed fruit, then give it moderate temperature, ventilation and regular checks. An open box suits easy inspection; a breathable bag with a ripe tomato can help a small batch color sooner. Hold a large harvest cooler only when slower use is the goal. Remove ripe fruit for eating, discard decay, and keep frost-killed-vine tomatoes out of home canning.