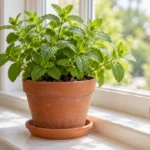

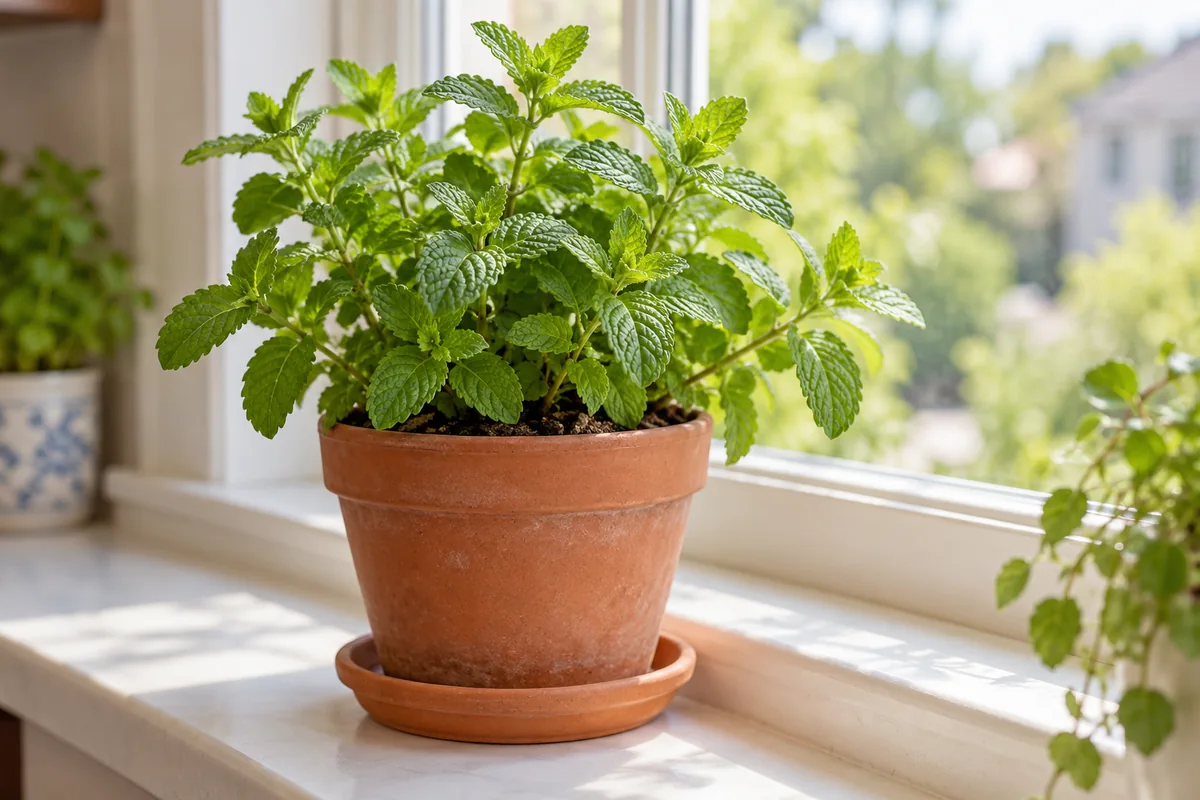
How to grow mint indoors depends on giving the plant enough light to replace the leaves you pick and keeping its roots moist and free to drain. Start with a healthy mint plant or rooted cutting, use a pot with drainage holes, and place it at a sunny window or beneath a suitable grow light. Check the potting mix before watering, then harvest shoot tips without stripping the plant.
A mint pot can smell wonderful when you brush its ridged leaves and still struggle to grow. Long gaps between leaf pairs suggest a light problem; drooping leaves require a moisture check before another drink. These signs matter more than a watering calendar. A bright summer window and a dim winter kitchen place different demands on the same plant. Adjust light, watering and picking together, and judge recovery by the new leaves.
Set up a mint pot you can keep harvesting
- Start: choose a healthy culinary mint plant, division or rooted cutting.
- Place: aim for about 6 hours of bright window light, or use a suitable grow light for 12-16 hours daily.
- Check: feel below the mix surface and lift the pot before watering; empty collected drainage water.
- Clip: take a growing tip above a leaf pair, leaving healthy foliage below.
Stretched stems: assess light first. Wilting stems: distinguish a dry pot from a wet one before adding water.
Key Takeaways
- Choose a healthy mint plant before planning regular harvests.
- Use a draining pot with room for new roots.
- Increase usable light when new stems grow long and sparse.
- Check moisture below the surface before watering your mint.
- Clip above leaf pairs and allow side shoots to develop.
Table of Contents
How to Grow Mint Indoors Without Long, Sparse Stems
Light sets the pace of leaf production. A mint plant can survive temporarily in a dim room with little growth you can harvest. Examine the newest stem sections: large gaps between opposite leaf pairs, small pale leaves and growth leaning strongly toward the glass call for a closer look at the light reaching the plant.
About 6 hours of bright window light, or 12-16 hours of suitable supplemental lighting, is the mint-specific starting guidance in the University of California Master Gardeners’ indoor mint growing recommendations. A south- or west-facing window may offer a useful position, but trees, neighboring buildings, screens and the season can reduce what reaches the leaves.
Check the position across the day. A window that lights the room may leave the actual pot shaded behind a curtain or beside the frame. Move the foliage into the usable light, clear of glass that becomes very cold or hot. Turn the pot occasionally if growth leans. Also correct a location that stays too dark.
Use a grow light when the window falls short
Place a plant-growing LED or other suitable fixture over the foliage, using its instructions for clearance and safe operation. Set a timer within the mint-specific 12-16-hour range and leave an overnight dark period. Lamp duration alone does not describe its brightness: a weak bulb far above the plant can run all day without producing compact growth.
Judge the adjustment by emerging shoots. Old elongated stems will keep their long gaps; shorter spacing on new growth shows a different response. Avoid cutting every weak stem back at once on a struggling plant. Improve light, retain useful leaves and begin selective pinching when growth strengthens.
An east-facing window can be worth trying when it receives unobstructed morning light. During a dark northern winter, plan for slower regrowth or supplemental lighting. Keeping a pot alive and supplying a handful of leaves whenever you want are different levels of production.
Start With Roots or Help a Cutting Establish Them
A small nursery plant offers an immediate root system. Choose one with healthy new tips and no obvious insect colonies, webbing or spreading leaf damage. Check beneath the leaves and around the pot rim before bringing it beside other houseplants. A supermarket herb pot can work too, provided its shoots and roots are healthy.
Choose a labeled culinary mint you like to use. The different flavors of mint varieties matter when the leaves are destined for tea, salads or drinks. A cutting or division retains the parent plant’s characteristics. Seedlings can vary. There is no need to start from seed to maintain an indoor pot.
Root a healthy stem before asking it for a harvest
Take a nonflowering shoot from a healthy culinary mint plant with permission. Make a clean cut below a leaf node, then remove lower leaves that would sit in water. Keep the remaining foliage above the waterline and place the cutting in a clean glass where it gets bright light without overheating.
Replace the water if it becomes cloudy, and discard a cutting that turns slimy or decays. Fine roots emerging from the lower stem are more useful than a promised number of days. Once a small root system has developed, pot the cutting gently in moist container mix. Keep checking moisture as the roots establish in that new medium.
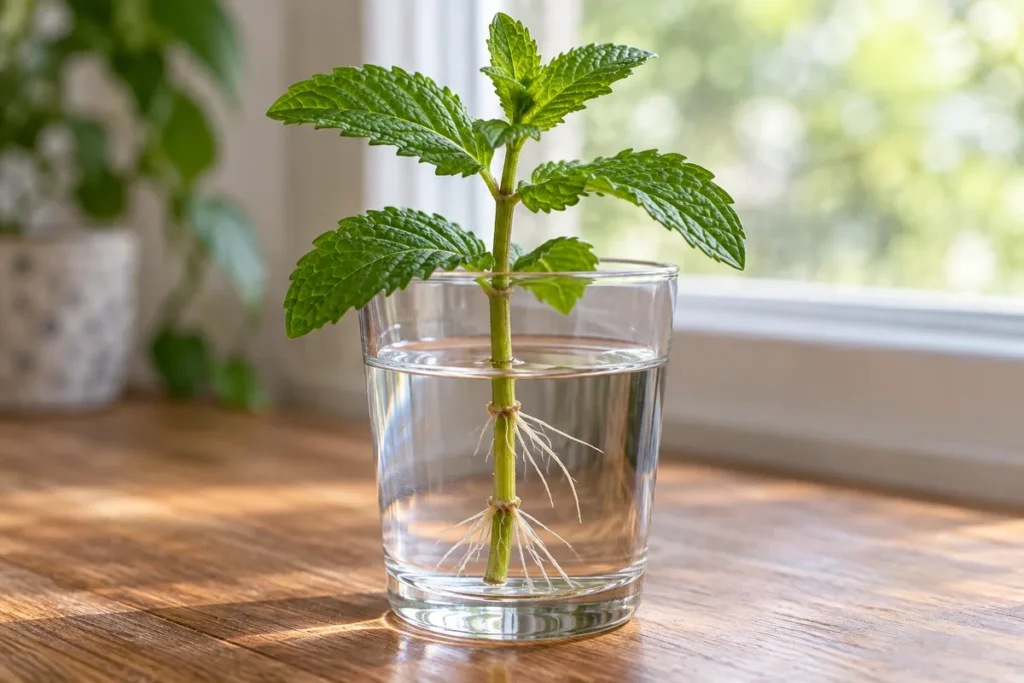
Stem cuttings root in water or moist potting media, and division is another common way to reproduce mint, as described in Iowa State University Extension’s mint propagation and harvest methods. A glass used for rooting should not be treated as a promise of indefinite leaf production. Long-term water culture also needs nutrient and root management.
Give Spreading Roots Air and Usable Potting Mix
Use a container with an open drainage hole and room for the existing root ball plus some fresh mix. A small rooted cutting does not need a large tub of wet material around it. An established plant with roots tightly circling its pot needs more usable root space or division into smaller plants.
Slip the root ball out gently when checking crowding. Look for a dense mat against the pot wall and very little loose mix. If water repeatedly runs through without wetting the root ball, break up the congestion by dividing or repotting; pouring more water onto the same packed surface may leave the underlying problem untouched.
Container mix must retain moisture and have air spaces after watering. A lightweight commercial potting mix is a better starting point than dense garden soil in a kitchen pot. Mixing two parts soilless potting mix with one part perlite is an indoor-herb option from University of Maryland Extension. Check a ready-made mix before adding more material; it may already have suitable aeration.
Check whether your bag already contains aeration material and fertilizer. The balance between drainage and water retention in a container soil mix affects how quickly the pot dries. More mineral material does not remove the need for a drainage hole or correct an outer cover pot full of water.
Set the mint at its previous planting level, settle fresh mix around the roots and water it in. Give mint its own pot. Spreading roots and its preference for reliable moisture make shared containers awkward, especially with herbs that need a drier root zone.
Water After Checking the Root Zone, Then Let It Drain
Mint prefers moist, well-drained growing conditions. Indoors, the useful distinction is between moisture held in the mix and water that keeps the root zone saturated. Roots need oxygen as well as water; a pot left standing in runoff can stay wet even as its leaves droop.
Feel the mix below its dry-looking surface and lift the container. A pot that has become noticeably lighter, with mix beginning to dry beneath the surface, needs a different response from a heavy pot with cool, wet mix. Repeat that comparison after watering so you learn the change in your own container.
When watering is needed, wet the mix thoroughly and let the excess escape. Empty the saucer or decorative outer container after drainage. If water sits on top or fails to leave the bottom, check the hole and the condition of the mix before repeating the watering.
Separate dry wilt from wet wilt
Drooping leaves on a light, dry pot may improve after thorough watering. Recheck the plant once the mix has absorbed moisture, and investigate why it dried so far. A small root-filled pot beside a heating vent can run out of moisture quickly. Move it out of the hot airflow and consider whether the root ball needs attention.
Drooping leaves on a heavy, wet pot call for a drainage and root check. Do not automatically add another drink. Roots that are soft or collapsing, especially with a sour smell from saturated mix, warrant closer inspection. Those signs raise concern about damaged roots; wilt alone does not identify a particular disease.
The same drooping leaf symptoms can follow several failures of water uptake. Check the pot before changing two or three care routines at once. Pale foliage and poor regrowth will not resolve if a drainage problem keeps damaging the roots.
Match Feeding and Winter Picking to Active Growth
Begin with light, roots and moisture before reaching for fertilizer. A plant producing long, weak stems beside a shaded window needs a better light supply. Feeding that plant heavily can add salts to the mix without correcting the cause of weak growth.
Read the potting-mix label before feeding. If it contains fertilizer, account for that supply and follow its directions before adding another product. Once the plant is actively making healthy leaves, use a fertilizer labeled for edible container plants, at an appropriate label rate. Avoid stacking several feeds because the leaves look pale.
There is no single indoor-mint feeding interval that fits every product and potting mix. A newly rooted cutting, a recently repotted plant in fertilized mix and a vigorous established pot do not start with the same nutrient supply. Review growth and the product directions together before deciding whether feeding is needed.
Shorter winter days can reduce growth even in a room that feels comfortable. Keep foliage away from cold glass and hot, drying vents. Check moisture by feel because a slower-growing plant may use less water. Reduce harvest size if replacement leaves are emerging slowly, and increase picking only when the pot is growing strongly again.
Cut Above Leaf Pairs to Keep Shoots Branching
Take a shoot tip with a clean snip just above a pair of healthy leaves. The leaves and buds remaining below the cut can continue supporting growth. Pinching the tip encourages branching, which produces more leafy shoots when the plant has adequate light and healthy roots.
Find the node before cutting. Mint leaves grow in opposite pairs along the stem; the node is the point where a pair joins it. Keep those leaves attached and snip the stem just above their node. On a sparse young plant, take a small tip and retain most of the healthy foliage.
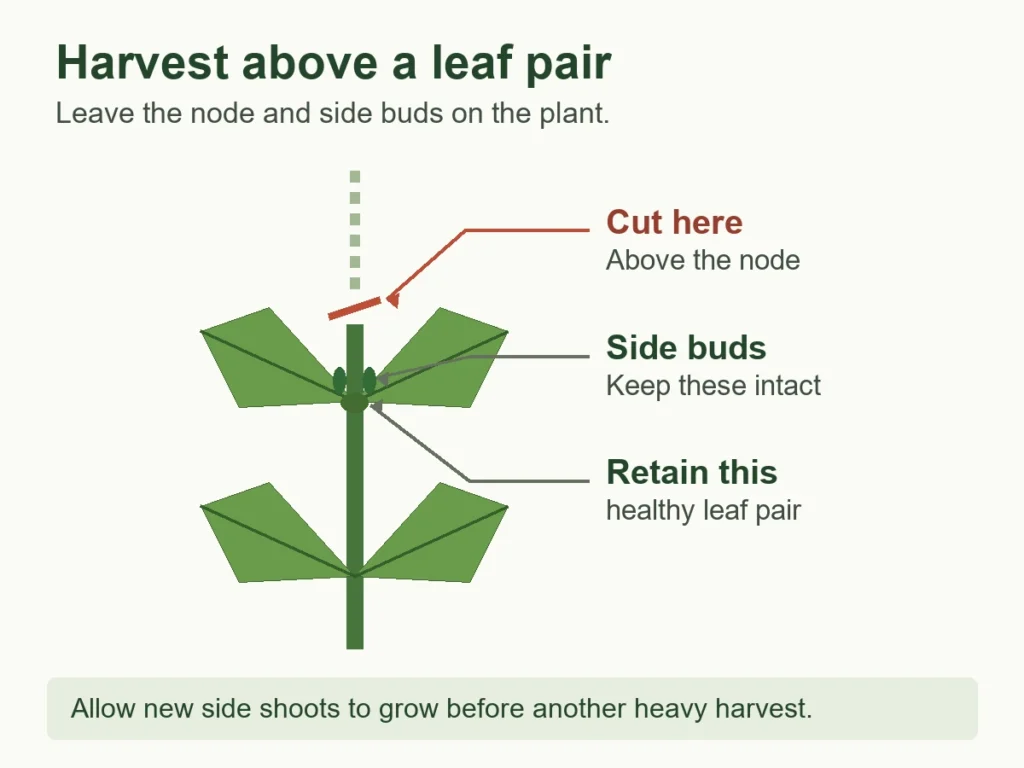
Alternate the stems you harvest and watch for fresh side growth before taking another substantial handful. Thin, tender new leaves and firm shoots are useful recovery signs. If the remaining leaves are tiny or the plant has stopped extending, pause heavier picking and reassess its growing conditions.
Repeatedly pulling off individual leaves from the lower stem can leave a tall, bare plant. Tip harvesting gives a clearer place for branching. A flowering shoot can also be removed when leafy growth is the goal, but do not strip an already weak winter plant in an attempt to make it bushy overnight.
There is no dependable weekly yield for every windowsill. A mature, well-lit pot may replace harvested tips readily; a small cutting or a dim winter plant may need much longer. Let the amount of healthy replacement foliage determine the next harvest.
Use New Growth, Soil Feel and Leaf Undersides to Diagnose Trouble
Look at the whole pot before deciding what to change. A pale leaf by itself cannot tell you whether the cause is low light, damaged roots, insects or aging foliage. Compare the newest shoots, inspect the growing medium and turn over several affected leaves.
| Visible sign | Check before acting | Next action |
|---|---|---|
| Long gaps, pale new leaves | Light reaching the foliage across the day | Improve placement or supplemental light; assess the next shoots. |
| Wilt in a light, dry pot | Moisture below the surface, root crowding and heat exposure | Water thoroughly, drain, then address rapid drying. |
| Wilt in a heavy, wet pot | Drainage hole, trapped runoff and root condition | Stop automatic watering and correct the root-zone problem. |
| Speckled or sticky foliage | Leaf undersides, shoot tips and fine webbing | Separate the plant and identify the pest before treatment. |
| Little regrowth after picking | Remaining healthy leaves, light and root space | Pause heavy harvests; let replacement shoots develop. |
Aphids can gather around tender growth, leaving sticky deposits; mites can cause pale speckling and fine webbing. Rust-like raised spots or spreading lesions require a different investigation from a uniformly pale shoot. Rust, spider mites and aphids are among the problems listed for mint by University of Delaware Cooperative Extension. A symptom is a starting point for identification.
Move a suspect pot away from other plants and inspect it in good light. If you find aphids, choose aphid control methods appropriate for an indoor edible herb. Use only products labeled for the plant, pest and location, and follow any harvest restrictions. Ask a local Extension office about persistent or uncertain disease symptoms.
Conclusion
Start with a healthy mint plant, a draining pot and a location that supplies usable light. Then let the pot and its new growth guide your care. Check wet versus dry mix before watering, cut above leaf pairs, and leave enough foliage for recovery. When fresh side shoots replace the tips you harvested, the setup is doing its job.
Frequently Asked Questions
Does indoor mint need a daily misting?
A misting routine does not replace checking the root-zone moisture or supplying enough light. If foliage is crowded and stays wet, improve spacing and air movement. Keep the pot away from drying heat vents and water the mix according to its condition.
Can I bring an outdoor mint pot inside for winter?
Yes, if the plant is healthy and you can give it suitable indoor conditions. Inspect leaves, stems and the pot for pests before moving it beside houseplants. Expect its watering needs and growth rate to change with indoor light and temperature.
Should I throw away mint when its lower stems become bare?
Check the roots and newer shoots first. A healthy plant may recover through better light and selective pinching, or supply a clean cutting for a new pot. A declining plant with persistent pests or damaged roots needs diagnosis before you propagate from it.