
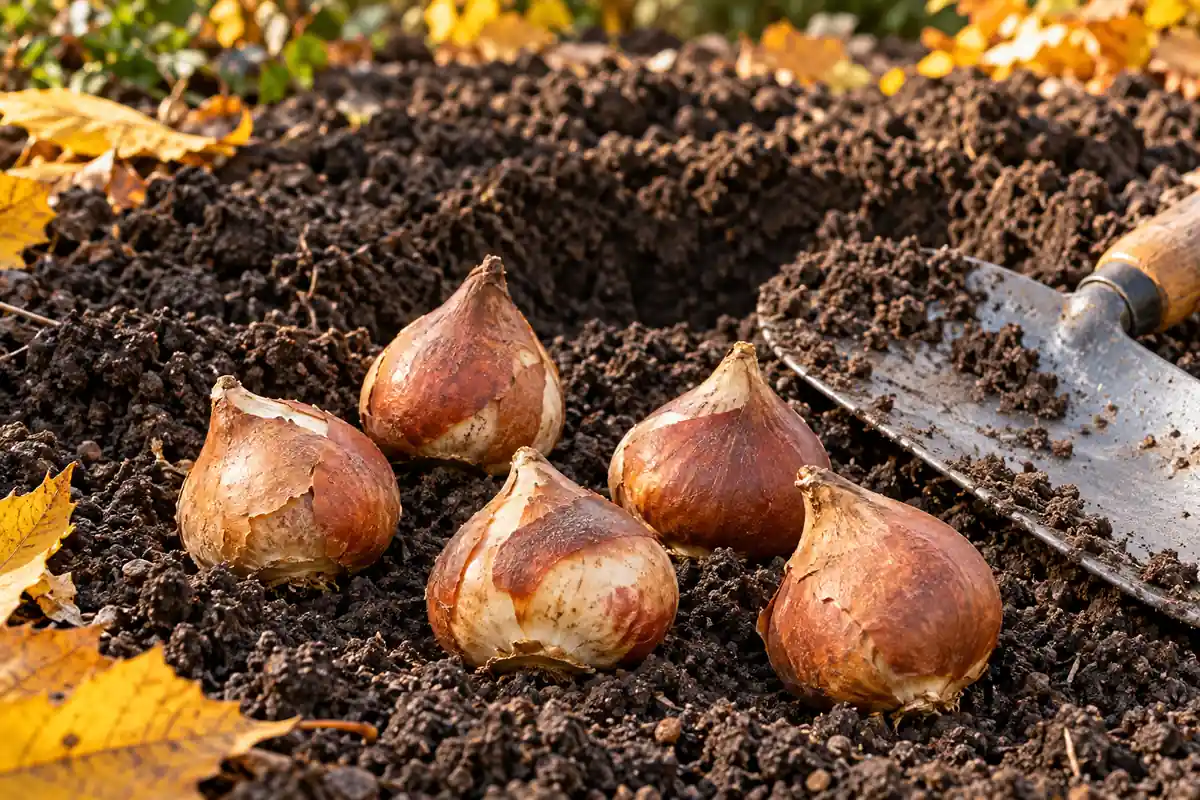
How to plant tulip bulbs successfully depends on choosing a draining site, planting during the local fall window, and measuring depth from the correct part of the bulb. Follow the instructions for your variety. Place each bulb with its pointed growing tip up and flat root plate down, cover with soil, then water to settle the bed without leaving it saturated.
Before digging, check what the depth number means. Eight inches to the bottom of a bulb and eight inches of soil above its tip produce different planting positions. Soil texture, bulb size and winter conditions also change the advice. Firm bulbs in crumbly soil have a different start from soft bulbs pressed into a sticky, waterlogged hole. Make those checks now, and plan how the bed or pot will drain and stay protected through winter.
Check the bulb, the hole and the coming winter
- Use firm bulbs and soil that drains. Stop if the planting area stays waterlogged.
- Check the label’s depth reference. For many large tulips, about 8 inches to the bulb base is one Extension starting point; small species tulips and local guidance can differ.
- Set the point upward, space for the variety and cover to finished soil level.
- Water to settle. In warm-winter areas, confirm chilling needs; in cold areas, plan protection for exposed pots.
Example only: a bulb 2 inches tall with its base 8 inches down has 6 inches of soil above its tip.
Key Takeaways
- Check local fall conditions before choosing your planting date.
- Measure depth from the bulb end specified by the instructions.
- Move the planting site if water collects around the bulbs.
- Plant firm bulbs with pointed tips facing upward.
- Keep green leaves after flowering so bulbs can replenish reserves.
Table of Contents
Plant in Fall So Roots Develop Before Winter
Tulips are usually planted as dormant bulbs in fall for spring flowers. The planting window needs to allow root growth before the ground freezes. A national calendar date cannot account for a Minnesota bed, a mountain garden and a mild Southern winter.
Local Extension planting windows offer a better starting point than waiting for the same air temperature everywhere. Late September through October is the Central Oregon window given by Oregon State University. In Georgia, many spring-flowering bulbs can be planted from October through late December, with cold-treatment decisions made for the bulbs and location.
Check the ground as well as the calendar. Soil that breaks into workable crumbs allows you to prepare a bed and settle bulbs properly. Wet soil that smears into a shiny ribbon on the shovel needs time to drain. Frozen ground requires a different plan from an unfrozen bed after a frosty night.
If the ideal planting month has passed
Plant sound bulbs promptly if the soil remains unfrozen and workable. Late planting is preferable to leaving them unplanted until spring, according to Iowa State University Extension’s advice on unplanted spring bulbs. Their roots and cold exposure are part of the seasonal cycle; storage in a warm room does not replace it.
If the ground has frozen solid, consider a documented container-forcing method with a controlled cold period. Buying spring bulbs late and leaving them indoors until warm spring weather is an unreliable route to flowering. Check the bulb condition and the method’s full requirements before deciding whether the remaining bulbs are worth keeping.
Confirm chilling in a warm-winter garden
Ask the supplier whether the tulip bulbs have been precooled and what your location requires. The University of Georgia’s flowering-bulb guidance specifically raises this question for mild-winter conditions. A bag labeled for a cold-climate fall bed may need a different preparation from bulbs supplied for a warm-region display.
Do not give every bulb an extra refrigerator treatment automatically. Cultivar, supplier handling and local winter temperatures matter. Follow a verified treatment for that stock, and avoid assuming that a refrigerator interval for indoor forcing is the same as outdoor planting preparation.
Choose Spring Light and Soil That Releases Excess Water
Choose a spot with adequate sunlight during the growing and flowering season. A bed under a deciduous tree can receive spring light before the canopy fills in, though the foliage must still receive enough light after flowering. Check spring shade patterns when comparing flowers for sun and partial shade.
Drainage is just as important as exposure. Avoid a low pocket beneath a downspout or a bed that holds standing water after rain. A raised, freely draining planting area can help when it addresses the wet conditions across the root zone. Digging a small improved pocket inside dense, saturated clay may leave water collecting around the bulbs.
Loosen a wider planting area when practical, removing stones and large clods so bulbs can sit at consistent depths. Work amendments through the bed according to its condition. Root-zone aeration is a major part of bulb-bed preparation in Colorado State University Extension’s planting guidance; avoid compacting soil underneath the bulbs.
Wait if the bed is too wet to work. Soil that sticks heavily to the spade and smears smooth under pressure can become more compacted during digging. Planting shallower does not solve a site that remains saturated. Relocate the bulbs or correct the drainage before planting.
Measure Tulip Bulb Depth From the Specified End
Read the package first, then identify the measurement reference. A depth can describe the distance from finished soil level to the bulb’s base, or the covering above its pointed tip. The thickness of mulch is separate from the finished soil level used for planting measurements.
For many large tulips, about 8 inches to the bottom is the example in University of Illinois Extension’s bulb planting-depth instructions. The same source states explicitly that depth is measured from the bottom. It is not an instruction to add 8 inches of soil above every bulb.
A different measurement appears in Amy Jo Detweiler’s Oregon State University Central Oregon bulb planting table. Its depths run from the tip to the soil surface. General tulips have 5 inches of cover in that table, with separate early- and late-tulip entries of 6 and 7 inches. Those are regional recommendations, not a single national rule.
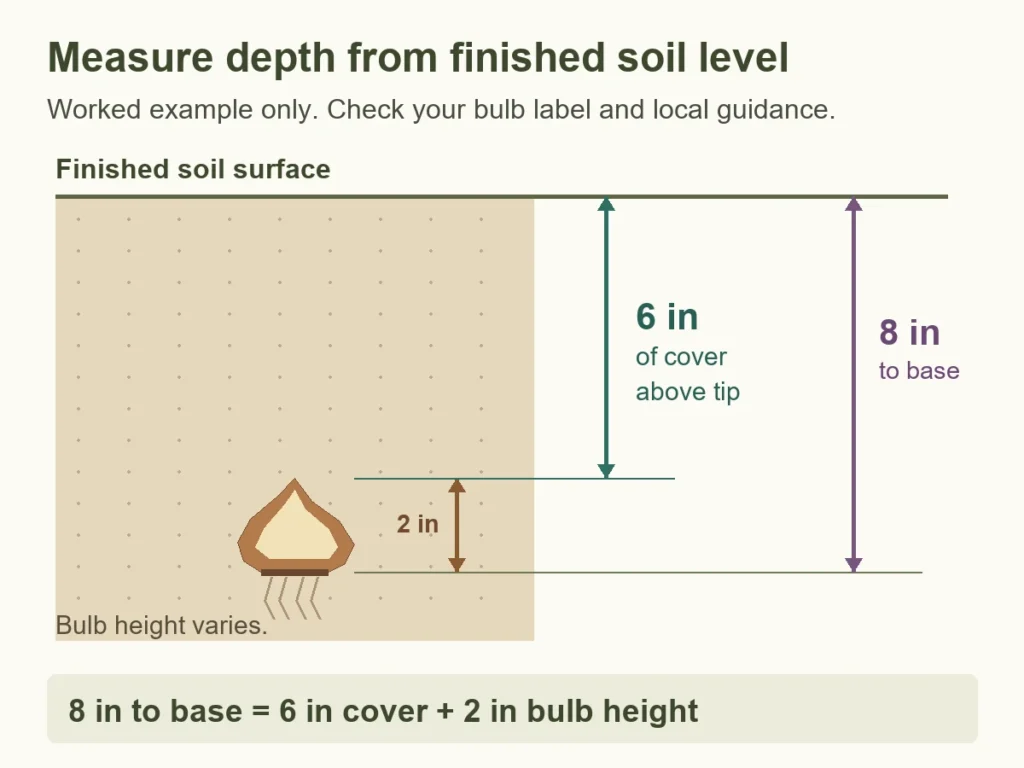
Measure the actual bulb if you need to convert the numbers. With a 2-inch-tall bulb, an 8-inch base depth leaves 6 inches of cover above the tip. A 5-inch cover depth places that bulb’s base 7 inches below the surface. The arithmetic explains the reference points; it does not select a planting depth for every cultivar.
Adjust for bulb size, soil and the local recommendation
Small species tulips can need shallower planting than large garden hybrids. In heavier soil, Colorado State’s chart notes a planting position 1-2 inches higher than its well-drained-soil baseline. Apply any adjustment to the relevant local baseline, with the same measurement convention, after addressing drainage.
Spacing also depends on the variety and display. Illinois lists tulips at 4-8 inches apart; Central Oregon’s general tulip entry uses 6-8 inches. Use the bulb package’s spacing when it is more specific. A tightly packed one-season display and bulbs intended to remain for several seasons have different management demands.
How to Plant Tulip Bulbs With the Root Plate Down
Gather the bulbs, a spade or trowel, a ruler, labels and water. Keep each variety’s label with its bulbs until the planting area is marked. Separate damaged bulbs before they disappear beneath the soil.
- Inspect each bulb. Keep firm bulbs with intact bases. Reject soft, collapsing or badly decayed bulbs; the feel beneath the dry papery covering matters.
- Prepare the bed. Loosen the planting area to the required depth without packing the soil underneath into a hard layer.
- Measure from finished soil level. Use the label’s depth reference and check that the bulb can sit upright at that position.
- Set the bulb. Put the pointed nose upward and the flatter basal plate downward, where roots will grow.
- Check spacing. Arrange the group before covering it so the bulbs remain separated at the chosen distance.
- Backfill gently. Return soil around and above the bulbs without leaving large empty pockets or heavily compacting the bed.
- Water and mark. Settle the soil with water if conditions allow, let excess moisture drain, and label the variety and location.
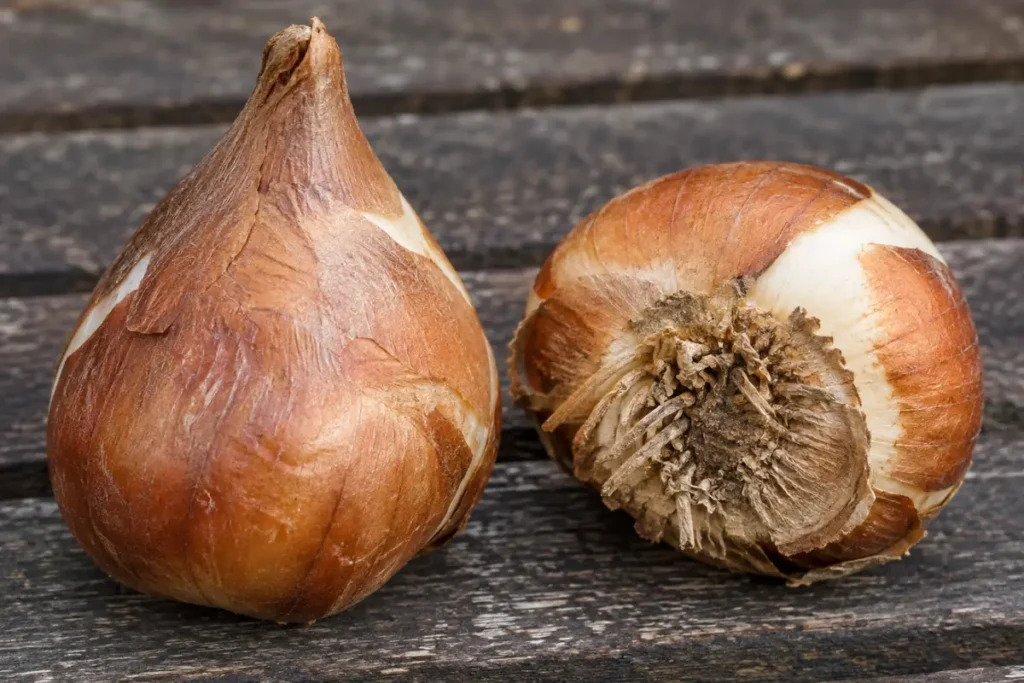
For a group, excavating and loosening the whole planting area can make depth and spacing easier to check than repeatedly driving a narrow bulb planter into resistant soil. Place the bulbs before backfilling, and keep the final soil level in mind if the loosened earth settles.
Do not add bone meal or a high-phosphorus fertilizer automatically. Soil fertility, pH and existing nutrient levels affect whether a product is needed. A soil test for nutrient and pH decisions is a better basis for amendments than assuming every bulb hole needs the same powder.
Give Outdoor Pots Drainage and a Winter Protection Plan
Outdoor tulip containers need drainage holes, suitable potting mix and enough depth for the bulbs’ covering and root zone. Confirm those requirements before filling a shallow decorative planter. A container that holds water needs a draining inner pot or a different use.
Skip a gravel layer in the bottom. It takes up root space and does not correct a container without an outlet. Penn State Extension’s garden-myth review explains why coarse material underneath potting mix can interfere with drainage. Use a suitable mix through the pot and let water escape through the actual holes.
Plant outdoor bulbs according to appropriate container and supplier instructions. Do not copy a photograph of indoor forcing with bulb noses poking above the mix. Iowa State’s exposed-tip method belongs to a controlled forcing process, including a cold period and a later move into suitable light and temperature.
| Setup | Main check | Action before winter |
|---|---|---|
| Draining garden bed | Local timing, depth reference and soil condition | Plant while soil is workable and mark the positions. |
| Exposed outdoor pot | Freezing exposure, drainage and drying | Arrange suitable cold protection without trapping runoff. |
| Mild-winter garden | Supplier’s chilling history and local requirements | Confirm precooled stock or the appropriate cold treatment. |
| Indoor forcing pot | A complete documented forcing procedure | Control chilling, then light and temperature; do not improvise from outdoor timing. |
Above-ground pots face greater winter exposure than bulbs surrounded by garden soil. A protected position or sinking a suitable container into the ground can reduce exposure where the method fits the site. A balcony pot that cannot be buried needs a locally appropriate overwintering plan. There is no dependable insulation thickness or safe outdoor temperature for every pot, tulip and winter.
Distinguish Digging Damage From Water and Frost Problems
Freshly disturbed soil can attract squirrels or chipmunks. If bulbs are dug up soon after planting, inspect for disturbed holes and missing bulbs before blaming the depth. A secured mesh barrier over the planting area can deter digging. Arrange it so emerging shoots are not trapped, and inspect it as growth begins.
That barrier does not solve deer browsing on spring foliage and buds. Where deer pressure is high, plan protection from deer for the emerging display. Missing underground bulbs and bitten-off shoots point to different problems and different barriers.
After the initial watering, check rainfall and the bed’s condition before adding more. There may be no foliage in fall to show a problem. A dry-looking surface can cover damp soil below, so assess moisture in the planting zone. Repeatedly soaking an already wet bed increases trouble around dormant bulbs.
In cold regions, mulch can limit repeated freezing and thawing. Colorado State describes applying about 3 inches after the ground freezes in its regional conditions. Keep planting-depth measurements tied to soil level, and manage the mulch so emerging shoots can pass through in spring. Wet, matted material and drifting leaves deserve attention after winter storms.
Keep Green Leaves Working After the Flowers Fade
Emergence and bloom timing vary with the variety, site and spring weather. A warm wall or south-facing slope can bring growth on earlier than a cooler position. Watch local conditions and the planted groups before assuming one late shoot means the bulbs have failed.
Remove spent flower heads when you are maintaining bulbs for future growth. Leave green foliage attached until it yellows and dies back naturally. Those leaves make food that can be stored in the bulb; tying, braiding or cutting them early reduces the working leaf area.
Let the foliage finish even when it looks untidy among later flowers. Arrange neighboring plants to soften the view without immediately burying or shading the tulip leaves. Then reassess the bulb group after its seasonal growth has ended.
Many garden tulips give their strongest display in the first season, and some varieties return more reliably than others. Healthy planting conditions help, but they cannot guarantee annual flowers from every hybrid. Record the variety and its performance so you can keep successful groups and replace disappointing ones deliberately.
Conclusion
Plant firm tulip bulbs in a draining site during your local fall window. Read the depth reference, keep the root plate down, and distinguish soil cover from the full depth to the bulb base. After planting, manage water, digging animals and winter pot exposure according to the site. In spring, let the green leaves finish their work before clearing them away.