How to grow milkweed from seed starts with the botanical name on the packet. Milkweeds belong to the genus Asclepias, and their needs change with the species, seed origin and growing site. A damp winter treatment that suits one temperate seed lot may be unnecessary for a California nursery’s locally sourced material.
Start by choosing a locally appropriate native species and checking its seed instructions. Then decide between an outdoor seedbed and individual starter cells. Both routes need good seed contact, moisture during germination and room for roots to develop without repeated disturbance, especially when a young root has begun to lengthen.
The first season may produce leaves and roots before flowers. That can still be healthy perennial growth. What matters is getting the right plant established in the right place, then protecting its foliage and checking the root zone as weather changes.
Choose first: Confirm the native species, seed origin, site moisture and any local monarch-habitat restrictions. Check whether the packet is already treated.
Outdoor route: For suitable temperate species, sow into a prepared, weed-free bed for natural winter exposure. Follow the species instructions for pressing or lightly covering seed.
Indoor route: Complete any required cold-moist treatment, sow in draining individual cells, and keep the seed zone moist. Harden seedlings before moving an intact root plug outdoors.
Key Takeaways
- Identify the native species and seed origin before sowing.
- Match cold treatment to the packet’s actual seed lot.
- Prepare weed-free soil and keep seed-level moisture consistent.
- Move rooted seedlings with their soil plugs held intact.
- Judge first-year progress by growth, roots and seasonal return.
Table of Contents
How to Grow Milkweed From Seed in the Right Location
A packet labeled simply milkweed leaves several decisions unanswered. Find the scientific name, where the seed was produced, whether it received pretreatment, and which soil conditions suit the plant. Check county-level native records or a regional native-plant nursery before ordering, then match that local choice to the sunlight and drainage in the intended bed.
Swamp milkweed, A. incarnata, illustrates why the planting spot matters. Naples Botanical Garden describes growing it in a moist, sunny Florida garden. That moisture regime should not be copied onto every milkweed species or every indoor pot; select the species for the bed you have, including its drainage through winter.
Native status also has a local conservation exception. In its California monarch habitat recommendations, the Xerces Society advises avoiding milkweed within five miles of the coast north of Santa Barbara and within one mile south of Santa Barbara. This includes native milkweed near overwintering habitat. In those areas, prioritize appropriate seasonal nectar plants and check local conservation guidance before sowing.
Tropical milkweed, A. curassavica, is a poor default substitute for locally native seed. In mild climates, persistent foliage can encourage winter breeding associated with greater transmission of the monarch parasite OE. That does not mean every tropical plant is infected. Regional management differs, so avoid applying one national cutback rule to existing plants.
Milkweed leaves feed monarch caterpillars; flowers supply nectar when they bloom. Other pollinator-friendly plants can supply nectar before young milkweed flowers. Neither leaves nor flowers guarantee a monarch visit.
Match Seed Dormancy to Species and Origin
Cold-moist treatment lets hydrated seed experience a winter-like interval before germination. Dry seed in a refrigerator has experienced cold storage, not the same hydrated process. Read the packet before adding any treatment, especially if the supplier sells pretreated seed.
Oklahoma State University describes about 30 days of cold-moist treatment for five named Oklahoma milkweeds: A. viridis, A. tuberosa, A. incarnata, A. viridiflora and A. verticillata. Other species can need longer. Those examples do not establish a fixed 30-day requirement for every seed sold under those names.
| Seed example | Source conditions | Your next action |
|---|---|---|
| Five named Oklahoma species above | Oklahoma State’s approximately 30-day damp-chill method | Check whether your species, seed origin and packet call for that treatment. |
| California A. fascicularis, A. speciosa or A. eriocarpa | Theodore Payne Foundation uses warm-season sowing for its local material; staff describe some lots without chilling. | Follow the actual supplier’s instructions. Ask about a conflicting packet before changing treatment. |
| Common milkweed, A. syriaca | Common milkweed seed may arrive untreated or with a supplier’s stated pretreatment. | Get the seed producer’s regional germination directions. |
| Seed sold as pretreated | The supplier has already completed a stated treatment. | Check storage and sowing instructions before repeating it. |
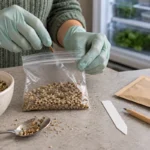
For a small lot that needs refrigerator treatment, wet a clean paper towel and squeeze out the excess. It should feel damp and pliable without releasing drops under light pressure. Space the seeds inside, place the folded towel in a bag, and label the species, origin, start date and expected treatment interval.
Use the refrigerator conditions specified for the lot. Monarch Joint Venture describes approximately 41 degrees F and a broad three-week to three-month interval for its milkweed seed-starting method. That broad example explains the range of possible treatments; it does not replace a species-specific instruction. Keep the bag refrigerated rather than frozen.
Check moisture and seed condition during treatment. Refresh moldy, saturated paper and separate soft, decaying seeds. A firm seed with a little surface mold is not automatically dead; firmness alone cannot prove viability. Avoid improvised bleach or peroxide recipes.
After the required interval, sow into cells or use the producer’s warm germination method. If a white root tip appears, plant promptly without pulling it through towel fibers. The seed coat is safer to handle than the tender root. The moisture and temperature controls for cold stratification apply before emergence; a stretched green seedling needs a different correction.
Give Outdoor Seeds Soil Contact and Seasonal Moisture
Fall sowing suits many temperate milkweeds because winter can supply the moist cold their seeds need. It works only when the species and local conditions match; in the arid Southwest, anticipated rainfall may guide sowing more than an autumn date on a planting calendar. California warm-germinating material may follow a spring or summer nursery schedule.
- Clear a small seedbed of competing grass and weeds.
- Rake the surface to a fine texture and firm it gently.
- Place seed sparsely, using the packet’s pressing or covering method.
- Mark the location and species so later seedlings are recognizable.
- Watch for drying, washout and renewed weed growth as germination approaches.
Pressing seed into soil and burying it under a thick layer are different actions. Xerces describes scattering and pressing seed onto prepared soil for fall or early spring sowing. Monarch Joint Venture uses about one-quarter inch of cover in its method. Theodore Payne makes a roughly half-inch depression and lightly covers seed in its California milkweed sowing method. A half-inch depression is not an instruction to bury every species beneath half an inch of soil.
Use the method supplied for your seed and conditions. Close soil contact lets moisture reach the seed; coarse thatch, thick mulch and loose dry clods interrupt that contact. Scattering seed into an established lawn also leaves tiny seedlings competing with established roots.
Check the marked bed when local warmth and moisture should trigger emergence. A surface that turns pale, dusty and loose between rains may need gentle watering. Avoid a hard stream that shifts the seed. Keep new weeds from overtopping the milkweed seedlings.
Start Indoor Milkweed in Cells That Protect New Roots
Individual, adequately deep cells reduce the need to separate intertwined roots later. Use clean containers with drainage holes and a seed-starting medium that holds moisture without staying heavy and airless. Moisten the medium before filling so seed does not sit above a dry pocket.
For a small-cell example, Naples Botanical Garden sows one or two seeds per cell with a light covering. Monarch Joint Venture uses three or four in its starter cups. Container size and seed quality differ. Choose the supplier’s method, then prevent seedlings from becoming a crowded clump.
Set seeds onto the prepared medium, cover as directed and water gently. Check moisture at seed depth, not only the color of the tray’s surface. Warmth can speed germination in an appropriate lot; a hot, dry surface can interrupt it, so maintain moist seed contact with free drainage below.
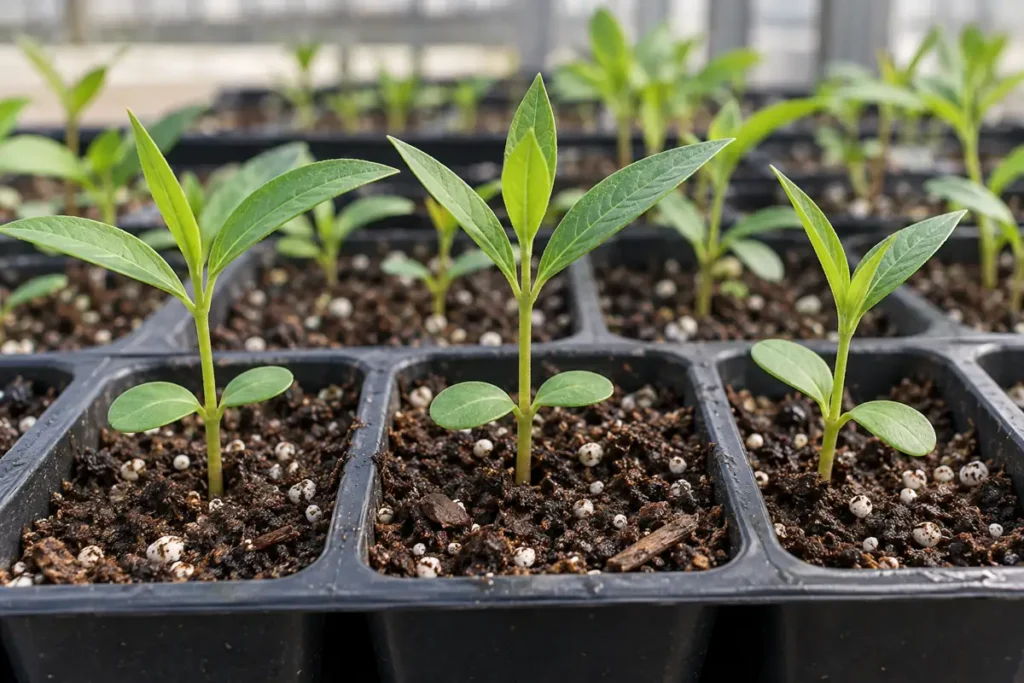
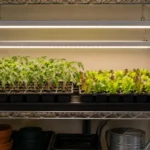
Move emerged seedlings into useful light promptly. Long, leaning stems and widely spaced leaves suggest the tray needs a light or crowding adjustment. Position grow lights for seedlings for the fixture’s actual output and the whole tray, checking leaves for heat stress. A fixed distance cannot suit every lamp.
If several seedlings share a cell, keep them from forming a dense root knot. Snipping an unwanted small seedling at soil level avoids pulling its neighbor’s roots. Keep the strongest healthy plant with room to develop, and check moisture again after thinning because a less crowded cell may dry differently.
A wilted seedling in a heavy, wet cell needs a drainage and stem-base check before another watering. A wet-site garden species still needs oxygen around roots in a starter container, where persistent wetness can turn an otherwise suitable medium into a poor root environment.
Transplant When Leaves, Roots and Weather Agree
Look for several true leaves, active growth and a root plug that holds together during removal, so the plant can enter its new bed without losing its growing roots. Cotyledons are the first seed leaves; the later leaves have the developing plant’s shape. Height alone cannot tell you whether the roots are ready.
Published examples vary. Monarch Joint Venture describes four true leaves at roughly three inches, and Naples Botanical Garden describes taller rooted starts. Xerces notes that some milkweed plants are ready in about eight weeks and others take months. Use those as context, then inspect your plant and planting weather.
Harden indoor starts in a sheltered outdoor position before planting. Begin with protection from strong sun and wind, then increase exposure gradually over several days. Check cell moisture more often outdoors, and reduce exposure if papery pale patches or sudden wilt indicate that the transition has been too abrupt for the seedlings.
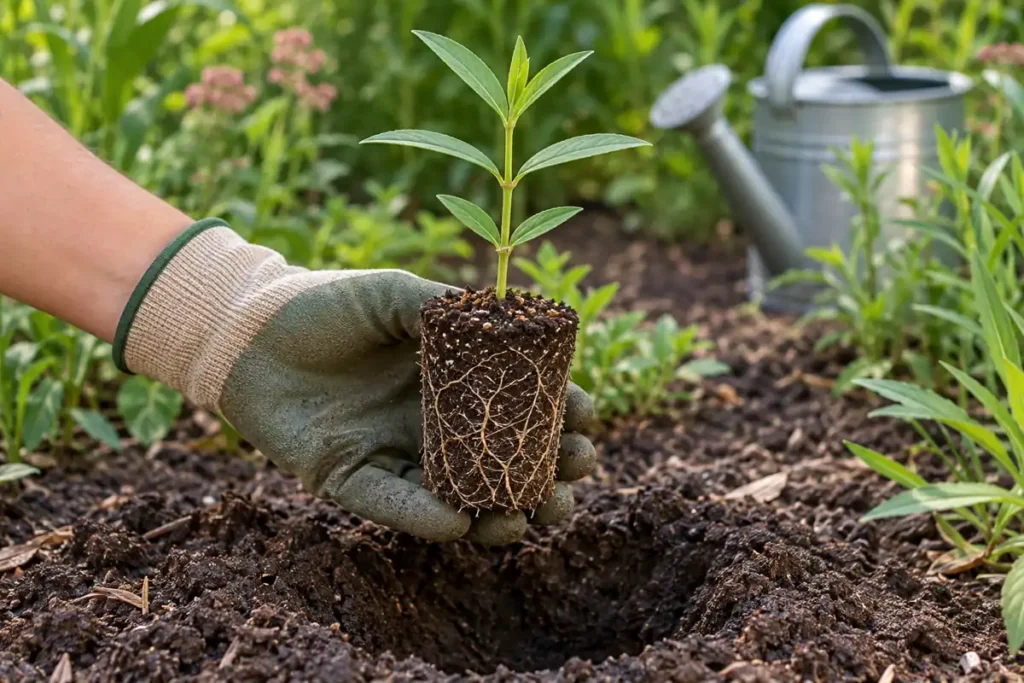
- Wait until local frost risk has passed and avoid hot, drying wind.
- Clear nearby competing growth and dig a hole that fits the plug.
- Moisten a dry cell enough to make the plug cohesive.
- Press the container from below and support the root mass as it slides out.
- Set the stem base at its original soil level, fill around the plug and water in.
Leave the root mass intact, keeping the soil around a fragile central root as you ease the whole plug into its prepared hole. Milkweed root systems vary by species, and delicate new roots can break during repeated handling. The common handling goal is to avoid unnecessary breakage.
Help First-Year Roots Establish Before Expecting Flowers
Feel the soil beside the new plug and within its root zone as weather changes. A dry surrounding bed can pull moisture from a small plug. Water to settle the roots at planting, then monitor rather than adopting a fixed daily volume. Soil texture, rain, wind and species moisture needs change the interval.
Keep grass and weeds away from the young plant. A seedling with clean leaves can still lose the competition for water below ground. Mark its position so maintenance does not remove it when top growth dies back.
Many native milkweeds are deciduous perennials. First-year growth may emphasize roots and leaves, with flowering delayed. Seasonal browning can be dormancy; wet, mushy decay is a different warning. Consider season and soil history before digging up a plant that has lost its stems.
Protect young host foliage from unnecessary spraying. Caterpillar feeding can remove leaves without being a plant disease. Use gloves when handling broken stems, wash sap from hands, and avoid touching eyes or face. Keep plant material away from children or pets that might chew it.
Use Seed and Seedling Symptoms to Change the Next Step
Separate a seed that has not germinated from a seedling that germinated and then declined. Repeating cold treatment cannot correct weak light after emergence. Check one stage at a time before replacing the entire packet.
| Visible sign | Check | Change |
|---|---|---|
| Firm seeds, no roots | Species treatment, seed maturity, towel moisture and warmth | Correct the missing condition; ask the supplier before extending treatment blindly. |
| Soft seeds in wet, moldy paper | Pooling water and decay | Discard decaying seeds and refresh damp paper for any sound remaining seed. |
| Thin, leaning seedlings | Useful light across the tray and crowding | Adjust light and spacing; judge improvement by new growth. |
| Wilt in wet media | Drainage, stem-base damage and root condition | Correct saturation and isolate collapsing plants rather than adding water automatically. |
Stem collapse, yellowing and root damage can overlap. Compare the stem base, medium and recent changes when diagnosing seedling problems. A plant scorched after its first outdoor afternoon needs different care from one collapsing in a constantly wet cell.
Conclusion
Choose locally appropriate seed, follow its treatment needs and keep moisture close to the seed without drowning the roots. Move sturdy seedlings into the garden with their plugs intact. Healthy leaves, developing roots and seasonal survival are useful progress checks long before a new milkweed plant carries its first flowers.
Frequently Asked Questions
How do you collect and store milkweed seed?
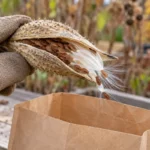
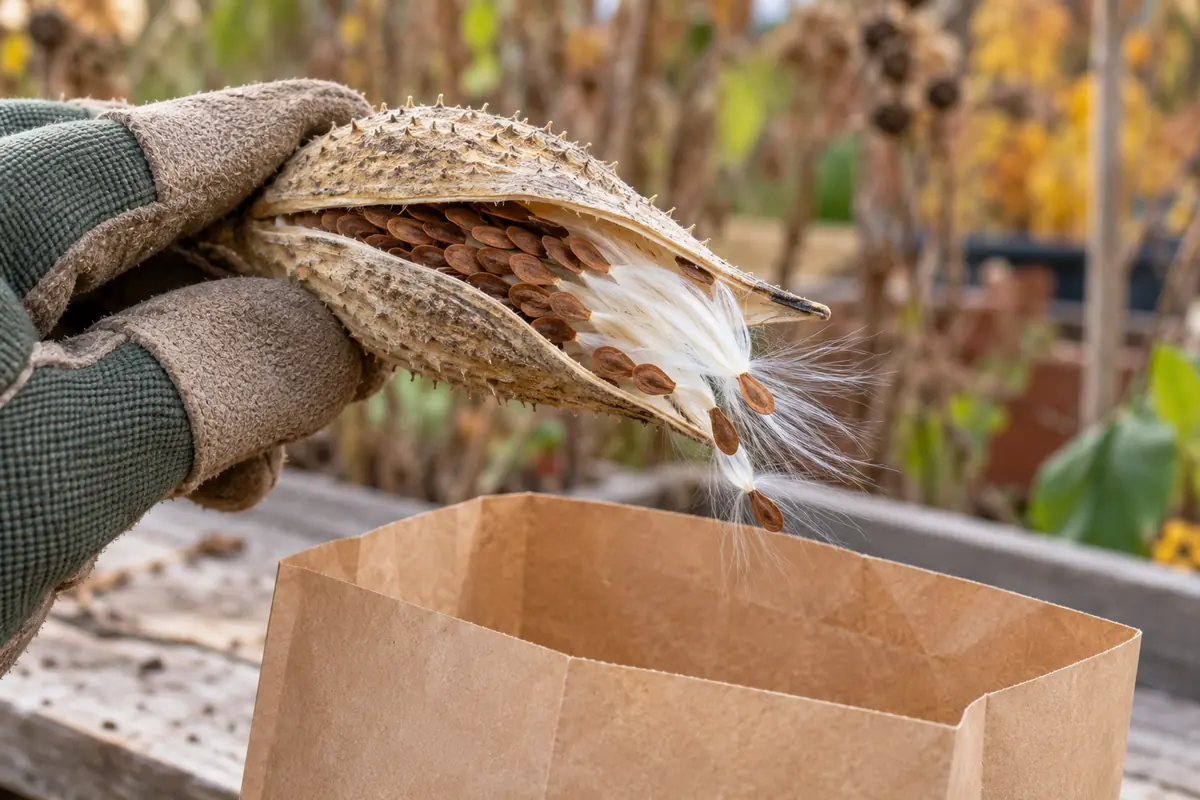
Collect only with permission and leave seed for natural regeneration. Inspect the seeds themselves: mature seeds are brown, even when some pod tissue remains green. Separate dry seeds from the silky floss and store them cool and dry in a labeled container. Avoid sealing damp pods and floss together.
What should you do about orange aphids on young milkweed?
Inspect for monarch eggs and caterpillars before touching the colony. Oleander aphids do not always require removal from a tolerating plant. Hand removal may suit an isolated colony after checking the foliage; a hard water jet can also dislodge delicate eggs. Avoid systemic insecticides on host plants.
What if you cannot find locally appropriate milkweed seed?
Ask a regional native nursery or conservation organization about seed origin and seasonal availability. Do not substitute an unidentified mix or tropical milkweed simply because it ships quickly. Locally suitable nectar flowers can support adult butterflies as you wait for an appropriate host-plant source.