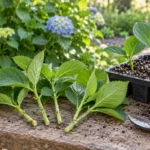

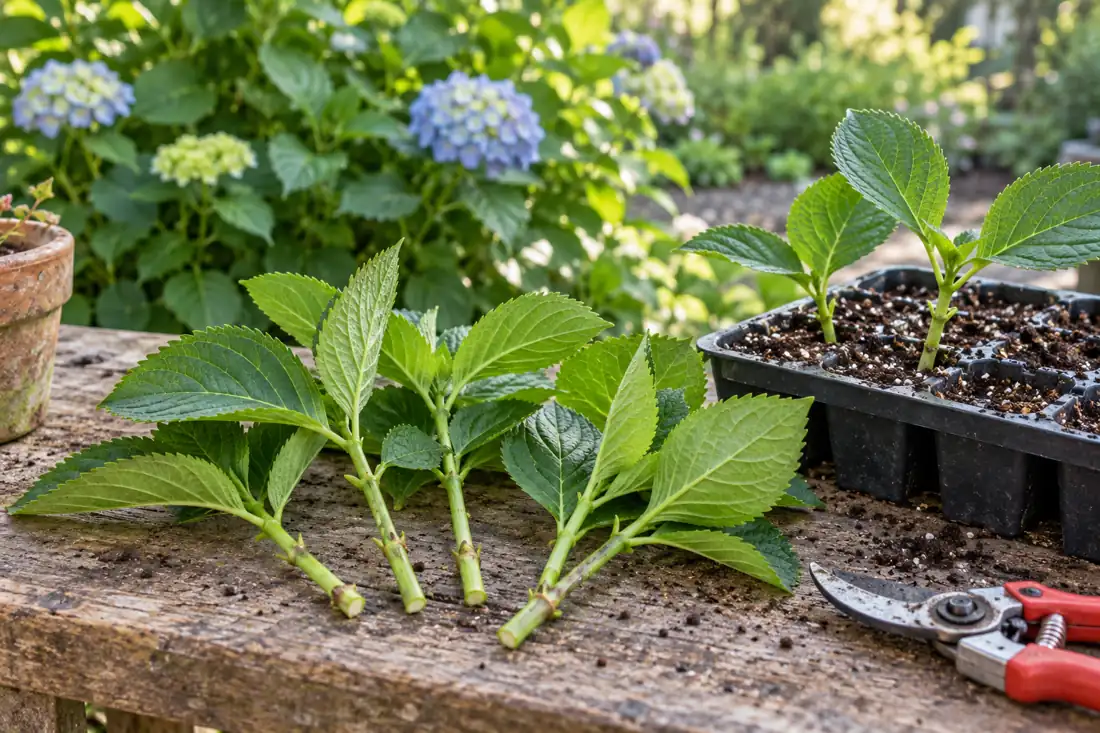
Learning how to propagate hydrangeas starts with a healthy, nonflowering stem and a place where its leaves can stay hydrated before roots form. Choose flexible growth from the current season, trim below a leaf node, remove the lower leaves, and insert the bare base into moist, freely draining propagation mix. A clear cover helps hold humidity around the remaining foliage, with protection from hot sun and regular ventilation.
Rooting is only the first stage. A cutting that stays green under plastic still needs its own roots before it can handle ordinary garden conditions. Newly rooted plants also need a winter plan, especially in small pots exposed to freezing weather. Match each step to the stem, the roots, and your climate; a fixed calendar date cannot tell you whether a cutting is ready for the next move.
Check the stage before you cut or move a plant
Firm, flexible, nonflowering shoot: Take a nodal stem cutting. Put its leaf-free lower node into damp, draining mix and protect the leaves with a ventilated clear cover.
Green leaves, roots not confirmed: Maintain rooting conditions. Opening a leaf does not prove the cutting can support itself.
Rooted plant approaching winter: Gradually reduce humidity and protect the small root ball according to the cultivar and local winter conditions.
Key Takeaways
- Choose firm new growth without flowers or visibly damaged leaves.
- Keep a bare lower node inside moist, draining rooting mix.
- Reduce oversized leaves and keep plastic clear of foliage.
- Check actual roots before removing protection or repotting the cutting.
- Protect young potted roots from drying and rapid winter temperature changes.
Table of Contents
How to Propagate Hydrangeas at the Right Stem Stage
Softwood cuttings use young shoots that are still flexible. Look for a green stem with distinct leaf pairs, enough firmness to handle, and no flower head. Very floppy growth that collapses soon after cutting is difficult to keep hydrated. A hard, dormant brown twig needs a different method from a leafy summer cutting.
Late spring and early summer commonly supply suitable material. The exact point arrives earlier in some US gardens than others, and species grow at different rates. Check the plant itself. University of Georgia propagation guidance gives different collection periods and rooting examples for smooth, bigleaf, and panicle hydrangeas, showing why one national date is a poor instruction.
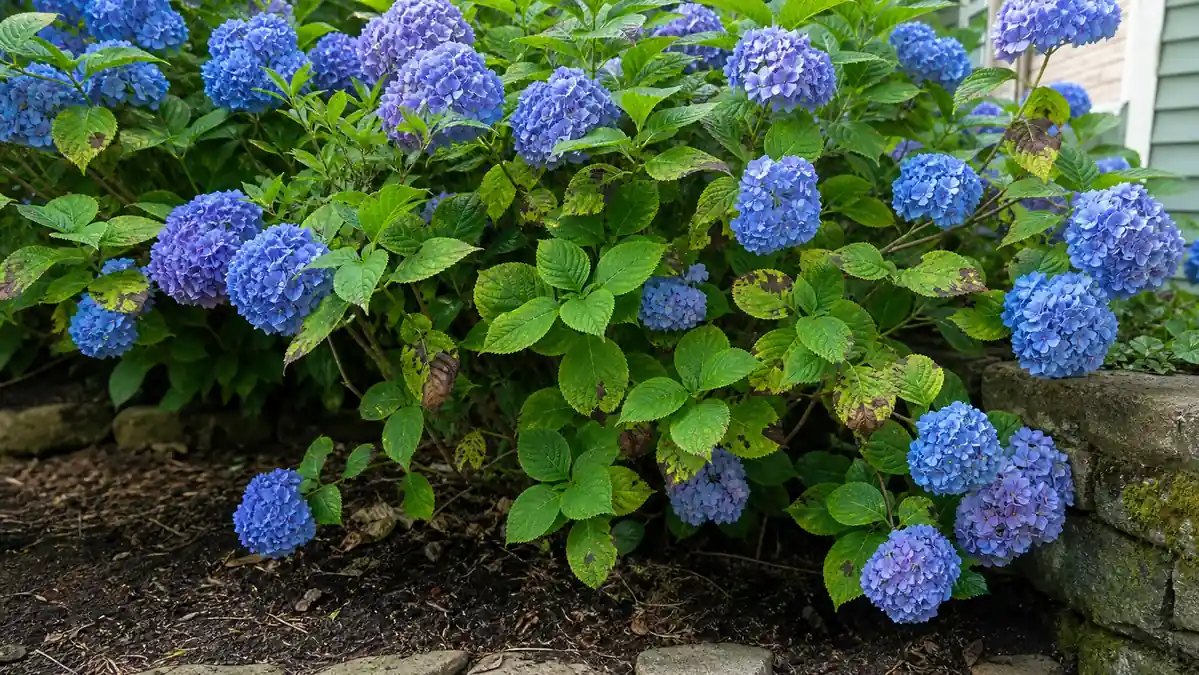
Identify your hydrangea type and its growing requirements before choosing a shoot. Bigleaf hydrangeas have different flowering and winter risks from panicle types. Oakleaf hydrangeas can be propagated from cuttings, too, although nursery procedures vary by cultivar and should not become a household hormone recipe.
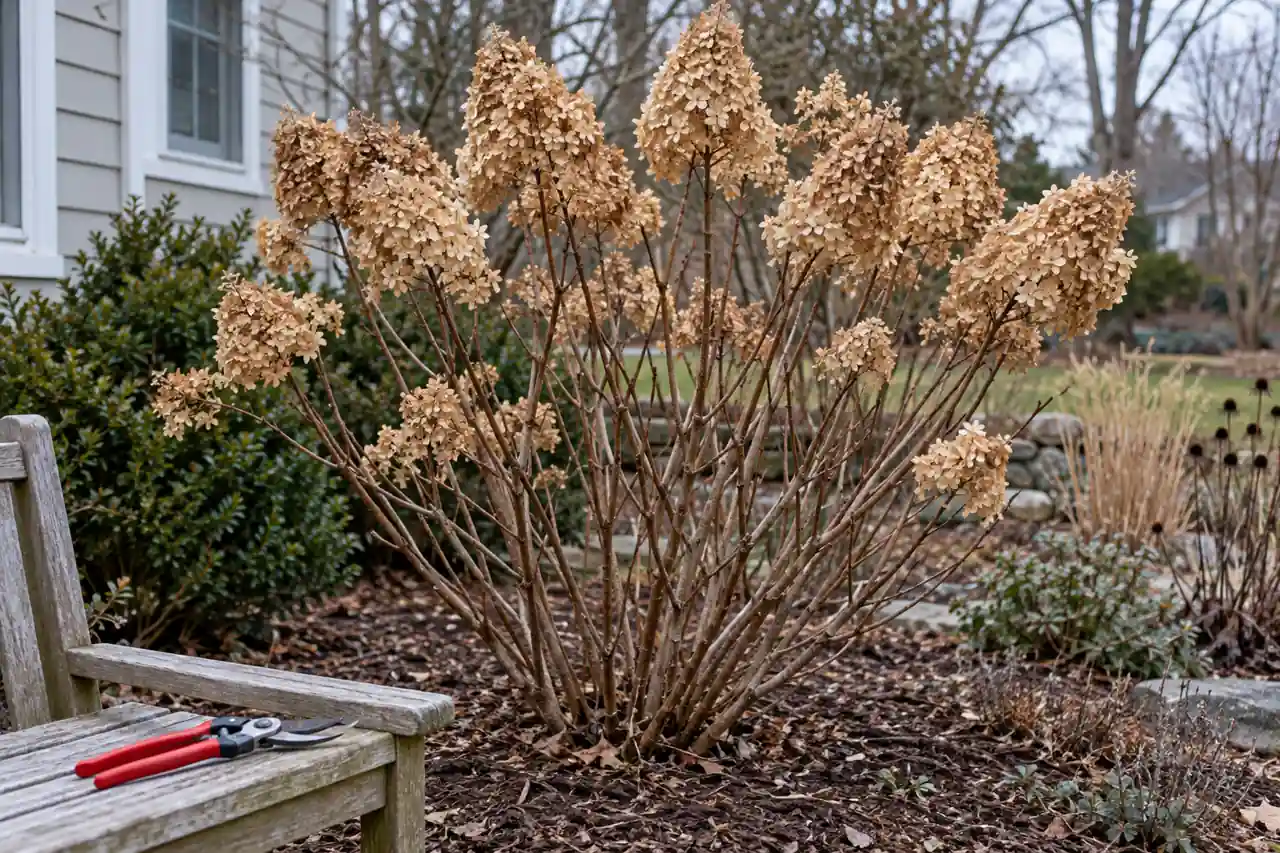
Take a few suitable tips without turning the job into whole-shrub pruning. Some bigleaf hydrangeas set the following year’s flower buds on existing stems, so removing those shoots later can cost flowers. The timing for pruning a Limelight hydrangea concerns its panicle growth habit; it is not a calendar for taking every kind of hydrangea cutting.
Start with clean, healthy growth. Inspect prospective stems for insects, wilt, and spreading lesions. Persistent brown spots on hydrangea leaves need identification before affected material goes into a humid enclosure. Healthy shoots give you fewer problems to diagnose after cutting.
Cut Below a Node and Reduce Leaf Water Loss
Prepare the rooting pot and cover before harvesting. A rootless shoot begins losing water as soon as it leaves the parent, so a sunny bench is a poor waiting place. Collect hydrated material early in the day when possible, keep it shaded, and work promptly with a sharp, clean blade.
A node is the point where leaves attach to the main stem. On a typical hydrangea shoot, the paired leaves make these positions easy to follow. The stem between pairs is an internode. Retain a lower node for rooting and upper leaves that can continue functioning above the mix.
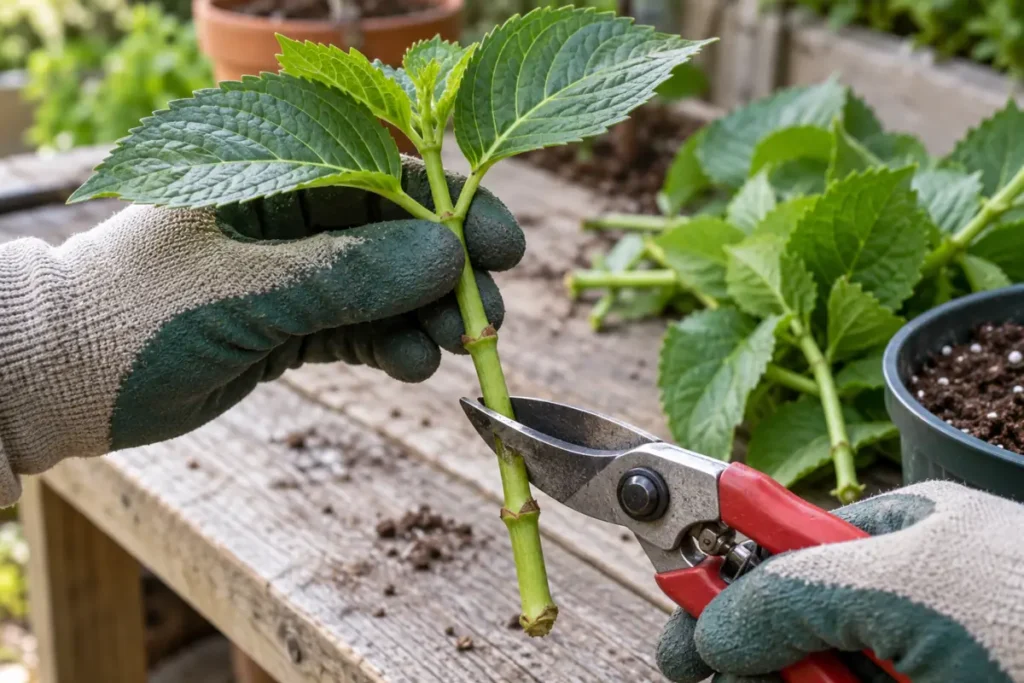
Cutting lengths in established methods differ. Illinois Extension uses a nonflowering shoot about 5-6 inches long; University of Georgia’s bigleaf guidance uses about 3-5 inches. These are workable examples for their methods. Select a manageable piece with useful nodes and sound upper foliage, avoiding an unnecessarily long, top-heavy branch.
- Remove your selected shoot neatly above a bud or leaf joint left on the parent.
- Trim the removed piece just below the lower node you will retain on the cutting.
- Remove the lower leaves that would sit inside the rooting medium, preserving the stem and node.
- Retain healthy upper foliage. Shorten unusually large leaf blades by about half if needed to reduce water loss.
- Remove any flower buds from the prepared piece and keep it shaded until planted.
The two cut positions serve different purposes: one leaves the parent tidy; the other retains a basal node on the cutting. A detached leaf and its stalk do not provide the same stem structure. Keep the true main stem in your sample.
Leaf trimming also involves a tradeoff. A broad leaf loses water across a large surface before the cutting has roots to replace it. Smaller retained leaves reduce that demand and still contribute to growth. University of Connecticut’s hydrangea instructions use this approach; cutting every small leaf in half or stripping all foliage is unnecessary.
Set the Lower Node in a Moist, Airy Rooting Pot
Use a clean pot with open drainage holes and fresh propagation medium. A packaged cutting mix is convenient. The medium should hold moisture around the base and retain air spaces after watering. Heavy garden soil that compacts into a wet mass makes those conditions harder to maintain.
Moisten the mix first, let surplus water leave the pot, and make a planting hole with a pencil or dibber. Lower the cutting into that hole so the bare basal node contacts the medium. Leave the remaining leaf bases above the surface, then gently settle the mix around the stem. Making the hole first helps avoid scraping the base or forcing a soft shoot through packed material.
Water to settle the medium and drain completely. Keep a saucer or outer container from holding the pot in runoff. With several cuttings together, leave room for the upper leaves and for inspection; crowded overlapping foliage is difficult to keep clear of the cover.
Rooting Hormone Is an Optional Part of the Home Method
Added rooting hormone can encourage root initiation, and several nursery methods include it. The Illinois home hydrangea-cutting method treats it as optional. Suitable plant material, humidity, and drainage still matter whichever choice you make.
If you use a rooting product, follow its label for the cutting type. Put a small amount into a separate container, treat the base as directed, and discard the unused portion. Dipping successive shoots into the main supply can contaminate it. A stronger dose or extra powder cannot compensate for an overheated cover or a decaying stem.
Hold Humidity Around Leaves Without Soaking the Base
Support a clear plastic bag or propagator lid above the foliage. Sticks can keep a bag from pressing against leaves. Place the setup in bright shade or indirect light, protected from hot direct sun. Light reaching an established shrub safely can be too much for an unrooted shoot inside clear plastic.
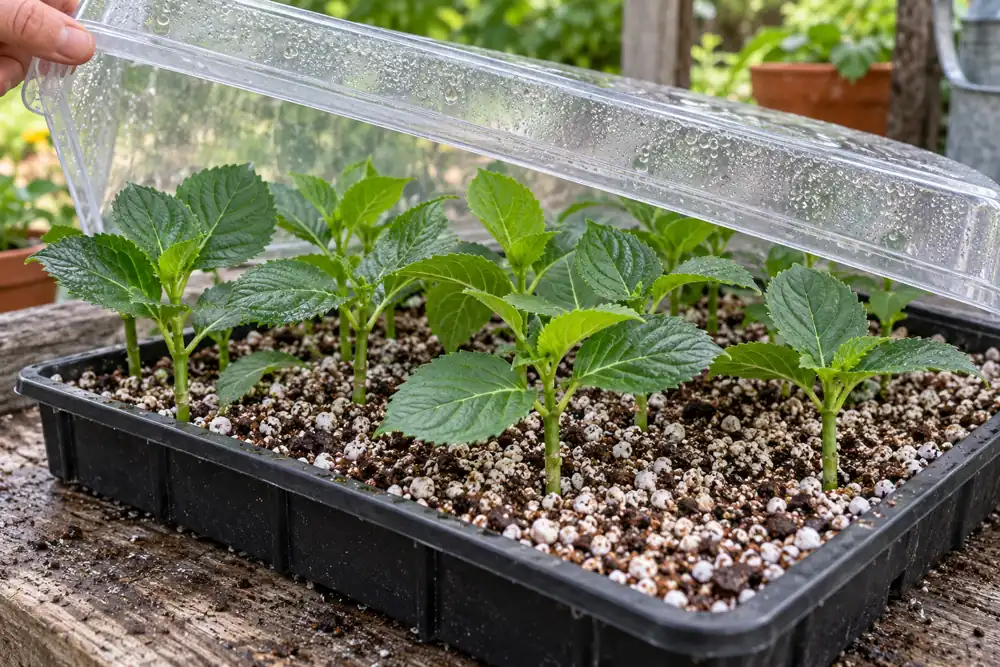
The leaves and the base need separate checks. Humid air slows water loss from the foliage. Moist, porous medium supplies water around the basal stem without keeping every air space flooded. A damp pot with wilting leaves may need shade and restored humidity, not another soaking.
Inspect the enclosure regularly. Droplets on the cover show moisture in the air; they do not prove that the medium needs watering. Clear accumulated dead leaves, check for soft tissue, and ventilate if moisture collects heavily or decay begins. The Royal Horticultural Society’s softwood guidance includes airing bag-covered cuttings at least twice weekly for ten minutes as a starting routine. Conditions may require earlier attention.
Lift the cover briefly for inspection, then restore protection if a rootless shoot loses firmness in drier air. Keep the bag off the leaves and the pot out of direct sun. Gradual adjustments let you respond to the plant without alternating between a sealed hot enclosure and an exposed, drying cutting.
Moderate warmth is useful; overheating is a separate risk. Connecticut’s home setup gives 60-80°F as an example range, alongside indirect light and humidity. An already warm room does not automatically need a heating mat. Check conditions at the pot, especially beside glass where daytime heat and nighttime cold can differ sharply.
Confirm Roots Before Potting or Removing the Cover
Expect rooting to take weeks, with variation from species, stem maturity, and environment. Illinois gives an example of roots beginning in about 2-3 weeks under favorable home conditions. University of Georgia’s misted propagation examples span about 3-5 weeks across different hydrangea species. These estimates describe different setups and are not a deadline for every pot.
A new leaf is encouraging. Stored resources and a humid enclosure can sustain growth before the cutting has a useful independent root system. Check for sound new roots where they are visible. Gentle resistance can be another clue, provided a stake or tightly packed mix is not simply holding the stem in place.
Avoid pulling repeatedly to test progress. Fine new roots break easily. If a sample must be checked, support the surrounding medium and disturb it as little as possible. A firm green cutting with no visible roots may need more time; a black, soft base calls for a different response.
Once roots have developed, increase ventilation gradually in the same shaded position. Allow roughly two weeks for gradual humidity reduction in the RHS softwood method, giving protected foliage time to adjust to drier air. Watch whether leaves stay firm as the cover remains open longer.
Prepare an individual draining pot before moving a rooted cutting. Lift it with its small root ball intact where possible, place it at the same general depth, and settle fresh potting mix around the roots. Water and drain. Keep it sheltered during recovery, then introduce suitable outdoor conditions gradually when the weather allows.
Separate Water-Loss Wilt From Wet-Stem Decay
A drooping leaf is a symptom, not an instruction to water. Feel the medium, inspect drainage, and look at the basal stem before adding anything. A dry pot and a saturated pot can both hold a wilted cutting, yet need different corrections.
| Visible problem | Check first | First correction |
|---|---|---|
| Limp leaves, light pot, dry surface | Moisture around the inserted node | Rewet and drain the medium. Restore protected humidity and shade. |
| Limp leaves, damp mix, firm stem | Hot sun on plastic or a sudden drop in humidity | Move out of hot sun and adjust the cover. Recheck before watering. |
| Dark, soft base in heavy wet mix | Trapped runoff and extent of stem decay | Remove the affected cutting if its base has collapsed. Correct drainage before starting again. |
| Fuzzy growth on dead leaves | Decaying debris and condensation | Remove dead material, ventilate, and inspect living stems for spread. |
| No roots after an expected interval | Stem firmness, shoot maturity, warmth, and moisture | Maintain suitable conditions for sound tissue. Replace collapsed or decaying material. |
Mold on one fallen leaf does not identify a particular disease in the whole tray. Remove affected debris and examine each cutting. If a stem becomes soft and disintegrates at the base, additional hormone cannot restore it. Restart with clean equipment and healthy material after correcting the conditions.
Protect Young Potted Roots Through Their First Winter
A rooted cutting in a small pot does not have the insulation of a shrub established in the ground. Its root ball can dry quickly or undergo repeated temperature changes. Check the cultivar’s local hardiness and the actual shelter available before deciding where it will spend winter.
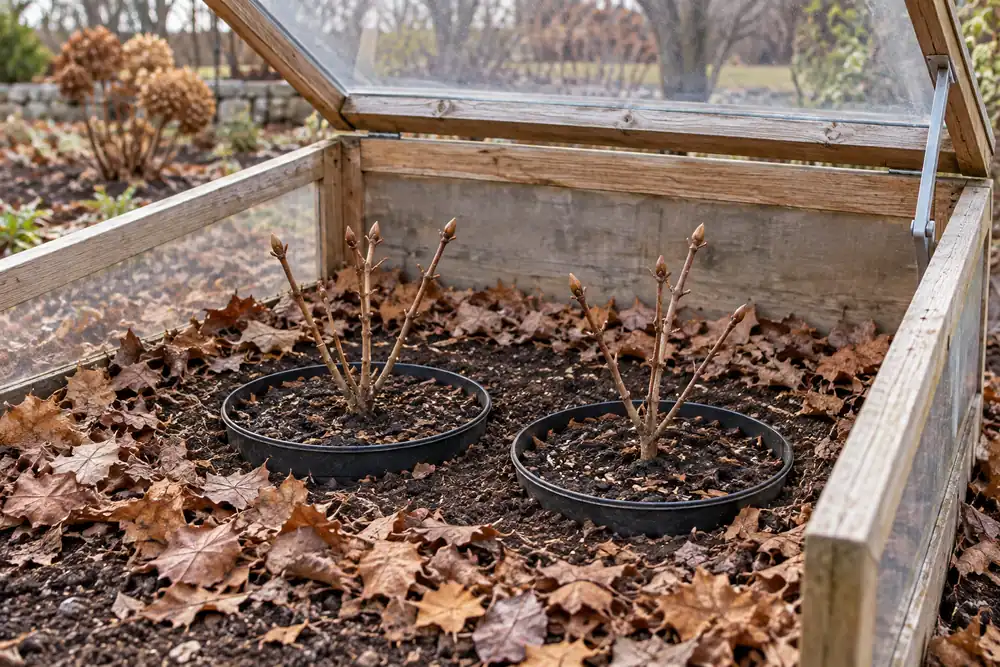
For hardy young hydrangeas in colder regions, a cold frame, sheltered holding area, or temporarily buried pot can moderate exposure. Protected overwintering of rooted hydrangea cuttings in University of Maryland Extension’s guidance addresses both wind and root-ball temperature swings.
To heel in a pot, choose a well-draining spot and sink the container into the ground with its rim accessible. Soil around its sides buffers temperature changes, and the pot can be lifted later. Add suitable mulch around the root zone for insulation, keeping the young stems clear. An exposed pot on a deck receives much less protection.
A garage is an option only when its actual conditions suit the plant. Michigan State Extension’s advice for a zone 5b/6a case conditions garage storage on temperatures remaining above freezing, or added pot insulation if colder. Check the space with a thermometer. The words unheated garage do not describe a dependable temperature.
Dormant plants still need moisture checks. Water when the mix needs it, allowing full drainage, and wait for a thaw if the root ball is frozen. Winter demand is lower, so a summer watering schedule can keep pots too wet. Letting the mix dry completely also damages roots.
In mild climates, a well-rooted, acclimated plant may be ready for its permanent site. Sparse late roots or an uncertain cultivar call for more protection and local advice. Keep a winter shelter from overheating during warm spells, and protect any tender new shoots from a return to frost.
Conclusion
Begin with a healthy nonflowering shoot, retain a lower node, and keep the rooting medium moist and draining. Protect leaves from water loss without overheating the cover or drowning the base. Confirm roots, reduce humidity gradually, and plan the first winter around the young root ball and local conditions. Each transition needs its own check before the plant moves on.
Frequently Asked Questions
Can hydrangea cuttings root in water?
Some gardeners use water, but University of Vermont Extension recommends rooting hydrangeas in potting medium. A moist, draining substrate under a managed humidity cover is the better-supported starting method here. Water-rooting results from other houseplants do not establish equal success for hydrangeas.
Can I take hydrangea cuttings in fall or winter?
Firmer late-season shoots and dormant wood require different handling from leafy softwood. Winter hardwood cuttings are an option for panicle hydrangea in the RHS species guidance. Check the species-specific method and winter protection available before using dormant stems; the summer leaf-and-cover procedure is not interchangeable.
Will a cutting keep its parent’s flower characteristics?
Vegetative cuttings generally preserve the parent’s characteristics more reliably than seedlings. Flower color on responsive bigleaf types can still change with growing conditions, so a clone does not guarantee identical bloom color in different soil.