

When to dethatch lawn grass depends on the layer beneath the blades, the kind of turf and the growing weather ahead. A springy step across the yard is a reason to inspect the grass. It does not tell you how much living turf a machine would pull out.
Lift a small section and examine its side. Between the green shoots and mineral soil, thatch forms a tangled, felt-like band. A thin layer protects healthy turf; excessive buildup deserves closer attention. Removing it creates wounds and sometimes bare ground, so the grass needs a suitable recovery window. Kentucky bluegrass in an Iowa autumn follows a different schedule from a southern bermudagrass lawn. Start with a measured sample, then choose a regional season and a controlled method. A hard, thin lawn with little true thatch needs a different repair.
Match the season to a measured problem
Timing: cool-season lawns favor late summer or early fall during active growth. For warm-season lawns without a confirmed regional program, wait for vigorous growth after spring green-up. Oklahoma publishes a local pre-green-up exception. Delay during heat, drought or inadequate recovery before winter.
Little attached mat, healthy growth: leave the protective layer in place. Collect loose surface debris separately.
Around half an inch or more of fibrous mat: assess grass type, local recommendations and recovery conditions. Thickness is a warning, not an automatic machine setting.
Hard soil beneath a thin mat: investigate compaction. Core aeration treats a different part of the profile.
Key Takeaways
- Measure the attached fibrous layer before booking a machine.
- Leave a thin protective layer beneath otherwise healthy grass.
- Match disruptive work to grass growth and regional advice.
- Stop a test pass that uproots rooted green turf.
- Inspect buildup annually and reserve removal for confirmed excess.
Table of Contents
Measure the Brown Mat Above the Mineral Soil
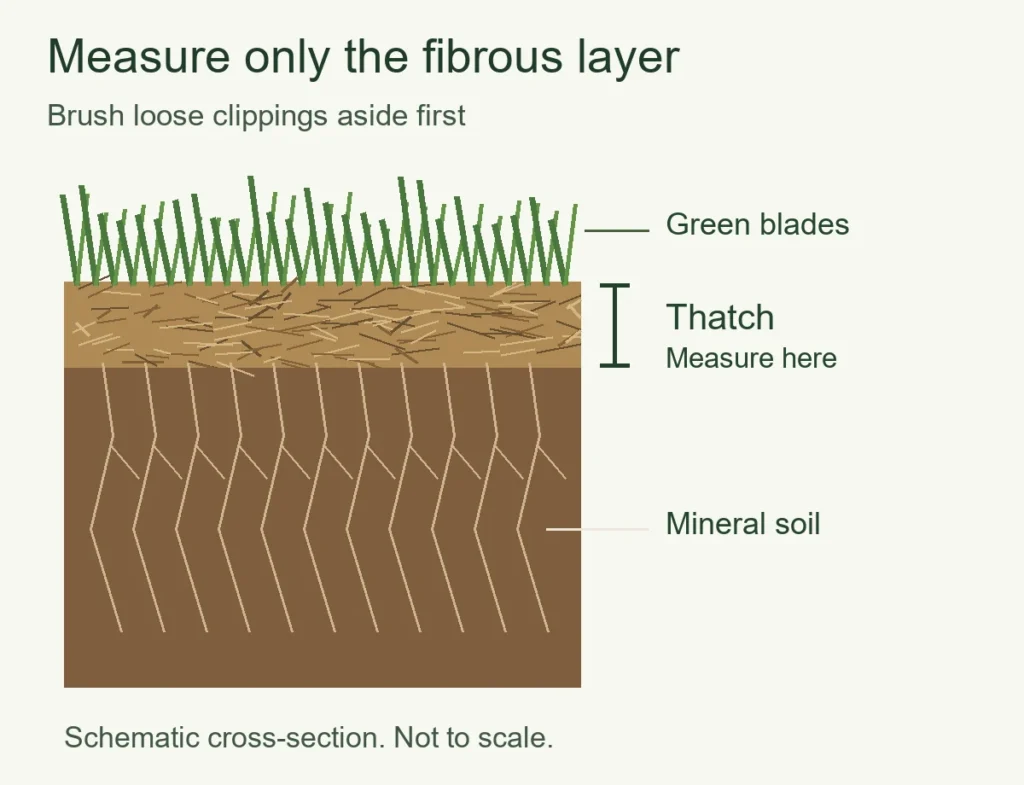
Brush aside loose clippings before taking the sample. Those pieces sit on the surface; the attached interwoven layer remains with the sod when you lift it. Its fibers resist a gentle pull; moist mineral soil breaks into crumbs or smears according to its texture.
Cut a small square or wedge with a hand trowel or spade, avoiding buried irrigation and cables. The UC IPM sampling method reaches about 3 inches deep; Oklahoma State’s lawn-management guidance uses a 3-4-inch-deep plug. The sample needs enough soil beneath the grass to expose the lower edge of the mat. Measuring from the top of the blades to the bottom of that sample adds green foliage and mineral soil to the material you actually need to assess.
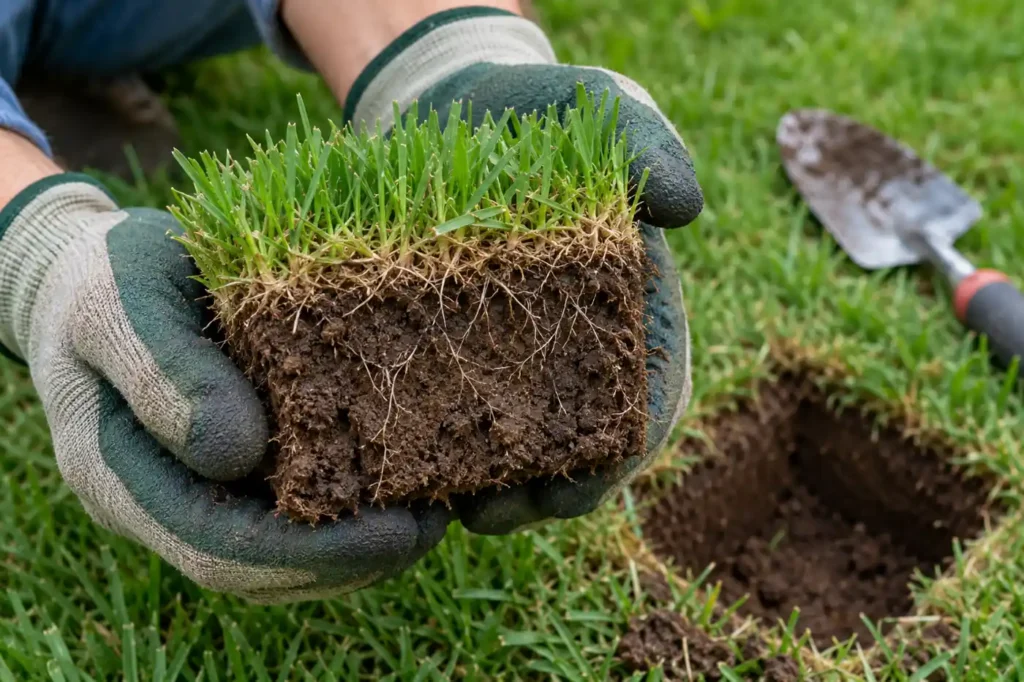
Hold a ruler beside the cut face and measure vertically through the attached fibrous band. Avoid squeezing the plug flat. Compare a springy patch with an ordinary area and record their locations separately. A thick section beside an overwatered border does not establish that the entire yard needs the same treatment.
Around half an inch is a useful investigation point, with regional differences. UC IPM and NC State use more than half an inch; Iowa State’s removal guidance uses half an inch or greater. Oklahoma State’s dedicated thatch publication sets a lower target, one-third inch, for cool-season lawns and half an inch for warm-season lawns. Follow the applicable local guidance and assess turf condition rather than treating a ruler mark as a precise biological switch.
When to Dethatch Lawn Grass by Growth Season
Schedule removal when the grass has a suitable period for replacing injured shoots and roots. Heat, water shortage and approaching dormancy reduce that capacity. A calendar month helps only after you know which grass is growing and how it is behaving.
| Lawn type or condition | Useful starting window | Condition that changes the plan |
|---|---|---|
| Cool-season turf, including Kentucky bluegrass | Late summer or early fall during favorable growth; Iowa specifies September. | Postpone during drought or heat, or when little growing weather remains. |
| Bermudagrass or zoysiagrass | After spring green-up during vigorous regrowth, unless a confirmed regional program directs otherwise. | Oklahoma recommends before spring green-up; other programs place disruptive work after green-up. Do not copy dates between regions. |
| St. Augustinegrass or centipedegrass | Confirm an appropriate local growth window and a cautious method. | Aggressive power raking and unsuitable blade spacing risk injury. |
| New, thin, poorly rooted or stressed lawn | Wait and diagnose the limiting condition. | Excess mat does not make weak turf ready for an aggressive pass. |
Cool-season lawns need growing weather after the work
Late-summer and early-fall removal gives northern cool-season grass time to recover as summer stress eases. The September dethatching recommendation for Iowa specifically relies on several weeks of favorable growth afterward. It is not a national appointment for every lawn.
Spring is a possible window in some climates. UC’s California guidance includes mid-to-late spring during active growth. Consider the approaching heat and weed pressure before choosing a heavy operation then. If your healthy lawn has little mat, there is no need to create a spring recovery project.
Southern lawns require a regional decision
Warm-season recommendations differ. Oklahoma State’s homeowner program places bermudagrass and zoysiagrass removal before spring green-up. NC State’s athletic-field calendar places bermudagrass verticutting after green-up and warns against fall disturbance without adequate winter recovery. Those publications address different regions and management programs; neither supplies a universal date for an unidentified backyard lawn.
For a homeowner without a confirmed local program, wait for vigorous regrowth after spring green-up and enough favorable weather for recovery. Identify the turf, ask local Extension about timing and describe the actual machine you intend to use. An unfamiliar species, a partly dormant lawn or an approaching cold period is reason to delay a severe pass.
Separate Surface Thatch From Compacted Soil
A dethatcher cuts or pulls fibrous plant material. A hollow-tine aerator removes cylinders of soil, opening channels through a compressed root zone. Both disturb turf, and neither should be booked solely because the grass looks tired.
Press the cut face of your sample gently. A dense, resistant mineral layer below a small amount of thatch points toward a soil problem. Traffic lanes and puddling strengthen that suspicion; drainage, soil texture and moisture also affect resistance. Dry ground feels hard without necessarily proving compaction.
Where compacted soil is the main limitation, core aeration addresses that root-zone restriction. It also removes some organic material and improves conditions for decomposition. It does not make a thick attached mat identical to compacted soil.
Brown areas with little true thatch need their own diagnosis. Uneven irrigation, mowing injury, insects and diseases produce different patterns. The position and texture of dead patches in a lawn matter more than the amount of loose brown material a rake collects.
If both a thick mat and compaction are present, decide whether the lawn has enough vigor for combined work. UC’s renovation guidance includes dethatching and aeration where each is needed. A weakened lawn deserves a recovery plan before you stack several disruptive operations into one afternoon.
Choose Blades and Rakes That Match the Living Turf
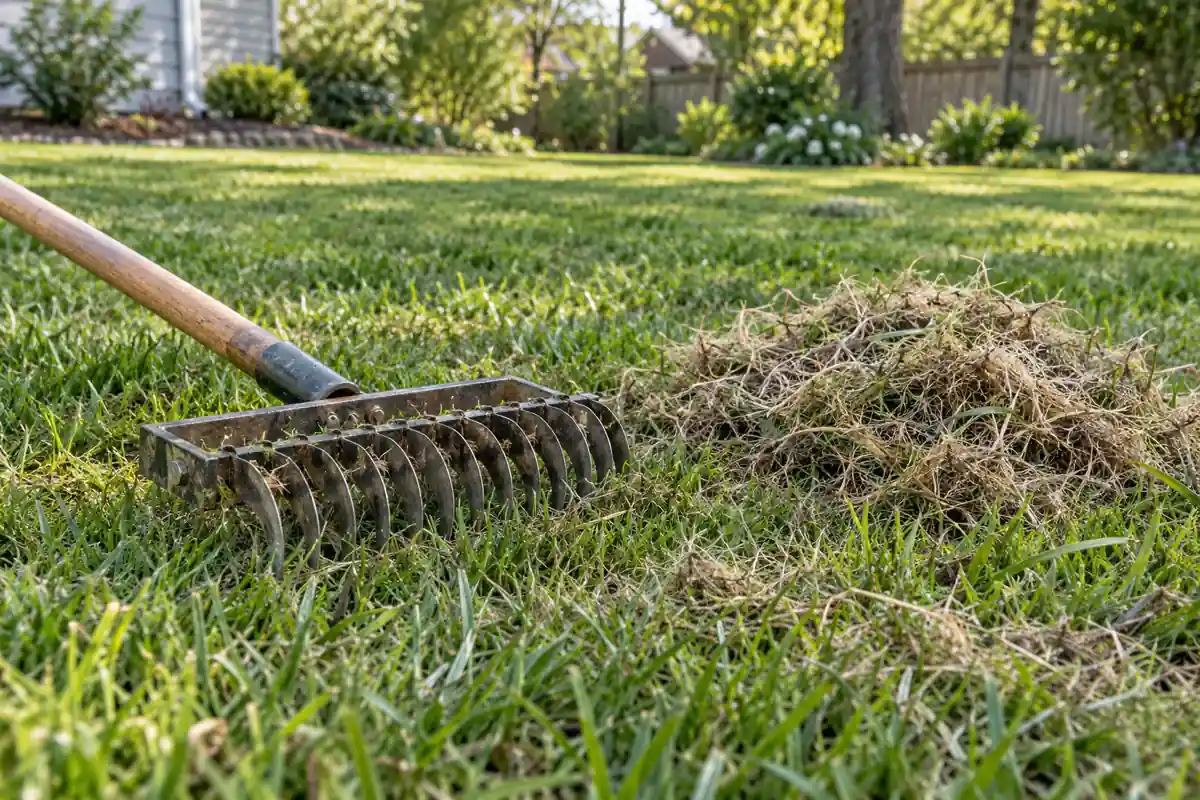
A dedicated thatching rake has rigid curved blades that engage the fibrous layer. Small problem areas are easier to work selectively with that tool. Collecting a little material and exposing the remaining surface gives you feedback before the whole lawn is disturbed.
Flexible lawn rake tines mainly gather leaves and loosened debris. Pressing them harder does not turn them into adjustable cutting blades. A pile of dry clippings after vigorous raking is not proof that you have removed an excessive attached layer.
Powered equipment needs a species-specific setup
Powered lawn dethatching equipment engages the turf differently according to its tine or blade assembly. Ask which attachment is fitted, how its depth changes and whether its setup suits your grass, because a rental sign alone leaves those mechanical differences unresolved. An adjustment number on one machine has no reliable meaning on another.
The NC State power-raking precautions favor several light passes over excessive removal at once. They specify 3-inch blade spacing to reduce injury to centipedegrass and St. Augustinegrass. That spacing describes the separation between blades, not their depth below ground.
Do not copy an aggressive creeping-turf setting onto every lawn. UC’s vertical-mower example uses a much closer blade spacing for creeping grasses and a higher, wider setup for bunch grasses. A rental unit that cannot be configured appropriately is a reason to choose another method or a qualified operator.
A heavily rooted mat needs staged work
Roots in a thick old organic layer complicate removal. Pulling out the mat also pulls out the living grass anchored in it. Oklahoma State describes moderate treatment over two or three years as preferable in severe cases where a single removal would take most of the lawn. That is a staged option, not a promised recovery schedule.
Decide whether you are maintaining an intact lawn or renovating one that will need reestablishment. If most green plants lift with the mat, stop treating the job as routine cleanup. Get help with the renovation plan before continuing across the remaining area.
How to Dethatch a Lawn With a Controlled Test Pass
Before machinery enters, clear stones, toys, branches and other obstacles, mark sprinkler heads and exposed irrigation components, and identify shallow lines. Read the machine’s operating and protective-equipment instructions. Keep bystanders away and disconnect power or stop the engine before inspecting an attachment.
UC’s preparation calls for mowing slightly lower than normal and lightly moistening the soil surface. Retain a safe cutting height for the species. Scalping weakens the plants you need for recovery, and saturated soil is vulnerable to wheel damage. The ground should not leave a glossy smear as the machine travels.
- Choose a small, less conspicuous strip with representative mat.
- Use the conservative setting recommended for that machine and turf.
- Make one controlled pass, then stop and collect the loosened debris.
- Inspect the remaining fibrous layer, attached crowns and soil surface.
- Continue only if the operation removes mat without extensive uprooting.
A few severed green blades differ from whole rooted plants in the debris. Lift the material and examine it: long attached roots, torn stolons and bare linear strips indicate excessive disturbance. Raise or lighten the setup if the equipment permits, or stop for a different plan. Do not keep cutting simply because the machine continues to fill a bag.
What remains rooted after that first strip? Its condition is more useful than the size of the pile beside it. A perpendicular pass belongs only where the turf tolerates further work and more removal is justified. The cross-pass described in some instructions is not permission to ignore torn crowns.
Clear Debris and Protect the Recovering Root Zone
Remove the loosened mat before it blankets the remaining grass. A light collection pass exposes the surface so you can see bare ground, standing shoots and localized damage. Leaving the pulled fibers in a thick heap blocks light and defeats the cleanup.
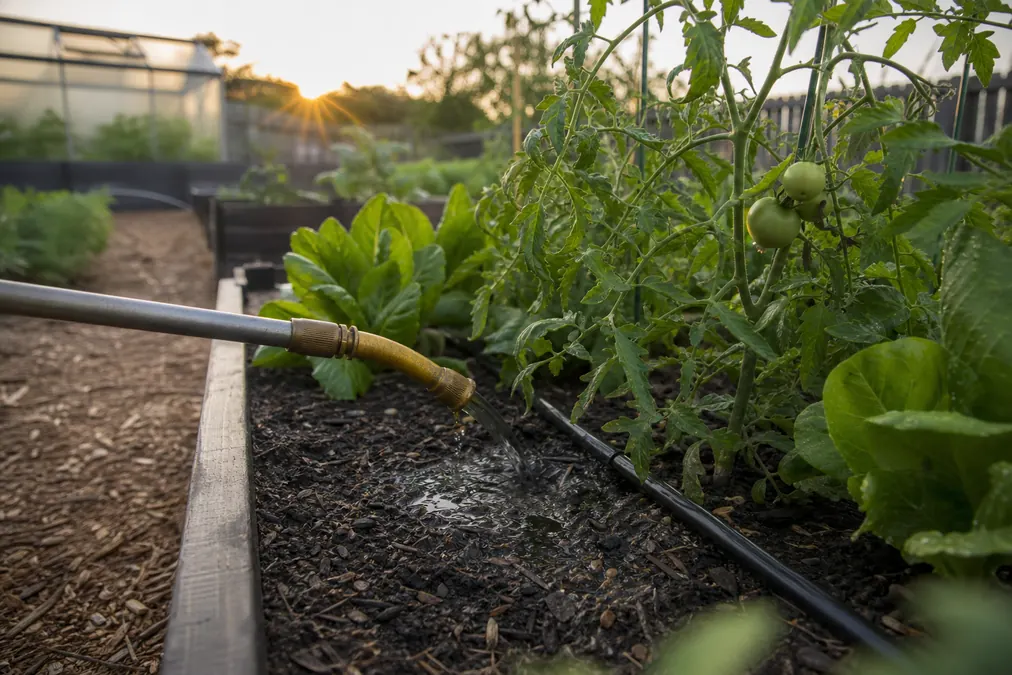
Base watering on moisture beneath the disturbed surface. Dry debris on top gives an incomplete reading. Exposed patches dry differently from intact turf. Irrigate according to the remaining roots, soil and weather; slow or pause if water runs away. Saturating a damaged lawn adds stress without replacing the roots that were removed.
Seed only where the lawn and season justify it
Dethatching before overseeding is useful when an excessive layer prevents seed from reaching soil. Thin cool-season areas deserve assessment for reseeding in a suitable establishment window. Intact creeping turf with favorable growth ahead needs a different recovery plan from bare ground that has lost its rooted plants.
Review weed treatments before adding seed. A preemergence product or other recent herbicide application can change what is permitted and when desired grass will germinate. Mechanical disturbance also changes the treated surface. Confirm the permitted seeding interval and any further treatment with the actual label and local advice before proceeding.
Use the local grass-care program for nutrition. A laboratory soil test helps guide lime, phosphorus and potassium decisions; routine soil results do not by themselves establish a nitrogen dose. Extra fertilizer is a poor substitute for a correctly timed operation. Watch for new anchored growth before increasing traffic or planning another pass.
Reduce Buildup Through Mowing, Water and Feeding
Thatch accumulates when durable plant tissue is produced faster than it decomposes. Creeping grasses contribute stems and spreading structures to that layer. Kentucky bluegrass, bermudagrass and bentgrass are more prone to buildup than bunch-type tall fescue and perennial ryegrass under comparable management.
Normal short clippings are not the main material to blame. NC State’s mowing guidance explains that they decompose quickly. Remove long wet clumps that shade the turf, but do not bag every ordinary mowing solely to prevent a fibrous root-and-stem mat.
Review fertilizer and irrigation where buildup returns quickly. Excess nitrogen and excessive or frequent shallow watering favor unwanted accumulation. Check automatic watering against rain and the actual root-zone moisture. A damp, springy surface above drier mineral soil deserves a closer look at how water is entering the profile.
Keep a simple record: location, grass type, approximate measured thickness and the weather surrounding any treatment. Revisit those places during the next suitable inspection season. A repeatedly thickening corner calls for attention to its growing conditions; a healthy thin layer does not require an annual machine visit.
Conclusion
Before the next rental booking, put a ruler against a fresh turf sample and note where the living roots sit. If the mat is thin, keep the machine away and investigate the actual limitation. If removal is justified, begin with a small test strip and inspect what remains attached. Watch for fresh green growth held firmly in the soil as roots reestablish beneath the recovering surface.