Last Updated May 20, 2026
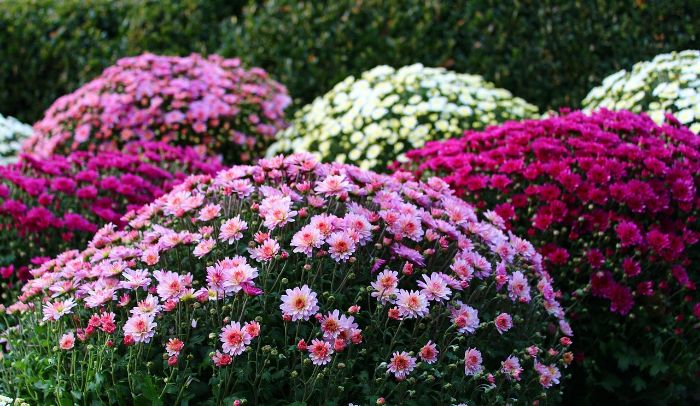
Planting chrysanthemums works best when the roots get a growing season before the plant is asked to survive winter. A mum packed with buds in September can look ready for the border even as that tight nursery pot holds a shallow root ball, dry edges, and stems already using most of the plant’s stored energy for flowers.
Garden mums are not hard to plant. The mistake is treating every mum the same. A spring-planted hardy mum is being built for next year. A fall-blooming pot is often being used for instant color. Both can belong in the garden. They need different expectations, timing, and aftercare.
The stronger planting decision is simple: choose a hardy plant, give it sun without night lighting, set the crown at soil level, water the root zone deeply, and pinch young growth before buds form. That is how a seasonal pot becomes a real garden plant.
Key Takeaways:
- Plant hardy mums in spring for stronger winter survival
- Choose full sun with dark nights for better bud set
- Avoid low wet soil where shallow roots suffocate
- Water deeply after planting, then check root-zone moisture
- Pinch young spring growth before buds begin forming
Table of Contents
Planting Chrysanthemums Timing – Spring Roots Beat Fall Color
A chrysanthemum planted in spring has time to make roots before the ground turns cold. That root time changes the plant’s future more than the size of the flower display on the day you buy it. Spring planting also gives you room to pinch the stems, correct spacing, and water through the first hot stretch before buds begin to form.

Outdoor chrysanthemums move into the garden after the last frost, once rooted cuttings or overwintered plants are hardened off and growing strongly. In much of the United States, that means planting garden mums after the soil has warmed and hard freezes have passed, with the first season treated as establishment, not only a flower show.
Fall planting can still work. The window is narrower. Fall-planted mums need about six weeks before winter for roots to establish beyond the original potting mix. Plants set out after that point may bloom beautifully and still fail by spring because the root ball never moved out into the surrounding soil.
That is the honest tradeoff with September mums. You are buying color at the exact moment the plant should be preparing underground. If the plant is in full bloom, rootbound, or sold as a florist mum, treat it as seasonal color unless you can plant early, water carefully, and mulch before freeze-thaw cycles start.
| Planting moment | Best use | Root risk | Better move |
|---|---|---|---|
| Spring after last frost | Perennial garden mum | Low if watered through summer | Plant, pinch, and build a broad root system |
| Early summer | Border or container plant | Moderate in heat | Plant on a mild day and shade only during transplant stress |
| Late summer with tight buds | Fall display with some perennial chance | Moderate to high | Plant quickly, keep evenly moist, and mulch after frost |
| Full bloom near frost | Seasonal color | High | Enjoy the flowers and do not count on spring regrowth |
Plant labels matter here. Hardy garden mums, Korean mums, and rubellum types are better candidates for returning than many gift-shop or florist chrysanthemums. If the tag does not make that clear, the plant choice belongs before the planting hole; the local chrysanthemum selection decision changes how much winter risk you should accept.
Chrysanthemum Light Requirements – Sun By Day, Darkness By Night
Chrysanthemums need full sun for dense growth and strong flowering. Give them at least six hours of direct sun where possible, because plants grown with less light often stretch, open at the center, and carry fewer buds along weaker stems.
Morning sun is valuable because it dries dew from the leaves before fungal pressure builds. All-day sun is better in cool or moderate climates, especially where autumn weather turns damp. In hot inland gardens, a site with strong morning sun and some late-afternoon relief can keep newly planted mums from wilting so hard that the root ball pulls away from the surrounding soil.
Night light is often the hidden cause of weak bud set. Mums form flowers in response to long nights, so porch lights, security lights, streetlights, and bright window spill can delay or reduce bud set. A bed beside a sunny driveway may seem perfect at noon and still disappoint in fall if a light stays on above it every evening.
Observation: Weak-blooming mums near patios are often not short on fertilizer. They are sitting in a small pool of artificial light after dark, so the plant receives a mixed seasonal signal when it should be setting buds.
Check the site twice before planting: once when the sun is high and once after dark. Leaves should feel dry by midday, and the plant should sit in genuine darkness at night. If the spot fails either test, move the mum before roots settle.
Planting Site And Soil – Drainage Decides Root Survival
Chrysanthemum roots sit close to the surface, so a planting site can fail fast when the top layer dries out or the lower layer stays wet. The best soil is fertile, loose enough for roots to spread, and drained well enough that a hole does not smell sour after rain.
A slightly acidic soil near pH 6.5 suits garden mums in many home beds, and drainage should be checked before any pH adjustment. Clay that holds water around the crown in winter does more damage than soil that is slightly outside the target pH. Sandy soil creates the opposite problem: water moves through before shallow roots can use it, so compost matters for moisture retention as much as fertility.
A broad bed preparation beats a rich pocket in a poor hole. Work compost into the full planting area, so roots do not leave loose amended soil and hit a hard clay wall at the edge of the hole. A chrysanthemum soil preparation pass is worth doing before plants arrive if the bed has compacted, crusted, or stayed wet after previous plantings.
The most useful timing detail is the bed-prep window. A 10-day to two-week soilbed preparation window gives loosened soil time to settle and exposes new weed seedlings before planting. That second light pass removes weeds before the mum root ball is in the way.
Pro Tip: Dig one test hole, fill it with water, and watch what happens after the first drain. If the second fill still sits after several hours, plant mums on a raised mound or in a container so the crown stays out of a cold wet pocket.
Do not bury the crown to compensate for a loose plant. Set the root ball at the same level as the surrounding bed, then firm soil around the sides. A buried crown traps moisture against new shoots in spring, and that damp collar is where rot often starts.
How To Plant Chrysanthemums – Crown Level, Spacing, And First Soak
A good planting hole is wider than the root ball and only as deep as the root ball itself. The goal is side-to-side root movement, not a deep sump below the plant. If the potting mix has dried hard, soak the pot before planting so the root ball does not repel water after it is in the ground.
Slide the plant out of the pot and look at the roots before it touches the hole. White or tan roots that hold the mix together are normal. Brown, mushy, sour-smelling roots point to rot. A tight mat of circling roots should be loosened with fingers or lightly scored so new roots move outward into the bed.
Use the spacing table as a mature-size check, not a fixed rule. Compact named cultivars can sit closer, while broad landscape mums and taller types need more air around the final mound.
| Mum type | Spacing | Planting depth | What to check |
|---|---|---|---|
| Compact cushion mum | 12 to 18 inches | Top of root ball level with soil | Airflow between mature mounds |
| Medium garden mum | 18 to 24 inches | Crown uncovered after firming | Room for pinched side shoots |
| Tall or loose-growing type | 24 to 30 inches | Root ball level, stake at planting | Support before stems become brittle |
| Container mum | One plant per wide pot | Same level as nursery pot | Drainage holes and stable pot size |
Backfill with the soil you removed, firming in layers with your hands, not packing with your foot. Water until the soil settles around the root ball and the surface glistens for a moment before soaking in. If a ring opens around the original potting mix after watering, add a little soil and press it closed.
Mulch helps. Mulch against stems creates a wet collar. Keep a bare finger-width gap around the crown and use a light 1 to 2 inch layer over the surrounding root zone. Straw, shredded leaves, bark fines, or finished compost all work when they stay loose enough for water to pass through.
Containers need the same planting level and more drainage discipline. Use a pot wide enough that the root ball has room on all sides, and raise the container on feet if heavy autumn rain blocks the drainage holes. A beautiful mum in a waterlogged decorative cachepot can collapse in a week.
If you are planting several mums, set them out in their pots first and look at the mature mound size, not the current width. Leaves should touch visually by fall, not physically by planting day. Crowded mums hold damp leaves after dew, and that is where leaf spot and mildew gain ground.
In a mixed border, keep mums near plants that want similar water and sun. They pair well with asters, ornamental grasses, sedum, and late-season perennials when each plant has its own airflow. In containers, let one mum own the pot unless the container is broad enough for real root space; a packed fall combo looks full at the store and dries out like a sponge on a windy porch.
After-Planting Care – Water, Mulch, And Pinch Before Buds
Newly planted chrysanthemums need moisture where the new roots are trying to grow, not a daily sprinkle over the leaves. Push a finger 2 inches into the soil just outside the original root ball. If that zone is dry, water slowly at the base until the surrounding soil is damp, then let the surface breathe before watering again.

Shallow roots explain why mums wilt quickly in heat and why they dislike soggy ground. A dry root ball can shrink away from the bed, sending water down the gap and away from the roots. A saturated bed pushes air out of the soil. Both conditions produce the same sad-looking plant, so check the soil before assuming the answer is more water.
The fuller fall plants come from early pinching. When spring growth reaches about 6 to 8 inches, remove the soft growing tip just above a pair of leaves. New side shoots form below the pinch, and those shoots become the branching structure that carries more buds. Stop pinching by late June or around early July in many climates so the plant has time to set flower buds.
Fall-blooming nursery mums are different. Their buds are already formed, so pinching them removes the flowers you bought. After buds open, reduce feeding pressure and keep watering chrysanthemums tied to root-zone moisture rather than surface appearance. Late soft growth has poor winter value.
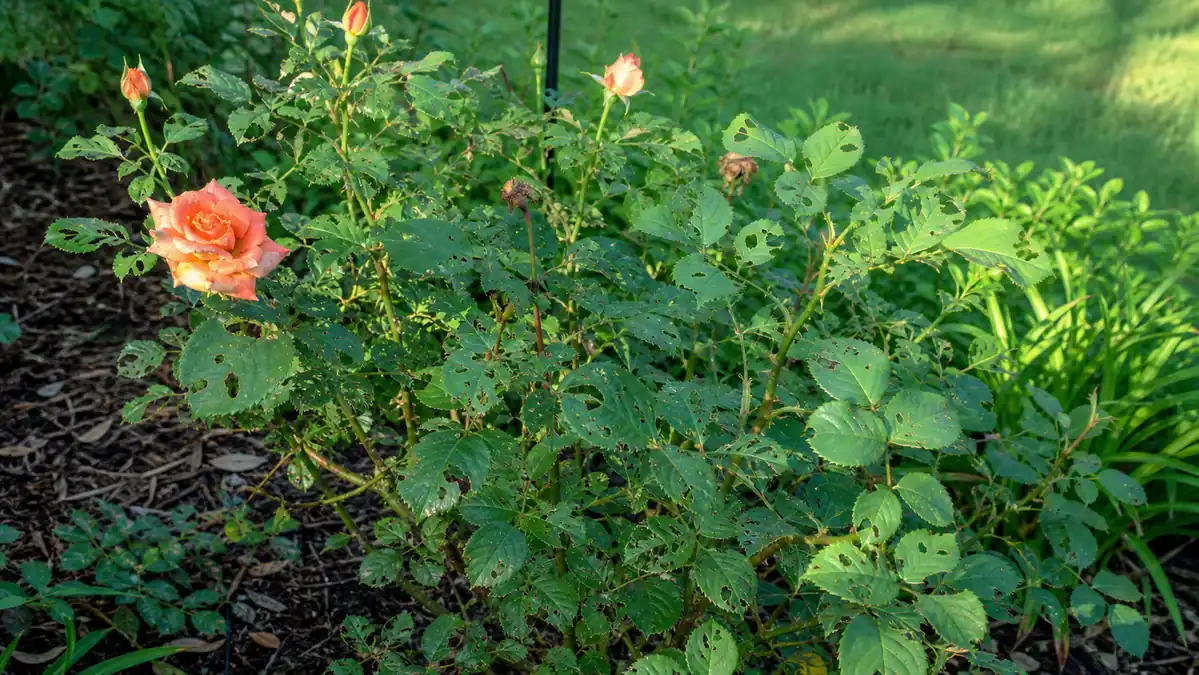
Watch the lower leaves in the first month. Yellowing from the bottom, blackened stems, powdery leaf patches, or tiny insects clustered on new tips are early signals that spacing, watering, or airflow needs correction. If disease pressure shows up early, the broader chrysanthemum pest and disease checks become part of planting recovery, not a separate job later.
Where To Start With Chrysanthemums – Match The Plant To The Season

Your garden goal is a mum bed that returns next year. Start with hardy garden mums in spring after frost risk has passed, then water deeply through the first hot stretch and pinch once new growth reaches several inches.
Your goal is instant porch color in September. Treat a bud-heavy fall mum as a seasonal display first, then plant only if you can give the root ball mild weeks, even moisture, and drainage before winter.
Your bed is heavy clay or stays wet after rain. Plant the mum on a raised mound or move it into a wide container before the first autumn storm exposes the drainage problem.
Your plant looks full at the nursery and feels tight in the pot. Soak the root ball, loosen the circling roots, and plant at crown level before the potting mix dries into a hard core.
Conclusion – Plant For The Root System You Want Later
A mum that returns next year is usually won at planting time, before the flowers are the loudest part of the plant. If you plant in spring, pinch early and water through heat. If you plant in fall, give the roots as many mild weeks as possible, keep the crown dry, and mulch after the ground begins to freeze with the stems still clear.
Check the planting once a week for the first month. The surface can look dry even when the root ball is still damp, or look dark even when the original nursery mix has gone hard inside. A settled plant will push firm side shoots, hold green lower leaves, and sit upright after watering, with the mulch loose around the crown and the first fall buds forming in clean light.
FAQ
Can chrysanthemums be planted in fall?
Yes, fall planting can work if the mum goes into the ground early enough to root before winter. Give the plant about six mild weeks, keep the root ball evenly moist, and protect the crown from wet, freezing soil. A full-bloom mum planted close to frost should be treated as seasonal color first.
Do chrysanthemums come back every year?
Hardy garden mums can return for several years when they are planted early, grown in full sun, and kept out of winter-wet soil. Florist mums and late-planted fall pots are less reliable. Spring planting gives the plant the best chance because roots expand before cold weather arrives.
How much sun do chrysanthemums need?
Six hours of direct sun is the practical minimum for strong stems and better flowering. Morning sun is especially useful because it dries dew from the leaves. Night darkness also matters, since porch lights and streetlights can interfere with bud formation.
How deep should chrysanthemums be planted?
Plant chrysanthemums at the same depth they grew in the nursery pot. The top of the root ball should sit level with the surrounding soil, and the crown should stay uncovered. Planting too deep traps moisture around the stems and raises the risk of rot.
Should newly planted chrysanthemums be pinched?
Spring-planted mums should be pinched when new growth reaches about 6 to 8 inches, then stopped by late June or early July in many climates. Fall nursery mums should not be pinched because their flower buds are already formed. Pinching those plants removes the bloom display.