
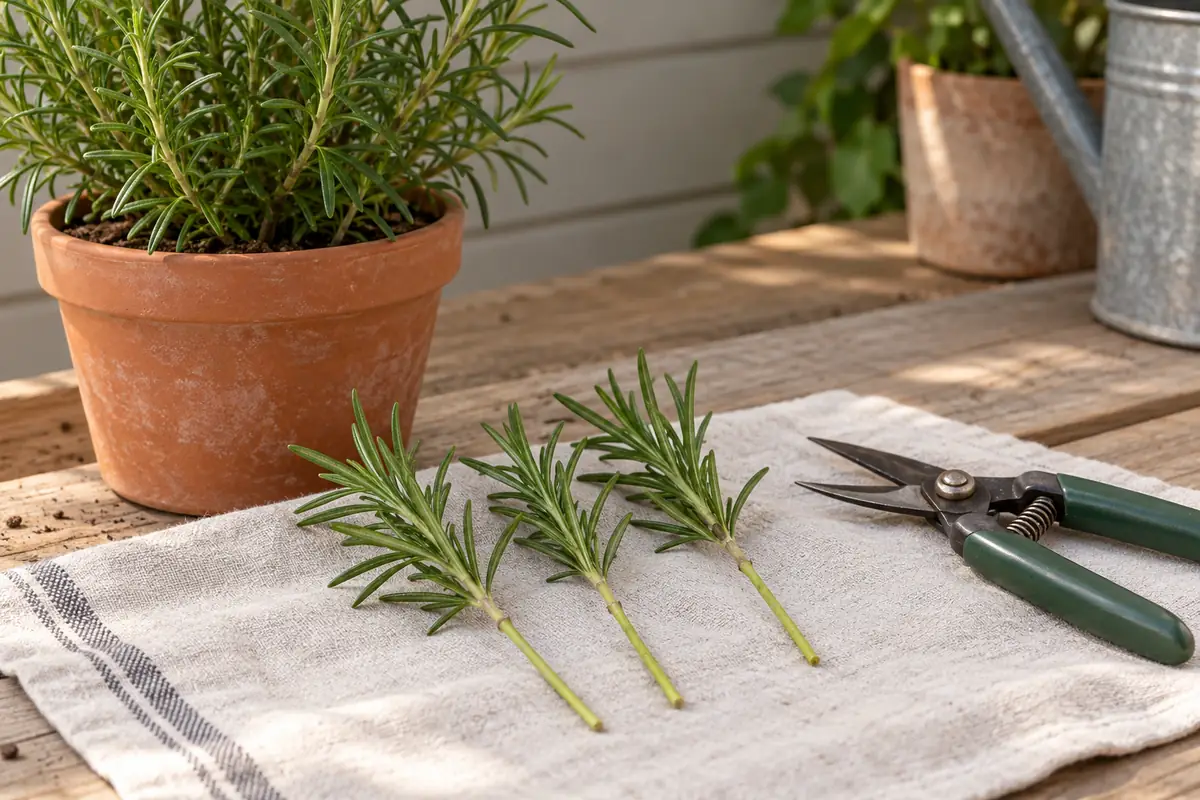
How to propagate rosemary begins with a healthy, nonflowering stem tip and a choice between water and a moist rooting mix. Take flexible new growth, remove the lower leaves, and make a fresh cut just below a leaf attachment point. Keep the remaining foliage above the water or mix. Protect the cutting from drying, and wait for actual roots before treating it like an established rosemary plant.
A mature rosemary shrub tolerates conditions that a rootless shoot cannot. The parent may thrive in strong sun and drying soil; its detached tip has no root system to replace water lost through its leaves. That changes the first few weeks of care. Gentle light, suitable humidity and air around the rooting zone matter more than feeding. A firm green stem with no roots after two weeks may still be viable, especially when growth is slow.
Choose the rooting route you can monitor
- For a pot: insert the stripped stem into a clean, free-draining rooting mix. Keep it moist, cover for humidity, and ventilate daily. Keep the cover out of hot direct sun.
- For a jar: place only the bare lower stem in clean water. Keep leaves above the waterline, replace cloudy water, and pot up after a root system develops.
- For either route: use living, nonflowering growth. A soft blackened base needs inspection and usually a fresh start, not extra water.
Allow several weeks. Rooting times vary with the cutting and setup. Water makes roots visible; it does not establish a universal speed or success advantage.
Key Takeaways
- Choose flexible, healthy rosemary tips without flowers or damaged foliage.
- Strip lower leaves and cut just below a node.
- Keep upper leaves above the waterline or rooting mix.
- Vent covered pots daily and avoid hot direct sun.
- Confirm roots before potting on and increasing outdoor exposure.
Table of Contents
Flexible New Stems Have Different Needs From Old Wood
Select a parent plant with healthy foliage and active tips. The shoot should bend gently and feel alive, with a fresh green upper stem and firm needles. Avoid a dried culinary sprig, a heavily flowering tip, or a piece whose base is already soft. Old brown branches are not the default material for this tip-cutting method.
Late spring into summer supplies suitable green growth in many gardens. Stem condition is the better guide across US climates. Rosemary also accepts semi-ripe cuttings, whose base has begun to firm as the tip remains softer. The RHS rosemary growing guide distinguishes these summer cuttings from softer new growth. That does not make a dormant, woody winter branch equally suitable.
Choose the parent for the plant you want to keep. A cutting preserves its vegetative characteristics, including upright or trailing growth. Select a rosemary variety suited to your climate and space before taking several copies. Propagation does not make a tender variety cold hardy.
Prepare the pot or jar first. A detached shoot loses water as it waits on a bench, especially in sun or wind. Collect it when the parent is well hydrated and move promptly to preparation. The needles should still feel firm; a strong resinous scent from handling them does not prove that a wilted stem remains a good cutting.
A Clean Basal Cut Places the Node Near the Rooting Zone
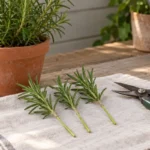
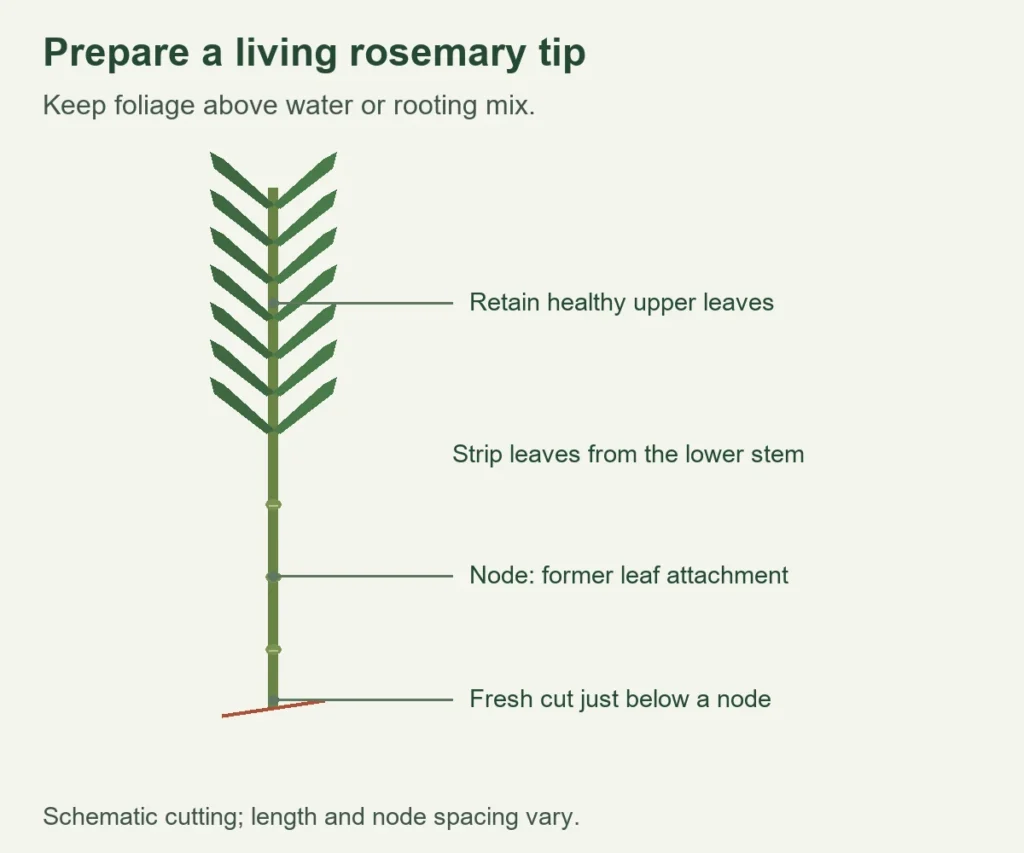
A node is the point where leaves attach to the stem. After you strip the lower needles, small attachment marks remain. Find one near the base and make a fresh cut immediately below it with clean, sharp scissors or pruners. Do not crush the stem or leave a long damaged tail beneath it.
A 3-5 inch tip is a workable starting size in NC State Extension’s rosemary propagation procedure. Its preparation leaves foliage on the upper 1-2 inches. Other documented methods use somewhat longer tips. The goal is a manageable living shoot with a leafless lower section, not a measurement that overrides stem quality.
- Inspect the shoot. Remove a healthy nonflowering tip from the parent, avoiding pest-damaged or discolored growth.
- Strip the base. Remove lower needles carefully, keeping a leafy tip to capture light. Do not scrape away long strips of stem bark.
- Locate a node. Feel or look for a former leaf attachment near the base, then recut just below it.
- Place promptly. Put the bare lower stem into the prepared rooting mix or water. No leaves should be buried or submerged.
Rooting hormone is optional for this home method. Maryland Extension’s herb-cutting instructions include it; the NC State rosemary procedure works without prescribing it. If you use a product, follow its label for the cutting and application. More powder is not a substitute for healthy tissue or suitable moisture.
How to Propagate Rosemary in a Moist, Aerated Mix
Use a clean pot with drainage holes and a fresh, free-draining propagation medium. NC State’s example uses a pot at least 3 inches deep and a soilless mix, with options including perlite or a seed-starting mix. Heavy garden clay can pack around the stem and hold too much water for this small, humid setup.
Pre-moisten the medium so it is evenly damp. A dry pocket beneath a wet-looking surface can leave the stem without moisture. A saturated pot sitting in a tray of water creates the opposite problem. Let excess water drain before the pot goes into its covered location.
Insert the stem without compressing the mix
Make a hole with a pencil or stick. Slide the bare lower stem into it, leaving the remaining needles above the surface. Lightly bring the medium against the stem so it has contact without being rammed tight. In a shared pot, leave space between tips and keep their foliage from forming a crowded wet mass.
A clear bag held away from the foliage can reduce water loss. Use supports if needed so the plastic does not rest on the needles. Keep the covered pot in bright, sheltered light, protected from strong wind. Direct midday sun can overheat an enclosure even when a mature rosemary plant nearby looks comfortable.
Vent the cover and inspect below the surface
Lift the cover daily for air exchange and to inspect the cuttings. Remove dead material. Humidity around the leaves and moisture in the medium are separate checks: condensation on plastic does not prove the rooting zone needs another watering. Check moisture below the surface and judge the pot before adding more.
This balance follows the RHS Propagation techniques guidance: retain humidity, prevent stagnant wet conditions and pot on after roots and active growth develop. Keep the medium moist during rooting, with air spaces remaining between particles. Do not apply the parent’s drought-tolerant watering routine to an unrooted cutting.
Clean Water Makes Roots Visible Without Removing the Cutting
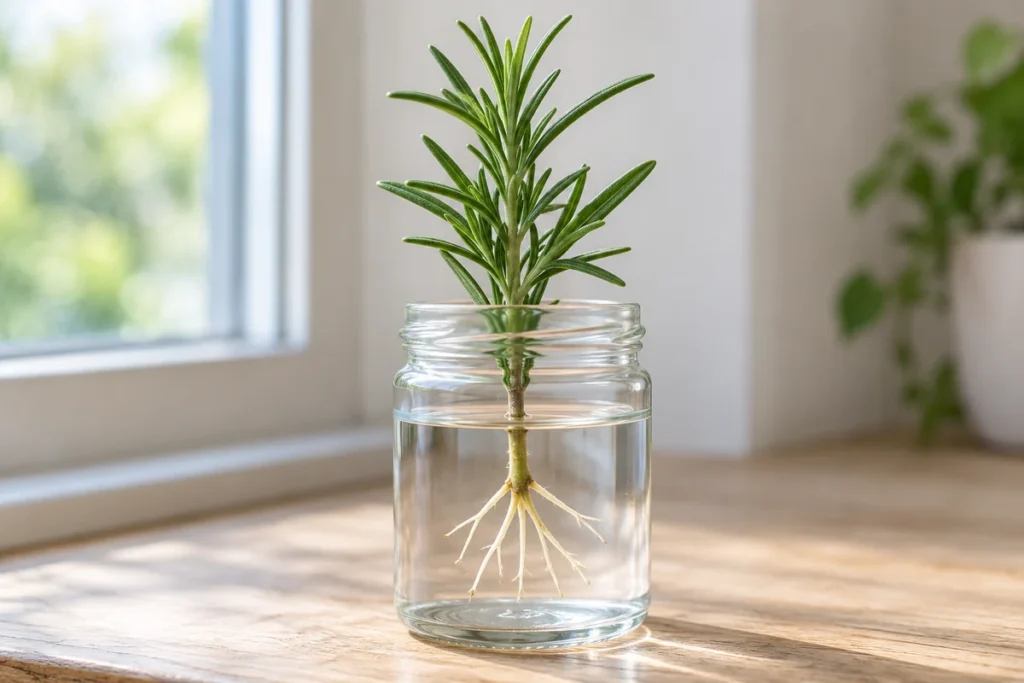
Water rooting lets you inspect the base through a small clear container. Place the stripped lower stem in water and keep every remaining needle above the waterline. Use a container that holds the cutting securely without bending it against the rim. Put it in warm, bright indirect light, away from a hot window surface.
The water method is documented in Joanne McClain’s rosemary propagation account for Nevada Extension. She used young shoots, changed the water every two or three days, and watched for roots over several weeks. Her experience is a practical example, not a controlled comparison proving water faster for every rosemary plant.
Check clarity and the stem as you refresh the water. Remove fallen needles before they deteriorate. If the water becomes cloudy or smells stale, replace it and inspect the base for softness. Keep enough water around the bare lower stem as the level falls, without raising it over the foliage.
Do not leave a rooted cutting indefinitely in its starter jar if your goal is a potted herb. Once several roots have developed, prepare a small draining pot and moist mix. Long, tangled roots are harder to handle without breaking. Visible roots are a better transfer signal than a date written on the glass.
Confirmed Roots Matter More Than a Fixed Week
NC State gives about 4-6 weeks for roots in its covered-pot setup. McClain’s water-grown shoots began rooting over roughly 2-4 weeks. Different material and conditions produced those examples. A cutting that remains firm and green beyond one of those checkpoints deserves inspection before disposal.
In water, look for pale roots emerging from the lower stem and extending into the jar. In a pot, renewed growth can be encouraging, although a small burst of leaves alone is not the same as seeing a developed root system. Avoid pulling the stem out every few days. Repeated disturbance can break the delicate roots you are waiting for.
When a mix-rooted cutting has established roots, lift from underneath with a small tool and preserve the rootball. Separate shared-pot cuttings carefully. For a water-rooted shoot, make a hole large enough to accept the roots without bending them sharply, position the plant, and settle damp mix around them gently.
Keep a newly potted cutting protected as it establishes. The rooting medium and the next potting mixture need not be identical. A draining container mix must suit the pot’s size and the young roots. Moving one small cutting straight into a large volume of constantly wet material makes moisture harder to manage.
Stem Firmness Helps Separate Drying From Wet Damage
Wilt does not tell you to water automatically. An uncovered tip can lose moisture faster than its bare stem can replace it. A cutting with a damaged, soft base may also wilt because its tissue has failed. Check the leaves, stem base and medium together before changing care.
| Visible sign | First check | Next action |
|---|---|---|
| Dry, limp needles; firm stem | Dry medium, heat, wind or low humidity | Correct the dry or exposed condition |
| Soft, darkened base | Wet stagnant mix or deteriorating jar tissue | Remove damaged cuttings; correct setup before restarting |
| Cloudy jar water | Submerged needles and stem condition | Refresh water and remove fallen foliage |
| Firm green cutting with no visible roots | Stem maturity, light, moisture and elapsed time | Continue monitoring viable tissue without repeated pulling |
A blackened base is not enough evidence to name a pathogen. Discard tissue that is soft and collapsing, clean the container, and restart with a healthy cutting in an improved setup. Adding fertilizer or topping up an already soaked pot will not restore dead tissue.
If rooted tips stall after potting, check the new root zone before increasing feeding. Water-rooted plants can need a period of adjustment to a solid medium. Keep conditions gentle and moisture appropriate; a stalled tip does not prove that every root has died. Avoid repeatedly unpotting it to check.
Established Roots Allow a Gradual Move Toward Adult Care
Reduce dependence on the cover as a pot-rooted cutting establishes, watching whether the foliage stays firm between checks. Increase outdoor exposure gradually in suitable weather. Start protected from harsh sun and wind, then extend exposure as the plant tolerates it. A newly rooted tip should not jump directly from a humid bag into a hot, exposed bed.
Once the root system is established, the plant can move toward normal rosemary drainage and soil care. Mature drought tolerance develops with roots; it is not a reason to dry a newly transferred rootball completely. Keep the young plant protected from freezing conditions until it is ready for its intended location and climate.
Conclusion
Choose living nonflowering tips, prepare a bare lower stem and root them in clean water or a moist, airy mix. Protect the foliage from rapid drying, inspect the base when trouble appears, and confirm roots before potting on. A healthy cutting needs suitable conditions and time, followed by a gradual transition into ordinary rosemary care.