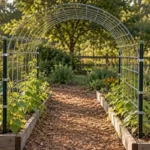


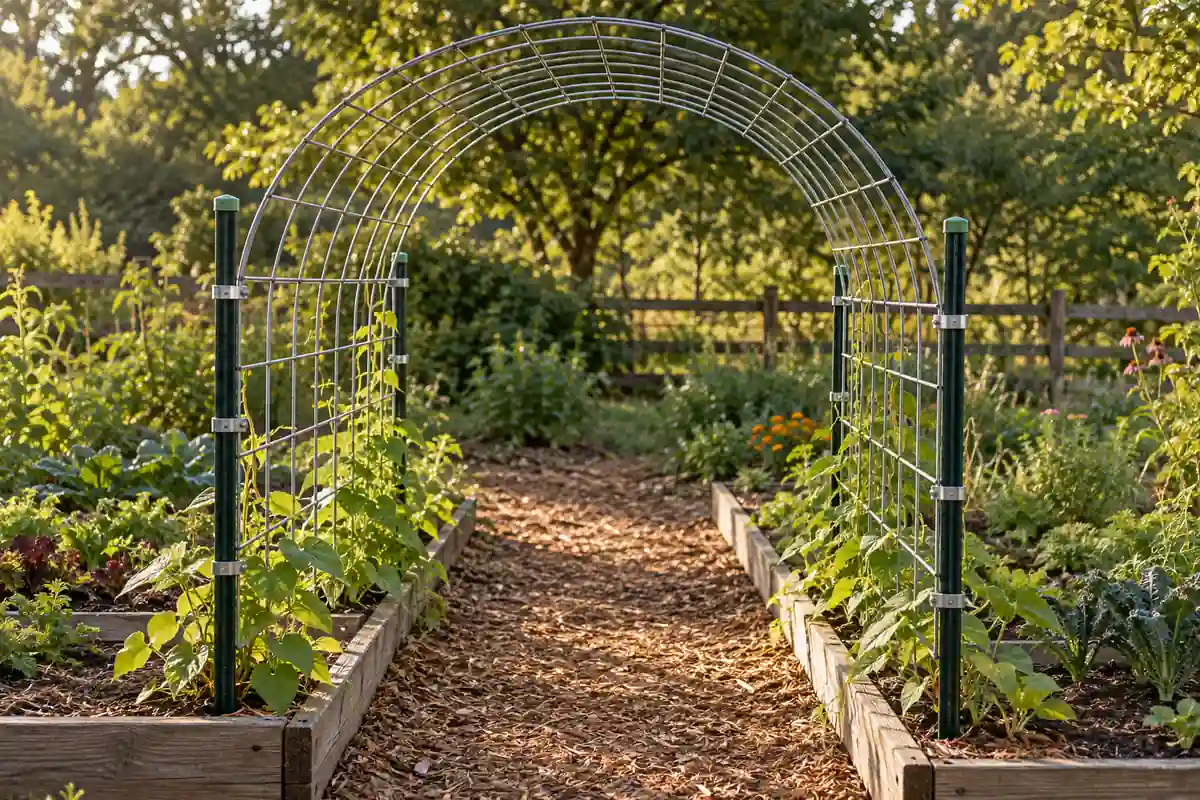
A cattle panel trellis can form a walk-through garden arch or a straight support along a bed. Start with a rigid welded livestock panel, then choose the shape before marking posts. On a common 16-foot by 50-inch panel, the long dimension bends over the path for an arch. The short dimension becomes the depth of that arch along the walkway.
A flat installation uses those dimensions differently: about 16 feet along the row and 50 inches upward. Neither arrangement is finished until the posts hold firmly, the connections restrain the wire and the crop fits the available space. Steel feels reassuringly solid in your hand, but a springy panel can push outward as it bends. Plan for a helper, locate buried services before driving posts and check the empty structure before vines make every attachment harder to reach.
Choose the shape before buying posts
- Walk-through arch: bend the 16-foot length across the path. One panel covers only about 50 inches along the path. A four-post layout puts two supports on each side.
- Flat row support: keep the 16-foot length horizontal. Include intermediate supports; the panel itself remains about 50 inches tall.
- Large pumpkins or an exposed overhead site: panel dimensions alone give no safe load or wind rating. Choose a different crop or a site-designed structure.
- Before ground work: contact 811 or your state locate center, wait for responses and markings, and account for private lines.
Key Takeaways
- Verify panel dimensions, wire construction and condition before arranging delivery.
- Measure path width separately from the arch’s short tunnel depth.
- Anchor posts in suitable ground before releasing the panel’s tension.
- Use compatible outdoor fasteners and protect exposed sharp wire ends.
- Inspect posts and connections again as foliage and fruit increase.
Table of Contents
Cattle Panel Trellis Dimensions Change With Its Orientation
Genuine cattle panels are rigid welded sections, not thin fencing sold in a flexible roll. Hutchison lists a galvanized 4-gauge model measuring 50 inches high in 8-foot and 16-foot lengths. Check the actual product: wire gauge, mesh openings and dimensions can vary among suppliers and livestock-panel types.
A hog panel or a lightweight garden mesh is not an automatic substitute. Different height or stiffness changes what you can bend, how high the result stands and where vines can grip. Inspect welds and distorted wires before accepting a damaged discounted panel.
For an arch, the 16-foot stock length follows the curve from one side of the path to the other. The 50-inch stock height runs along the path. One sheet therefore makes a short canopy, not a 16-foot-long tunnel. Extending the tunnel requires additional panels and supports.
For a wall, keep the long edge along the row and the short edge upright. Raising a panel above the soil does not create more wire for tall vines to climb. Compare the actual finished support with the crop’s growth habit before committing to either shape.
A straight wall also avoids the bending operation, which may make it the better choice when a walk-through opening serves no garden purpose. A trellis matched to the crop starts with climbing habit and access, then uses a material that suits that job.
Measure Access, Shade and Firm Ground Before Installation
Mark the mature growing space as well as the bare structure. Leaves will reach into the passage, fruit may hang below the top and a dense canopy can shade neighboring vegetables. Leave room to carry a bucket, reach fruit and inspect both sides without stepping into planted soil.
When planning a small vegetable garden, place the proposed trellis on the layout before filling the remaining bed space. Moving four posts after roots and vines develop is a much harder correction than moving four marks.
Request the utility locate before digging or driving posts and follow your state’s process. Wait for the required responses and markings. Identify private irrigation, lighting or other services that may need separate attention; shallow post work can still intersect buried lines.
Next, examine the anchoring ground. Loose raised-bed mix and thin bed boards do not automatically restrain an arch as securely as appropriately installed ground posts. If the planned location sits over paving, rock or ground that cannot hold anchors, change the design or get site-specific help.
Manufacturer Rohrer’s fencing guidance calls for burying a T-post’s anchor plate completely and checking alignment. That is an observable installation condition, not a universal depth or a guarantee that any soil will hold a planted arch. Choose post length and anchorage for the site, keeping enough usable post above ground for the panel connections.
Prepare the Panel, Four Posts and Compatible Connections
For the single-panel arch described below, gather the components before bending. A long panel is awkward to transport and control. Ask the supplier about delivery or suitable transport; avoid buying first and improvising a vehicle restraint afterward.
| Item | Single arch example | Check |
|---|---|---|
| Rigid welded cattle panel | One 16-foot by approximately 50-inch sheet | Actual dimensions, wire gauge and sound welds |
| Suitable T-posts | Four, two on each path edge | Length, soil anchorage and accessible attachment height |
| Clips or exterior metal tie wire | Multiple connections on every post | Compatibility with both post and panel wire |
| Layout and installation tools | Tape, line, level, suitable driver and fastening tools | Follow the tool and hardware instructions |
| Handling protection and help | Gloves, eye protection and a second adult | Control of spring tension; hearing protection where needed |
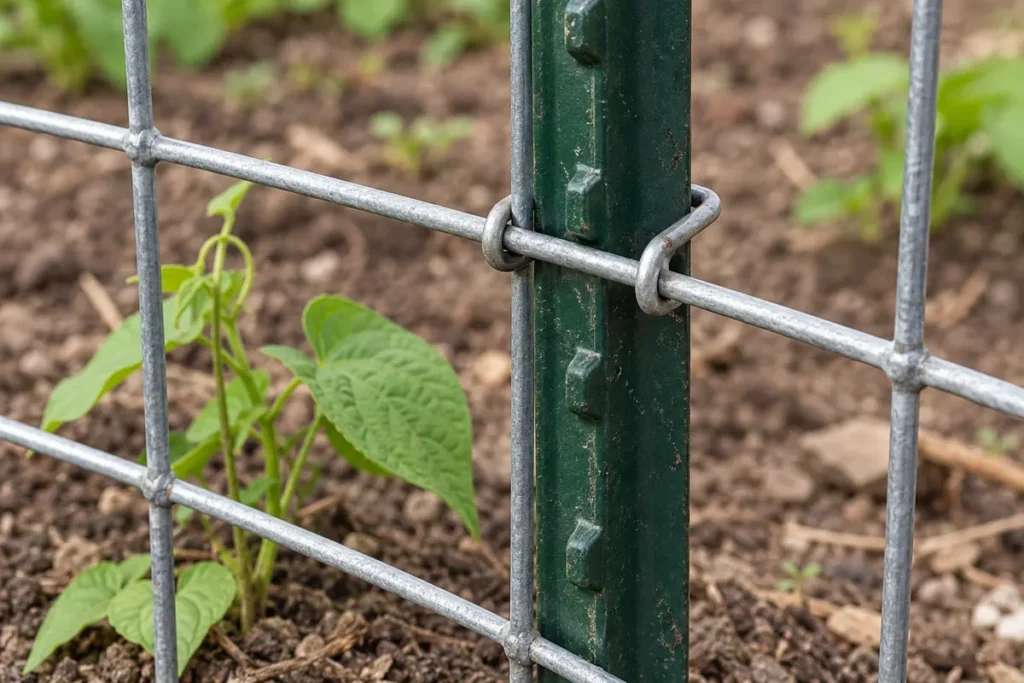
Purpose-made T-post clips are one connection option documented by fence-wire manufacturer Bekaert. Suitable galvanized wire is another. The fastener must capture the panel against the post without slipping; a printed strength on one cable tie does not rate the whole structure.
Plastic ties weather, and metal ties can leave sharp tails. Inspect either type in service. For metal wire, excessive twisting can break the connection. Finish ends where they cannot catch a hand or face during harvesting.
Build the Arch With Controlled Bending and Four Anchors
A five-foot path span is a useful published layout example for one 16-foot panel. Its finished height depends on how the panel bends and where its ends sit. Do not calculate guaranteed headroom from a perfect semicircle; the actual shape is constrained by the base spacing and the steel.
Example footprint viewed from above
Five feet across the path. Approximately 50 inches from the entrance station to the exit station.
Entrance left
Entrance right
50-inch canopy depth
Exit left
Exit right
The 16-foot panel length curves from the left side over the path to the right side. These are example layout measurements, not a load-rated design or guaranteed clearance.
- Mark the four corners. After utility clearance, mark two points on each path edge. Check the span, depth and alignment against the panel you purchased.
- Install the posts. Keep them plumb and orient them consistently for the chosen clips. Drive them into suitable ground with the anchor plates buried. Stop if an obstruction or unstable ground prevents proper installation.
- Control the first panel edge. With a helper, position the short edge at one side’s posts. Keep control of the opposite edge and the surrounding work area.
- Guide the long dimension into the arch. Work together to bring the opposite short edge across the path to its supports. Do not release an unsecured end under spring tension.
- Secure all four posts. Make compatible connections at multiple points, restraining the panel before either handler lets go. Follow the hardware’s installation method.
- Inspect before planting. Check for rocking posts, slipping clips, distorted welds and protruding ends. Measure usable clearance. Correct problems before vines occupy the frame.
If either person cannot control the panel during bending, stop and arrange more suitable help. Do not substitute a solo wrestling attempt for a handling plan. Keep children, pets and bystanders out of the panel’s movement area.
Check the passage with future foliage in mind. Bare-wire clearance can feel generous until tendrils, leaves and fruit hang into the route. A panel that springs, leans or shifts during inspection needs correction; a gentle check is not a structural proof test.
Support a Flat Panel Along Its Length
A straight installation holds the 16-foot edge horizontally. Add intermediate posts to control the long run. Two end supports alone should not be assumed adequate once a vigorous crop catches wind.
Roughly five to six feet between stakes is the general garden-trellis spacing suggested by University of Minnesota Extension. Using that guidance as an illustration, four posts along a 16-foot run divide it into three spans of five feet four inches. This arithmetic is a layout example, not a certified span for every cattle panel and soil.
Flat-wall example post positions
Along a 16-foot line: 0 feet, 5 feet 4 inches, 10 feet 8 inches and 16 feet.
The unrotated panel is approximately 50 inches high. Adapt the support positions and bracing to the actual panel, ground and crop.
Set and align posts before mounting the sheet. Lift it with help, seat the wire consistently against the supports and secure multiple points. Inspect the middle spans for bowing and keep the low edge where young vines can reach it without exposing sharp ends along a path.
For vigorous beans, check the climbing height a pole bean trellis needs. A 50-inch wall is not automatically a tall bean support. Choose an arch or a properly framed taller system when needed; turning an entire 16-foot sheet upright is a different construction project.
Train Suitable Vines and Keep Heavy Fruit Off Unrated Arches
Match the cultivar to the finished space. Beans twine, cucumbers and peas use tendrils, and tomatoes need tying and containment. Guide young growth before stems become long and brittle. Soft ties should support a stem without tightening around it as it thickens.
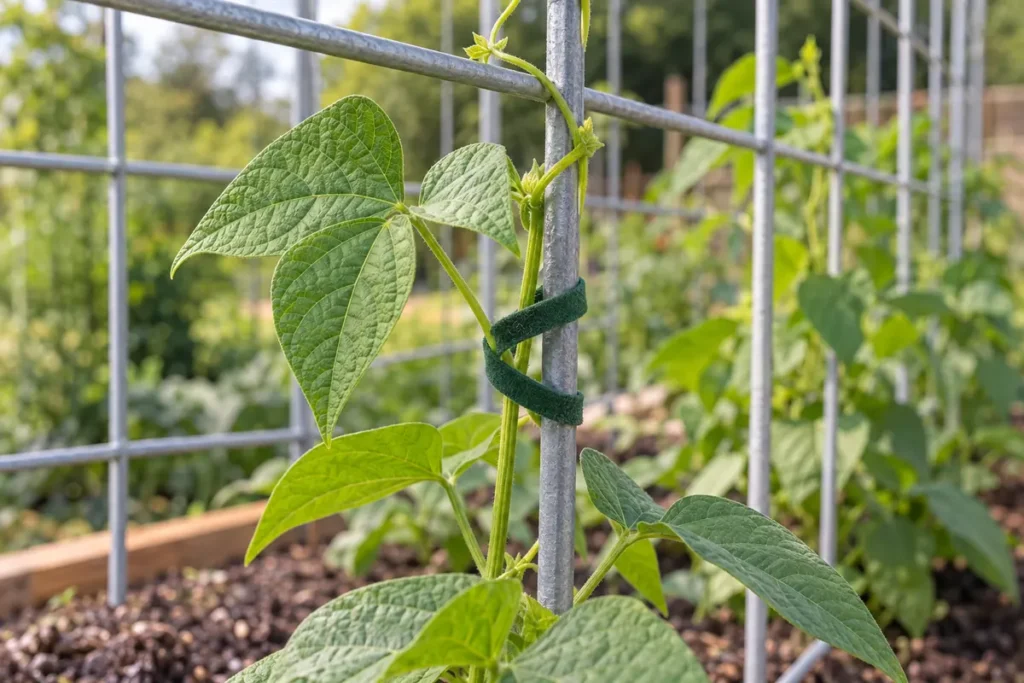
Keep normal cultivar spacing at the base. More vertical wire does not automatically justify crowding extra plants into the root zone. For training cucumbers on a trellis, check growing fruit frequently so it does not wedge between the wires.
Smaller vining fruit is the better general choice in the vegetable support guidance from University of Minnesota Extension. Its roughly three-pound fruit example is a crop-suitability recommendation, not the safe load rating of a steel arch. Large squash and pumpkins are better grown on the ground under that guidance.
Some ripening melons detach from their vines. Support suitable small melons with cloth slings attached to the structure, allowing room for the fruit. A sling protects the fruit from falling; it does not increase the load capacity of weak posts or make a large pumpkin safe overhead.
Find the Moving Part Before Retightening Anything
A planted trellis changes through the season. Foliage catches wind, wet growth adds weight and soil can soften after rain. A rattle at a connector and a post rocking in the ground need different corrections.
| Sign | Check | Next action |
|---|---|---|
| Wire moving against a firm post | Slipped, broken or weathered fastener | Stabilize the panel and replace compatible hardware; inspect neighboring connections. |
| Post leaning or soil lifting near its base | Ground restraint and changing crop load | Keep clear of the unstable arch; reassess anchors or rebuild. |
| Flat wall bowing between posts | Panel type, unsupported span and vine pressure | Reduce pressure safely and add suitable support before continued use. |
| Fruit or vines narrowing the walkway | Crop suitability and remaining clearance | Redirect suitable young growth; change the crop or structure if access cannot remain clear. |
Do not stand beneath a moving arch to prove it is strong or retie a loaded overhead panel without first making the situation stable. Unloading, rebuilding or getting local installation help can be the correct response. Strong wire cannot compensate for a failing anchor.
Conclusion
Choose the arch or wall first, verify the panel and lay out its real footprint. Locate utilities, install suitable anchors and control the steel during attachment. Inspect the empty structure before planting, then repeat checks as the crop and weather change. Keep the crop within the support’s practical limits and use a different design when the site needs more than an ordinary garden trellis.