
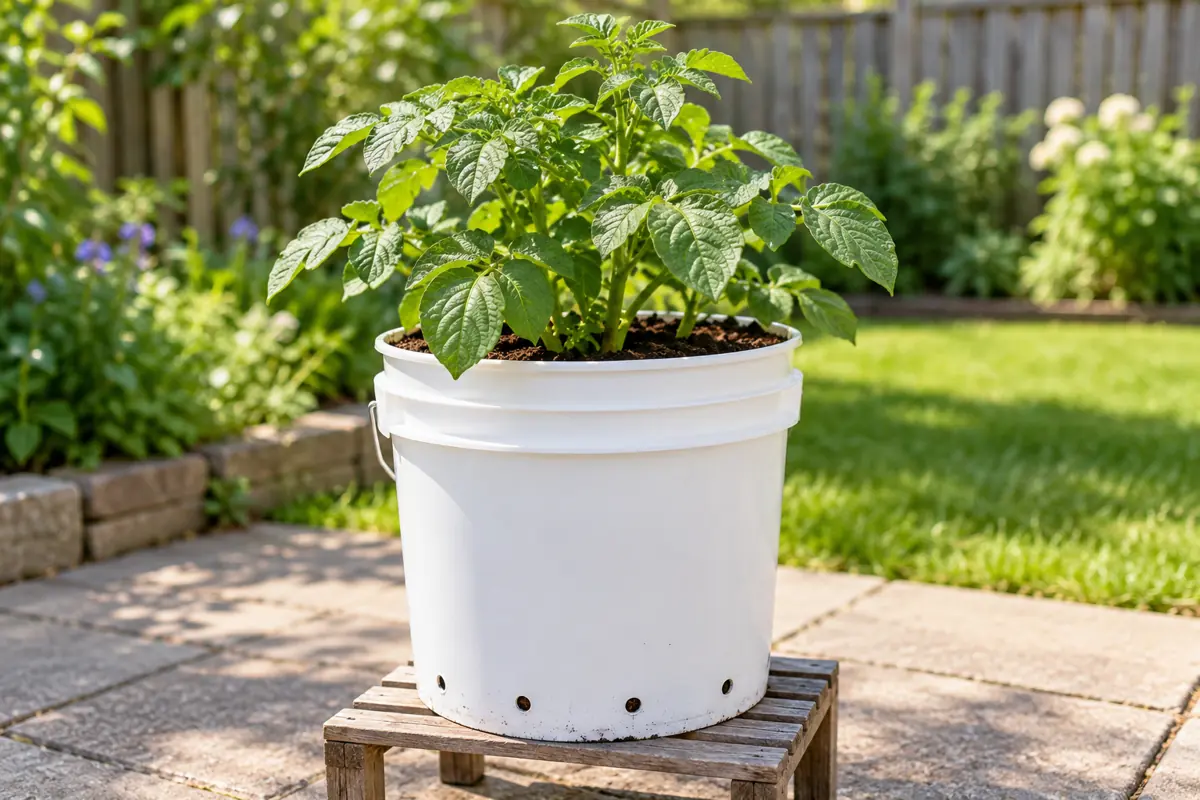
How to grow potatoes in a bucket starts with a safe container, working drainage and enough loose growing medium around the seed tuber. A small bucket can produce potatoes. It also gives roots a limited supply of space and water, so filling it higher is not a substitute for managing those conditions.
Use certified seed potatoes, keep developing tubers covered and check moisture below the surface. The foliage needs sunlight; the forming potatoes need protection from light. Those two requirements should guide where you place the bucket and how you add growing medium.
For a first attempt, aim for a manageable crop and a clear record of what you planted. A five-gallon bucket is a small growing project. A wider, larger planter gives more room and water buffer when your goal is a larger harvest.
Container: Choose an intact food-grade bucket with known previous contents. Reject containers used for paint, detergents or chemicals.
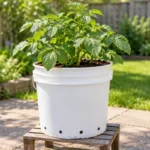
Drainage: Add base openings, raise them clear of the ground and test outflow. Use airy potting mix without a gravel layer.
Plant: A simple first five-gallon trial can use one small, sound seed potato, with mix below and above it and headroom for later additions. This is a space-conscious starting layout, not a proven optimum.
Maintain: Keep leaves in useful sun, prevent extreme bucket heat, and check the medium daily in hot weather. Water according to moisture, not automatically every day.
Harvest: Decide between tender new potatoes and a mature crop with set skins. Flowers alone cannot tell you the right day.
Key Takeaways
- Choose food-grade buckets with a known, safe use history.
- Keep base outlets open and skip the gravel layer.
- Plant sound seed tubers without crowding a small container.
- Cover developing tubers with mix and retain green leaves.
- Check root moisture and maturity before changing the care.
Table of Contents
Choose a Bucket That Protects Roots and Drains Freely
Start with the container’s history. Choose opaque walls to keep light off developing tubers. A food-grade symbol or suitable plastic type does not undo previous chemical use. Buy a new food-grade bucket or obtain a clean food-service container whose contents you can verify. Replace brittle, cracked or crumbling plastic before planting.
That distinction matters even for familiar recycling codes. University of Maryland Extension includes HDPE, LDPE and polypropylene among its food-safe plastic options, with prior contamination a separate concern. A washed paint bucket is still the wrong choice for an edible crop.
Even a five-gallon fabric bag can grow a modest potato crop, as shown in Maryland’s container vegetable guidance. The fabric-bag example demonstrates that a small container can produce potatoes, without establishing the ideal number of seed pieces for a rigid plastic bucket.
Choose a larger container if you have the space and want more root room or a less demanding moisture buffer. Small containers can be worthwhile experiments even when potatoes are not the highest-payoff choice among vegetables for pots and buckets. Keep the expected scale of the crop realistic.
Prepare and test the drainage
Make several openings across the base of an ordinary bucket. One published five-gallon setup from Rural Sprout uses four to six quarter-inch holes. Treat that as an example, then judge the finished container by actual outflow. Outlet size, position and obstruction all matter.
Raise the base on stable feet or slats so holes do not seal against a flat patio. Keep the bucket secure and account for the water that will drain below it. A saucer must not become a standing reservoir around the base.
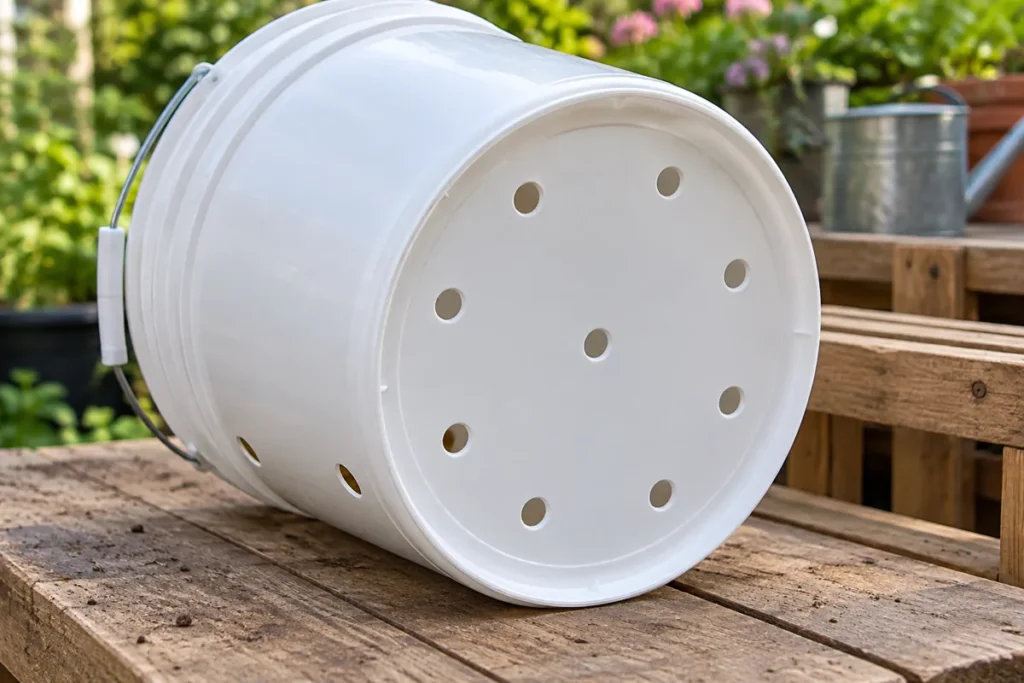
Skip gravel at the bottom. A coarse layer below finer mix can hold the saturated zone higher in the container and also removes root space. Functional pot drainage depends on open outlets and suitable medium, not a hidden layer of stones.
Choose Sound Seed Potatoes and a Suitable Growing Window
Plant seed tubers with living eyes, the small buds that produce shoots. Certified seed potatoes reduce the risk of introducing disease compared with supermarket potatoes or uninspected saved tubers. Certification reduces risk; it does not mean the tuber is sterile.
A small, firm seed potato can be planted whole. If a larger tuber must be divided, use a clean knife and retain at least one sound eye on each substantial piece, preferably two or three. Avoid cutting it into tiny scraps. Let fresh cut surfaces dry for a few days according to the supplier’s guidance before planting.
Firm tubers with living eyes give shoots a sound start, as described in Minnesota Extension’s seed potato planting guidance. Choose firm material without soft decay, and handle existing sprouts gently. A wet cut piece pushed into cold, saturated mix has a poor start.
Match the cultivar to your available growing season. Earlier types can suit a small new-potato project or a short season. A later cultivar intended for a larger mature crop asks more from the growing window and container. Check the named variety’s local recommendations.
Potato tubers develop best without extreme root-zone heat. Maryland gives soil at least 45 degrees F as a planting condition and warns that soil above 80 degrees F inhibits tuber development. Measure the container medium when temperature is uncertain; hot air and hot growing medium are different observations.
Choose a local spring or other suitable cool-season window, considering frost forecasts as well as root conditions. A bucket on a warm afternoon can still contain cold, wet mix. Green shoots also need protection from damaging frost after they emerge.
How to Grow Potatoes in a Bucket With Room for Later Filling
Use an airy potting medium that holds moisture and drains. Heavy garden soil can compact inside a bucket. A suitable container soil mix gives roots air space as well as water. Check whether it already contains fertilizer before adding anything.
For a first five-gallon attempt, one small whole seed potato is an uncrowded starting choice. Published small-container examples also use two or three pieces. More seed pieces compete for the same root space and water; they cannot promise a larger harvest.
The starting layers in Rural Sprout’s bucket method leave room for later additions. It separates the mix under the seed from the cover above it. Adjust the starting layers to your container and leave healthy shoots room to emerge.
| Part of the bucket | Starting example | Purpose |
|---|---|---|
| Below the seed | About four inches of moistened potting mix | Provides initial rooting medium above open outlets. |
| Seed position | One small seed potato for this first trial, eyes upward | Leaves room around the developing plant. |
| Above the seed | About two to three inches of loose mix | Covers the tuber without filling the entire bucket. |
| Upper space | Leave unfilled initially | Allows later additions around stems and a final watering gap below the rim. |
- Moisten the mix evenly before placing the bottom layer.
- Set the sound seed potato on the mix with its eyes or short sprouts upward.
- For a cut piece, orient the cut surface downward and protect the buds.
- Add the loose cover without packing it hard.
- Water gently to settle the mix and check that excess leaves the outlets.
- Label the cultivar, planting date and number of seed pieces.
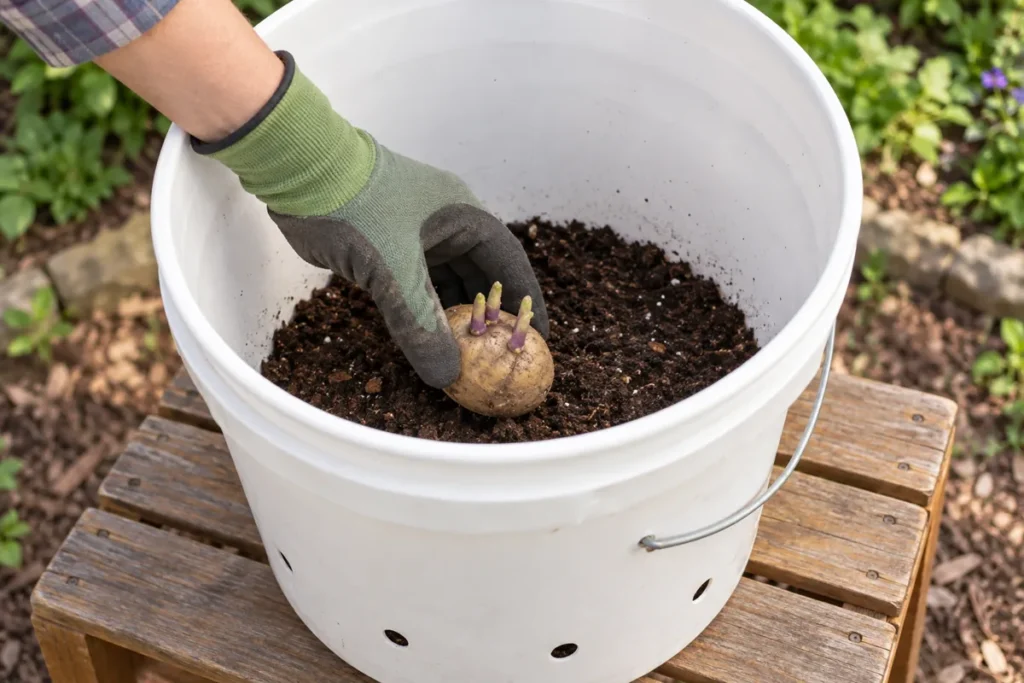
Keep the bucket outdoors in a suitable position and monitor the medium during emergence. Do not dig up sound seed repeatedly to check it. If growth is delayed, review temperature and drainage first.
Add Mix to Protect Tubers Without Burying the Whole Canopy
Potatoes form on underground stems called stolons. They are not ordinary roots swelling into a crop. Many tubers develop close to the original planted seed piece, which is why a tall column of mix cannot be treated as a stack of guaranteed potato layers.
Add loose medium around the lower stems after healthy shoots stand above the surface, keeping functioning green leaves exposed. Oregon’s container method starts additions around six-inch shoots; other bucket methods begin earlier. The purpose is coverage and support, not meeting one exact shoot-height deadline.
Work gently around stems, then water as needed to settle the fresh material. Check for gaps after settling. Stop adding mix once tubers are covered or usable space runs out; retain a gap below the rim so water can enter without washing mix out.
If a potato shoulder appears at the surface, cover it promptly. Light exposure can encourage greening and harmful glycoalkaloid accumulation. An opaque bucket and adequate cover protect different sides of the same crop.
The visible canopy and hidden tubers develop at different rates. Potato plant growth stages help separate leaf growth from tuber formation and enlargement. More leaves or an extra top-up alone cannot tell you the size of the crop below.
Keep Leaves Lit and the Root Zone Moist, Aerated and Cool Enough
Give the foliage strong direct sun. Maryland recommends at least six hours, with more preferred under suitable conditions. Keep an eye on the container itself: a dark bucket beside reflective paving can become excessively hot even when the leaves receive useful light.
Move the bucket away from intense reflected heat or shield its exposed wall without shading the whole canopy. Check the actual mix temperature during a hot spell before blaming the seed variety. Small containers have less buffering volume than a bed.
Inspect moisture daily during hot weather. This means checking, not necessarily watering. Feel below the dry surface and learn the bucket’s weight after watering. Loose, dry mix and a noticeably light container suggest a different action from cold, heavy mix that stays wet.
Water at the base gently enough for the medium to absorb it, continuing until the root zone is moistened and excess drains. Watch for water racing down a side gap past a dry central plug. Rewet dry medium gradually rather than assuming runoff proves the whole bucket became wet.
As tubers enlarge, repeated drying followed by heavy saturation can disturb development. Aim for consistent root moisture with drainage. A weekly in-ground irrigation amount is not a measured dose for a five-gallon bucket.
Review the mix label before feeding. A precharged potting medium may already supply nutrients, and compost changes the starting supply. Follow a vegetable fertilizer’s container directions when more feeding is needed. Extra bone meal or potash is not an automatic answer to small tubers.
Fertilizer cannot restore air to waterlogged roots. If leaves yellow or growth slows, check moisture, temperature and plant stage before adding another nutrient dose. Water leaving the holes can carry dissolved nutrients away, so both leaching and overfeeding deserve attention.
Check the Bucket Before Treating Yellow Leaves or a Small Crop
A single yellow leaf cannot distinguish maturity from stress. Compare the whole plant, recent weather and the condition of the medium. Slow seasonal drying and rapid collapse need different decisions.
| Sign | Check first | Next action |
|---|---|---|
| No shoots | Temperature, blocked outlets and persistent saturation | Correct conditions; inspect a failing seed piece carefully if needed. Leave sound seed undisturbed. |
| Wilt in heavy, wet mix | Drainage, standing runoff and soft stem-base decay | Stop automatic watering and investigate root or disease trouble. |
| Large canopy, small tubers | Maturity, root heat, moisture, crowding and feeding | Find the limiting condition before adding more mix or fertilizer. |
| Rapidly spreading dark leaf patches | Lesion pattern, stems and recent cool, wet weather | Seek prompt local diagnosis; do not assume normal maturity or reuse suspect growing material. |
Cool, saturated conditions can accompany seed decay. A firm tuber in merely cool mix may be slow; a soft, rotting piece needs removal and a review of drainage and possible contamination. Do not replace it into unchanged, suspect medium and expect a different result.
Early blight and late blight are different diseases. Rapid irregular dark lesions during damp weather warrant local Extension advice, especially if stems or tubers also decline. Keep foliage dry when watering and avoid saving suspect tubers for seed. A photograph or one spot cannot confirm the pathogen.
Harvest New or Mature Potatoes Without Damaging Them
Choose the harvest you want. For small new potatoes, Maryland and Minnesota give roughly six-to-eight-week checks under their respective conditions. Cultivar and weather shift that timing. Flowers are not a dependable countdown.
If sampling is practical, feel carefully near the bucket’s edge without tearing the root mass. A small container can also be harvested whole for new potatoes. Their thin skins are expected; that is a different stage from a fully mature crop.
For mature tubers, watch for gradual natural top decline and skins that resist gentle rubbing. Abrupt blackening or collapse is a reason to investigate, not proof that maturity arrived early. Avoid emptying a healthy bucket just because one lower leaf turned yellow.
When ready, place a tarp or shallow tray beside the bucket and tip the contents gently if you can handle the weight safely. Scoop some medium out first or get help if needed. Sort with your hands instead of stabbing blindly with a fork, and move the crop out of direct light.
Discard badly decayed or extensively green potatoes. Greening can accompany increased glycoalkaloids, as Oregon State Extension describes; the green pigment itself is not the toxin. Cooking is not a reliable fix for pronounced greening. Prevent exposure during growing and reject a heavily green harvest.
Conclusion
Give seed potatoes a safe bucket, open drainage and loose medium, then manage the crop by what its roots and leaves need. Keep tubers covered, avoid extreme root heat and check moisture before watering. A small first crop becomes more useful when you record the variety, seed count and conditions for the next planting.
Frequently Asked Questions
Do you have to sprout seed potatoes before planting?
No. Presprouting, sometimes called chitting, is an optional technique. Sound seed tubers with living eyes can be planted without a separate sprouting stage. If sprouts are already present, handle them gently. Long, fragile shoots do not guarantee a stronger plant or an earlier bucket harvest.
Can you use straw for later hilling?
Some container methods, including Oregon’s, use clean straw for added cover. It must keep tubers shaded and stay in place. Straw is not the same water and nutrient reservoir as potting mix, so using it does not remove the need to check moisture or supply the roots with suitable growing medium.
Can you reuse the bucket’s potting mix next season?
Consider the crop’s disease history and whether the mix still has useful structure. Do not treat medium from a diseased crop as clean. Healthy used medium may need refreshing and a new nutrient plan; it is not an unchanged supply of fertility. Clean the reusable, food-safe container before another crop.