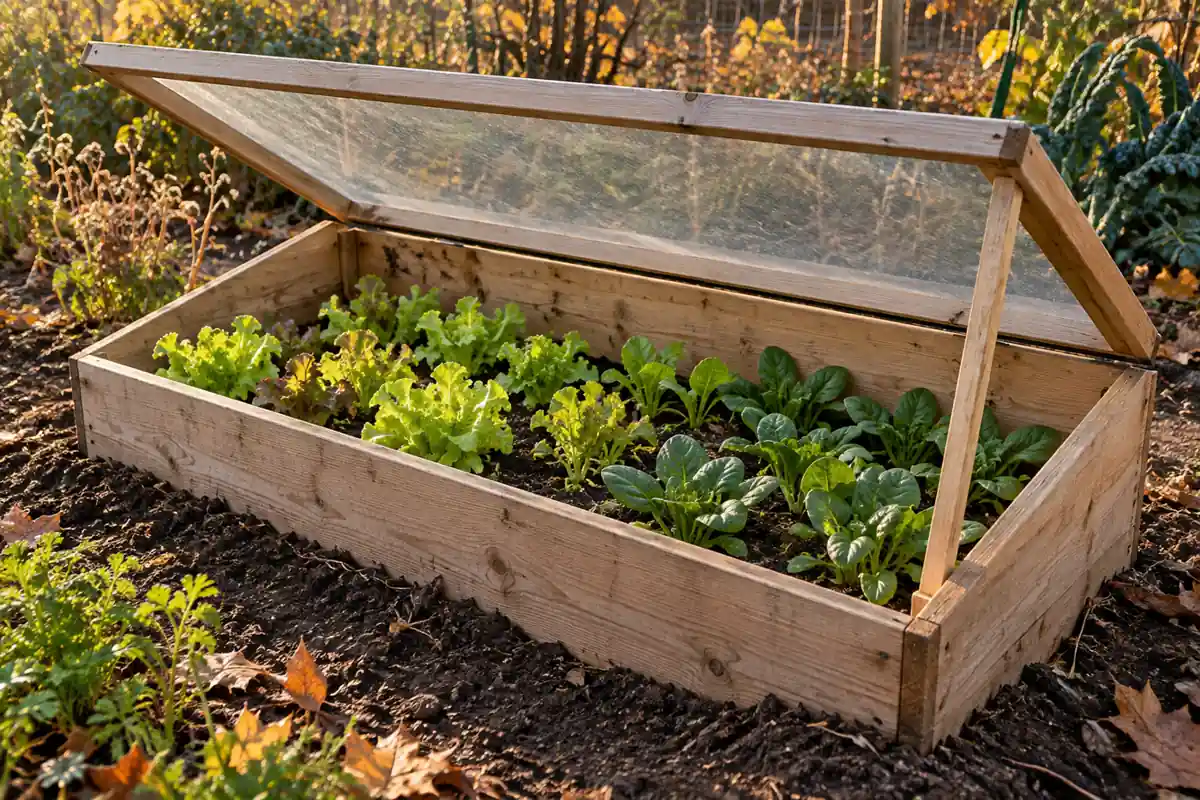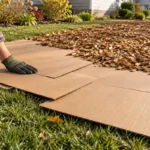


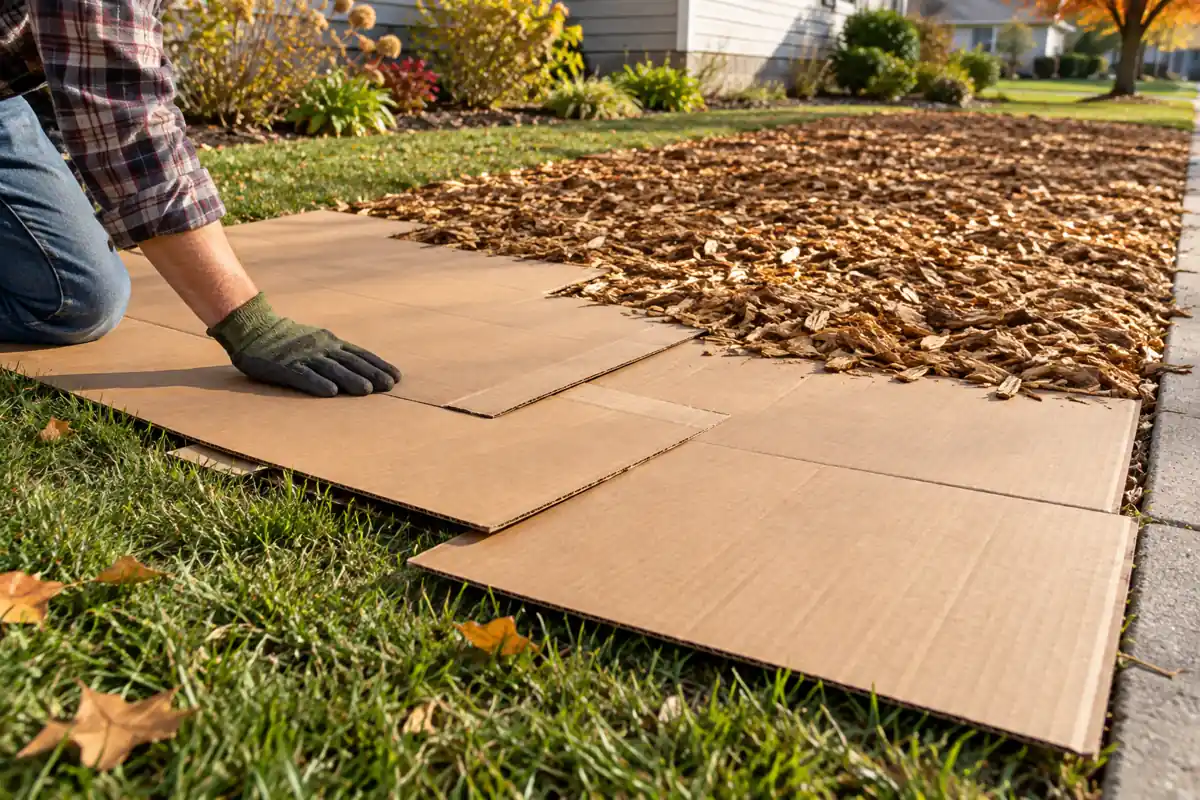
Sheet mulching covers grass or weeds with an overlapping paper barrier and surface mulch, cutting off the light that growing shoots need. On a suitable lawn patch, it can prepare a new bed without turning over the whole soil surface. The result still depends on the weeds underneath, water movement and what you intend to plant.
Plain cardboard topped with wood chips is a different project from a tall stack of leaves, clippings and other materials composting in place. A transplant can sometimes go through a planned opening into good soil immediately. Fine seeds need a prepared growing surface, and a fresh compost stack needs time to change. Check those needs before collecting boxes. A bed that looks neatly covered can still contain dry roots, persistent underground weeds or a tree’s feeding roots that should not be buried beneath a continuous barrier.
Choose the planting route before covering grass
- Ordinary lawn, open well-drained site: use a continuous light barrier and suitable surface mulch, then inspect the edges.
- Transplants needed soon: provide openings into actual growing soil and a way to water the root balls underneath.
- Fine seeds or a tall fresh compost stack: prepare a real seedbed or wait for the growing material to mature.
- Persistent root weeds, ponding or established tree roots: correct the site or choose another method first.
Key Takeaways
- Identify perennial weeds and valuable roots before covering turf.
- Keep cardboard overlaps continuous without building an unnecessarily thick stack.
- Separate simple weed suppression from slow lasagna composting.
- Plant transplants into suitable soil and check water underneath.
- Trace returning weeds to their origin before repairing layers.
Table of Contents
Sheet Mulching Blocks Light Before It Builds Organic Matter
The opaque sheet prevents covered foliage from continuing normal photosynthesis. Surface mulch holds the paper down and protects it as it decomposes. The materials eventually contribute organic matter. Their first job is shading the living grass.
Gaps matter because a green shoot reaching light can continue growing. Underground reserves also matter: bindweed roots, nutsedge tubers and bermudagrass rhizomes are not equivalent to a patch of ordinary mown turf. A thicker chip blanket cannot be assumed to remove every established weed.
| Construction | Immediate job | Planting condition |
|---|---|---|
| Cardboard or heavy paper beneath a surface mulch | Suppress existing lawn and emerging weeds | Transplants can use planned openings into suitable soil; check irrigation beneath. |
| Alternating green and brown compostable layers above a base barrier | Create compost in place as well as suppress growth | Allow decomposition before treating the stack as a seedbed, or provide a separately suitable rooting zone. |
Names overlap between gardening traditions. The practical distinction is the material you are asking roots to grow in. Alternating organic layers 18 inches or more high may take six months or longer to become soil-like in Oregon State’s lasagna method. A simple paper-and-chip cover is not that same stack and does not inherit a compulsory six-month planting delay.
Inspect the Lawn, Water Outlet and Existing Root Systems
Walk the intended area before mowing it. Identify plants you want to retain, then inspect suspicious spreading weeds. Lift a small section where necessary to see runners or underground structures. Strong perennial weeds such as bindweed, quackgrass, blackberry, bermudagrass and nutsedge need a separate control plan; repeated shoots through the middle of the cover are a foreseeable problem.
Check what happens after rain. Water collecting in a low spot, a slick saturated surface or material washing downslope calls for a site correction. Cardboard can restrict air and water movement. It does not create an outlet for water already trapped in poorly drained ground.
A fork can gently loosen compacted ground where that is appropriate, as in the Oregon State preparation method. Do not work saturated soil or stab through important woody roots. One loosening pass cannot correct every hard layer or high water table. For a bed needing a separate soil-volume and access solution, raised-bed placement and soil depth still require their own planning.
Keep valued tree roots out of the conversion recipe
A tree’s feeding roots may extend beneath the lawn well beyond its trunk. Leaving a small bare ring around the bark does not remove the air-and-water restriction across those roots. Avoid spreading thick continuous cardboard over an established root zone without a suitable assessment.
Use ordinary tree-mulching guidance for those plants instead of an open-lawn conversion depth. Organic mulch is limited to 3 inches, with the root flare exposed, in the University of Minnesota’s newly planted tree guidance. That is a different job from covering vacant turf with a deeper weed-suppression layer.
Select Clean Materials and Calculate the Surface Cover
For sheet mulching with cardboard, choose large pieces of plain brown, uncoated material. Remove packing tape, staples, plastic windows and synthetic labels. Flatten the boxes fully so the pieces contact the mown ground. Large sheets reduce the number of joins; bulky folded boxes create unwanted thickness.
Choose clean coarse wood chips or another mulch suited to the future planting. Ask where hay, grass clippings, manure and compost came from before bringing them onto a food-growing site. Persistent herbicide residues can arrive in those materials and injure sensitive crops even after composting. An earthy smell does not establish their treatment history.
Use soil-test results to guide nutrient and pH corrections. A routine fertility test does not rule out every herbicide contaminant. For suspect imported material, keep it separate and seek the appropriate extension assessment or published bioassay before spreading the whole load.
Measure the area and choose the cover depth for the actual use. UC WeedCUT describes 4-6 inches of wood chips in its open-site weed-management system. California Native Plant Society also uses a substantial surface cover in its lawn-conversion example. Those depths are not permission to bury existing stems, tree roots or tiny seedlings.
A quantity example for an open, unplanted strip
Bed: 3 feet by 12 feet = 36 square feet.
Chosen example cover: 4 inches = one-third of a foot.
Mulch volume: 36 × one-third = 12 cubic feet, or about 0.44 cubic yard.
Volume in cubic yards = area in square feet × depth in inches ÷ 324. Measure settled depth separately; this calculation does not determine which depth suits a plant.
Allow additional cardboard for joins and the perimeter. Do not estimate it from the visible bed area alone. Start with a manageable section if transporting mulch or watering access would otherwise leave a large unfinished barrier exposed to wind.
How to Sheet Mulch an Open Lawn Patch Step by Step
- Mark the bed and access path. Check that you can reach the center without walking over planted soil. A 3-foot-wide strip is one manageable example; use the actual reach and access of the gardener.
- Cut the grass low and remove problem growth. Keep ordinary short cut vegetation where appropriate. Remove persistent weeds or complete their separate control first. Mark any desirable plants before covering them.
- Prepare irrigation and planting positions. If transplants will go in soon, arrange watering beneath the future barrier. Test the line before covering it. Existing healthy soil remains the rooting medium in this simple method.
- Lay flat sheets with generous overlaps. Leave no exposed grass between joins. At least 8 inches of edge overlap is used in Oregon State’s lasagna instructions; that is a generous seam example, separate from the number of paper layers in a compost stack. Avoid piling multiple folded corrugated boxes into a thick laminate.
- Wet for the garden’s decomposition and planting goal. Soak the cardboard as in the Oregon State garden method so it lies against the ground. Watering the sheet does not by itself prove water reaches the roots below.
- Add the chosen surface cover promptly. Spread it evenly, keeping planned stems and openings clear. Inspect the perimeter and joins, then check again after wind, rain or irrigation.
For the simple cover, the order is existing soil and mown turf, a continuous paper barrier, then surface mulch. No raw manure or kitchen-waste layer is needed to make that light barrier function. If you choose a full lasagna compost bed, use a complete composting method with the corresponding material and maturity checks.
Wetting advice changes with the purpose. A wildland barrier maintained for prolonged suppression may be kept dry and intact to slow its breakdown. That priority in UC WeedCUT is different from growing newly planted roots beneath a decomposing garden sheet. Never preserve the cardboard by withholding water a crop needs.
Plant Through to Real Soil or Wait for a Mature Seedbed
A nursery transplant can go through a planned opening when the soil below is suitable and you can water the root ball. Another option is to install plants and irrigation first, then fit the paper around them. Both approaches appear in UC IPM’s sheet-mulch planting methods.
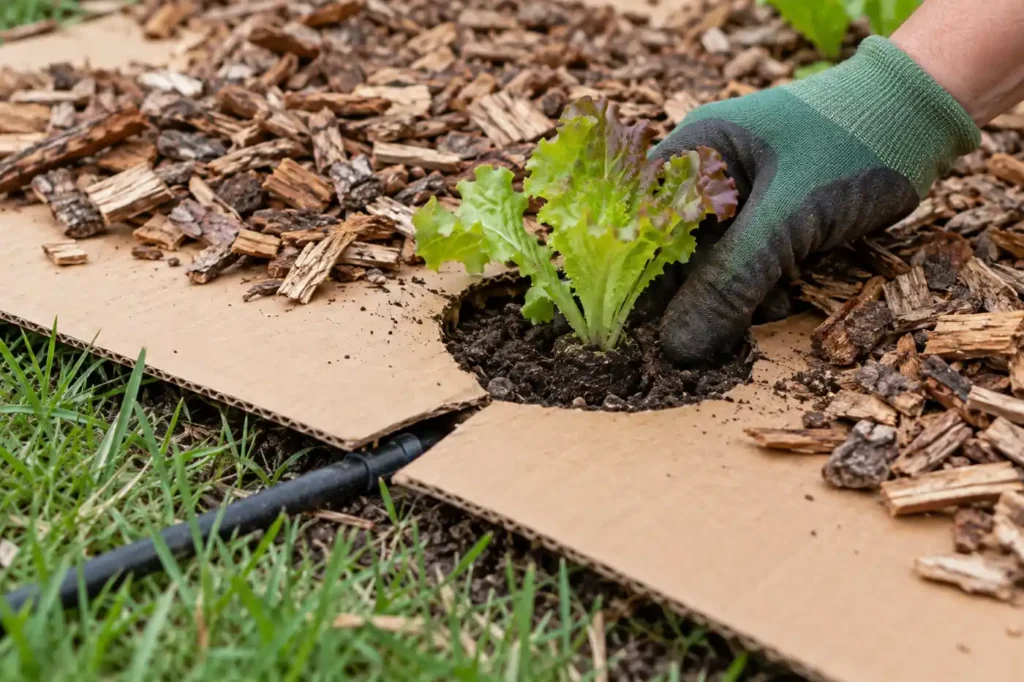
Cut enough space to seat the root ball at the plant’s proper depth. Keep wood chips out of the planting hole and off the crown. A transplant perched on top of cardboard with roots surrounded only by raw chips has not gained a dependable growing medium.
After watering, check the root ball and adjacent soil through the opening. A damp chip surface can conceal dry soil beneath a sheet that sheds water. Conversely, persistently saturated soil calls for less water and a drainage correction. Do not assume every wilting plant needs another soaking.
Direct seeds need a different starting surface
Small seeds require appropriate seed-to-soil contact and enough suitable growing medium for the crop. Do not scatter lettuce or carrot seed into coarse wood chips and expect the weed barrier to become a seedbed overnight. Prepare a genuine sowing strip or pocket, accepting that its opening also needs weed monitoring, or wait until the growing material is ready.
For a tall lasagna bed, inspect decomposition before using the stack as soil. Original layers should be largely unrecognizable, with a crumbly, soil-like texture and earthy smell. The six-month-or-longer estimate in Oregon State’s lasagna composting method depends on the material, moisture and climate. A date alone cannot certify maturity.
Use known finished material for immediate food-crop planting. Raw manure and fresh waste require their own decomposition and food-safety decisions; a thin cap of compost does not automatically make every fresh layer suitable for edible roots.
Trace Returning Weeds and Water Before Adding More Layers
New green growth can come from three different places. Pull the mulch aside carefully at one affected point and find where the shoot begins. The repair depends on its origin.
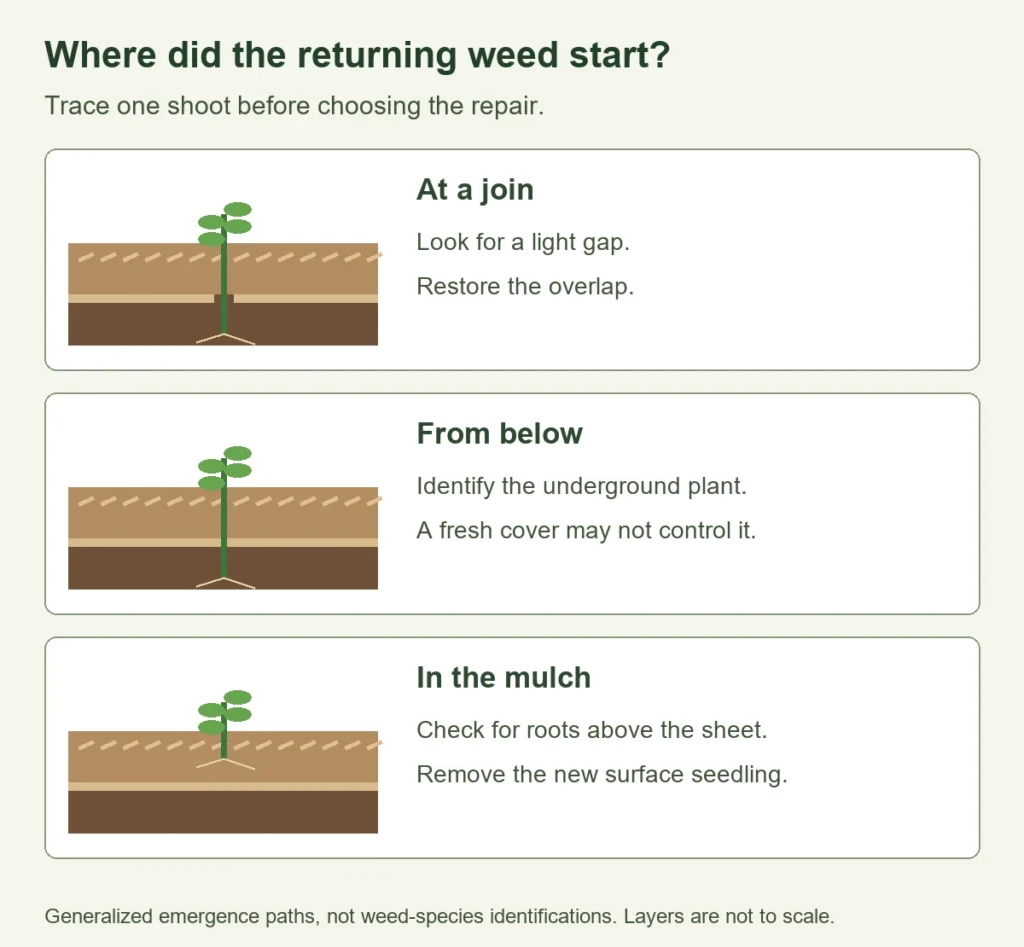
| Problem | What to inspect | Correction |
|---|---|---|
| Grass at a seam or perimeter | Exposed light gap, shifted sheet or runner from outside | Remove escape growth and restore continuous overlapping cover. |
| Strong shoot emerging through the center | Trace it below the sheet; identify underground roots or tubers | Manage the confirmed perennial weed rather than adding chips indefinitely. |
| Small weeds rooted only in the top mulch | Check for windblown or imported seed and fine decayed material | Remove young weeds and renew suitable clean surface cover. |
| Wet chips above dry planted soil | Check the watering route and root-ball moisture | Redirect irrigation below the barrier or reconfigure the sheet. |
| Persistent wetness below the sheet | Check drainage, watering and plant roots | Correct saturation; remove or change the barrier if it is worsening the condition. |
Do not treat cardboard as a structural erosion-control system. If storms carry chips and sheets downslope, correct runoff and stability before rebuilding. A level or gently sloping stable area is easier to manage than an eroding bank.
Distorted new leaves after imported compost or clippings deserve a material-history check as well as ordinary water and pest diagnosis. Keep the batch information and ask for help when contamination is plausible. Adding fertilizer cannot reliably correct an unidentified residue problem.
Keep Soil Covered Without Rebuilding the Barrier Blindly
During the first season, inspect the edge, surface cover and planted root zones after substantial weather changes. Renew mulch where it has settled enough to expose the barrier, keeping the depth appropriate to nearby plants. Pull small surface-rooted weeds before they establish and shed more seed.
The paper will soften and break down at a rate determined partly by moisture, soil and climate. Do not keep adding cardboard over established planting roots simply to preserve the original appearance. Once desirable plants occupy the bed, manage the surface according to their needs and normal organic mulch renewal.
Keep paths distinct so repeated foot traffic does not tear paper around stems or compact the growing area. A permanent bed can then receive appropriate surface organic matter without repeatedly turning the whole soil profile. Check nutrients and crop performance before adding more compost or minerals.
Conclusion
Before laying the first sheet, identify what is growing underneath and decide where future roots will receive water. Start with a reachable section, close the light gaps and keep the growing soil accessible at planned planting points. Inspect any returning shoot at its origin. That check tells you whether to repair a seam, remove a surface seedling or change the weed-control plan.