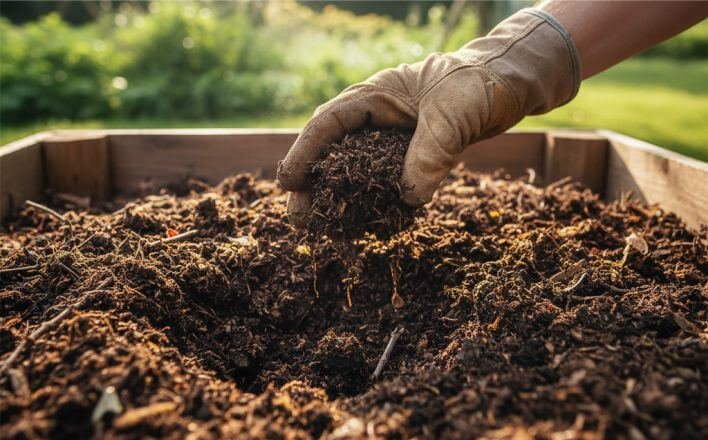
A garden trowel feels wrong fast when planting holes cave in, seedlings wobble, or digging takes more force than it should. Most problems come down to a simple mismatch between blade shape, soil condition, and how the tool gets handled day to day. Small slips add up – torn roots, wasted starts, sore wrists, and a trowel that drags or rusts early. Clear boundaries on what the tool should do, plus a few practical habits, lead to cleaner planting, quicker work, and tools that stay sharp and smooth season after season.
Key takeaways:
- Match blade shape to soil firmness before planting starts.
- Use depth control to keep transplants consistent and stable.
- Reduce wrist strain by choosing a handle that fits grip.
- Keep cuts clean to speed seedling recovery after replanting.
- Clean and dry after use to avoid rust drag.
Table of Contents
What a Garden Trowel Is Meant to Do
Planting goes sideways when holes slump back in, roots bend, or soil packs tighter than expected. Problems like that rarely come from technique alone. Tool scale and control usually sit underneath, especially when a small task gets forced with the wrong blade.
A garden trowel exists for controlled work in confined soil zones where accuracy matters more than leverage. Understanding that boundary removes a lot of daily friction.
Hand trowel as a precision tool
A hand trowel handles soil volumes measured in handfuls, not shovel loads. Blade lengths usually fall between 6 and 8 inches, which lines up with the root ball size of most vegetable starts and herbs. That range allows the blade to open a cavity without collapsing sidewalls, because surrounding soil stays supported by the undisturbed edge.
The tool excels when placement matters. Seedlings sit straighter when the cavity matches the root mass instead of being widened by excess force. Bulbs land at repeatable depths because the wrist guides the cut rather than the shoulder driving it. When soil texture shifts mid-bed, a short blade transmits feedback fast, allowing pressure to ease before roots tear.
I often notice that resistance appears before blade length becomes limiting. When progress stalls within the first few inches, soil density has crossed into a range better handled by a fork or spade. Pushing harder usually compacts the cut edges, which slows water movement and root recovery after planting.
The name hand trowel reflects function rather than branding. Some gardeners call it a transplanting trowel, others a planting trowel. All describe the same role – precise excavation, lift, and backfill within a tight working area. Once the task shifts toward trenching, edging, or breaking crusted ground, efficiency drops fast and strain rises.
Keeping the tool inside its design lane saves time and reduces fatigue. Clean cavities, intact soil structure, and predictable depth come from matching the task to the scale of the blade rather than forcing progress.
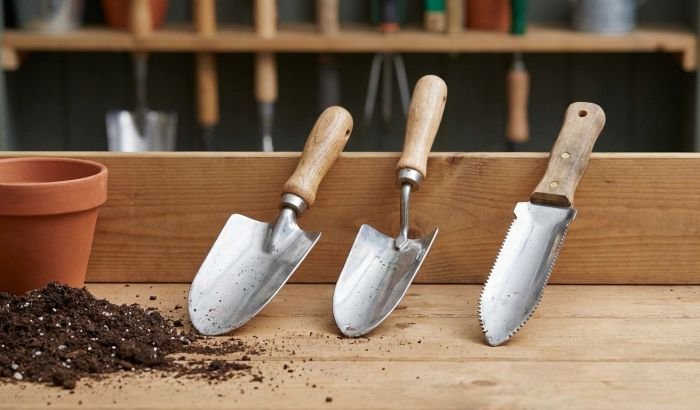
Common Types of Garden Trowels and What Each One Handles
A tool swap halfway through planting usually means blade geometry stopped matching soil conditions. One shape punches in cleanly, another holds a tidy cavity, and a third works in tight spots without ripping roots.
Picking the right style comes down to how the blade enters soil, how it moves soil aside, and how much disturbance happens around nearby plants.
What are the three types of trowels?
Three workhorse categories cover most garden beds – pointed digging trowels, transplanting trowels with depth marks, and narrow trowels built for weeding and close work.
| Blade shape | Best task | Soil situation |
|---|---|---|
| Pointed, slightly curved | Starting holes, breaking into firm spots | Compacted beds, dry crust, cloddy ground |
| Scoop with depth marks | Repeatable transplant depth, bulb placement | Worked soil, raised beds, amended rows |
| Narrow and slim | Weeding between stems, opening slots for seedlings | Crowded plantings, established root zones |
Blade mismatch shows up fast. A pointed tip can tunnel too deep when transplant depth needs control, while a broad scoop can heave soil sideways and disturb neighboring roots in a tight row.
Pointed digging trowels
Pointed digging trowels earn their keep when the first inch fights back. A tapered tip concentrates force into a smaller contact area, so entry improves in firm beds where a rounded front just skates or compresses the surface.
Use a simple rule when choosing one – if the tip penetrates about 1 inch with moderate hand pressure, the tool fits the job. If the tip bounces and the wrist starts twisting, switch to a fork or pre-loosen soil, because extra torque often bends the planting cavity and leaves a glazed wall that slows water infiltration.
A pointed blade also makes cleaner pilot holes for direct-sown vegetables in crusted soil. The cut stays narrower, so backfill closes without leaving an air gap around seed.
Transplanting trowels with depth guides
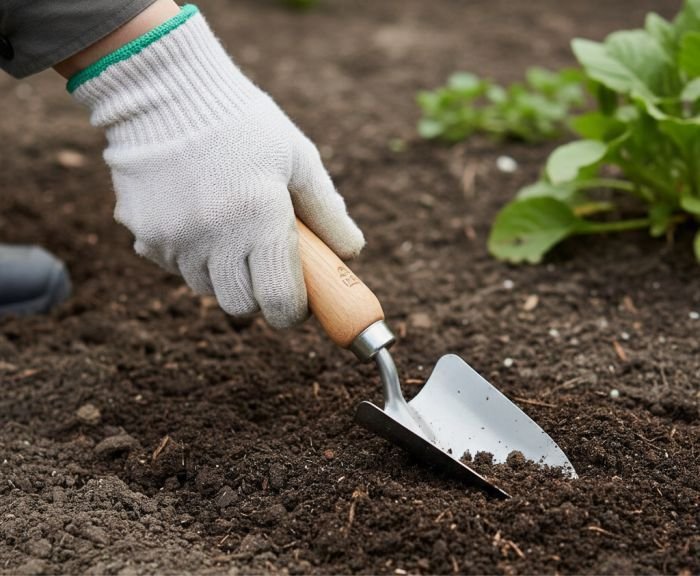
Transplanting models with stamped depth marks support consistency. Depth control matters because many vegetable starts settle best when the root ball lands at the same depth each time, especially across a full flat of seedlings.
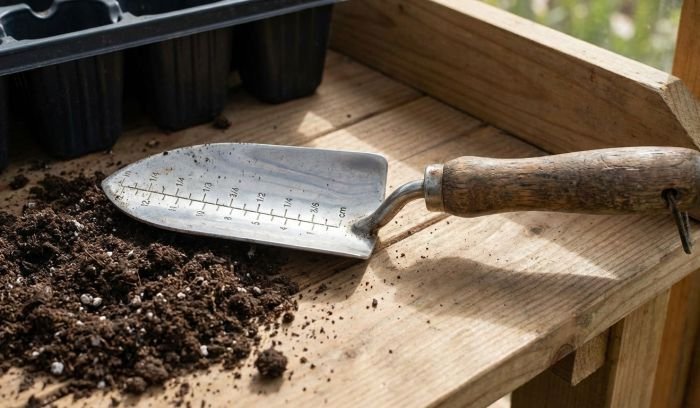
Depth guides help most when planting repeats across 10-20 plants in one session. A quick glance at the mark prevents shallow root balls that dry out fast and avoids burying stems too deep on plants that dislike it. Soil displacement stays predictable as well, since the scoop carries roughly the same volume per hole.
Look for marks that remain readable after soil scuffing. Faint paint wears off quickly, leaving no reference point when planting speeds up.
Narrow and weeding-focused trowels
Narrow trowels perform best in beds where spacing already exists and damage tolerance drops. A slim blade fits between stems, slides along the edge of a root zone, and lifts small weeds with less soil heave.
Use angle as the control lever. A 20-30 degree entry under a weed crown tends to pop roots while keeping surrounding soil intact. A steep, straight jab often slices into feeder roots on nearby crops, especially in shallow-rooted greens.
Trowel uses vary by bed layout, yet blade profile drives results more than branding or handle color.
Blade Materials and Structural Build Choices That Affect Longevity
Light surface rust rarely looks serious on day one, yet added drag builds fast. Extra friction forces the wrist to work harder, and small inefficiencies compound across a planting session.
Blade material determines how quickly wear shows up, how often maintenance becomes necessary, and how predictably a tool ages under normal garden use.
Stainless steel blades
A stainless steel trowel resists corrosion because chromium in the alloy limits oxidation at the surface. Reduced rust lowers drag when sliding through damp soil, which cuts wrist load during repeated scoops.
Stainless blades perform best when soil stays moderately moist rather than sticky. Clay-heavy beds can polish the surface over time, which improves glide but rounds the cutting edge faster. Edge refresh intervals tend to fall around one light touch-up per season for frequent gardeners.
Stainless also tolerates missed cleanups better. Leaving soil on the blade overnight usually stains rather than pits, so long-term damage accumulates slowly when care slips during busy weeks.
Carbon steel blades
A carbon steel trowel trades corrosion resistance for edge retention. Higher carbon content supports a sharper working edge that bites cleanly into firm ground, reducing force needed for entry.
Carbon steel responds well to sharpening because the metal abrades evenly. A quick pass restores bite without grinding away large amounts of material. Edge life often doubles compared to softer stainless blends when used in abrasive soils.
Oxidation remains the main failure signal. Darkened patches increase friction and signal moisture exposure. If drag increases noticeably after only a few scoops, oxidation has likely roughened the surface and needs correction before deeper pitting forms.
Insider tip – a thin wipe of food-safe oil after washing limits oxygen contact and slows oxidation without leaving residue in soil.
Blade thickness matters alongside material choice. Thin blades around 1.5-2 mm cut efficiently but flex under leverage, while thicker blades near 3 mm tolerate prying at the cost of higher resistance. Match thickness to soil density rather than habit.
Handle junction design also shapes longevity. Welded joints spread load across a wider area, while riveted joints concentrate stress at fasteners. Repeated twisting in compacted beds exposes weak junctions first, regardless of blade metal.
Material choice sets the maintenance rhythm. Stainless favors low-intervention routines, while carbon steel rewards quick post-use care with longer edge life. Predictable aging beats surprise failure when planting windows stay tight.
Ergonomics and Grip Design During Repetitive Work
Ever notice wrist tension creeping in halfway through planting, even when soil conditions feel manageable? Grip design and handle geometry usually drive that fatigue long before blade sharpness becomes a factor.
Ergonomics determines how force travels from forearm to soil. Small changes in handle shape alter wrist angle, torque, and control during hundreds of short digging motions.
Handle shape and diameter
Handle diameter controls pressure distribution across the palm. Narrow handles concentrate force along the fingers, which speeds fatigue during repetitive scoops. Diameters around 1.25-1.5 inches usually spread load more evenly for average adult hands, reducing pinch strength demands.
Oval or teardrop profiles limit rotation better than round handles. Reduced rotation keeps the blade aligned with the forearm, which lowers strain during twisting motions in compacted beds. If the wrist bends past roughly 20-25 degrees during entry, handle geometry is working against the joint.
Grip surface matters as much as shape. Smooth hardwood promotes subtle repositioning during long sessions, while rubberized coatings increase friction. High-friction grips improve control in wet soil but raise heat buildup and skin pressure over time.
An ergonomic trowel should feel balanced when held loosely rather than squeezed. Excess weight forward forces constant grip tension to stabilize the blade. If forearm muscles stay engaged between scoops, balance favors the blade too heavily.
Grip length also plays a role. Short handles reduce leverage and suit container work. Longer handles increase torque control but amplify wrist strain if diameter stays small. Handle length and thickness must scale together to avoid overload.
Common failure signals show up quickly. Tingling fingers or localized palm soreness within ten minutes indicate pressure concentration. Slipping during insertion suggests diameter or surface mismatch rather than poor technique.
- Handle fills palm without forcing finger spread
- Oval profile resists twist under load
- Surface grips when wet without biting skin
- Balance rests near grip center
- Length matches task scale
Comfort directly affects precision. Reduced fatigue keeps blade placement accurate, which protects roots and speeds planting rhythm across longer sessions.
Using a Trowel Across Vegetable Growing Setups
Most vegetable roots live close to the surface, so damage often happens during routine digging instead of major bed work. A trowel earns its keep when blade choice and technique match root depth, soil structure, and bed edges.
A small shift in approach can cut transplant shock because root hairs sit in the outer zone of the root ball and tear easily under sideways prying.
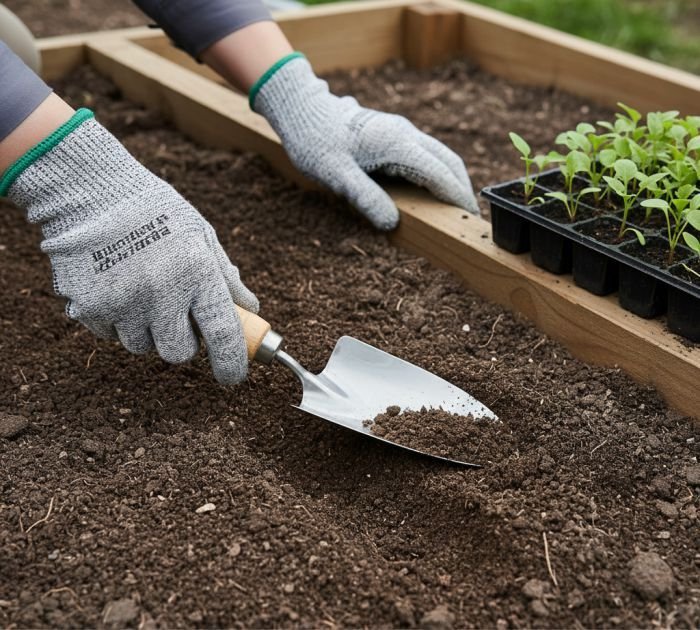
Raised beds and loose soil
Raised beds reward speed, but loose mixes collapse fast when a scoop gets too wide. Keep the blade angle shallow and take two narrower bites instead of one deep pull, especially near drip lines where soil stays softer.
If a planting hole caves in twice, switch to cutting a clean slot first, then lift soil out in controlled scoops. A slot keeps the wall intact, so backfill packs evenly around stems.
Containers and small plots
Small containers punish overreach because a full-size tool pushes soil out of the pot and exposes roots along the rim. Use short strokes and work in quarters around the container rather than chasing a full circle.
Mini tools outperform full-size trowels when container diameter runs under about 12 inches or when a balcony planter sits against a rail that blocks arm swing. A shorter handle reduces torque, so the wrist stays neutral while the blade stays vertical.
Soil edge integrity matters in pots. A big blade clips the edge, crumbles the wall, and leaves gaps that dry out faster. A narrow blade lets the gardener loosen only the zone needed for a transplant pocket, keeping the rest of the root area stable.
Organic beds and soil care
Organic beds rely on structure. Repeated chopping and stirring breaks aggregates and disrupts pore spaces that regulate water movement. Use the trowel like a scalpel: slice, lift, and set soil back with minimal mixing.
If soil clumps smear onto the blade, wait until moisture drops slightly before heavy transplanting. Smearing signals excess moisture, and aggressive digging at that stage compacts the cut surface and slows root entry.
I often notice that seedlings rebound faster when the blade makes clean cuts along the hole edge instead of tearing sideways, because intact walls hold moisture and roots reconnect sooner.
Different setups call for different stroke length and blade width, but the same rule holds. Control beats force when vegetables need quick root recovery.
Garden Trowel Care – Cleaning, Sharpening, and Storage Habits
Dried mud turns gritty and hard, then the blade starts scratching instead of slicing. A few minutes after each session keeps the edge cutting clean and keeps rust from forming in the first place.
Cleaning after use
Cleaning right after work stops trapped moisture and soil salts from sitting on the steel.
If a rinse happens within 10 minutes, most soil releases with a thumb and a stiff brush. If mud dries overnight, hardened grit acts like sandpaper during the next dig, so the edge rounds faster and the blade face picks up drag marks.
A quick cadence works in real gardens. Rinse, brush the corners near the neck, then dry the blade in under 15 seconds with a rag or paper towel.
Sharpening for digging efficiency
A sharp edge lowers the force needed per cut because the blade slices roots and soil fibers instead of crushing them. Less force means fewer wrist twists, straighter holes, and cleaner transplant pockets.
Sharpening does not mean creating a knife edge. A working trowel edge holds up best with a small bevel that matches the factory grind, usually around 20-30 degrees. Use a mill file or diamond stone and pull along the edge with even pressure, checking progress every 6-8 strokes by feel rather than sight. A burr on the back side signals enough metal removal, then a couple of light passes on the back knocks the burr off and keeps the edge from folding on first contact.
Insider tip – follow the original bevel angle, because a steeper bevel chips sooner and a flatter bevel dulls faster under soil abrasion.
Storage habits that prevent rust
Storage keeps the edge crisp and keeps the blade from warping.
A clean tool still rusts if storage traps humidity. Hang the trowel or stand it blade-down in a dry spot where air moves, and avoid leaving the tool in a bucket that holds rinse water in the bottom. A quick monthly check catches early corrosion. Orange dust near the neck or along the edge means moisture sits there, so dry time needs to improve and the storage location needs airflow.
Common storage mistakes:
- Leaving mud on the blade overnight
- Storing tools in sealed wet totes
- Keeping tools in damp soil buckets
- Leaning the blade on concrete floors
- Stacking tools edge-on-edge
Regular cleaning and a touch-up edge keep each cut clean, so planting work stays precise instead of turning into a fight with the tool.
Conclusion
A garden trowel earns trust during routine work, so a quick field check helps decide whether the tool stays in rotation. If wrist angle drifts past a comfortable line after 10–15 minutes, grip geometry no longer matches hand size or task load, and switching tools saves strain. If soil starts tearing instead of parting cleanly, edge geometry needs attention or replacement becomes the smarter option. Small signals appear early, and catching them keeps planting days productive rather than exhausting.
A simple ownership rhythm keeps decisions clear. Run a seasonal reset at the start of spring and again mid-season. Check edge bite with a light scrape on compact soil, check handle security with a firm twist, then store the tool dry and visible so problems do not hide. If rust returns within a week of cleaning, storage conditions need airflow. If sharpening holds less than a few sessions, steel quality or bevel angle no longer suits the workload.
- Test grip comfort after 10 minutes of planting
- Check edge bite on compact soil
- Twist handle firmly for looseness
- Inspect blade neck for hairline cracks
- Store dry with open airflow
FAQ
Can you use one garden trowel for planting, weeding, and light digging?
One tool can cover several tasks only when soil stays loose and roots remain shallow. Once resistance increases or precision work starts disturbing nearby plants, switching to a narrower or sharper profile reduces hand force and prevents root tearing. Pushing a single trowel beyond that point usually leads to fatigue and messy cuts.
What happens if you do not clean a garden trowel after use?
Soil left on the blade traps moisture and organic acids, which accelerates surface pitting within days. Drag increases, wrist effort rises, and sharpening intervals shorten. Even a quick rinse and dry within an hour after work slows wear more than any later repair.
Can you tell when a trowel is causing wrist strain rather than soil resistance?
Wrist strain shows up as tension during straight pushes, even in loose ground. If grip pressure increases after 10-15 minutes while soil texture stays unchanged, handle diameter or angle no longer matches hand mechanics. Changing tools often fixes the issue faster than adjusting technique.
How often should a home gardener sharpen a trowel used weekly?
Light touch-ups every 3-4 weeks work better than heavy grinding once a season. When edge bite fades and the blade starts compressing soil instead of slicing, a few passes at the original bevel restores efficiency and lowers force per cut.
Can you safely use a garden trowel in container gardening without damaging roots?
Containers tolerate narrow, shallow passes better than full-depth plunges. Working at half the blade depth and angling slightly away from stems keeps most feeder roots intact. When resistance feels springy rather than granular, roots are likely in contact and pressure should ease.
What happens if a trowel is stored in a damp shed or garage?
Poor airflow allows condensation to settle on metal overnight, leading to rust blooms within a week. Edges dull faster and the blade starts dragging through soil. Hanging the tool where air circulates or storing with a light oil film prevents recurring damage.
How can you quickly test whether a trowel still performs well before a planting session?
Press the edge into firm soil using arm weight only. A clean entry without rocking shows proper sharpness and alignment. Skidding or chatter indicates edge wear or a bent blade, which wastes effort during longer sessions.