Updated October 20, 2025
Many recycled planters look charming until the first watering ruins them. The real skill is spotting pieces that drain cleanly, stay cool, and keep their shape under use. Tap the wall and feel for a firm ring, pour a little water and watch it clear fast, touch the base after sun and it should feel mild, never hot.
Once you read those cues, you stop gambling on random containers and start collecting pieces that genuinely grow. The payoff is simple: less waste, stronger roots, and planters that last beyond one season.
Key Takeaways
- Catch the warning signs before recycled pots trap water.
- Turn castoffs into planters that look made for the job.
- Keep herbs thriving with cool walls and clean liners.
- Check weekly for leaks, heat spots, and hidden stress cracks.
- Avoid glossy glazes that build heat and scorch roots.
Table of Contents
Standards for Safe and Suitable Repurposed Plant Containers
Clear pass-fail rules save time and prevent plant losses. Use the checks below before you drill, line, or plant anything.
Food-safe vs. risky materials
Yes, you can make planters from recycled items if the material is inert, clean, and free of toxic coatings.
For plastics, keep only resin codes 1, 2, 4, or 5 for herbs and greens, and reserve 3, 6, or unmarked plastics for ornamentals. Old ceramics with crazed glaze or unknown paints need a quick lead-test swab; if the swab discolors, retire the item or use it only as a cachepot with a separate nursery pot inside. Galvanized metal is fine for ornamentals, but use a liner for edibles when the mix will sit wet for long periods. Pressure-treated wood, railroad ties, or anything that smells of solvents stays out of food production.
Wash every candidate with warm water and mild soap, then air-dry. If odor lingers after cleaning, do not plant edibles in it.
Structural integrity and tipping thresholds
A planter must hold weight without flexing and resist tipping under normal use.
Set the empty container on a flat surface and press at the rim with one hand. If the wall bows or the base rocks, it will deform under wet soil. Load a mock weight equal to your intended mix and plant mass – a filled bag of sand or damp potting mix – and try a slow 20-degree tilt for 10 seconds in each direction. Any sliding or a sudden drop means the base is too smooth or the center of gravity sits too high. Outdoors, add a simple wind check – if a light push equal to a breezy day moves it more than a couple of inches, plan for a heavier base or a lower, wider plant.
Handles, seams, and welded joints should show no hairline cracks after the tilt test. If you see white stress marks or hear faint creaks, choose a sturdier candidate.
Minimum drainage and liner standards
Drainage must move excess water out quickly and keep roots off standing water.
Do a pour test before drilling: pour about 250 ml of water into the empty container. If puddling remains after 15 seconds, you will need real openings and a breathable liner later. For permanent use, aim for a total outlet area near 1-2% of the base footprint so water clears without flushing out mix. Any bare metal that will stay damp, woven baskets, or unknown plastics touching edible roots require a barrier liner that keeps moisture in the mix while isolating the container material.
Pro tip – Drop a piece of window screen in the bottom during tests so you can pour, observe, and dump without losing debris or splashing.
A container that passes the material check, the tilt test, and the drainage timing is ready for conversion without surprises.
Household Items That Convert Well Into Recycled Planters
Pick containers that hold shape, accept light prep, and fit the plant’s root depth. The options below balance durability, weight, and where they live best.
What can be repurposed as a planter?
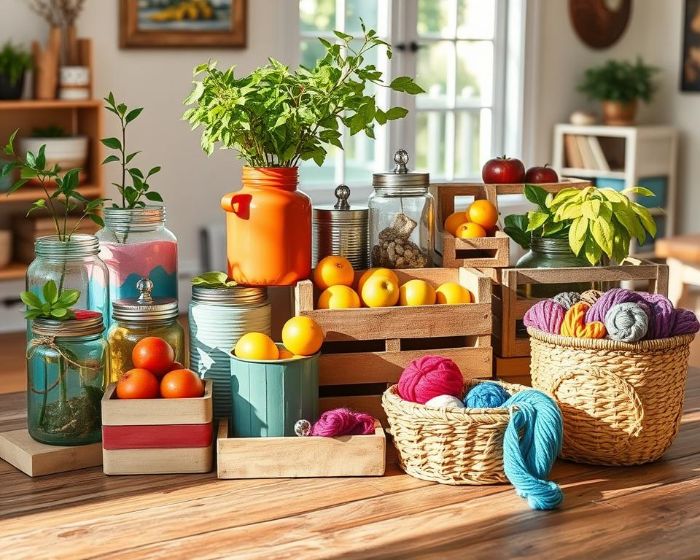
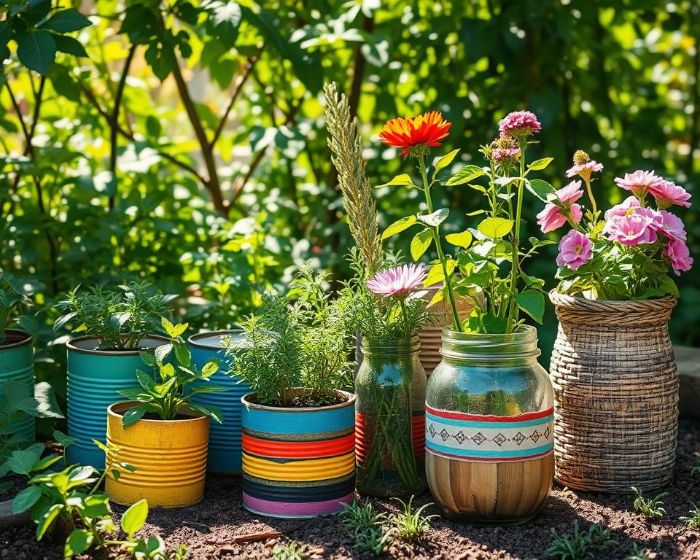
Use items that stay rigid when wet, accept drainage, and won’t leach into the mix for edible crops. Good candidates include tins, glass jars, ceramic mugs, wooden boxes, woven baskets, denim or canvas bags, and labeled plastics with safe resin codes.
I often notice that thin ceramics with hairline cracks chip at the rim after light tapping, which tells me to keep them as cachepots rather than drill them.
Metal, glass, and ceramic finds
Metal cans, colanders, and enamelware handle outdoor swings and hold shape under a full potting load. They carry heat in full sun, so match them with drought-tolerant plants or give afternoon shade. Glass jars and bottles suit bright interiors and herbs on shelves, but avoid tall, narrow forms that trap moisture at the base. Ceramic bowls and mugs bring weight and stability for desktops and steps.
Check rims and handles for micro cracks. If the base rocks on a flat surface or shows dent memory, move on to a sturdier piece.
Wood, baskets, and fabric containers
Wooden crates and drawers breathe well and buffer temperature. They need an inner barrier to slow rot and keep mix from contacting stains or old finishes. Woven baskets and burlap or denim bags shine indoors where wind is minimal. They dry faster because air moves through the sides, so pair them with plants that like lighter moisture or plan for closer checks.
If the weave sheds fibers when rubbed, expect faster wear. Use a saucer under fabric containers on shelves to protect surfaces from damp rings.
Plastics by type
Marked plastics with codes 1, 2, 4, or 5 are safer bets for herbs and greens. Thicker walls hold shape during handling and after watering. Unmarked or brittle items are fine for ornamentals, patios, or as cachepots. Clear plastics near sunny windows can run hot, so place them a few inches off the glass or rotate to a cooler spot by midday.
Avoid thin, sun-exposed pieces outdoors where UV chalking starts quickly and weakens walls during the season.
| Item type | Indoors/Outdoors fit | Prep needed | Best plant size | Stability class |
|---|---|---|---|---|
| Tin can, colander | Outdoors or bright patios | Edge smoothing, drainage | Small herbs, compact flowers | Medium |
| Glass jar, bottle | Indoors, bright shelves | Cachepot use or careful base prep | Herbs, cuttings | Low |
| Ceramic mug, bowl | Indoors or protected porch | Chip check, drainage | Small foliage, succulents | High |
| Wooden crate, drawer | Outdoors under cover or indoors | Barrier liner | Leafy greens, mixed herbs | Medium |
| Woven basket, canvas bag | Indoors, low wind | Inner liner | Trailing plants, light rooters | Low |
| Marked plastics 1,2,4,5 | Indoors or shaded outdoors | Drainage | Herbs, lettuces | Medium |
Choose by placement first, then by wall rigidity. If the location brings heat or wind, favor heavier ceramics or wood over light plastics or fabric.
Step-by-Step Conversion Workflow for Upcycled Planters
A tight workflow avoids cracks, leaks, and root stress. Follow the sequence once, then adjust for material and placement.
How to make eco-friendly plant pots?
Start by removing residues and stabilizing edges so the container accepts drainage without chipping. Wash with warm water and mild soap, rinse well, and let surfaces dry fully. Scuff glossy interiors lightly with fine sandpaper so liners grip and roots don’t skate on a slick wall.
Blunt sharp rims with a file or sanding block. Tape any hairline cracks with painter’s tape during drilling so stress does not spread. For unknown coatings, keep the item as a cachepot and place a separate nursery pot inside to isolate the mix.
Pro tip – Score a small X through painter’s tape and start a pilot hole with a 1/16 in bit before stepping up. The tape stops the bit from walking and prevents chips on glass or glazed ceramic.
Drainage and liner methods
Create real outlets that move water without dumping mix. For metal and hard plastics, use 1/8 in to 3/16 in holes spaced across the base. For ceramics, use a carbide or diamond bit at low speed with light pressure and water for cooling. For wood, drill slightly larger openings to account for swelling after the first few waterings.
Add a mesh layer sized to the base so media stays put while water exits. Window screen works under most mixes. In baskets or fabric containers, a thin breathable liner holds fine particles while the sides still breathe. For long-soak situations or edibles in marginal materials, fit a removable inner pot with built-in outlets and set it on small risers so the base does not sit in leftover water.
If water beads on the interior after rinsing, install a thin liner regardless of material. Beading signals a surface that sheds water and slows percolation inside the root zone.
First fill and planting checks
Stage the first fill to catch balance problems early. Add a shallow layer of mix and shake the container gently so the base settles. Place the plant and backfill in lifts, tapping the side with your knuckles to collapse voids. Stop once the crown sits just above the rim so irrigation does not spill over edges.
Water once to seat the mix and watch for leaks around seams. If the base weeps from a single spot, add one more outlet near that point rather than enlarging existing holes. Lift the container by the sides and check for flex. Any wall bend after a full soak calls for a lighter media blend or a sturdier vessel in the next cycle.
Quick tools and materials – painter’s tape, drill with 1/16 in pilot and 1/8-3/16 in bits, diamond or carbide bit for ceramic, file or sanding block, window screen or mesh, removable inner pot and risers, mild soap, fine sandpaper.
Finish by labeling material notes on masking tape under the base. The short record tells you which bit worked, whether a liner was needed, and how the first watering behaved. That saves time when you convert the next piece.
Placement, Weight, and Water Management With Reused Containers
Good placement prevents falls, stains, and heat stress. Set containers where the base grips, overflow is contained, and midday sun does not bake the root zone.
Weight and anchoring choices
Match footprint to shelf depth and center of gravity. If the shelf depth is under 75% of the container diameter, relocate or anchor the pot. On railings or narrow sills, add low mass at the base, not at the rim, so the center of gravity stays below mid-height.
Use non-marking options that bite into the surface. Museum putty or rubber pads work indoors. For outdoor pieces, run a discreet cable tie through a hidden eye screw behind the container or add a 1-2 lb counterweight in a concealed base tray. Perform a light pull test at the top foliage – if the base shifts more than an inch, increase friction or weight before planting.
Catch-trays and overflow control
Protect floors and furniture by sizing trays to real watering volumes. Pick a tray that holds roughly 10-20% of a normal watering. If you apply 16 oz to a mid-size pot, the tray should hold 2-3 oz with side clearance so water does not wick back into the mix.
Keep the root zone off the puddle. Add small risers under the inner pot to create an air gap above the tray floor. After watering, check for persistent damp rings around the tray edge. A ring that stays past 30 minutes points to capillary backflow – raise the pot higher or switch to a deeper tray.
Sun and heat near glass
Window glass concentrates heat and cooks thin-walled containers first. Keep clear or dark plastics 1-3 inches off the glass and rotate the pot a quarter turn every week. If the interior wall feels hot to the touch for more than 3 seconds or a thermometer reads 90 F or higher, move the container to light that is bright but indirect.
Metal and ceramic absorb and radiate heat differently. Metal warms fast in direct sun, so pair it with drought-tolerant plants or provide afternoon shade. Ceramic buffers short spikes but holds warmth into evening; check leaves for midday droop and adjust exposure or distance from glass.
I often notice that a dark crescent-shaped wet mark under the tray after watering means the surface is slightly off-level, and that same pot tends to creep toward the low side within the week.
Quick placement helpers – museum putty, rubber pads, cable ties with eye screw, shallow counterweight tray, risers for air gap, digital thermometer.
A few minutes of placement work saves hours of cleanup and keeps roots in a safer temperature band through the season.
Care, Cleaning, and When to Retire Recycled Planters
Routine care keeps recycled planters safe and functional through seasons. Work on a simple cadence, watch for early failure signs, and retire containers before they damage roots or surfaces.
Routine cleaning without plant shock
Clean salts and biofilm before they harden. Rinse with lukewarm water, then brush deposits with a soft nylon brush. If white crust clings after a minute of brushing, use a 1-2 tablespoon per quart vinegar soak for 10-15 minutes, then rinse until the odor clears.
Time cleaning so roots stay calm. Water lightly the day before, slide the plant out with the root ball intact, and wrap the ball in a damp towel while you wipe the container interior. Return the plant within 10 minutes so the root surface does not dry and crack. A monthly quick wipe is usually enough indoors, while outdoor pieces benefit from a deeper clean at the start and end of the growing season.
Pro tip – Label the underside with the last deep clean date and the cleaner used; it tells you when a mild wipe will do versus a full soak.
Checking for leach, cracks, and rust
Look for stains and weak spots that show up after watering. Orange or brown trails from seams point to corrosion, while charcoal-gray weeping from hairline cracks in ceramic signals moisture moving through the wall. If fingertips pick up chalky residue from sun-exposed plastic, UV has started to break the surface.
Act on the first signs. For light rust inside metal, fit a removable inner pot and keep the outer vessel dry between waterings. For a single ceramic hairline, rotate that side out of direct sun and use a thin barrier liner to slow moisture movement. If a wooden planter smells musty even after drying 24 hours, the finish has failed and needs a new seal before the next cycle.
Seasonal storage and re-use
Store by material to limit damage. Empty and air-dry metal and ceramic before hard freezes so trapped water does not expand and open new cracks. Keep plastics out of direct sun during storage to slow chalking. Wood and baskets stay sound longer when they dry under moving air for a full day before you stack or bag them.
Use a simple replacement rule. Replace when cracks reach the base, when rust flakes off with a light rub, or when UV chalking leaves residue after a quick wipe. If a container leaves a damp ring an hour after watering despite a dry tray, retire it from active use and repurpose it as a cachepot or décor.
| Material | Common failure sign | Quick fix | Replace when |
|---|---|---|---|
| Metal | Orange streaks, flaky rust | Inner pot on risers; keep outer dry | Rust rubs off in flakes after light touch |
| Ceramic | Hairline weeping, pinhole leaks | Thin liner; rotate away from direct sun | Crack reaches base or expands after one cycle |
| Plastic | UV chalky film, soft spots | Move to shade; use as cachepot | Residue remains after wipe, wall deforms when lifted |
| Wood | Musty odor, darkened joints | Reseal interior; add breathable liner | Odor persists after 24 hours dry time |
| Woven/fabric | Frayed seams, sagging base | Add inner liner; support base | Weave opens gaps that spill mix |
A light, regular care loop costs minutes and extends service life. When failure signs cross the thresholds above, retire the container and protect the roots before the next planting.
Practical Wrap-Up
Treat conversion like a short, repeatable loop. Give yourself 30 minutes per batch – 10 minutes to inspect and label candidates, 10 minutes to prep and open outlets, 10 minutes for first fill and a single watering check. Run the loop monthly so small problems never turn into plant losses.
Use clear pass-fail rules. If a container shifts more than 1 inch during a gentle side pull, anchor it or move it. If interior wall temperature at midday reads 95 F or higher, back it off the glass or rotate to indirect light. If you smell a sour note after watering, add one more outlet or lift the inner pot on risers to break the water seal. If chalky dust still wipes off plastic after a shade week, demote it to a cachepot. Keep one box of pre-cut mesh, two liner sizes, and a note card with bit sizes so recycled planters move from “idea” to “in service” without delay.
- Schedule a 30-day recheck for heat and tilt.
- Inspect, label, and sort by material in 10 minutes.
- Open outlets, fit mesh, and smooth edges.
- First fill, single watering, watch for leaks.
- Record bit size and liner choice under base.
FAQ
Can I use a container without drilling holes and still keep roots healthy?
Yes. Fit an inner nursery pot on 0.25-0.5 in risers, then run 1-3 cotton wicks through the inner base so water drains into the outer shell. A quick pour test helps: add 8 oz, and the outer shell should clear visible water within 20-30 seconds through the wick ends. If moisture lingers, add another wick or raise the pot higher to break the water seal.
Are spray sealants safe for edible plants in repurposed containers?
Only food-contact epoxies that fully cure are appropriate, and cure can take 5-7 days at 68-72 F. After curing, fill with warm water for 1 hour and smell the surface; any plastic or solvent odor means the liner stays for ornamentals only. Chips or scratches expose raw material, so a lined inner pot is still the safer long-term choice.
How can I stop rust or color stains under metal or clay containers?
Add three silicone dots or HDPE pads under the base so air reaches the contact points. Use a tray that holds 10-20% of a normal watering, then check the surface 30 minutes later. If a dark ring remains, increase pad height to 0.25 in or switch to a deeper tray to keep water off the floor.
What’s a quick way to size soil volume for odd-shaped recycled planters?
Fill the empty container with water using a 1-liter jug, count how many liters it holds, then multiply by 0.85 to account for root space and headroom. If the wall flexes when you lift a matching weight of damp mix, drop volume by 10-15% or pick a sturdier vessel.
Do clear plastic bottle planters grow algae indoors, and how do I prevent it?
Clear walls let light hit moist surfaces, which triggers algae. Slip a paper or fabric sleeve around the bottle, leave a narrow inspection window, and rotate the sleeve monthly. If green film appears, rinse with lukewarm water and a soft brush, then reduce direct sun by moving 2-4 inches back from the window.
Can I keep upcycled planters outdoors through winter freezes?
Empty and dry metal and ceramic before the first hard freeze so trapped water does not expand and open cracks. Plastics handle freeze-thaw better but chalk faster under winter sun, so store them out of direct light. Replant in spring after a quick check for hairline fractures and soft spots.
Are pressure-treated wood boxes ever okay for herbs or greens?
For food crops, keep the mix off treated wood with a continuous 6 mil liner that climbs the sides and folds over the rim. Replace the liner if it tears or smells after 24 hours of drying. If you cannot maintain an intact barrier, use that box as a cachepot only.
What’s a simple self-watering setup for recycled planters that reduces summer checks?
Seat a small reservoir under the inner pot and thread two cotton wicks up into the mix. Aim for 2 wicks on containers up to 10 in wide, 3 on larger ones. The reservoir should refill every 2-3 days in hot weather; if the top inch dries within 24 hours, add another wick or increase reservoir depth.